
Related Manuals for Cook's essentials K43547


Summary of Contents for Cook's essentials K43547
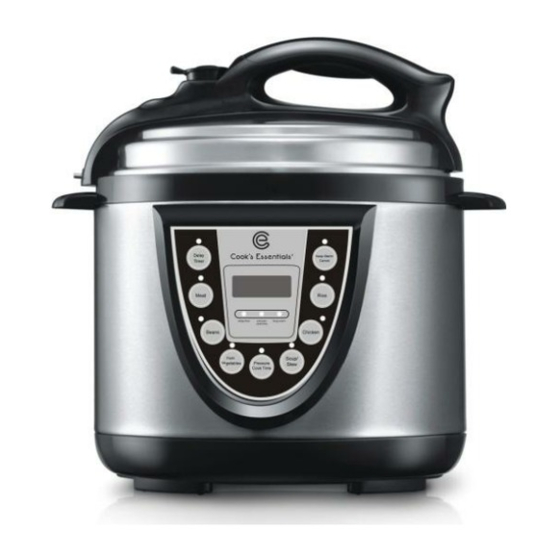
- Page 1 4Qt. Electric Pressure Cooker Model K43547 INSTRUCTION MANUAL Before operating your new appliance, please read all instructions carefully and keep for future reference.
-
Page 2: Table Of Contents
TABLE OF CONTENTS IMPORTANT SAFEGUARDS SAFETY WARNING/ADDITIONAL SAFETY TIPS E4 LED ERROR INDICATORS ABOUT YOUR PRESSURE COOKER SHORT CORD PURPOSE/POLARIZED PLUG PARTS IDENTIFICATION BEFORE FIRST USE/LID ASSEMBLY PREPARING YOUR PRESSURE COOKER 9-11 Opening the lid Closing the lid OPERATING INSTRUCTIONS 12-18 How to use the menu buttons 12-13... -
Page 3: Important Safeguards
IMPORTANT SAFEGUARDS When using pressure cookers, basic safety precautions should always be followed: Read all instructions before operation. Do not operate while unattended. Do not touch hot surfaces. Use handles or knobs. Close supervision is necessary when the pressure cooker is used near children. DO NOT allow children to operate under any circumstance. - Page 4 25. Food should not be kept warm for more than 4 hours in order to maintain the freshness of the food. The pressure cooker should not be used for more than 6 hours continuously. Serious Injury and/or damage may occur if any safeguards are ignored.
-
Page 5: Safety Warning/Additional Safety Tips
Safety Warning There is a potential risk of fire, electric shock or injury to persons if the product is not used as instructed. Protection against electric shock is assured only if the main power cord is connected to a properly grounded 120V | 60Hz power receptacle. ... -
Page 6: About Your Pressure Cooker
This digitally controlled and automatic pressure cooker uses advanced technology so you and your family can enjoy the benefits of better, faster and healthier cooking. Your Cook's Essentials' Pressure Cooker seals in steam to cook hotter and faster while maintaining important nutrients for healthier meals. Cooking fast and with less water saves vital natural resources and energy! The unit features easy touch-button settings, a countdown timer, and a cooking pot big enough for family gatherings! It’s the easiest... -
Page 7: Short Cord Purpose/Polarized Plug
SHORT CORD PURPOSE NOTE: A short power cord is provided to reduce the risk of personal injury resulting from becoming entangled in or tripping over a longer cord. Longer power-supply cords or extension cords are available and may be used if care is exercised in their use. -
Page 8: Parts Identification
PARTS IDENTIFICATION 1. Handle 9. Upper Ring 16. Electronic Heater 2. Lid 10. Control Panel 17. Bottom Ring 3. Pressure Limiting Valve 11. Power Cable 18. Seal Ring for Float Valve 4. Float Valve (external view) 12. Scoop 19. Filter 5. -
Page 9: Before First Use/Lid Assembly
BEFORE FIRST USE Working Maximum Keep Warm Delay Timer Pressure Pressure Temperature 0~70kPa 12 PSI 90kPa 140ºF ~ 175 ºF 0.5~24 Hours Remove all packaging materials such as cardboard, plastics, Styrofoam and literature. Clean all parts by wiping with a soft, damp cloth or sponge and dry thoroughly. LID ASSEMBLY: How to open the lid: Hold the handle (1) firmly, turn the lid (2) clockwise until it loosens and lift vertically (Figures 1-2). -
Page 10: Preparing Your Pressure Cooker
To Install the Gasket Plate (22): Simply line up the Gasket Plate (22) with the rubber knob in the center and push downwards until you hear a "Click." How to Remove and Install the Rubber Seal Ring (20): In order to remove the Rubber Seal Ring (20), the Gasket Plate (22) must first be removed. -
Page 11: Closing The Lid
Cooking Rice When cooking rice, the maximum amount of rice allowed for this 4 quart pressure cooker is 8 cups of uncooked rice. Normally one cup of rice requires one cup of water. This may vary according to taste. Only measure rice with the included measuring cup. For best results rinse measured rice until the water becomes relatively clear. - Page 12 Adjust the Pressure Limiting Valve (3) to the “Air Tight” position , and ensure that the Float Valve (5) sinks. When adjusting the Pressure Limiting Valve (3) to either the "Airtight" or the "Exhaust" positions, line up the marking (•) on the Pressure Limiting Valve (3) with the "Airtight"...
-
Page 13: Operating Instructions
OPERATING INSTRUCTIONS HOW TO USE THE There are 6 MENU BUTTONS pre-programmed for your pressure cooker. They are RICE, CHICKEN, SOUP/STEW, FISH/VEGETABLES, BEANS & MEAT. The default times are pre-set for quick and easy cooking for small portions of food. (When cooking food that is more than 3lbs. - Page 14 hear quiet hissing or sizzling sounds coming from inside of the unit during this time. **See Notes & Tips #2 if there is steam escaping from the Lid (2) or the Pressure Limiting Valve (3). 10. When cooking has completed, the pressure cooker will beep and automatically go to KEEP WARM.
-
Page 15: How To Use The Pressure Cook Time Button
HOW TO USE THE BUTTON: Setting your own cook time is ideal for cooking meat or poultry that weighs more than 3- pounds. It is also suggested for slow-cooking certain recipes that require cooking for more than 30-minutes. The programmed cook time can be set up to 60-minutes. ... -
Page 16: How To Use The Delay Timer
HOW TO USE THE If you wish to Program your pressure cooker to automatically cook prepared food at a later time, you can program the pressure cooker to delay cooking by up to 24-hours. (*See Notes & Tips #7). This setting is used in combination with the MENU BUTTON SELECTIONS in the chart shown on page 12 and with the PRESSURE COOK TIME BUTTON. -
Page 17: How To Use The Keep Warm Function
NOTES & TIPS #7: During the cooking process, when the pressure cooker enters into the Pressurized Sequence, the first digit on the LED screen will display the letter “P”. For foods with a high volume of liquid (Stews, soups, porridges, etc.) IT IS NOT RECOMMEND TO USE QUICK RELEASE. -
Page 18: How To Cook With Frozen Foods
HOW TO COOK WITH FOODS: Cooking frozen food inside a pressure cooker is quick and easy but has certain restrictions. Only cook individual cuts of frozen meats that are up to 1 inch thick, the cooking time does not need to be altered. Pressure will not be achieved until the internal temperature has reached a preset level. - Page 19 12. Make sure the Pressure Limiting Valve (3) is set to the “Airtight” position. 13. Plug the power cord into a 120V power outlet. 14. Follow canning recipe for the type of food you are canning and program the PRESSURE COOK TIME for the specified time frame for the size of jars and type of food recipe you are using by following the directions under How to use the Menu Buttons and How to Set Pressure Cook Time in this manual.
-
Page 20: Cleaning & Care
CLEANING AND CARE Always make sure the Pressure Cooker is unplugged, depressurized and completely cooled down before dismantling. Use a non-abrasive sponge or damp wash cloth to clean the exterior of the outer body (15). NEVER immerse the pressure cooker in any liquids. Remove the Water Collector (14) and rinse it thoroughly and let dry. -
Page 21: Troubleshooting
TROUBLESHOOTING PROBLEM SOLUTION If you are not cooking or using the unit, the Valve (3) will be loose. It will turn Is the 360 degrees and may even come off if you pull on it. Once you start using the Airtight/Exhaust pressure cooker and the pressure has built up and the Valve is set to “Airtight”... - Page 22 PROBLEM SOLUTION See Notes & Tips #2. The Rubber Seal Ring (20) did not make a proper seal. Cancel all the Steam is being released functions. Exhaust any remaining pressure and steam. Open the lid and around the rim of the lid remove it entirely.
-
Page 23: Cooking Time Chart
COOKING TIME CHART Courtesy of www.healthfoods.com *Please note that all the below information is for your reference only and can be adjusted according to the user’s preference. Meat/Poultry Always cook meat or poultry with at least 1-3 cups of liquid. If the cooking time exceeds 15 minutes, use 2 cups of liquid. - Page 24 Vegetables Always cook with at least 1-2 cups of liquid. Add 1-2 additional minutes to cooking time when preparing frozen vegetables. Use the quick-release release method at the end of cooking cycle so vegetables will not become soggy. (Below chart is for quantity approximately half a pot). Type of Vegetable Approximate Cooking Minutes Pressure Release Quick Release...
- Page 25 Dried Beans and Other Legumes Place beans or legumes in pressure cooker. Add 3 cups of water for each cup of beans or legumes. Add 1 tablespoon of vegetable oil for each cup of water to cut down on foaming. Do not add salt until after cooking.
- Page 26 Meat/Poultry (Larger Cuts) Always cook meat or poultry with at least 1-3 cups of liquid. If the cooking time exceeds 15 minutes, use 2 cups of liquid. If weight of meat or poultry is 3lbs, use 3 cups of liquid. Preserved or salted meats should be immersed in water.
-
Page 27: Recipes
RECIPES LEEK & ASPARAGUS RISOTTO SERVES 4 -6 Ingredients: 1 1/2 cups Arborio rice 1 1/2 tablespoons olive oil 4 cups vegetable broth 1 1/2 tablespoons butter 1/4 lb asparagus, chopped into 1 inch 1 1/2 tablespoons water segments 2 garlic cloves, minced 1 1/4 cups parmesan cheese, shredded 1 1/2 cups leeks, sliced Directions:... - Page 28 BEEF IN PEPPER SAUCE (CONT.) Directions: Remove 1 tablespoon of tomato sauce from the can to be used later. Blend the ingredients for the pepper sauce (green pepper through cardamom) in a food processor or blender until there are no chunks left. Set aside. Pour the oil into the pressure cooker, sprinkle the beef with salt &...
- Page 29 ITALIAN POTATO, RICE, & SPINACH SOUP SERVES 6 Ingredients: 1/4 cup olive oil 1 teaspoon salt 6 leeks, white part only, sliced 1/4 teaspoon pepper 3 garlic cloves, crushed 2 teaspoons dried basil 2 carrots 2 tablespoons fresh lemon juice 1/2 cup Arborio rice 3 tablespoons tomato paste 3 potatoes, cut in large chunks...
- Page 30 CHICKEN ADOBO (CONT.) Add the chicken to the sauce. Stir a bit to get the chicken thighs down into the liquid. Close the lid and press the CHICKEN button. Use this time to cook the jasmine rice if desired. When cooking is complete, follow instructions to reduce pressure. Lift lid.
- Page 31 JAMBALAYA SERVES 4-5 Ingredients: 1 tablespoon vegetable oil 1 onion, chopped 1/2 lb boneless skinless chicken 3 garlic cloves, minced breasts, cut into 1" pieces 1 green bell pepper, chopped 1/2 lb fully cooked Andouille or Italian 3 stalks celery, sliced sausage, sliced 1 cup long grain rice 1/2 lb uncooked shrimp, peeled and...
- Page 32 TORTILLA SOUP (CONT.) Remove from unit and purée with tomatoes in blender or food processor until smooth. Return to pressure cooker and add broth. Heat to boiling. Lock the lid in place and press the SOUP/STEW button. When cooking is complete, use the Quick or Natural release method and remove the lid.
- Page 33 SPICED APPLE CRUNCH (CONT.) in baking dish then pour melted butter over ingredients and cover baking dish firmly with aluminum foil. Place water, trivet, and then baking dish in pressure cooker. Lock the lid in place and set the Pressure Cook time to cook for 20 minutes (cooking time may vary).
- Page 34 PEARS STEWED IN RED WINE SERVES 4 Ingredients: 1/4 teaspoon mace 2 cups water 4 firm pears, peeled but not cored, stems 1/2 cup sugar 2 slices lemon 3/4 cup red wine 2 cinnamon sticks 1 cup frozen raspberries 4 tablespoons heavy cream Directions: In the pressure cooker, combine water, sugar, lemon, cinnamon sticks and mace.
- Page 35 OLD FASHIONED RICE PUDDING SERVES 4 Ingredients: 1 tablespoon butter 1 egg 1/4 cup long grain rice 1/4 cup evaporated milk 2 cups milk 1/2 teaspoon vanilla 1 cup water Cinnamon 1/3 sugar 1/2 teaspoon salt Directions: Melt the butter in the pressure cooker and stir in the rice, coating it with the butter. Pour in the fresh milk and water, and then stir in the sugar and salt.
Need help?
Do you have a question about the K43547 and is the answer not in the manual?
Questions and answers