
Subscribe to Our Youtube Channel
Related Manuals for Cook's essentials K41143/EPC-678


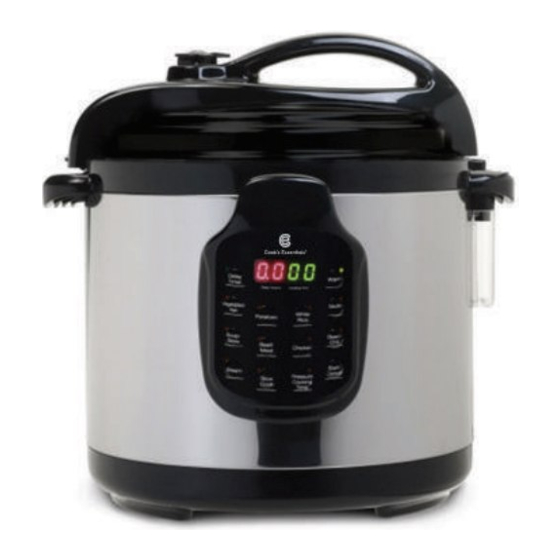
Summary of Contents for Cook's essentials K41143/EPC-678
- Page 1 6 QT. DIGITAL PRESSURE COOKER MODEL K41143/EPC-678 INSTRUCTION MANUAL Before operating your new appliance, please read all instructions carefully and keep for future reference.
-
Page 2: Table Of Contents
TABLE OF CONTENTS IMPORTANT SAFEGUARDS ________________________ ABOUT YOUR PRESSURE COOKER ___________________ SHORT CORD PURPOSE/POLARIZED PLUG _____________ PARTS IDENTIFICATION __________________________ GLASS LID ASSEMBLY/PRESSURE COOKER LID MARKINGS _ BEFORE FIRST USE ______________________________ PREPARING YOUR PRESSURE COOKER ________________ 10-12 OPERATING INSTRUCTIONS _______________________ 13-21 CLEANING &... -
Page 3: Important Safeguards
IMPORTANT SAFEGUARDS When using pressure cookers, basic safety precautions should always be followed: Read all instructions before operation. Do not operate while unattended. 2) Do not touch hot surfaces. Use handles or knobs. 3) Close supervision is necessary when the pressure cooker is used near children. - Page 4 IMPORTANT SAFEGUARDS (CONT.) 22) sources. DO NOT replace the Inner Pot with a container other than what is recommended by the manufacturer. 23) The Inner Pot consists of a non-stick surface. To avoid scratching the non-stick surface, please use wooden or plastic utensils. 24) Food should not be kept warm for more than 8-10 hours in order to maintain the freshness of the food.
-
Page 5: About Your Pressure Cooker
This digitally controlled and automatic pressure cooker uses advanced technology so you and your family can enjoy the benefits of better, faster and healthier cooking. Your Cook's Essentials Pressure Cooker seals in steam to cook hotter and faster while maintaining important nutrients for healthier meals. -
Page 6: Short Cord Purpose/Polarized Plug
SHORT CORD PURPOSE NOTE: A short power cord is provided to reduce the risk of personal injury resulting from becoming entangled in or tripping over a longer cord. Longer power-supply cords or extension cords are available and may be used if care is exercised in their use. If an extension cord is used: (1) the marked electrical rating of the extension cord should be at least as great as the electrical rating of the product;... -
Page 7: Parts Identification
PARTS IDENTIFICATION Handle Pressure Limiting Valve Float Valve (External View) Float Valve (Internal View) Non-stick Inner Pot Control Panel Condensation Collector (Snaps On) Seal Ring for Float Valve Filter Rubber Seal Ring for Lid Body Cover/Structure Lid Rest (Lid latches onto the side handle) Glass Lid (to be used with the SLOW COOK and STEAM functions) -
Page 8: Glass Lid Assembly/Pressure Cooker Lid Markings
GLASS LID ASSEMBLY **Your Pressure Cooker is equipped with a Tempered Glass Lid (14) that can be used with the SLOW COOK and STEAM functions. Please do not use this Glass Lid (14) with any other functions on this Pressure Cooker. -
Page 9: Before First Use
BEFORE FIRST USE Working Maximum Keep Warm Delay Timer Pressure Pressure Temperature 0~70kPa 12 PSI 90kPa 140ºF ~ 175 0.5~24 Hours 0.5 Hour Increments up to ºF 10 hours thereafter 1-hour increments 1. Remove packaging materials such as cardboard, plastics or Styrofoam and discard appropriately. -
Page 10: Preparing Your Pressure Cooker
PREPARING YOUR PRESSURE COOKER Opening the lid: Hold the handle (2) firmly, turn the lid (1) clockwise until it loosens and lift vertically. (See Figures 7-8); the lid (1) can stand on the lid rest (13) (Figure 9). OPEN OPEN OPEN 2) Remove the inner pot (6) and add desired ingredients. - Page 11 PREPARING YOUR PRESSURE COOKER (CONT). 4) Closing the Lid: Make sure the Rubber Seal Ring (11) is fitted properly onto the inner part of the lid (1). Observe the Rubber Seal Ring (11) inside the Lid (1) and ensure that it is evenly fitted onto the track. (Caution: If the rubber seal ring is damaged, do not use the pressure cooker.
-
Page 12: Preparing Your Pressure Cooker ________________
PREPARING YOUR PRESSURE COOKER (CONT). NOTES & TIPS #1: • Please note that the Pressure Limiting Valve (3) will be loose when you are not using the unit for cooking. It will rock slightly and will turn 360° manually. Once the pressure cooker is in operation and the pressure has built up to its capacity, the Pressure Limiting Valve (3) will tighten, only allowing itself to be turned to “Exhaust”. -
Page 13: Pre-Set Menu Buttons
OPERATING INSTRUCTIONS PRE-SET MENU BUTTONS HOW TO USE THE There are Seven Pre-set Menu Buttons pre-programmed for your pressure cooker (Vegetables/Fish, Soup/Stew, Potatoes, Beef/Meat, Rice, Chicken, and Beans/Chili). These are pre-set for quick and easy cooking for small portions of food in addition to manual programming. (When cooking food that is more than 3lbs. - Page 14 OPERATING INSTRUCTIONS (CONT.) 9) When the unit has pressurized, it will begin to pressure-cook the food. You may hear quiet hissing or sizzling sounds coming from inside of the unit during this time. 10) When cooking has completed, the pressure cooker will beep 6-times and automatically go to KEEP WARM.
-
Page 15: Pressure Cook Time Button
OPERATING INSTRUCTIONS (CONT.) NOTES & TIPS #6: • NATURAL RELEASE is recommended when cooking foods that will not have the tendency to overcook such as Potatoes, Beans, Soups & Stews. During the Natural Release time period (may take 10-15 minutes), the pressure cooker may still be heated and cooking the food slightly. - Page 16 OPERATING INSTRUCTIONS (CONT.) DELAY TIMER BUTTON HOW TO USE THE If you wish to program your pressure cooker to automatically cook prepared food at a later time, you can program the pressure cooker to delay cooking by up to 24-hours. This setting is used in combination with the MENU BUTTON SELECTIONS in the chart shown on page 12 with the exception of the BROWN/SAUTE function.
- Page 17 OPERATING INSTRUCTIONS (CONT.) NOTES & TIPS #7: • It is recommended to release the pressurized steam when the “Keep Warm” LED stops flashing as the pressure cooker will have lower pressure. This will require a little more time. (Approximately 5-10 minutes). •...
-
Page 18: How To Use Keep Warm Button
OPERATING INSTRUCTIONS (CONT.) KEEP WARM BUTTON: HOW TO USE THE Food can be prepared at an earlier time and kept warm inside the pressure cooker using the KEEP WARM function. Food can be kept warm for up to 4-hours. Additional time may cause a change in flavor, appearance and cause food to spoil. Prepare desired food and place into inner pot (6). -
Page 19: Slow Cook Button
OPERATING INSTRUCTIONS (CONT.) SLOW COOK BUTTON: HOW TO USE THE Prepare desired food and place into Inner Pot (6). 2) Place the Tempered Glass Lid (14) (included) onto the pressure cooker. 3) Press the SLOW COOK button. The light will begin blinking and the display will show 0.0 0.5 (this equals 30minutes of slow cook time). - Page 20 OPERATING INSTRUCTIONS (CONT.) • Always use canning supplies specifically manufactured for canning purposes. It is recommended to use mason jars that are 32-ounces or smaller. Do not stack jars on top of each other. • Always inspect your canning supplies to ensure proper function and safety.
-
Page 21: Cleaning & Maintenance
OPERATING INSTRUCTIONS (CONT.) • Carefully remove jars using special canning utensils or tools. CAUTION: Jars are hot! • Set jars on a towel or cooling rack and allow to cool completely in a draft-free location. • Follow recipe instructions on cooling and storage. NOTES &... -
Page 22: How To Clean The Filter
CLEANING & MAINTENANCE (CONT.) How to Clean the Filter: If you wish to clean the filter (10), you may remove it by pulling vertically. To re-attach, simply line up the filter (10) and press down to secure the filter (Figure 22). FAQ (FREQUENTLY ASKED QUESTIONS) Is the Airtight/Exhaust Valve Knob (3) on the top of the lid (1) supposed to be loose? - Page 23 FAQ (FREQUENTLY ASKED QUESTIONS) will keep cooking once the pressure is released, so if you prefer your meat to be Medium or Medium-Rare, we suggest the quick release.) - Once the pressure has completely released, the floating valve (3) will drop down. You can unlock the lid (1) and open to check on your food.
-
Page 24: Faq ________________________________________
FAQ (FREQUENTLY ASKED QUESTIONS) 6) Pressurized Steam is being quietly released from the Floating Valve (3) area during the pressurizing sequence. How do I fix this? - This may happen during the initial start-up of the Pressurizing Sequence. Simply use tongs or similar utensil or oven mitt and carefully adjust it so it is seated properly. -
Page 25: Cooking Time Chart
COOKING TIME CHART Courtesy of www.healthfoods.com Please note that all the below information is for your reference only and can be adjusted according to the user’s preference. Meat/Poultry • Always cook meat or poultry with at least 1-3 cups of liquid. If the cooking time exceeds 15 minutes, use 2 cups of liquid. - Page 26 Vegetables • Always cook with at least 1-2 cups of liquid. • Add 1-2 additional minutes to cooking time when preparing frozen vegetables. • Use the quick-release release method at the end of cooking cycle so vegetables will not become soggy. (Below chart is for quantity approximately half a pot).
- Page 27 Dried Beans and Other Legumes • Place beans or legumes in pressure cooker. Add 3 cups of water for each cup of beans or legumes. • Add 1 tablespoon of vegetable oil for each cup of water to cut down on foaming. Do not add salt until after cooking.
- Page 28 Meat/Poultry (Larger Cuts) • Always cook meat or poultry with at least 1-3 cups of liquid. If the cooking time exceeds 15 minutes, use 2 cups of liquid. If weight of meat or poultry is 3lbs, use 3 cups of liquid. Preserved or salted meats should be immersed in water.
Need help?
Do you have a question about the K41143/EPC-678 and is the answer not in the manual?
Questions and answers
I need a printed copy of a Cooks Essentials 6qt. manual. How do I order and pay for it? My model # is: K41143. It is a round pressure cooker. Bought off of QVC.
@Colleen Mora
My inner reservoir lining is coming off in several areas I need a new inner ****, where can I buy a replacement, I do not feel safe cooking in this container if you're company doesn't have one can you advise what I can buy to replace it. Model # brand
I need an inner **** replacement for Cooks Essentials 6 quart digital pressure cooker Model K41143/EPC-768