Advertisement
Quick Links
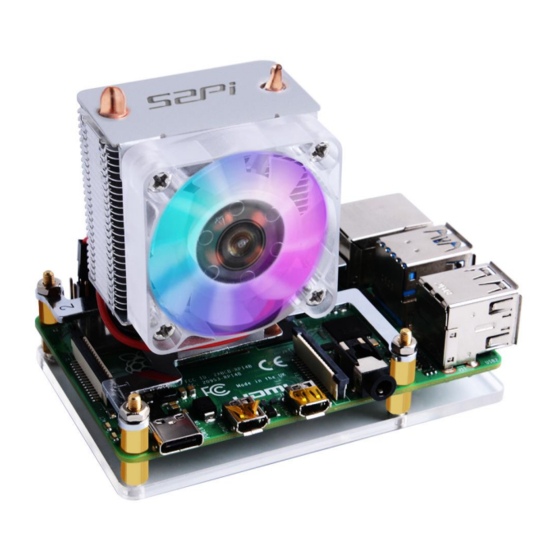
ICE Tower Cooling Fan For Raspberry Pi
Product features
⚫ Support Raspberry Pi 4B/ 3B+/3B
⚫ Colorful LED fan with automatic color change
⚫ Single-Stack Tower-style heatsink
⚫ DC 5V Power in
⚫ 5mm Copper tube
⚫ Super Heat dissipation
⚫ Rated Power 0.4W @5V, 0.08A
⚫ Easy to Setup
⚫ Acrylic Protection Holder
Advertisement

Summary of Contents for Raspberry Pi S2Pi
- Page 1 ICE Tower Cooling Fan For Raspberry Pi Product features ⚫ Support Raspberry Pi 4B/ 3B+/3B ⚫ Colorful LED fan with automatic color change ⚫ Single-Stack Tower-style heatsink ⚫ DC 5V Power in ⚫ 5mm Copper tube ⚫ Super Heat dissipation ⚫...
-
Page 2: Package List
Package list ⚫ 1 x ICE Tower Cooler ⚫ 8 x M2.5x6+6 Copper Stick ⚫ 4 x M2.5 Nuts ⚫ 6 x M2.5x6 Screws ⚫ 3 x Thermal Tape ⚫ 1 x Screwdriver ⚫ 1 x Mounting brackets pack ⚫ 1 x Acrylic protection panel ⚫... -
Page 3: Installation Instructions
Installation instructions 1. Fixed mounting brackets with two M2.5 screws to ICE Tower Cooler. Please pay attention to the direction of mounting brackets. 2. Add copper sticks and nuts to mounting brackets. - Page 4 3. Paste thermal tape to Raspberry Pi’s CPU SOC. 4. Fixed mounting brackets to Raspberry Pi with copper sticks.
- Page 5 5. Fixed Acrylic protection holder to Raspberry Pi with M2.5 screws. 6. Connect the red wire to 5V and black wire to GND on Raspberry Pi’s GPIO.
- Page 6 7. While the Ice Tower’s fan is massively loud, it can get a little irritating. There’s a quick solution: moving the red power cable from a 5V pin on the Raspberry Pi’s GPIO header to the 3V3 pin instead. This can reduce both the fan speed, noise, and the brightness of the LED light, at the cost of it pushing less air through the heatsink stack.


Need help?
Do you have a question about the S2Pi and is the answer not in the manual?
Questions and answers