
Related Manuals for PowerWalker VFI 10000CP 3/3


Summary of Contents for PowerWalker VFI 10000CP 3/3
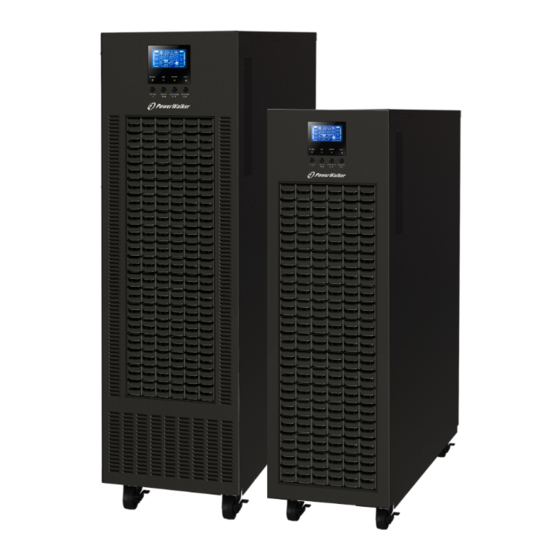
- Page 1 Online UPS PowerWalker VFI 10000CP 3/3 PowerWalker VFI 15000CP 3/3 PowerWalker VFI 20000CP 3/3 PowerWalker VFI 30000CP 3/3 Bedienungsanleitung Unterbrechungsfreie Stromversorgung...
-
Page 3: Table Of Contents
INHALTSVERZEICHNIS 1. SAFETY AND EMC INSTRUCTIONS ....................1 1-1. T ......................1 RANSPORTATION AND TORAGE 1-2. P ..................E RROR OOKMARK NOT DEFINED REPARATION 1-3. I ..................E NSTALLATION RROR OOKMARK NOT DEFINED ..................E 1-4. O PERATION RROR OOKMARK NOT DEFINED 1-5. -
Page 4: Safety And Emc Instructions
1. Wichtige Sicherheitshinweise Bitte beachten Sie strikt alle Warnhinweise und Bedienungsanleitungen in diesem Handbuch. Verwahren Sie diese Anleitung gut auf und lesen sorgfältig die folgenden Anweisungen, bevor Sie das Gerät installieren. Nehmen Sie das Gerät nicht vor dem Lesen aller Sicherheitsinformation und Betriebsanleitungen in Betrieb. 1-1. -
Page 5: Standards
unterbrechen Sie nicht die Verbindung des Stromkabels mit der USV, da dies die Erdung aller angeschlossener Geräte inklusive der USV unterbricht. Die USV hat seine eigene interne Stromquelle (Akkus). Die Ausgänge der USV können unter Strom stehen, auch wenn die USV nicht an einer Steckdose eingesteckt ist. Um die USV komplett vom Netz zu nehmen, drücken Sie bitte zuerst die ... -
Page 6: Installation And Operation
2. Installation und Aufbau Es gibt zwei unterschiedliche Arten von Online-USV: Standard and Long-run Modelle. Bitte beachten Sie folgende Modellübersicht. Model Type Model Type 10000 10000L 15000 15000L Standard Long-run 20000 model 20000L model 30000 30000L We also offer optional parallel function for these two types by request. The UPS with parallel function is called as “Parallel model”. -
Page 7: Rear Panel View
2-2. Hintere Konsolenansicht Diagramm 1: 10000(L)/15000(L) Diagramm 2: 30000L Diagramm 3: 30000 /20000 (L) Rear Panel Diagramm 3: 10000(L)15000(L)/20000(L) Diagramm 4: 30000(L) Input/Output Terminal Input/Output Terminal... -
Page 8: Single Ups Installation
1. RS-232 Port 2. USB Port 3. Stecker für Not-Aus-Schalter (Emergency power off - EPO). 4. Share current port (only available for parallel model) 5. Parallel port (only available for parallel model) 6. Intelligent slot 7. Power stage fan 8. Externer Akkuanschluss 9. - Page 9 NOTE 1: The cable for 10000/10000L should be able to withstand over 40A current. It is recommended to use AWG 10 or thicker wire for Phase and AWG 8 or thicker wire for Neutral for safety and efficiency. NOTE 2: The cable for 15000/15000L should be able to withstand over 63A current. It is recommended to use AWG 8 or thicker wire for Phase and AWG 6 or thicker wire for Neutral for safety and efficiency.
- Page 10 For dual input unit, if there is two separate input, connect the Line input and bypass input respectively; if the is only one common input, please connect the line input and bypass input together. NOTE 1: Make sure that the wires are connected tightly with the terminals. NOTE 2: Please install the output breaker between the output terminal and the load, and the breaker should be qualified with leakage current protective function if necessary.
-
Page 11: Ups Installation For Parallel System
2-4. UPS Installation for Parallel System If the UPS is only available for single operation, you may skip this section to the next. 1) Install and wires the UPSs according to the section 2-3. 2) Connect the output wires of each UPS to an output breaker. 3) Connect all output breakers to a major output breaker. -
Page 12: Software Installation
Wiring diagram of parallel system for 30000(L) 2-5. Software Installation For optimal computer system protection, install UPS monitoring software to fully configure UPS shutdown. -
Page 13: Operations
3. Betrieb 3-1. Tastenbedienung Button Function Anschalten der USV: Drücken und halten Sie die ON/Mute Taste für mindesten 0,5 Sekunden, um die USV einzuschalten. ON/Enter Taste Auswahlbestätigen-Taste: Drücken Sie diese Taste. um die Auswahl in den USV Einstellungen zu bestätigen. USV ausschalten: Drücken und halten Sie diese Taste für mindesten 0,5 ... -
Page 14: Led Indicators And Lcd Panel
3-2. LCD Panel LCD panel LED indicators LED Indicators: There are 4 LEDs on front panel to show the UPS working status: Modus Bypass Line Akkus Fehler ● ● ● ● UPS An ○ ○ ○ ○ Keine Ausgang Modus ○... - Page 15 Anzeige Funktion Laufzeit Zeigt die verbleibende Überbrückungszeit als Wert. H: Stunde, M: Minute, S: Sekunde Fehlermeldung Zeigt Warnungen und Fehler an. Zeigt Warnung- und Fehlerkodierung an. Die Kodes sind im Kapitel 3-9 detailliert aufgelistet. Stummschaltung Zeigt an, dass der USV-Alarm ausgeschaltet ist. Ausgangs &...
-
Page 16: Single Ups Operation
Akku Zeigt den Ladungszustand des Akkus in 0-25%, 26-50%, 51-75%, und 76-100% an. Zeigt einen Akkudefekt an. Zeigt einen niedrigen Ladezustand und Spannung des Akkus an. Eingangs- & Akkuspannung Zeigt die Eingangsspannung oder -frequenz oder die Akkuspannung an. Vac: Eingangsspannung, Vdc: Akkuspannung, Hz: Eingangsfrequenz 3-3. - Page 17 3. Connect devices to UPS After the UPS is turned on, you can connect devices to the UPS. 1) Turn on the UPS first and then switch on the devices one by one, the LCD panel will display total load level. 2) If it is necessary to connect the inductive loads such as a printer, the in-rush current should be calculated carefully to see if it meets the capacity of the UPS, because the power consumption of this kind of loads is too big.
- Page 18 NOTE 2: After turning off the UPS, please be aware that the UPS is working at Bypass mode and there is risk of power loss for connected devices. 2) In Bypass mode, output voltage of the UPS is still present. In order to cut off the output, switch off the line input breaker(for dual input unit, also switch off the bypass line breaker).
-
Page 19: Parallel Operation
6) Switch on the line input breaker(for dual input unit, also switch on the bypass input breaker) and the UPS will enter Bypass mode. If the UPS is in maintenance Bypass mode, turn the maintenance switch to “UPS” position and then turn on the UPS. 3-5. -
Page 20: Abbreviation Meaning In Lcd Display
1) Press the “OFF” key twice and each time should be lasted for more than 0.5s. Then, the UPS will enter into bypass mode or no output mode without output. 2) Turn off the output breaker of this unit, and then turn off the input breaker of this unit. 3) After it shuts down, you can turn off the battery breaker (for long-run model) and remove the parallel and share current cables. -
Page 21: Lcd Setting
OP.V Ausgangspannung Parallel, 001 bezeichnet die erste USV Die erste Phase Die zweite Phase Die dritte Phase Die erste Zeile Die zweite Zeile Die dritte Zeile 3-7. USV Einstellungen Es können drei Parameter eingestellt werden. Parameter 1 Parameter 1: Es können 9 Programme eingestellt werden. - Page 22 reserviert Für zukünftige Optionen reserviert reserviert Für zukünftige Optionen reserviert Neutral-Loss-Detection Batteriespannung Kalibrierung Ladegerät Spannungsanpassung Wechselrichter A Spannungsanpassung Wechselrichter B Spannungsanpassung Wechselrichter C Spannungsanpassung Ausgang A Spannungskalibrierung Ausgang B Spannungskalibrierung Ausgang C Spannungskalibrierung *Y means that this program can be set in this mode. Note: All parameter settings will be saved only when UPS shuts down normally with internal or external battery connection.
- Page 23 may choose following two options in parameter 3: CF: Setting UPS to CVCF mode. If selected, the output frequency will be fixed at 50Hz or 60Hz according to setting in parameter 2. The input frequency could be from 46Hz to 64Hz. NCF: Setting UPS to normal mode (not CVCF mode).
- Page 24 Parameter 2: Low voltage point in ECO mode. The setting range is from -5% to -10% of the nominal voltage. Parameter 3: High voltage point in ECO mode. The setting range is from +5% to +10% of the nominal voltage. 07: Frequency range for ECO mode ...
- Page 25 Interface Setting Reserve for future options. 12: Neutral loss detection Interface Setting Parameter 2: N.L: Indicates neutral loss detection function. Parameter 3: DIS: Disable the neutral loss detection function. The UPS will not detect the neutral loss or not. ATO: The UPS will automatically detect the neutral is lost or not.
- Page 26 15: Inverter A voltage adjustment Interface Setting Parameter 2: you may choose Add or Sub to adjust inverter A voltage. Parameter 3: the voltage range is from 0V to 9.9V and the default value is 0V. 16: Inverter B voltage adjustment ...
- Page 27 Interface Setting Parameter 2: it always shows OP.V as output voltage. Parameter 3: it shows the internal measurement value of the output C voltage, and you can calibrate it by pressing Up or Down according to the measurement from an external voltage meter.
-
Page 28: Operating Mode/Status Description
3-8. Operating Mode/Status Description Following table shows LCD display for operating modes and status. (1) If the UPS is in normal operation, it will show seven screens one by one, which represents 3 phase input voltages (An, bn, Cn), 3 line input voltages (Ab, bC, CA) and frequency in turns. (2) If parallel UPS systems are successfully set up, it will show one more screen with “PAR”... - Page 29 AC mode Description When the input voltage is within acceptable range, UPS will provide pure and stable AC power to output. The UPS will also charge the battery at AC mode. LCD display ECO mode Description When the input voltage is within voltage regulation range and ECO mode is enabled, UPS will bypass voltage to output for energy saving.
- Page 30 CVCF mode Description When the output frequency is set to “CF”, the inverter will output constant frequency (50 Hz or 60 Hz). At this mode, the UPS will have no bypass output but still charge battery. LCD display...
- Page 31 Battery mode Description When the input voltage/frequency is beyond the acceptable range or power failure, UPS will backup power from battery and alarm will beep every 4 seconds. LCD display Bypass mode Description When input voltage is within acceptable range and bypass is enabled, turn off the UPS and it will enter Bypass mode.
- Page 32 Battery Test Description When UPS is in AC mode or CVCF mode, press “Test” key for more than 0.5s. Then, the UPS will beep once and start “Battery Test”. The line between I/P and inverter icons will blink to remind users. This operation is used to check the battery status.
- Page 33 Fault status Description When UPS has fault happened, the inverter will be blocked. It will display fault code in screen, and the icon will light up. You can find the code meaning in the fault code table. LCD display...
-
Page 34: Fault Code
3-9. Fault Code Fault code Fault event Icon Fault code Fault event Icon Bus start failure None Inverter A negative power None fault Bus over None Inverter B negative power None fault Bus under None Inverter C negative power None fault Bus unbalance None... -
Page 35: 3-11.Warning Code
3-11.Warning Code Warning code Warning event Warning code Warning event Battery unconnected L1 IP fuse broken* IP Neutral loss L2 IP fuse broken* IP phase abnormal L3 IP fuse broken* Line situations are different in parallel Bypass phase abnormal system Bypass situations are different in Over charge parallel system... - Page 36 Other fault codes are shown on LCD internal fault Contact your dealer display and alarm beeps continuously. occurred. Charge the batteries for at least 7 hours and then check Batteries are not fully charged capacity. If the problem still Battery backup time is shorter than persists, consult your dealer.
-
Page 37: Storage And Maintenance
5. Storage and Maintenance 5-1. Storage Before storing, charge the UPS at least 7 hours. Store the UPS covered and upright in a cool, dry location. During storage, recharge the battery in accordance with the following table: Storage Temperature Recharge Frequency Charging Duration -25°C - 40°C Every 3 months... -
Page 38: Specifications
6. Specifications MODEL 10000 10000L 15000 15000L 20000 20000L 30000 30000L CAPACITY* 10000VA / 9000W 15000VA / 13500W 20000VA / 18000W 30000VA / 27000W INPUT 110 VAC(Ph-N) ± 3 % at 50% Load Low Line Loss 176 VAC(Ph-N) ± 3 % at 100% Load Voltage Low Line Comeback Low Line Loss Voltage + 10V...
Need help?
Do you have a question about the VFI 10000CP 3/3 and is the answer not in the manual?
Questions and answers