Table of Contents
Advertisement
Quick Links
Advertisement
Table of Contents

Summary of Contents for Asus XG Station PRO
- Page 1 Q13545 First Edition January 2018 XG Station PRO Quick Start Guide...
-
Page 2: Safety Precautions
• DO NOT expose to strong magnetic or electrical fields. • DO NOT leave the XG Station PRO on your lap or any part of the body to prevent discomfort or injury from heat exposure. • DO NOT expose to or use near liquids, rain, or moisture. DO NOT use the modem during electrical storms. -
Page 3: Specifications Summary
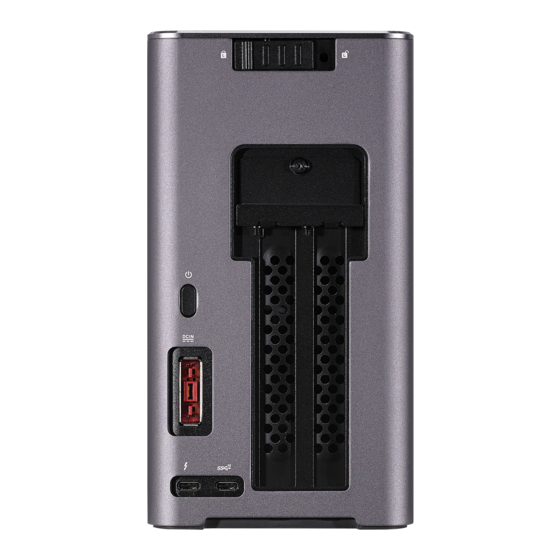
Specifications summary Model XG Station PRO Connection to PC Thunderbolt™ 3 Input / Output 1 x USB 3.1 Gen 2 port RGB Lighting Control ASUS ROG AURA supported Power Supply 330W Dimension 109mm x 205mm x 375mm Weight 3.6KG Graphics Card Support... -
Page 4: Hardware Installation
Hardware installation To install the XG Station PRO: Slide the cover lock to an unlocked position. Slide the top cover towards the rear of the XG Station PRO, then lift the top cover open. - Page 5 Slide the side cover upwards to remove it from the XG Station PRO. Remove the screw that secures the metal cover to the XG Station PRO.
- Page 6 Open the metal cover downwards to an opened position. Remove the screws that secures the metal bracket to the XG Station PRO, then remove the metal bracket.
- Page 7 Align and insert the graphics card into the PCI-E slot. Secure the metal bracket with the screws you removed earlier, then connect the power cables to the graphics card.
- Page 8 Lift the metal cover upwards to a closed position, then secure the metal cover with the screw that you removed earlier. Align and slide the side cover into the XG Station PRO.
- Page 9 Align and slide the top cover towards the front of the XG Station PRO to secure it in place. Slide the cover lock to the locked position.
- Page 10 Connect the bundled Thunderbolt™ 3 Type-C cable to your Notebook PC and the XG Station PRO. Connect the AC power cord to the AC/DC adapter (A). Connect the DC power connector into your XG Station PRO’s power (DC) input port (B). Plug the AC power adapter into a 100V~240V power source...
-
Page 11: Hardware Customization
Press the power button on your XG Station PRO to turn it on. Install the corresponding drivers for your graphics card. Hardware customization To customize the lighting effects of your XG Station PRO, visit www.asus.com and download the ASUS ROG AURA software. -
Page 12: Hardware Maintenance
Hardware maintenance To remove the air filter: Slide the cover lock to an unlocked position. Slide the top cover towards the rear of the XG Station PRO, then lift the top cover open. - Page 13 Slide the side cover upwards to remove it from the XG Station PRO. Slightly lift the air filter handle (A), then slide the air filter and lift it out of the side cover (B).
- Page 14 To reinstall the air filter: Align the air filter and slide it into the side cover. Ensure that all the tabs are inserted into place. Align and slide the side cover into the XG Station PRO.
- Page 15 Align and slide the top cover towards the front of the XG Station PRO to secure it in place. Slide the cover lock to the locked position.


Need help?
Do you have a question about the XG Station PRO and is the answer not in the manual?
Questions and answers