Table of Contents
Advertisement
Quick Links
Advertisement
Table of Contents

Subscribe to Our Youtube Channel
Related Manuals for Cata ASOMA 600


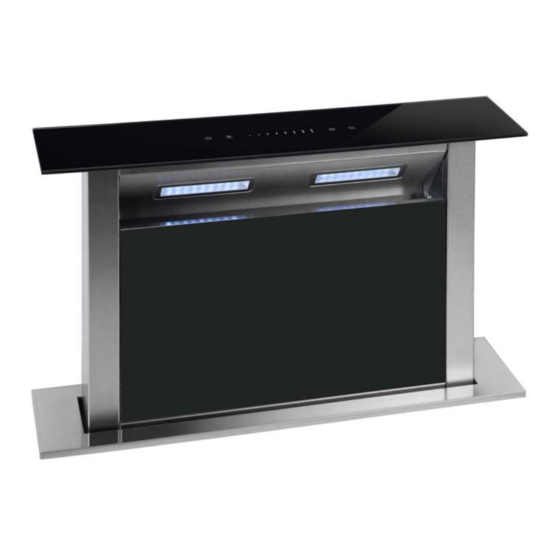
Summary of Contents for Cata ASOMA 600
- Page 1 DOWNDRAFT HOOD ASOMA 600 & ASOMA 900 OPERATION AND STORAGE MANUAL Read in full and retain for future reference Keep this manual with the appliance. If the appliance is to be used by a third party, this instruction manual must be supplied with it.
-
Page 2: Before First Use
DOWNDRAFT HOOD ASOMA 600 & ASOMA 900 Before First Use • Before first use, remove any stickers or similar from the appliance, except for the rating label. • Dispose of any plastic bags as they pose a risk of suffocation for young children. - Page 3 ATTENTION! Always switch off the electricity supply at the mains during nstallation, as well as for any maintenance, such as light bulb replacement. • The cooker hood must be installed in accordance with the installation instructions and measurements stated in this manual. •...
- Page 4 CAUTION The appliance and its accessible parts can become hot during operation. Be careful to avoid touching the heating elements. Children younger than 8 years old should be kept away, unless they are under constant supervision. • There should be adequate ventilation of the room when the cooker hood is used at the same time as appliances burning gas or other fuels.
-
Page 5: Installation (Vent Outside)
• If the cooker hood is damaged, do not attempt to use it. • Do not flambé under the cooker hood. • The air must not be discharged into a flue that is used for exhausting fumes from appliances burning gas or other fuels. Installation (Vent Outside) •... - Page 6 4. Connect the cavity and hood with 8pcs screw M10*10. The wind directions are up, down, left and right; the user can select according to the dimensions of the cabinet. 5. Fix the pipe onto the outlet and use 4pcs screw ST4*14 to fix the PCB box.
-
Page 7: Operation
WARNING For safety reasons, use only fixing or mounting screws that are the same size as those recommended in this instruction manual. Failure to install the screws or fix the device in accordance with these instructions may result in electrical hazards. Operation SLIDE CONTROL The control system consists of two parts;... - Page 8 2. To set the speed, touch this area with your finger sliding it. If your finger stops at the first or second points, the appliances motor will run at the lowest speed; if your finger stops at the third or fourth points, the motor will run at the second speed; if your finger stops at the fifth or sixth points, the motor will run at the third speed;...
-
Page 9: Troubleshooting
Troubleshooting FAULT POSSIBLE CAUSE SOLUTION Light on, but motor • Fan switch turned off • Select a fan switch does not work • Fan switch failed position. • Motor failed • Contact service centre. Light does not work, • House fuses are blown •... -
Page 10: Stainless Steel
• Cleaning and maintenance should be carried out when the appliance is cold. Avoid leaving alkaline or acid substances (lemon juice, vinegar, etc.) on the surfaces. STAINLESS STEEL • The stainless steel must be cleaned regularly (e.g. weekly) to ensure long life expectancy. - Page 11 Place the aluminum filter upside down. Then detach the charcoal filter. 2. Soak the aluminum filter in a solution of warm water and mild detergent for about 10 minutes. This should be done once a month. 3. Clean with a soft cloth/brush. Rinse thoroughly and dry well. The filter can be cleaned in the dishwasher.
-
Page 12: Bulb Replacement
ATTACHING FILTERS 1. After cleaning, attach the charcoal filter to the aluminum filter and secure it with the 4 iron wires. 2. Insert the aluminum filter into the cooker hood. Then insert the decorative board (04) and close it in place. NOTE: Make sure the filter is securely locked. - Page 13 • When handling the globes, hold them with a cloth or gloves to make sure perspiration does not come into contact with it’s globe, as this can reduce the life. Switch off the downdraft and unplug it from the main power supply.
-
Page 14: Protecting The Environment
Dismantling • Do not dismantle the appliance in a way that is not shown in the user manual. The appliance should not be dismantled by the user. At the end of life, the appliance should not be disposed of with household waste.
Need help?
Do you have a question about the ASOMA 600 and is the answer not in the manual?
Questions and answers