Table of Contents
Advertisement
Quick Links
CALIBRATION PROCEDURE
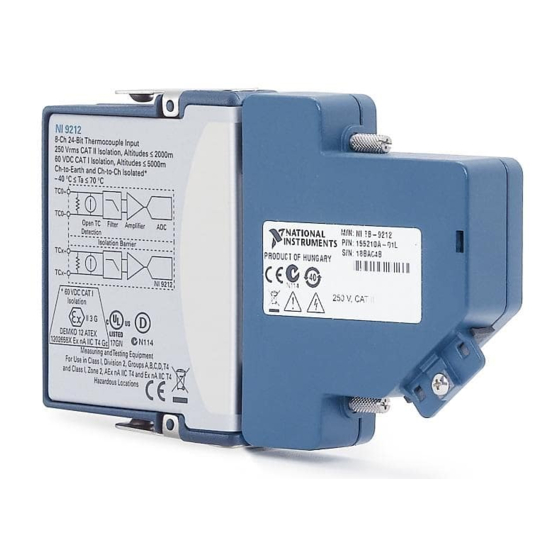
NI 9212
This document contains the verification and adjustment procedures for the NI 9212. For more
information about calibration solutions, visit
Refer to the NI TB-9212 Calibration Procedure on
Note
instructions on calibrating the NI TB-9212.
Contents
Software.................................................................................................................................... 2
Documentation.......................................................................................................................... 2
Test Equipment......................................................................................................................... 3
Connecting the NI 9212.................................................................................................... 4
Test Conditions......................................................................................................................... 5
Initial Setup............................................................................................................................... 5
Verification ............................................................................................................................... 6
Voltage Verification ......................................................................................................... 6
CJC Verification ............................................................................................................... 8
Adjustment................................................................................................................................ 11
Voltage Adjustment.......................................................................................................... 11
CJC Adjustment................................................................................................................ 12
EEPROM Update ..................................................................................................................... 14
Reverification ........................................................................................................................... 14
Accuracy Under Calibration Conditions .................................................................................. 14
Worldwide Support and Services ............................................................................................. 15
ni.com/calibration
.
ni.com/manuals
for
Advertisement
Table of Contents

Related Manuals for National Instruments 9212


Summary of Contents for National Instruments 9212
-
Page 1: Table Of Contents
CALIBRATION PROCEDURE NI 9212 This document contains the verification and adjustment procedures for the NI 9212. For more information about calibration solutions, visit ni.com/calibration Refer to the NI TB-9212 Calibration Procedure on ni.com/manuals Note instructions on calibrating the NI TB-9212. -
Page 2: Software
Software Calibrating the NI 9212 requires the installation of NI-DAQmx 15.1 or later on the calibration system. You can download NI-DAQmx from . NI-DAQmx supports ni.com/downloads LabVIEW, LabWindows ™ /CVI ™ , ANSI C, and .NET. When you install NI-DAQmx, you only need to install support for the application software that you intend to use. -
Page 3: Test Equipment
NI PXI-4071 A multiranging 7.5 digit digital Multimeter Adjustment multimeter with an accuracy of at least • 8 ppm at 100 mV range • 6 ppm at 10 V range NI 9212 Calibration Procedure | © National Instruments | 3... -
Page 4: Connecting The Ni 9212
Ground Lug (on the bottom side of the NI CAL-9212 enclosure) Connect the NI CAL-9212 to the NI 9212 front connector as shown in Figure 2. Tighten the two jackscrews on the NI CAL-9212 to hold it securely in place. Do not overtighten the jackscrews. -
Page 5: Test Conditions
The following setup and environmental conditions are required to ensure the NI 9212 meets published specifications. • Keep connections to the NI 9212 as short as possible. Long cables and wires act as antennas, picking up extra noise that can affect measurements. •... -
Page 6: Verification
Set the calibrator output to a Test Point value indicated in Table 4. Set the calibrator to Operate mode (OPR). Acquire and average samples. Create and configure an AI voltage channel on the NI 9212 according to Table 2. Table 2. NI 9212 Voltage Channel Configuration Input Range (mV) - Page 7 10. Compare the average to the limits in Table 4. 11. Repeat steps 6 through 10 for each test point. 12. Repeat steps 6 through 11 for each ADC timing mode on the NI 9212. Table 4. NI 9212 Voltage Verification Test Limits for Positive and Negative Test Points...
-
Page 8: Cjc Verification
16. Reinstall the top cover on the NI CAL-9212. 17. Acquire and average samples. Create and configure an AI voltage channel on the NI 9212 according to Table 2. Configure the AI voltage channel timing according to Table 3. Start the task. - Page 9 Set the calibrator output to a Test Point value indicated in Table 8. Set the calibrator to Operate mode (OPR). Wait at least 15 seconds for the NI 9212 to settle before proceeding to the next step. Acquire and average samples.
- Page 10 – 11. Compare the calculated resistance to the limits in Table 8. 12. Repeat steps 9 through 11 for each ADC timing mode on the NI 9212. 13. Repeat steps 6 through 12 for each test point. 14. Set the calibrator to Standby mode (STBY).
-
Page 11: Adjustment
NI 9212. Voltage Adjustment Complete the following procedure to adjust the voltage accuracy of the NI 9212. Loosen the captive screws and remove the top cover from the NI CAL-9212. Connect the calibrator to the NI CAL-9212, as shown in Figure 3. -
Page 12: Cjc Adjustment
Reinstall the top cover on the NI CAL-9212. Connect the NI CAL-9212 to the NI 9212, as shown in Figure 2. Wait at least 15 seconds for the NI 9212 to settle before proceeding to the next step. Acquire the adjustment coefficient. - Page 13 Set the calibrator to a reference value determined by the array of adjustment points. Set the calibrator to Operate mode (OPR). Wait at least 15 seconds for the NI 9212 to settle before proceeding to the next step. Take five digital multimeter readings.
-
Page 14: Eeprom Update
EEPROM Update When an adjustment procedure is completed, the NI 9212 internal calibration memory (EEPROM) is immediately updated. If you do not want to perform an adjustment, you can update the calibration date and onboard calibration temperature without making any adjustments by initializing an external calibration, setting the C Series calibration temperature, and closing the external calibration. -
Page 15: Worldwide Support And Services
19,000 508.78 951.43 100,000 308.90 1,243.43 For operational specifications, refer to the most recent NI 9212 with Note NI TB-9212 Datasheet online at ni.com/manuals Worldwide Support and Services The NI website is your complete resource for technical support. At you have ni.com/support... - Page 16 For patents covering NI products/technology, refer to the appropriate location: Help»Patents in your software, the patents.txt file on your media, or the National Instruments Patents Notice at ni.com/patents. You can find information about end-user license agreements (EULAs) and third-party legal notices in the readme file for your NI product.
Need help?
Do you have a question about the 9212 and is the answer not in the manual?
Questions and answers