Advertisement
Quick Links
Advertisement

Related Manuals for Wisenet HCF-8010V


Summary of Contents for Wisenet HCF-8010V
- Page 1 ANALOG CAMERA User Manual HCF-8010V...
- Page 2 Analog Camera User Manual Copyright ©2019 Hanwha Techwin Co., Ltd. All rights reserved. Trademark Each of trademarks herein is registered. The name of this product and other trademarks mentioned in this manual are the registered trademark of their respective company. Restriction Copyright of this document is reserved.
- Page 3 Safety information CAUTION RISK OF ELECTRIC SHOCK. DO NOT OPEN CAUTION: TO REDUCE THE RISK OF ELECTRIC SHOCK, DO NOT REMOVE COVER (OR BACK) NO USER SERVICEABLE PARTS INSIDE. REFER SERVICING TO QUALIFIED SERVICE PERSONNEL. This symbol indicates that dangerous voltage consisting a risk of electric shock is present within this unit.
- Page 4 Safety information 6. Do not place conductive objects (e.g. screwdrivers, coins, metal parts, etc.) or containers filled with water on top of the camera. doing so may cause personal injury due to fire, electric shock, or falling objects. 7. Do not install the unit in humid, dusty, or sooty locations. doing so may cause fire or electric shock.
- Page 5 FCC Statement This device complies with part 15 of the FCC Rules. Operation is subject to the following two conditions : 1) This device may not cause harmful interference, and 2) This device must accept any interference received including interference that may cause undesired operation.
- Page 6 Important safety instructions Read these instructions. Keep these instructions. Heed all warnings. Follow all instructions. Do not use this apparatus near water. Clean only with dry cloth. Do not block any ventilation openings. Install in accordance with the manufacturer’s instructions. Do not install near any heat sources such as radiators, heat registers, or other apparatus (including amplifiers) that produce heat.
- Page 7 Important safety instructions 17. Do not install the product in a place where chemical substances or oil mist exists or may be generated. As edible oils such as soybean oil may damage or warp the product, do not install the product in the kitchen or near the kitchen table. This may cause damage to the product.
- Page 8 Contents OVERVIEW What's included At a Glance INSTALLATION Before installation Disassembling Installation CONNECTION Connecting to Monitor Connecting to Power CAMERA OPERATION Menu Configuration Camera setup TROUBLESHOOTING Troubleshooting SPECIFICATIONS Specifications Dimension 8_ contents...
- Page 9 Overview WHAT'S INCLUDED Please check if your camera and accessories are all included in the product package. (As for each sales country, accessories are not the same.) ANALOG CAMERA Quick Guide HCF-8010V Camera Quick Manual Warranty card Template Tapping Screw...
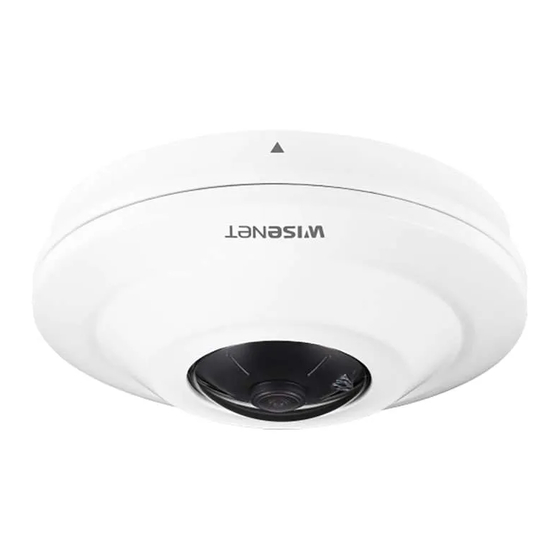
- Page 10 Overview AT A GLANCE Appearance Camera Mounting Plate: Used to mount the camera. Power Input Connector (Dual (24V AC & 12V DC)) Video Output Jack : Outputs a video in the set video format. Video Format Setting Switch: Allows to set to a video format (TVI/AHD/CVBS) of your choice. Screw Hole: Used to assemble/disassemble the camera and plate.
- Page 11 Installation BEFORE INSTALLATION Ensure you read out the following instructions before installing the camera: y You have to check whether the location (ceiling or wall) can bear five times the weight of your camera. y Don’t let the cable to be caught in improper place or the electric line cover to be damaged. Otherwise it may cause a breakdown or fire.
- Page 12 Installation INSTALLATION 1. Attach the installation template to the selected area and punch 4 holes as shown in the figure. 12_ Installation...
- Page 13 2. Align the installation holes of the camera and use the tapping screws to fix the mounting plate. Make sure that the <FRONT> marking on the bottom mounting plate is turned towards the direction to monitor. Mounting plate Tapping Screw 3.
- Page 14 Optional Accessories for Installation For your easier installation, you can purchase appropriate optional accessories available. 1. Install the mounting plate to the bracket (SBP-300HMW7 /SBP-122HMW) as shown below, and then attach the camera to the mounting plate. Bracket (SBP-300HMW7 /SBP-122HMW) Mounting plate Screw 2.
- Page 15 connection CONNECTING TO MONITOR Connect the Video OUT port on the rear panel of the camera to a DVR. ALARM NETWORK BACKUP POWER Monitor y As the connecting method varies with the instruments, refer to the manual supplied with the instrument. y Only connect the cable when the power is turned off.
- Page 16 Connection CONNECTING TO POWER You can connect power as shown in the following figure. Power Input Terminal When the resistance value of copper wire is at [20°C(68°F)] Copper wire size (AWG) #24 (0.22 mm #22 (0.33 mm #20 (0.52 mm #18 (0.83 mm Resistance value(Ω/m) 0.078...
- Page 17 - Video Cable The camera's video output port is connected to the DVR with a BNC coaxial cable, shown below. Recommended Cable Distance Specification 500 m 5C2V It is recommended that pure copper coax cable is used and not copper coated steel, as this will cause issues with the communication over the coaxial cable.
- Page 18 camera operation MENU CONFIGURATION MAIN SETUP VIDEO FORMAT ◦ ◦ FORMAT RETURN ◦ ◦ ◦ INDOOR OUTDOOR WHITE BAL ◦ ◦ AWC → SET ◦ MANUAL RETURN ◦ ◦ ◦ BRIGHTNESS SHUTTER EXPOSURE ◦ ◦ SSNR RETURN BACKLIGHT ◦ ◦ ◦...
- Page 19 White Bal (White Balance) Use the White Balance function to adjust the screen color. 1. From the Setup menu, select the MAIN SETUP <White Bal>. 1. VIDEO FORMAT FORMAT 2. Select the desired mode. 2. WHITE BAL Select one of the following 5 modes, ...
- Page 20 Camera operation EXPOSURE 1. From the Setup menu, select the MAIN SETUP <EXPOSURE>. 1. VIDEO FORMAT FORMAT 2. Select each item and set it properly. 2. WHITE BAL 3. EXPOSURE y BRIGHTNESS : Adjusts the video 4. BACKLIGHT brightness. 5.
- Page 21 The camera uses high performance DSP chips that are designed to clearly display the object and the background despite severe reverse light. 1. From the Setup menu, select the <BACKLIGHT>. 2. Select the desired mode. MAIN SETUP 1. VIDEO FORMAT FORMAT 2.
- Page 22 Camera operation SPECIAL 1. From the Setup menu, select the <SPECIAL>. 2. Select the desired mode. y LANGUAGE : Only english can be SPECIAL SETUP used with this unit. LANGUAGE IMAGE ADJ y IMAGE ADJ DAY/NIGHT AUTO Select <IMAGE ADJ>. ❶...
- Page 23 y DAY/NIGHT: You can display pictures in color or in black and white. Select <DAY/NIGHT>. ➊ Select each item and set it properly. ➋ - AUTO : The mode is switched D&N AUTO to ’Color‘ in a normal BURST MODE ...
- Page 24 troubleshooting TROUBLESHOOTING If you have trouble operating your camera, refer to the following table. If the guidelines do not enable you to solve the problem, contact an authorized technician. Problems Troubleshooting Nothing appears on the screen. y Check that the power cord and line connection between the camera and monitor are properly connected.
- Page 25 SPECIFICATIONS HCF-8010V Video Imaging Device 1/2.9” CMOS Total Pixels 2560(H) x 1944(V) Effective Pixels 1944(H) x 1944(V) Scanning System Progressive Scan Min. Illumination Color : 0.95 Lux(F 2.1, 30IRE), B/W : 0.005Lux(F2.1, 30IRE) Video Output BNC(AHD / TVI / CVBS Selectable)
- Page 26 Specifications HCF-8010V Environmental Operating Temperature -30 °C ~ +55 °C (-22 °F ~ +131 °F) Ingress Protection IP66 Vandal Resistance IK10 Electrical Input Voltage DC 12 V and AC 24 V Power Consumption Max 2 W Mechanical Color / Material White / Metal Dimension (Ø...
- Page 27 DIMENSION Unit: mm (inch) English_27...
- Page 28 Head Office 6, Pangyo-ro 319 beon-gil, Bundang-gu, Seongnam-si, Gyeonggi-do, 463-400 Rep. of KOREA Tel : +82.70.7147.8753 Fax : +82.31.8018.3740 www.hanwha-security.com Hanwha Techwin America 500 Frank W. Burr Blvd. Suite 43 Teaneck, NJ 07666 Toll Free +1.877.213.1222 Direct +1.201.325.6920 Fax +1.201.373.0124 www.hanwhasecurity.com Hanwha Techwin Europe Heriot House, Heriot Road, Chertsey, Surrey, KT16 9DT, United Kingdom...
Need help?
Do you have a question about the HCF-8010V and is the answer not in the manual?
Questions and answers