Table of Contents
Advertisement
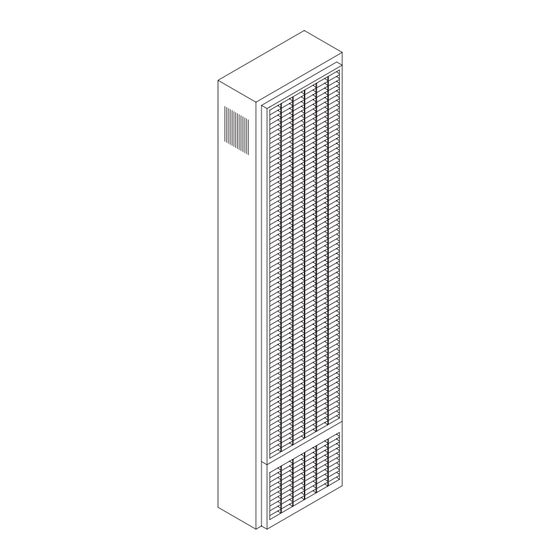
OWNER'S MANUAL
Save this manual for future reference
AC2030
TOP-VENT GAS WALL HEATER
MODEL NUMBERS:
AC2030TN FOR USE WITH NATURAL GAS ONLY
READ THIS OWNER'S MANUAL CAREFULLY BEFORE
YOU INSTALL YOUR NEW WILLIAMS WALL FURNACE
WARNING: If the information in these instructions
is not followed exactly, a fire or explosion may result
causing property damage, personal injury or loss of life.
Do not store or use gasoline or other flammable vapors
and liquids in the vicinity of this or any other appliance.
WHAT TO DO IF YOU SMELL GAS:
• Open all windows.
• Do not try to light any appliance.
• Do not touch any electrical switch; do not use
any phone or cell phone in your building.
• Extinguish any open flame.
• Immediately call your gas supplier from a neighbor's
phone. Follow the gas supplier's instructions.
• If you cannot reach the gas supplier, call the fire
department.
Installation and service must be performed by a qualified
installer, service agency or the gas supplier.
WARNING: Improper installation, adjustment, alteration,
service or maintenance can cause injury or property
damage. Refer to this manual. For assistance or for
additional information consult a qualified installer,
service agency or the gas supplier.
WWW.WFC-FC.COM • 888-444-1212
.
20,000 - 30,000 BTU/hr. Model
WARNING: INSTALLATION IN MANUFACTURED HOMES
Williams Top-Vent Furnaces are allowed in manufactured
homes when the following conditions are met:
- The manufactured home is permanently sited per local codes.
- The manufactured home is manufactured after 6/15/1976
and is HUD approved with a red certification label (US only).
These models are allowed only in the USA. This applies to
aftermarket manufactured home installations where the
home is sold, installed and permanently sited. Not for
manufactured home manufacturing factory installation These
units may not be installed in trailers or recreational vehicles.
WARNING: This product can expose you to chemicals
including epichlorohydrin which is known to the State of
California to cause cancer and birth defects and/or other
reproductive harm. For information go to
www.p65warnings.ca.gov
Advertisement
Table of Contents

Related Manuals for Williams AC2030


Summary of Contents for Williams AC2030
- Page 1 MODEL NUMBERS: AC2030TN FOR USE WITH NATURAL GAS ONLY READ THIS OWNER’S MANUAL CAREFULLY BEFORE YOU INSTALL YOUR NEW WILLIAMS WALL FURNACE WARNING: If the information in these instructions is not followed exactly, a fire or explosion may result causing property damage, personal injury or loss of life.
-
Page 2: Your Williams Warranty
WARRANTY The manufacturer, Williams Furnace Co., warrants this wall furnace This warranty does not cover claims which do not involve or heater to the original purchaser under the following conditions: defective workmanship or materials. LIMITED ONE-YEAR WARRANTY DUTIES OF THE CONSUMER... -
Page 3: Table Of Contents
Basic Tools Needed ..................5 Optional Accessories ................5 Caring for Your Furnace ................21 Learn how to keep your new Williams Furnace operating. Installing Your Wall Furnace ..............6 Locating Wall Furnace and Thermostat ..........6 Combustion & Ventilation Air .............. 7-9 Installation Recessed Mount Installation ............ -
Page 4: Safety Rules
SAFETY RULES Provide for adequate combustion and ventilation air. See WARNING: Read these rules and the instructions page 7. The flow of this air to the furnace must not be blocked. carefully. Failure to follow these rules and instructions could cause a malfunction of the furnace. This could 10. -
Page 5: Introduction
INTRODUCTION Basic Materials Needed The following steps are all needed for proper installation and safe operation of your furnace. If you have any doubts Pipe and fittings to make gas connections to the furnace. as to any requirements, check with local authorities. Obtain Vertical venting materials. -
Page 6: Installing Your Wall Furnace
INSTALLING YOUR FURNACE The following steps are needed for proper installation and Locate the furnace near the center of the space to be safe operation of your furnace. If you have any doubts as to heated for good air circulation. Do not put it behind a any requirements, obtain professional help. -
Page 7: Combustion & Ventilation Air
After picking a location that meets the requirements, check After it has been determined that each appliance the walls, attic and roof to make sure there are no obstructions connected to the venting system properly vents when such as pipes, electrical wiring, etc., which could interfere with tested as outlined above, return doors, windows, exhaust the installation of the furnace or vent pipe. - Page 8 INSTALLING YOUR FURNACE FIGURE 2 – Draft Hood Spillage Ducts must have the same cross-sectional area as the free area of the openings to which they connect. The minimum dimension of rectangular air ducts must not be less than 3-inches in length or height. WARNING: Danger of property damage, bodily injury or loss of life.
- Page 9 Hole Placement - Example Examples of Grill Placement HOLES FROM VENTILATED VENTILATION GRILLES CONNECTING TWO ATTIC INTO STUD SPACE ROOMS TO MEET UNCONFINED SPACE 100 SQ IN VENTILATION 200 SQ IN MINIMUM GRILLES BETWEEN INTO CLOSET LARGE FOR HOT ROOMS WATER HEATER 100 SQ IN...
-
Page 10: Installation
INSTALLING YOUR FURNACE cutout and install the plaster ground before you install the WARNING: Danger of illness, bodily injury or death. Draft furnace. See instructions packed with accessory and Figure 5. hood spillage, with unobstructed vents, indicates that additional air must be brought into the structure from Do not allow wall finish material to project into the the outside. - Page 11 Close off stud space (if required) pipe in the center of the hole. Ceiling plate spacers preserve structural strength and position oval vent pipe in the center If studs are not on 16-inch centers, cut the hole for the of the cut out opening. Ceiling plate spacers are not furnace next to an existing stud and frame in the other included.
-
Page 12: Surface Mount Installation
INSTALLING YOUR FURNACE Surface Mount Installation the furnace and local codes. See Vent Installation, page 14. The use of the optional Free Standing Accessory No. 4901 allows single-sided furnaces to be surface mounted instead Set the furnace body into position. (Figure 9), page 15. The of recessed into a wall. - Page 13 FIGURE C FIGURE B STUD WALL STUD WALL 4 - 7/16ʺ 3 - 1/2ʺ CENTERED 14ʺ 16ʺ FIGURE D CEILING PLATE SPACER STUD WALL STUD WALL PLUMBERS GAS STUB LOCATIONS TAPE Vent Installed B-W VENT PIPING Front panel installed VENT HOLD DOWN PLATE HEADER...
-
Page 14: Vent Installation
INSTALLING YOUR FURNACE Vent Installation FIGURE 8 – Typical Vent Installation The vent installation must comply with all local codes and ordinances. If in doubt, consult your local codes or inspector. The furnace vent must be directed to the outdoors so that harmful combustion gases will not collect inside the building. -
Page 15: Attaching Your Furnace
If an existing gas line is preventing the installation of a break the top tabs. Use caution when handling sharp Williams Monterey unit, a cut-out may be made using tin metal edges. snips on one of the legs to clear this existing gas line. This... -
Page 16: Gas Supply And Piping
INSTALLING YOUR FURNACE Attaching Your Furnace continued After furnace is in position, install rear outlet register as shown Orifice Sizes in Figure 12. Have damper in open position when inserting The efficiency rating of this appliance is a product thermal the assembly. - Page 17 Connections between the manual shutoff valve and burner WARNING: Danger of property damage, bodily injury or control assembly can be made with an A.G.A./C.G.A. design death. Never use a match or open flame to test for leaks. certified flexible connector if allowed by local codes. Drip leg Never exceed specified pressures for testing.
-
Page 18: Front Panel Installation
INSTALLING YOUR FURNACE Thermostat Installation Front Panel Installation Use the thermostat supplied with the unit. Place the front panel top over the channel on the header plate, as shown in Figure 16. Press the panel tight against wall, and Use cable supplied with the unit. secure it to the header channel with the screw provided in final If a new location is chosen or if this is a new installation, assembly package. -
Page 19: Start Up Procedure
Start-Up Procedure Check the manifold gas pressure A tapped opening is provided in the gas valve to facilitate Check the furnace operation as outlined in the following measuring manifold gas pressure. A water column instructions. If any sparking, odors or unusual noises are manometer having a scale range from 0 to 12-inches of water encountered, shut off electric power immediately. -
Page 20: Stay Safe
START-UP PROCEDURE continued Check control wiring connections FOR YOUR SAFETY READ BEFORE LIGHTING Refer to wiring digram on page 28. Burner flame characteristics WARNING: IF YOU DO NOT FOLLOW THESE INSTRUCTIONS EXACTLY, A FIRE OR EXPLOSION MAY RESULT CAUSING Start the furnace and let it operate at least ten minutes. PROPERTY DAMAGE, PERSONAL INJURY, OR LOSS OF LIFE. -
Page 21: Operating Your Furnace
OPERATING CARING FOR YOUR FURNACE YOUR FURNACE Operation Of Your Furnace How To Care For Your Furnace The furnace operates in the following sequence: WARNING: Danger of bodily injury or death. Turn off Switch on the Thermostat. The gas valve opens to allow electric power supply at disconnect switch, fuse box or gas flow to the burner and the combustion fan starts to service panel before removing any doors or access service... -
Page 22: Installing Your Motorized Rear Outlet Accessory
INSTALLING YOUR MOTORIZED REAR OUTLET DANGER: The build-up of any dust, lint or foreign material in the primary air opening of the burner can ACCESSORY interfere with the proper air gas mixture and can result in a yellow flame which can produce carbon monoxide and soot. - Page 23 connecting tabs, strike the head of the screwdriver FIGURE C – Surfaced Mounted Installation lightly with a hammer to break the tabs. Swing the plate outward and bend it back and forth to break the top tabs. Both knockout plates must be removed in order to attach the register assembly properly.
- Page 24 FIGURE E – Surfaced Mounted Installation FIGURE F – Wiring SURFACE MOUNTED FURNACE SWITCH LEGEND 1 - ON 2 - OFF 3 - AUTO SPEED NUT (4) SUPPORT SWITCH BRACKET BLOWER 2 X 4 MOTOR STUD HEAT SENSOR SWITCH DRY WALL SCREW #10 -24 X 4.50 PHIL HD 115V 60Hz REGISTER...
-
Page 25: Motorized Rear Outlet Replacement Parts
MOTORIZED REAR OUTLET REPLACEMENT PARTS Motorized Rear Outlet – Models 6919 and 6920 10 10 11 11 Motorized Rear Outlet Replacement Parts List – Models 6919 and 6920 Part Number Reference Number Description 6919 6920 Register Assembly 9B269 9B285 Strain Relief Bushing P500185 P500185 J-Box Cover... -
Page 26: Furnace Replacement Parts
FURNACE REPLACEMENT PARTS Replacement Parts Monday, 20 Jan 4h Hold 08:32 AM NOT HEATING... - Page 27 DRAWING PART NUMBER DISCRIPTION REF NO. P323834 VENT LIMIT SWITCH M116840 CIRCULATION FAN ASSEMBLY P323828 HIGH LIMIT SWITCH M117504 COMBUSTION WELD ASSEMBLY P323750 FLAME SENSOR P323762 THERMOCOUPLE PROBE P323742 HOT SURFACE IGNITER M117255 SIGHT WINDOW M117149 CONTROL BOARD 9C167 FRONT PANEL M117435 VENT SAFETY SWITCH M117283...
-
Page 28: Wiring Diagram
WIRING DIAGRAM Wiring Diagram FAN 1 01 - GND GR 02 - 12 VDC OG OUTLET 03 - TACH WH MOTOR FAN 1 01 - GND BK 02 - 12 VDC RD INLET 03 - TACH YL MOTOR 04 - PWM BR 01 - GND BK FAN 1 02 - 12 VDC RD... -
Page 29: Troubleshooting Chart
TROUBLESHOOTING YOUR FURNACE CORRECTIVE ACTION ISSUE POSSIBLE CAUSE(S) Check power cord connection Furnace won’t turn on AC power is not connected Control module power ON Control module power button is set to OFF Thermostat is set to OFF Turn thermostat to ON D. -
Page 30: Service Hints
TROUBLESHOOTING YOUR FURNACE CORRECTIVE ACTION ISSUE POSSIBLE CAUSE(S) Check heat sizing calculations. Furnace not producing Furnace may be too small for sufficient heating. space being heated. Furnace operates but will Thermostat wiring defective. Thermostat lead wires may be shorted together, not shut off when room caused by a nail or staple. - Page 31 MODEL NUMBER MFG. DATE CODE PART NUMBER PART DESCRIPTION All parts listed herein may be ordered from your equipment supplier. The Model Number of your Williams wall furnace will be found on the nameplate near gas valve, inside control compartment.
- Page 32 www.wfc-fc.com | 888-444-1212 P323738_06/20 ALL RIGHTS RESERVED...
Need help?
Do you have a question about the AC2030 and is the answer not in the manual?
Questions and answers