Table of Contents
Advertisement
Advertisement
Table of Contents

Related Manuals for Axis AX1870CP


Summary of Contents for Axis AX1870CP
-
Page 2: Safety Precautions
Safety Precautions Thank you for purchasing this product. P l e a s e d o n ' t c h a n g e t h e f u s e o n Please read through these operating the power cord without professional instructions so you will know how to guidance, using improper fuse may operate your model properly. - Page 3 Safety Precautions 1. Never disassemble or adjust the unit without any professional guidance. For details, please consult any professional car shop / dealer for inquiry. 2. If the front panel or TFT monitor is dirty, please use a clean silicone cloth and neutral detergent to wipe off the spot.
-
Page 4: Table Of Contents
Contents Settings ...........13 Safety Precautions ........2 Basic settings........13 Contents ............4 General settings........13 Video settings ........13 Before Using ..........5 Time settings ........14 Front Panel ..........5 System settings ........14 Basic Operations ........6 Other Modes ..........14 Parking Brake Inhibit.......6 Listen to Other Devices ......14 Mute ............6 Reset ............15 Power On / Off ........6... -
Page 5: Before Using
Before Using Front Panel 1. Reset Button Reset the unit. 2. [ ] Button Enter radio mode 3. Remote sensor 4. [ ] Button Show main menu 5. [ /VOL ] Rotary/pushbutton Switch on device In operation: Mute audio source (short press) Increase/Decrease the volume (rotate) Switch off device (long press) 6. -
Page 6: Basic Operations
Basic Operations Source Selection Power On / Off Press the [ ] button on the front panel to Press the [ /VOL ] knob on the unit to turn change between available playing sources. the unit on. The buttons on the front of the The playing mode is displayed on the screen. unit light up for a moment and the current mode status appears in the LCD. -
Page 7: Radio Mode
Radio Mode Radio Display Note: When a station is received, searching stops and the station is played. Manual Tuning Method 1: During manual tuning, the frequency will be changed in steps. Touch the [ ] / [ ] icon on the user interface to tune in a higher / lower station. -
Page 8: Playback Mode
Playback Mode Connect a USB Device Play/Pause Insert a USB drive into the USB slot. When playing, press [ ] button to pause, When connecting a USB drive, the unit will and the sound will be mute. read the files automatically. Press [ ] button to play. -
Page 9: Gallery Operations
Playback Mode Gallery Operations 1. Select [ ] on the folder/file list menu. 2. Touch a picture name to view it. Drag left/right to scroll. Listen to Other Devices You can connect an external audio/video device to the unit. 1. Connect the external device with the supplied AV cable. -
Page 10: Bluetooth Mode
Bluetooth Mode Bluetooth allows you to utilize your car’s built- in audio system for handsfree wireless mobile phone or music communication. This system can play audio data stored in a Bluetooth audio device. This unit can retrieve phonebook contacts, received calls, dialed calls, missed calls, incoming calls, outgoing calls and playback music. -
Page 11: Audio Playback Via Bluetooth Streaming
Bluetooth Mode Adjust Bluetooth Settings 1. In Bluetooth menu, touch [ The option menu is displayed. Call History 2. Touch on the selected option to change Access Call History by touching [ ] button. the setting. ∙ [BT Service]: To turn on or off “Bluetooth” function. -
Page 12: Apple Carplay
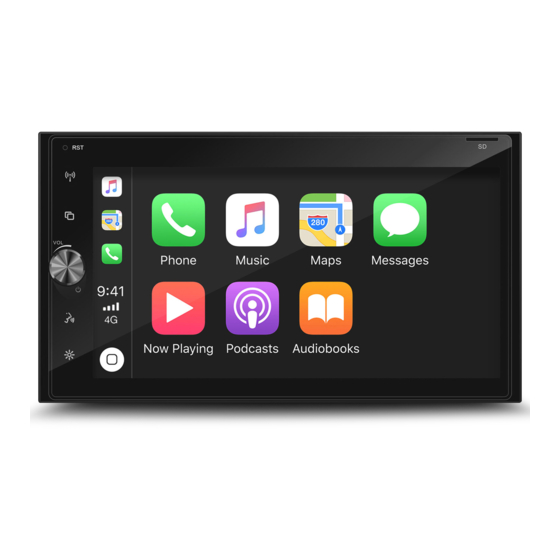
Apple CarPlay Apple CarPlay Apple CarPlay CarPlay is a smarter, safer way to use your iPhone in the car. CarPlay takes the things you want to do with your iPhone while driving and puts them right on your car's built-in display. -
Page 13: Settings
Settings Settings Basic settings In the settings menu, you can adjust the basic settings for the different functions of the device to your requirements. In the main menu, press the [ ] button. The settings menu is displayed, the General submenu is activated. -
Page 14: Time Settings
Settings Equalizer Set Date /Time 1. Touch [ 1. Enter the EQ setup mode 2. Touch [ Time ]. Touch the [ EQ ] icon in the user interface The date/time setup menu is displayed. and the EQ setup interface will be displayed on the screen. -
Page 15: Reset
Settings Steering Wheel Control Programming 1. Touch the [ ] button, the settings menu is displayed. 2. Touch [ SWC ], the SWC menu will be displayed. 3. Set each key with an individual function. 4. Touch [ Pair ] to program. 5. -
Page 16: Specifications
Specifications General Reference Supply Voltage ..............12V(DC) Operating Voltage Range ............10.5 - 15.8V(DC) Max Operating Current ................15A RMS Output Power ................4 X 26W Grounding System ..........Car Battery Negative Pole Dimensions(WXHXD) ............178×100×161.9 mm Weight(main unit) ................... 1.38kg Signal Noise Ratio ................≥50dB Residual Noise Sensitivity (S/N=30dB) .......... -
Page 17: Wire Connections
Wire Connections Wire Connections White Yellow White LINE OUT & AV IN White Brown Brown RADIO ANT... - Page 20 Purchaser’s Name: Purchaser’s Address: Model Number: Serial Number: Dealer Name: Date of Purchase: Dealer Address: Invoice/Sales Docket no: General Hints: To expedite service and prompt return of the equipment, please: a) Clearly describe the fault in detail b) Safely and securely pack the unit for transport c) Include your return address d) Provide proof of purchase date as outlined above PN:1270750035800...
Need help?
Do you have a question about the AX1870CP and is the answer not in the manual?
Questions and answers
Got a Hyundai I35 and need to know if ILLUMI IS +or - ? If to be connected in 17 or 8 of my car