Table of Contents
Advertisement
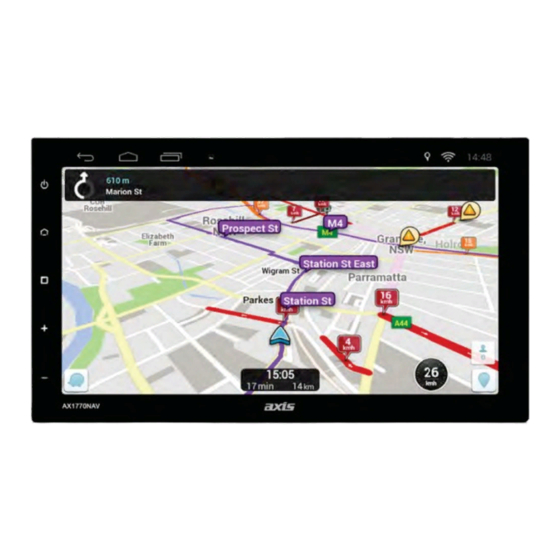
7" ANDROID MULTIMEDIA SYSTEM
GENERAL
- 7" HD Captive Touch LCD (1024 x 600)
- Android 6.0 OS
- Cortex A7 Quad Core T3 1.2Ghz
- 1GB DDR3 RAM
- 16GB Flash
- Steering Wheel Control (Programmable)
- 9.0 - 15.8V DC Voltage
- -20° to +60°C Operating Temp
- 175W x 100Hmm Nose
- 178W x 103H x 175Dmm Overall
AUDIO
- 4 x 45W Max Power
- 4 x 26W RMS (1 KHz 10% THD)
- 4 x 18.5W RMS (1 KHz 0% THD)
- 5 x EQ Presets
- 1 x Custom 3 Band EQ
- Loud/Mute
- 4 x RCA Pre-out (2V)
- 2 x Sub RCA Pre-out (2V)
AX1770NAV
MULTIMEDIA
- Built-in WiFi
- Google Play Store
- Mirror Link: Android Display & 2-Way Control via USB
Apple Display via WiFi
- 12GB Internal Storage
- Supports External Hard Disk
- 3 x USB (2.0) with 900mm Leads
- A/V RCA Input
- AUX RCA Input
- 1 x Video Input
- 2 x Video Output
- 2 x Camera Input (Selectable)
- Audio Formats: MP3, WMA, WAV, APE, OGG, FLAC, AC3
- Video Formats: 4K & 1080p, DivX, RMVB, MP4
- Image Formats: JPEG, BMP, GIF, PNG
BLUETOOTH
- A2DP Audio Steaming
- Phonebook & Search
- Internal Mic
1
NAVIGATION
- Includes: WAZE Navigation App
- Optional: iGo Primo Mapping
HEMA Explorer App
TUNER
- PLL Synthesized AM/FM
- FM 87.5-108MHz; AM522-1710KHz
- 30 Presets (18 FM/12 AM)
INCLUDES
- WiFi Antenna
- GPS Antenna
- ISO Wiring Harness
- Installation L Brackets
- 2 Year Warranty
2
YEAR
WARRANTY
Advertisement
Table of Contents

Subscribe to Our Youtube Channel
Related Manuals for Axis AX1770NAV


Summary of Contents for Axis AX1770NAV
- Page 1 AX1770NAV 7” ANDROID MULTIMEDIA SYSTEM GENERAL MULTIMEDIA NAVIGATION - 7” HD Captive Touch LCD (1024 x 600) - Built-in WiFi - Includes: WAZE Navigation App - Android 6.0 OS - Google Play Store - Optional: iGo Primo Mapping - Cortex A7 Quad Core T3 1.2Ghz - Mirror Link: Android Display &...
-
Page 2: Table Of Contents
CONTENTS User Manual Instructions ..................4 Warnings ........................4 Cleaning the Unit ....................5 Instructions for the Panel Buttons ................5 ....................6 Main Interface ......................6 App Screen Interface ....................7 Radio Function .......................8 Phone Function ......................9 Bluetooth Setting ....................13 Bluetooth Music Function ..................14 Music Function .......................15 Video Function ......................16 Internal Memory Function ..................17 Quick Picture Previewing Function .................18... - Page 3 One Click Setup.......................26 Guidebook Function ....................26 Navigation - WAZE, iGO ..................27 Navigation Error ......................28 iGO Primo Map Upgrade Instructions ..............29 Car Setting ......................31 Common Setting .....................32 Navigation Software Setting ..................32 Backlight Setting .....................33 Radio ........................33 Default Setting ......................33 Steering Wheel Control ..................33 Factory Reset ......................36 Setting ........................36 Wi-Fi Setting ......................37...
-
Page 4: User Manual Instructions
User Manual Instructions • Illustrations are used in this manual to explain operations and precautions. • The illustrations used in this manual are only for reference. improvements and updates. Please take the actual unit as the standard. Warnings To avoid any injury or damage to yourself, your car and others, please make sure to do as following: •... -
Page 5: Cleaning The Unit
Cleaning the Unit • If there is any dirt or marks on the front panel, clean the panel using a dry, soft cloth. • If the panel is very dirty, clean the panel with mild detergent and then the unit, as this will void the warranty. Panel Introduction 1. -
Page 6: Main Interface
• When the ignition switch is at ACC ON position, the unit will power on automatically. automatically. Power icon the panel for more than 2 seconds. Main Screen Interface After the unit is turned on, the system will enter Radio mode by default. Press the HOME icon to enter the Home Page. -
Page 7: App Screen Interface
App Screen Interface Here you can select the APP you wish to use. After selecting APP icon on Home Page: • Tap the icon in the APP display the time & date (as shown below). -
Page 8: Radio Function
Radio Function Operation Tap the Radio icon on the Home Page to enter the radio interface. Radio Band Select Tap the icon to switch the radio bands: FM1/FM2/FM3/AM1/AM2. Tune and Seek seeking when a station is found. Auto Search and Store Stations Press &... -
Page 9: Phone Function
Phone Pairing and Connections Tap the Phone icon on the Home Page to enter the phone interface. To pair a mobile phone to the unit: 1) Turn on the Bluetooth function on your mobile phone. 2) Search for Bluetooth devices with the mobile or the unit and connect. (The unit will show as “BC8-ANDROID”) 3) A message will show on the mobile, input the password 0000 (which is 4) If pairing successful, the system will display the interface below:... - Page 10 Dial • Tap the Phone icon on the Home Page to enter the phone interface. • Tap the Dial icon to enter the interface below: • After the mobile has connected to the unit successfully, input the phone number by tapping the Number buttons on the screen. •...
-
Page 11: Call History
Answer a call When there is an incoming call, the system will switch to the phone interface automatically and the call will ring via the vehicle audio system as shown in the interface below: • Tap the Green Phone icon to answer a call. - Page 12 Phonebook Tap the Phonebook icon to enter the interface below: NOTE: request message to the mobile...
-
Page 13: Bluetooth Setting
Bluetooth Settings Tap the Bluetooth setting icon to enter the interface below: 1) Tap the words 2) The keyboard will pop up allowing you to change the Device Name & Pin Code to your preference. 3) Tap the Bluetooth Auto Connect button to for auto connection. -
Page 14: Bluetooth Music Function
Bluetooth Audio Steaming 1) To use Bluetooth Audio streaming, ensure your mobile device supports 2) After the mobile Bluetooth device is paired to the unit, the audio system will auto-connect. 3) Tap the BT Music icon in APP section to enter the interface below: BT Music NOTE: For some mobiles, you may need to start the music app via your mobile. -
Page 15: Music Function
Music Function Tap the Music icon on the Home Page to enter the interface below: memory. The music formats supported by this unit include: MP3, M4A, WAV, AMR, WMA, OGG, AAC, MID, etc. • Tap the Pause icon to switch between Pause/Play. •... -
Page 16: Video Function
Video Function Tap the Video icon in APP section to enter the interface below: memory. The supported video formats include: MPEG, MPG, MP4, 3GP, MKV, AVI, FLV etc. • When playing a video format that is not supported; the system will display •... -
Page 17: Internal Memory Function
Internal memory instructions To add music/video to the internal memory (from external drive). Tap the ES File Explorer icon in APP section of the home page. 2) Tap “udisk”. Then select the 1) Tap “Local”. 4) Tap “Copy” then “sdcard”. 5) Tap “Paste”... -
Page 18: Quick Picture Previewing Function
Quick Picture Previewing Function Tap the QuickPic icon in the APP section to enter the interface below: • You may preview or edit the images on USB devices or in internal memory. • The image formats supported by this unit include: JPG, PNG, BMP, JPEG, etc. -
Page 19: Mirror Link Function
Mirror Link Function • This function allows you to view the phone’s screen on the unit. • Android phones* will display the phone’s screen via USB and allow 2-way control of the phone via the unit’s screen. • Apple phones* will display the phone’s screen via wireless Wi-Fi, but will not allow control of the phone via the unit’s screen. -
Page 20: Iphone Mirror Link Operation
Apple iPhone Mirror Link Function 1) On your iPhone, turn on the Wi-Fi Hotspot by entering Settings, then enter Personal Hotspot. Turn on Personal Hotspot name and password. 2) On the unit, select the EasyConnected icon in the APP section, then tap the “iPhone Wi-Fi” icon. 3) Select your phone name on the displayed phone on the unit. - Page 21 4) Click to install and enter the “Mirror Link” interface: • Tap the Double Screen Interactive/Mutual Control icon to switch between Mobile main interface and Drive Mode interface. • Tap the Phone Video • Tap the Setting icon to set the functions: Mutually Control/Smooth Mode/Bluetooth Prompt/Auto-turn Drive Mode on etc.
-
Page 22: Wallpaper
Wallpaper Tap the Wallpapers icon in the APP section to enter interface below: • Slide left and right to preview the wallpapers. After you select a wallpaper, tap the icon to set image as homepage background. Live Wallpaper Function 1) Tap the Live Wallpapers icon in the APP section to enter the interface below and select your desired live wallpaper. -
Page 23: Camera Function
Camera Function When there is a camera video input connected to this unit, tap the Camera icon in the APP section to enter interface below: 1) When there is no camera connected to the unit, “No Signal” will display. 2) When a camera is connected to the unit, “Loading“ will display. After loading, the camera’s image will show on the screen. -
Page 24: Boot Logo Function
Boot Logo Function • Tap the Boot Logo icon in the APP section to enter the Boot Logo setting interface. • Click the button located at the lower area of the interface to set the Boot Logo. AUX Function 1) Connect a RCA Video lead into the rear Video 2 input and the audio RCA leads into the rear AUX 2 audio input plugs. -
Page 25: Es File Explorer Function
ES File Explorer Function Tap the ES File Explorer icon in APP section to enter ES File Explorer interface. Favourite Enable access to websites including: News, Weather, Documents, Videos, Applications, Music, etc. via Wi-Fi. Local 1) ES will locate storage boot directory automatically. options, clipboard function and search function. -
Page 26: Tools Cabinet
Tools Cabinet Tap the Tool cabinet icon in the APP section Tools Manager interface. Cache Clear • Tap the Cache cleaner • You can also check the free space/used space beside this icon. • Click the Application drop-down list to delete one or delete all. GPS Monitor Enable to check GPS status parameters. -
Page 27: Navigation - Waze, Igo
Navigation WAZE Navigation • This unit is pre-load with WAZE Navigation APP. • Waze is owned by Google and is the world’s largest community-based a dedicated in-car navigation system. jams; all shared by other drivers in real-time, working together to get the best route. -
Page 28: Navigation Error
Error In normal conditions, the margin of error of satellite signal reception is about 7 meters. In several situations, some errors may still occur after the auto-correcting of the software. When this occurs, the driver should pay attention to the road conditions and drive accordingly. environmental conditions such as electromagnetic disturbance, tall buildings, etc. -
Page 29: Igo Primo Map Upgrade Instructions
iGO Primo Map Upgrade Instructions If you have optioned for iGO Primo Navigation and have received the latest mapping from Audioxtra; please follow the instructions below: Tap the ES File Explorer icon in APP section of the home page. The unit will display the following: 1) Tap “Local”. - Page 30 iGO Primo Map Upgrade Instructions cont... 6) Tap “sdcard”. 7) Find and tap “iGO”. 8) Tap “paste” at the bottom of the 9) The downloaded mapping has screen and the following option now been copied onto the unit. will display (8).
-
Page 31: Car Setting
Car Setting Touch the Car Setting icon in the APP section to enter the following menu: Audio Setting • Move the slider left and right to adjust the volume of the Treble/Tenor/Bass. • Tap to select EQ modes: Standard/Pop/Rock/Classical/Jazz/Custom. • Tap to select the original settings. -
Page 32: Common Setting
Common Settings: Handbreak Tap the tab to select if the hand break needs to be on to view movies. Headlight Tap the tab to light up the left side touch buttons. Beep Tap the tab to activate the beep sound for button press. Reversing Mirror Tap to have camera image normal or mirrored view. -
Page 33: Backlight Setting
Backlight Setting Adjust the screen brightness. Radio Select radio region. “Australia” setting enables wider AM frequency range. Default Setting Adjust the default volume for turn on. Steering Wheel Learning • The unit can also be controlled by most car steering wheels. •... - Page 34 SWC Wiring • Key A and Key B - SWC positive • Key GND - SWC negative/SWC ground To enable SWC control, prior to programming SWC functions, the key wires need to be connected to the vehicle’s SWC connections (see vehicle manual for information on vehicle SWC location and functions).
- Page 35 What can I do if the vehicle has a digital SWC system? A CANBUS SWC adaptor will be required to convert the digital signals to analogue signals. What if the vehicle does not have any SWC functions or the SWC function is not needed? Insulate the key wires.
-
Page 36: Factory Reset
FACTORY RESET • Tap the Reset icon in APP section to display reset setting interface. • Tap Determine to return the unit to factory settings. • The system will restart. • For a full System Reset, disconnect power from unit. NOTE: After the system returns to factory settings, all third party applications installed and user data will be lost. -
Page 37: Wi-Fi Setting
WI-FI • Tap the WI-Fi tab • After turning Wi-Fi on, the unit will search for available WLAN. will show on the right side of the screen. • If there is a lock icon shown beside the signal icon, it means this signal source is encrypted. -
Page 38: Data Usage
DATA USAGE • Enable to check data and data-using status. More... Tethering and portable hotspot • Tap Tethering & portable hotspot to make the unit a hotspot for other devices to connect to. • Enable Network SSID/Security/Password, then tap Save to set changes successfully. -
Page 39: Language And Input Method
LANGUAGE & INPUT Language settings interface includes Language settings, keyboard settings and input method settings. + ADD ACCOUNTS • Add your account details in this section. • For example: add a Google account to enable you download and purchase apps from the Google Play Store. -
Page 40: Date And Time Setting
DATE & TIME • Activating “GPS sync time” will allow the GPS antenna to sync with your local time. • Be sure to select the correct time zone. • To manually set the date & time, un-select “GPS sync time”. •... -
Page 41: Troubleshooting
Troubleshooting Please refer to the troubleshooting issues below: Issue Reason Remedy Replace the fuse with The fuse is burnt out the same value Fails to turn on There is abnormality Disconnect power from within the MPU unit to reset The vehicles battery or Reset and save fuse was replaced preferred settings... -
Page 42: Notes
Notes... - Page 43 Notes...
Need help?
Do you have a question about the AX1770NAV and is the answer not in the manual?
Questions and answers