Table of Contents
Advertisement
Advertisement
Table of Contents

Subscribe to Our Youtube Channel
Related Manuals for Logik LCRAN12


Summary of Contents for Logik LCRAN12
- Page 1 Instruction Manual Clock radio LCRAN12...
-
Page 3: Table Of Contents
Contents Safety Warnings ................... 4 Unpacking .................... 7 Product Overview ................8 Front View......................8 Top View ........................8 Rear View ......................8 Side View.......................9 Power Source ..................10 Mains Power ..................... 10 Backup Battery Power ................... 10 Basic Operation ................. 11 Powering ON/OFF ..................11 Adjusting the Volume ................... -
Page 4: Safety Warnings
Safety Warnings • Read all the instructions carefully before using the unit and keep them for future reference. • Retain the manual. If you pass the unit onto a third party make sure to include this manual. • Check that the voltage marked on the rating label matches your mains voltage. - Page 5 • Do not install or place this unit in a bookcase, built-in cabinet or in another confined space. Ensure the unit is well ventilated. Safety • Always disconnect the unit from the mains supply before connecting/ disconnecting other devices or moving the unit. •...
- Page 6 CAUTION RISK OF ELECTRIC SHOCK DO NOT OPEN The lightning flash with arrowhead symbol, within an equilateral triangle, is intended to alert the user to the presence of uninsulated “dangerous voltage” within the unit’s enclosure that may be of sufficient magnitude to constitute a risk of electric shock. The exclamation point within an equilateral triangle is intended to alert the user to the presence of important operating and maintenance (servicing) instructions in the manual accompanying...
-
Page 7: Unpacking
Thank you for purchasing your new product. We recommend that you spend some time reading this instruction manual in order that you fully understand all the operational features it offers. You will also find some hints and tips to help you resolve any issues. Read all the safety instructions carefully before use and keep this instruction manual for future reference. -
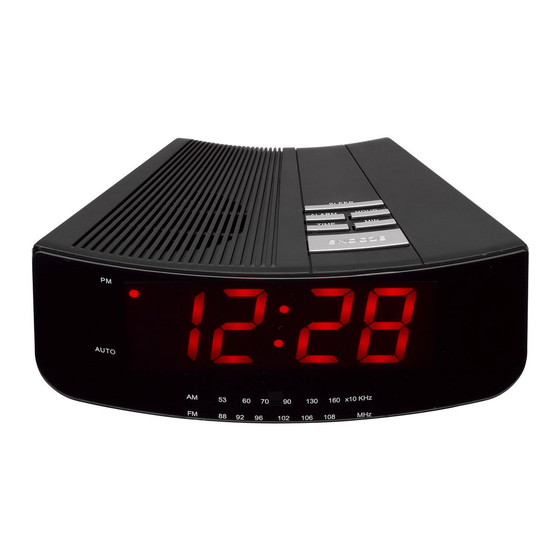
Page 8: Product Overview
Product Overview Front View PM Indicator LED Display ALARM Indicator Frequency Scale ALARM Top View Speaker ALARM Button TIME Button SNOOZE Button MIN Button HOUR Button SLEEP Buttons Rear View FM Aerial Mains Cable... -
Page 9: Side View
Side View ALARM/RADIO OFF/RADIO ON Selector AM / FM Selector Tuning Control BUZZ / VOL Control... -
Page 10: Power Source
Power Source Mains Power Connect the mains plug to the mains socket. To the Mains Socket Backup Battery Power 1. When the back-up clock battery runs out, change the battery as soon as possible. 2. To fit the battery, open the battery compartment at the rear of the unit. -
Page 11: Basic Operation
Handling the Batteries • Improper or incorrect use of batteries may cause corrosion or battery leakage, which could cause fire, personal injury or damage to property. • Install the batteries correctly by following the polarity (+ and –) indications in the battery compartment. •... -
Page 12: Setting The Clock
Setting the Clock When you first connect the unit to the mains socket, the unit will be in STANDBY mode. The clock is displayed in 12 hour format and the display will show “12 : 00” when the unit is powered on. 1. -
Page 13: Snooze Function
Snooze Function Press the SNOOZE button when the RADIO or BUZZER sounds. The alarm will go off and will then sound again around 8 minutes later. The snooze function will continue for 2 hours from the set alarm time. To turn off the alarm, move the ALARM/RADIO OFF/RADIO ON selector to the OFF position. -
Page 14: For Better Reception
For Better Reception Fully unwind and extend the FM aerial. Then position the aerial to obtain optimum reception. Do not connect the FM aerial to an outside aerial. Reposition the unit to obtain optimum AM reception. Maintenance Cleaning the Unit Ensure the unit is fully unplugged from the mains socket before cleaning. -
Page 15: Specifications
• Is the current time correctly set on the time display? • Is the alarm time correctly set? Specifications Model LCRAN12 Frequency Range AM: 530 – 1600 KHz FM: 88 – 108 MHz Mains Supply AC 230V~ 50Hz 5W... - Page 16 All trademarks are the property of their respective owners and all rights are acknowledged. DSG Retail Ltd. (co. no. 504877) 1 Portal Way, London, W3 6RS, UK EU Representative DSG Retail Ireland Ltd (259460) 3rd Floor Office Suite, Omni Park SC, Santry, Dublin 9, Republic of Ireland IB-LCRAN12-200318V9...
Need help?
Do you have a question about the LCRAN12 and is the answer not in the manual?
Questions and answers