
Related Manuals for Logik LCRDAB10


Summary of Contents for Logik LCRDAB10
- Page 1 DAB Clock Radio Instruction Manual LCRDAB10 LCRDAB10_IB_final111001_Zell.indd 1 01/11/2011 12:22 PM...
- Page 2 LCRDAB10_IB_final111001_Zell.indd 2 01/11/2011 12:22 PM...
-
Page 3: Table Of Contents
Contents Unpacking ........................5 Product Overview ......................6 Front View ............................. 6 Rear View ............................... 6 Top View ..............................7 Power Source ........................ 7 Mains Power ............................7 Basic Operation ......................8 Powering ON/OFF ..........................8 Selecting Modes ..........................8 Memory.............................. - Page 4 FM Operation ......................15 Switching from DAB to FM Mode ....................15 Auto Scan ............................15 Manual Scan ............................15 Storing Stations..........................15 Recalling a Stored Station ......................16 FM Display Modes ..........................17 Maintenance .......................18 Hints and Tips ......................18 Specification .......................19 Safety Warnings ......................20 LCRDAB10_IB_final111001_Zell.indd 4 01/11/2011 12:22 PM...
-
Page 5: Unpacking
Thank you for purchasing your new Logik DAB Clock Radio. We recommend that you spend some time reading this instruction manual in order that you fully understand all the operational features it offers. You will also find some hints and tips to help you resolve any issues. -
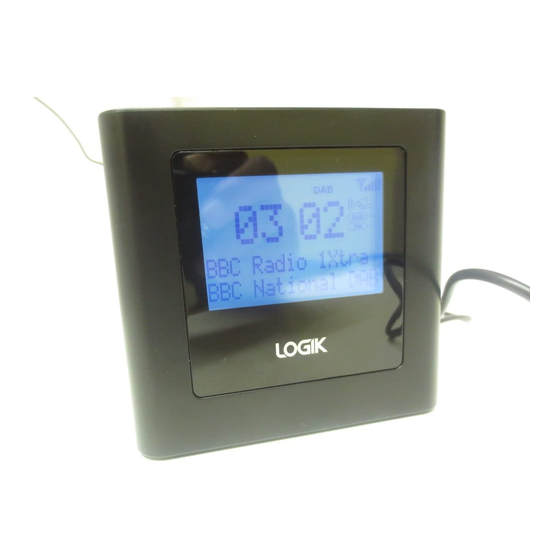
Page 6: Product Overview
Product Overview Front View LCD Display Rear View DC5V DC 5V IN Radio Aerial Earphones Socket LCRDAB10_IB_final111001_Zell.indd 6 01/11/2011 12:22 PM... -
Page 7: Top View
Top View SELECT ALARM1 ALARM2 DAB/FM DISPLAY STANDBY SLEEP PRESET SCAN /SAVE SNOOZE/MUTE VOL+ button SELECT button DAB/FM button ALARM2 button 10. DISPLAY button ALARM1 button button button 12. SCAN button STANDBY button 13. PRESET/SAVE button SLEEP button 14. VOL– button SNOOZE/MUTE button Power Source Mains Power... -
Page 8: Basic Operation
Basic Operation Powering ON/OFF When you first connect the mains adapter to the unit and the mains socket, the unit will enter Standby mode. • Press the STANDBY button to switch the unit on. • Your radio will start in DAB mode and will automatically tune into all the available DAB radio stations. -
Page 9: Setting The Time
Setting the Time When you first turn on your radio it will automatically set the time by searching out the DAB signal. It will continue to search for the clock whilst in DAB mode until it has managed to set the time. If after 10 minutes the clock has not automatically set itself try repositioning the radio to get better reception. -
Page 10: Checking The Alarm
Checking the Alarm To view the alarm time set, press the DISPLAY button until ALARM 1 or ALARM 2 status is displayed. You can see whether ALARM 1 or ALARM 2 is set as the will illuminate on the top left corner of the display. Snooze Function When the alarm sounds, the snooze indicator “... -
Page 11: Using Earphones
Using Earphones You can listen to your radio using earphones with a 3.5mm plug. Plug the earphones into socket on the side of your radio. • You can select the desired volume using the VOL+ and DC5V VOL– buttons. • You can press the MUTE button to turn off the sound and press it again to return to the previous volume level. -
Page 12: Dab Operation
DAB Operation To listen to the tuned stations press the buttons. Each time you press the buttons, you will skip to the previous or next stored station. The unit will display the station name on the top line of the display. Press the SELECT button to confirm. Auto Scan Modes When you turn on your radio for the first time it should have tuned in all the available DAB stations. -
Page 13: Secondary Services
Secondary Services You may see a “ ” symbol after the name of the station. This indicates that there are secondary services available to that station. These secondary services contain extra services that are related to the primary station. e.g. a sports station may want to add extra commentaries. -
Page 14: Dab Display Modes
DAB Display Modes Every time you press the DISPLAY button, the display will cycle through the following display modes: Multiplex Name, Time/Date, Programme Type, Audio Type / Bit Rate, DLS, Channel Frequency, Sleep Status, ALARM 1 Status, ALARM 2 Status. The information is displayed on the lower segment of the display. -
Page 15: Fm Operation
FM Operation Switching from DAB to FM Mode In order to switch the radio from DAB to FM mode, press the DAB/FM button once. On the top line of the display is the current frequency. On the bottom of the display, RDS (radio data system) information will be displayed if it is available. -
Page 16: Recalling A Stored Station
Recalling a Stored Station Once you have saved a station to one of the preset buttons, you can recall it by pressing the PRESET/SAVE button. Press the button to select your desired preset station number. Press the SELECT button to confirm the selection. If you choose a preset station that has not been allocated a station, the unit will be tuned to the previously playing station. -
Page 17: Fm Display Modes
FM Display Modes Every time you press the DISPLAY button, the display will cycle through the following display modes: Audio Mode, Frequency, Radio Text, Time/Date, Programme Type, Sleep Status, ALARM 1 Status, ALARM 2 Status. Audio Mode When in FM mode, the display will show if the Audio Mode station being received is in mono or stereo. -
Page 18: Maintenance
Maintenance Ensure to unplug the unit from the mains socket before cleaning. • To clean the unit, wipe the case with a slightly moist, lint-free cloth. • Do not use any cleaning fluids containing alcohol, ammonia or abrasives. • Do not spray an aerosol at or near the unit. Hints and Tips Problem Cause / Solution... -
Page 19: Specification
Specification Adapter Input 100-240V ~ 50/60 Hz 0.18A MAX Adapter Output 5V 1A Frequency response FM87.5 – 108 MHz DAB Band III 174.928 – 239.200 MHz Speaker Output 2.5W RMS Speakers 3 inches full range speaker x 1 piece LCD display with blue back light Earphones 3.5mm stereo earphone socket Power Consumption... -
Page 20: Safety Warnings
Safety Warnings • Read all the instructions carefully Naked Flames before using the unit and keep • Never place any type of candle or them for future reference. naked flame on the top of or near • Retain the manual. If you pass the the unit. - Page 21 • In the interests of safety and CAUTION to avoid unnecessary energy RISK OF ELECTRIC SHOCK consumption, never leave the unit DO NOT OPEN switched on while unattended for long periods of time, e.g. overnight, The lightning flash with while on holiday or while out of the arrowhead symbol, within an house.
- Page 22 EU. For more information, please contact the local authority or your retailer where you purchased the product. All trademarks are the property of their respective owners and all rights are acknowledged. DSG Retail Ltd • Maylands Avenue • Hemel Hempstead Herts • HP2 7TG • England (P.N.: LCRDAB10-003) LCRDAB10_IB_final111001_Zell.indd 22 01/11/2011 12:22 PM...
- Page 23 LCRDAB10_IB_final111001_Zell.indd 23 01/11/2011 12:22 PM...
- Page 24 LCRDAB10_IB_final111001_Zell.indd 24 01/11/2011 12:22 PM...
Need help?
Do you have a question about the LCRDAB10 and is the answer not in the manual?
Questions and answers