
Subscribe to Our Youtube Channel
Related Manuals for Evo ReNegaDE Air Rower Pro

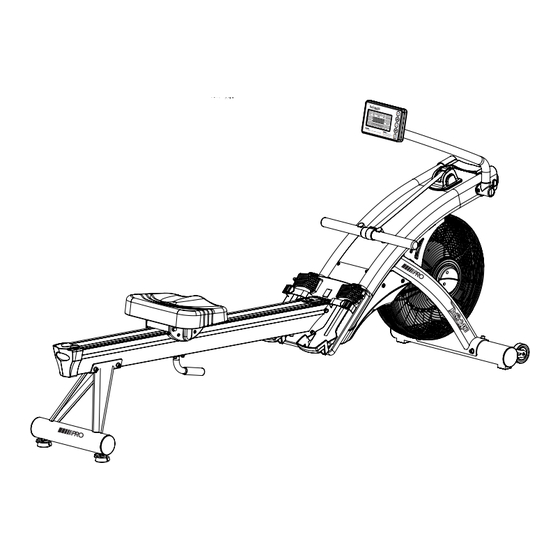
Summary of Contents for Evo ReNegaDE Air Rower Pro
- Page 1 DESCRIPTION: ReNegaDE Air Rower Pro CODE: ARP100 VERSION: 20170801 Air Rower Pro PLEASE READ THIS INSTRUCTION MANUAL BEFORE YOU BEGIN ASSEMBLY INSTRUCTION MANUAL...
-
Page 2: Table Of Contents
contents Safety information Customer support Assembly instructions Air rower features explained How to fold up and fold down rower Computer instructions - Quick start - Button functions - Console display and feedback - Using workout programs How to take care of your air rower Troubleshooting Exercising with your air rower Exploded diagrams and parts list... -
Page 3: Safety Information
Safety Information PLEASE READ THIS INSTRUCTION MANUAL BEFORE YOU BEGIN ASSEMBLY. GREAT CARE HAS BEEN TAKEN TO DESIGN THESE INSTRUCTIONS AND FOLLOWING THEM WILL HELP YOU WITH QUICKER ASSEMBLY AND MINIMISE THE RISK OF INJURY • This product has an intergrated speed dependent YOU ARE RESPONSIBLE FOR YOUR OWN SAFETY - resistance system without a constant power mode that is THIS LIST IS NOT EXHAUSTIVE. -
Page 4: Customer Support
Care & Maintenance • Always place the equipment in a dry environment. • Use a warm, damp cloth to keep the product clean. • No wet cleaning of electrical components, unplug before any care and maintenance • The safety level of the equipment can be maintained only if it is regularly examined for damage and wear. This includes any straps, pulleys, nuts, bolts, moving parts, bushes, chains, wheels, bearings &... -
Page 5: Assembly Instructions
Assembly Instruction Before you start 1. Prepare your work area - 2. Work with a friend - 3. Open the carton - 4. Unpack the carton it is important you we recommend you checking any warnings Make sure you have assemble the product in have someone assist on the carton and make... - Page 6 1. Locate the Handle Bar • Place the handle bar against the handle hooks in position shown. • Pull out the Stop Pin attached on pulling strap and remove the stopper carefully. • The pulling strap stopper is used for packaging purpose, which won’t be used again during the assembly.
- Page 7 2. Attach the Front Stabilizer FIXINGS: FIXINGS: 2-1. Remove the cardboard tube from the front end stabilizer bracket • Loosen the two M8 x 16mm Allen Head Bolts from the cardboard tube and remove the cardboard tube. • The two Allen Head Bolts and the cardboard tube are used for packaging protection purpose, which won’t be used again during the assembly.
- Page 8 3. Attach the Foot Rest Assembly FIXINGS: FIXINGS: 3-1. Remove the bolts for Rower Track Assembly Rower Track Part Mounting Tube • Fold the rower main frame from the rear end, and stand the whole main frame vertically as shown. •...
- Page 9 4. Attach the Rear Stabilizer & the Rear Handle 4-1. Attach the Rear Stabilizerr FIXINGS: FIXINGS: • Remove the four M8 x 20mm Hex Socket Head Bolt Part (B5) & M8 x 16mm x1.5mm Flat Washer (B7 ) from both sides of the rear end Rower Track with the 6mm Allen Key provided as shown.
- Page 10 5. Attach the Rower Track Assembly • Hold the Rower Track Assembly and slide it onto the mounting FIXINGS: FIXINGS: tube of the main frame carefully. • Finger tighten two M8 x 16mm Hex Socket Head Bolt (B5) & M8 x Part 16mm x1.5mm Flat Washer (B7) from the bottom of Rower Track carefully.
- Page 11 6. Attach the Rower Seat • Remove the four M8 x 16mm Hex Socket Head Bolt (J6) FIXINGS: FIXINGS: from the bottom of Rower Seat with the 6mm Allen Key provided as shown. Part • Attach the Rower Seat to the Seat Carriage Assembly with four M8 x 16mm Hex Socket Head Bolt (B5) as shown.
-
Page 12: Air Rower Features Explained
Air Rower Features Explained Adjusting the Foot Rest Yellow Lever To set the Foot Rest, pull the yellow lever with one hand and with the other to slide the Heel piece up or down to achieve the required set- ting, then release the yellow lever to lock it in position. - Page 13 Adjusting the Resistance This Rower features a speed dependent braking ( resistance ) system. The harder you pull, the more resistance you will feel. As you put more effort into your rowing, you will go faster, RESET produce more watts, and burn more calories. But it is more important to row for a longer time than to row harder.
-
Page 14: How To Fold Up And Fold Down The Rower
How to Fold Up and Fold Down the Rower TO FOLD-UP YOUR ROWER TO FOLD-DOWN YOUR ROWER Adjust the console arm and console Stand yourself behind the rower comfortably for storage as shown. and hold the handle with left hand as shown. Move the seat carriage to the front end. -
Page 15: Computer Instructions
Computer Instructions Quick Start Use this mode if you just want a quick workout session and are not interested in setting up any personal data. • Row for a few seconds to power the console on. • “MAINPAGE ” shown on the bottom segment display. •... -
Page 16: Console Display And Feedback
Console Display and Feedback • • • Indicates the current heart rate in beats Indicates the resistance level Indicates the current Stroke Per Minute you are per minute ( bpm), which are detected loaded this session, 1= easy rowing at , default counts up from 0 to 99. by a wireless heart rate chest strap, and 16= hard. -
Page 17: Using Workout Programs
Using Workout Programs MANUAL / TARGET Programs This console features 4 target programs : Target TIME, Target STROKES, Target CALORIES, Target DISTANCE. You can choose to workout by setting a target based on time , stroke, calories burned or distance travelled. - Page 18 6. Press “ ENTER “ to confirm your setting and set the resistance loaded of workout. 7. The default value of “ 5 “ is flashing in the LEVEL window. 8. Use the “ “ buttons to set your workout resistance loaded level ( 1~16 ) 9.
- Page 19 Target DISTANCES 1. Make sure the console is switched on. “MAINPAGE ” shown on the bottom segment display. 2. Use the “ “ buttons to select the program mode you want. “MANUAL” shown on the bottom segment display. 3. Press “ ENTER” to confirm your selection and press three times to reach target distance program..
- Page 20 6. Press “ ENTER “ to confirm your setting. 7. The default value of “----- “ is flashing in the METERS window. 8. Use the “ “ buttons, default value “ 1000 ” is flashing in window, to set your target travelled distance ( 500 ~ 99900 ). 9.
- Page 21 14. The default value of “---- “ is flashing in the CALORIES window. 15. Use the “ “ buttons default value “ 150 ” is flashing in window, to set your target calories ( 50 ~ 9990 ). 16. Press “ START “ to begin your workout or press “ ENTER “to set the target distances.
- Page 22 12. Press “ START “ to begin your workout or press “ ENTER “to set the target calories. 13. The default value of “---- “ is flashing in the CALORIES window. 14. Use the “ “ buttons default value “ 150 ” is flashing in window, to set your target calories ( 50 ~ 9990 ).
- Page 23 4. The default “ AGE - 35 ” shown on the bottom segment display. 5. Use the “ “ buttons to set the user’s age ( 10 ~ 99 ). 6. Press “ ENTER” to confirm your setting. 7. The target heart rate value will shown in the “PULSE “ window accordingly when you select the different HRC programs by using the “...
- Page 24 USER / USER 1 ~ USER 5 Programs This program allows you to create and store 5 personal workout pro- grams, which appear as USER 1, USER 2, USER 3, USER 4 or USER 5. The first time you choose program USER1, USER 2, USER 3, USER 4 or USER 5.
- Page 25 10. Use the “ “ buttons to set your workout resistance level ( 1~16 ) for your first segment. The “ segments “ flashing and changing accordingly on the top dot matrix display. 11. Press “ ENTER” to confirm your setting. 12.
-
Page 26: How To Take Care Of Your Air Rower
How to Take Care of Your Rower Storage Keep the equipment in a dry place with as little temperature variation as possible. Try to protect from dust and always unplug when not in use (if applicable). Cleaning & Maintenance Your rower is designed for indoor rowing used only and should not be used or stored in damp areas. Ensure you regularly check components for wear and make sure all the nuts &... -
Page 27: Exercising With Your Air Rower
Exercising with Your Air Rower Before Exercising Check: • You have to adequate space ie. at least 2ft (60cm) clearance on each side. • Check all bolts and locking pins are secured and protruding. In particular check all the bolts and pins for wear, replace doubtful parts before using the equipment. - Page 28 • The lower setting requires you to be a little faster in applying your power which, in the end, gives you a better workout. • Aim for a stroke rate / SPM of between 24 ~ 30 spm. • Allow a little extra time for warm-up, and start very easily. •...
- Page 29 Fitness Many things contribute to fitness and well being but the most important factor is the condition of your heart and lungs and how efficient they are in delivering oxygen via your blood to your muscles. Your muscle use this oxygen to provide enough energy for daily activity. This is called aerobic activity (with oxygen).
- Page 30 Target Zone PULSE MAXIMUM PULSE RATE RATE 85% OF MAX. EXERCISE SO THAT YOUR PULSE STAYS IN THIS RATE FOR AT LEAST 15-20 MINUTES 70% OF MAX. 55% OF MAX. COOL DOWN LEVEL RESET PULSE TIME WARM UP COOL DOWN THIS IS HOW YOUR PULSE SHOULD BEHAVE DURING GENERAL FITNESS EXERCISE.
- Page 31 Always consult your doctor If you experience nausea, dizziness or other abnormal before undertaking a new symptoms during exercise, stop at once and consult exercise regime your doctor Starting and finishing your workout Begin and end each workout with a Warm Up / Down session – a few minutes of stretching to help prevent strains, pulls and cramps Correct rowing form How long should I exercise for? •...
-
Page 32: Exploded Diagrams And Parts List
Exploded Diagram... - Page 33 Parts List DESCRIPTION Q'TY DESCRIPTION Q'TY Main Frame M8*16*1.5mm Flat Washer Handle Bar Holder Hex Socket Head Bolt(M8*30mm) Metal Top Cover Hex Socket Head Bolt(M6*16mm) Pull Strap Top Cover B-10 Hex Socket Head Bolt(M6*12mm) Main Cover (L) B-11 Self Tapping Screw M4*12.7 Main Cover (R) B-12 Cap Nut(M6)
-
Page 34: Console Assembly
I - 1 Console Assembly Heart Rate Reciver (100mm) 3 PIN 3 PIN 9 PIN 3 PIN 5 PIN 4 PIN 9 PIN 3 PIN DC JACK (900mm) 3 PIN 3 PIN 3 PIN 9 PIN 5 PIN 4 PIN D1 48mm (400mm) 4 PIN... -
Page 35: Your Warranty
Your Warranty This product is supplied with a 1 year warranty as follows: This product is warranted for use in a commercial environment This warranty excludes damage to the finish of the machine, damage sustained as a result form neglect, abuse, or failure to follow the suggested maintenance requirements (see Maintanance), shipping charges and if applicable, labor for the installation of any parts shipped to the owner under this warranty.
Need help?
Do you have a question about the ReNegaDE Air Rower Pro and is the answer not in the manual?
Questions and answers