Table of Contents
Advertisement
Advertisement
Table of Contents

Related Manuals for HP ProBook 650 G5


Summary of Contents for HP ProBook 650 G5
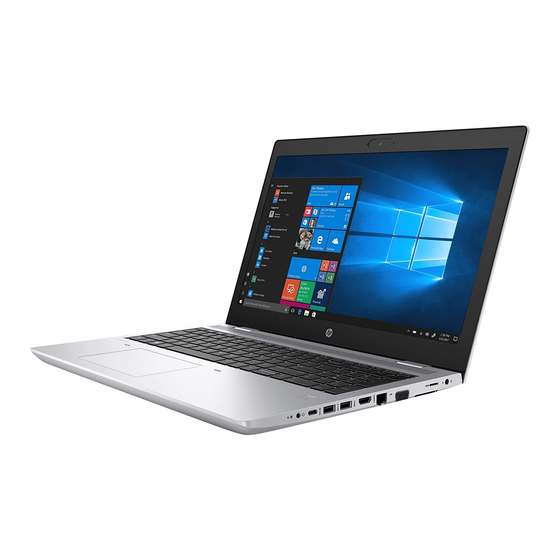
- Page 1 Maintenance and Service Guide HP ProBook 650 G5 Notebook PC...
- Page 2 HP Inc. under license. bound by the terms of the HP End User License Not all features are available in all editions or Intel, Optane, and Thunderbolt are trademarks Agreement (EULA).
- Page 3 Important Notice about Customer Self-Repair Parts IMPORTANT: Your computer includes Customer Self-Repair parts and parts that should be accessed by only an authorized service provider. See Chapter 5, "Removal and replacement procedures for Customer Self- Repair parts," for details. Accessing parts described in Chapter 6, "Removal and replacement procedures for authorized service provider parts,"...
- Page 4 Important Notice about Customer Self-Repair Parts...
- Page 5 Safety warning notice WARNING! To reduce the possibility of heat-related injuries or of overheating the device, do not place the device directly on your lap or obstruct the device air vents. Use the device only on a hard, flat surface. Do not allow another hard surface, such as an adjoining optional printer, or a soft surface, such as pillows or rugs or clothing, to block airflow.
- Page 6 Safety warning notice...
-
Page 7: Table Of Contents
Table of contents 1 Product description ............................1 2 Components ..............................7 Right ..................................7 Left ..................................9 Display ................................. 10 Keyboard area ..............................11 Pointing devices ..........................11 Lights ..............................12 Button, speakers, and fingerprint reader ..................13 Special keys ............................14 Hot keys (select products only) ...................... - Page 8 Speaker .............................. 73 Fingerprint reader assembly ......................74 Display assembly ..........................76 7 Computer Setup (BIOS), TPM, and HP Sure Start ..................... 84 Using Computer Setup ............................84 Starting Computer Setup ........................84 Navigating and selecting in Computer Setup ................... 84 Restoring factory settings in Computer Setup .................
- Page 9 Backing up information and creating recovery media ..................93 Using Windows tools ......................... 93 Using the HP Cloud Recovery Download Tool to create recovery media (select products only) ..93 Restoring and recovery ............................94 Restoring, resetting, and refreshing using Windows tools .............. 94 Recovering using HP Recovery media ....................
- Page 10 Requirements for specific countries and regions ..................... 101 12 Statement of memory volatility ........................ 103 Nonvolatile memory usage ..........................105 Questions and answers ............................. 107 Using HP Sure Start (select models only) ......................108 13 Recycling ..............................109 Index ................................110...
-
Page 11: Product Description
Supports HD decode, DX12, HDMI 1.4, DisplayPort™ 1.2, HDCP 2.2 via DisplayPort up to 4k @ 60 Hz and via HDMI up to 4K @ 30 Hz Up to three independent displays supported with HP Ultraslim Docking Station and HP Thunderbolt Dock 120 W G2 Panel 39.6 cm (15.6 in.), antiglare, non-touch... - Page 12 Table 1-1 Product components and their descriptions (continued) Category Description Supports up to 32 GB of system RAM in the following configurations: 32768 MB (16384 MB × 2) ● 16384 MB (16384 MB × 1) or (8192 MB × 2) ●...
- Page 13 Intel Ethernet Connection I219-LM 10/100/1000 Ethernet (vPro) Intel Ethernet Connection I219-V 10/100/1000 Ethernet (non-vPro) The following support S3/S4/S5 wake on LAN (via out of band): embedded NIC, HP USB-C Universal Dock, HP USB-C Dock The following support S0/S3/S4/S5 HBMA (via out of band): HP USB-C Universal Dock, HP USB-C Dock, HP...
- Page 14 Power connector, 4.5 mm Sensors Accelerometer Hall sensor Keyboard/pointing HP Advanced Keyboard devices Spill resistant with drain and numeric keypad Dura Keys, dual point, backlit, spill resistant with drain, privacy Dura Keys, dual point, backlit, spill resistant with drain and numeric keypad...
- Page 15 Integrated Smart Card reader (active) Preboot authentication (password, smart card) Supports models without a Smart Card reader Hardware enforced firmware protection: HP Hardware Root of Trust + Sure Start Gen4; ANSSI Certified Hardware Root of Trust: Yes Operating system Preinstalled Windows®...
- Page 16 Table 1-1 Product components and their descriptions (continued) Category Description Windows 10 Home 64 Plus Single Language APAC EM Windows 10 Home 64 Plus Single Language India Market PPP Windows 10 Home 64 Plus Single Language Indonesia Market PPP Windows 10 Home 64 Single Language APAC EM Windows 10 Home 64 Single Language India Market PPP Windows 10 Home 64 Single Language Indonesia Market PPP Windows 10 Home 64 StF MSNA for Higher Education Strategic...
-
Page 17: Components
Right-side components and their descriptions Component Description Drive light ● Blinking white: The hard drive is being accessed. Amber: HP 3D DriveGuard has temporarily parked the hard ● drive. Audio-out (headphone)/Audio-in (microphone) Connects optional powered stereo speakers, headphones, combo jack earbuds, a headset, or a television audio cable. - Page 18 Table 2-1 Right-side components and their descriptions (continued) Component Description USB SuperSpeed port Connects a USB device, such as a cell phone, camera, activity tracker, or smartwatch, and provides high-speed data transfer. HDMI port Connects an optional video or audio device, such as a high- definition television, any compatible digital or audio component, or a high-speed High Definition Multimedia Interface (HDMI) device.
-
Page 19: Left
Left Table 2-2 Left-side components and their descriptions Component Description Security cable slot Attaches an optional security cable to the computer. NOTE: The security cable is designed to act as a deterrent, but it may not prevent the computer from being mishandled or stolen. -
Page 20: Display
For wireless regulatory notices, see the section of the Regulatory, Safety, and Environmental Notices that applies to your country or region. To access this guide: Type HP Documentation in the taskbar search box, and then select HP Documentation. ▲ Chapter 2 Components... -
Page 21: Keyboard Area
For wireless regulatory notices, see the section of the Regulatory, Safety, and Environmental Notices that applies to your country or region. To access this guide: ▲ Type HP Documentation in the taskbar search box, and then select HP Documentation. Keyboard area... -
Page 22: Lights
Lights Table 2-5 Lights and their descriptions Component Description Power light On: The computer is on. ● ● Blinking: The computer is in the Sleep state, a power- saving state. The computer shuts off power to the display and other unneeded components. Off: The computer is off or in Hibernation. -
Page 23: Button, Speakers, And Fingerprint Reader
Button, speakers, and fingerprint reader Table 2-6 Button, speakers, and fingerprint reader and their descriptions Component Description Power button When the computer is off, press the button to turn on the computer. ● ● When the computer is on, press the button briefly to initiate Sleep. ●... -
Page 24: Special Keys
Special keys Table 2-7 Special keys and their descriptions Component Description Displays system information when pressed in combination with the key. Executes frequently used system functions when pressed in combination with another key. Such key combinations are called hot keys. Hot keys (select products only) on page Windows key Opens the Start menu. -
Page 25: Hot Keys (Select Products Only)
Hot keys (select products only) A hot key is the combination of the key and another key. To use a hot key: ▲ Press the key, and then press one of the keys listed in the following table. Table 2-8 Hot keys and their descriptions Description Turns on scroll lock. -
Page 26: Labels
Labels The labels affixed to the computer provide information you may need when you troubleshoot system problems or travel internationally with the computer. Labels may be in paper form or imprinted on the product. IMPORTANT: Check the following locations for the labels described in this section: the bottom of the computer, inside the battery bay, under the service door, on the back of the display, or on the bottom of a tablet kickstand. -
Page 27: Illustrated Parts Catalog
Computer major components NOTE: HP continually improves and changes product parts. For complete and current information on supported parts for your computer, go to http://partsurfer.hp.com, select your country or region, and then follow the on-screen instructions. NOTE: Details about your computer, including model, serial number, product key, and length of warranty, are on the service tag at the bottom of your computer. - Page 28 Touchpad For use in models with a pointing stick L65634-001 For use in models with a pointing stick L65635-001 WWAN module (LTE CAT4: Huawei HP lt4132, LTE/HSPA+ with GPS) Intel XMM 7360 LTE-Advanced L15398-001 Intel XMM 7262 LTE-Advanced L35286-001 WWAN module bracket (included in Bracket Kit)
- Page 29 Table 3-1 Computer major components and their descriptions (continued) Item Component Spare part number (18) Hard drive NOTE: For spare part information, see Mass storage devices on page (19) Memory modules (2400 MHz DDR4) 16 GB 937438-850 8 GB 937236-850 4 GB L10598-850 (20)
-
Page 30: Cable Kit
Cable Kit Table 3-2 Cable Kit components and their descriptions Item Component Spare part number Cable Kit, includes the following parts: L09583-001 Pointing stick cable NFC module cable Smart card board cable Touchpad button board cable Chapter 3 Illustrated parts catalog... -
Page 31: Bracket Kit
Bracket Kit Table 3-3 Bracket Kit components and their descriptions Item Component Spare part number Bracket Kit, includes the following parts: L09583-001 WWAN module bracket Fingerprint reader bracket Smart card bracket Hard drive cover Bracket Kit... -
Page 32: Display Assembly Subcomponents
Display assembly subcomponents Table 3-4 Display assembly components and their descriptions Item Component Spare part number Display bezel For use with non-touch displays with a camera module L09579-001 For use with non-touch displays with a microphone module L09580-001 Camera privacy cover (for use in non-touch models; not illustrated) L09542-001 Chapter 3 Illustrated parts catalog... - Page 33 Table 3-4 Display assembly components and their descriptions (continued) Item Component Spare part number Display panel Non-touch, FHD L58720-001 Non-touch, FHD, privacy L58721-001 Non-touch, HD L13838-001 Touch L58722-001 Camera module (includes sponge) L58702-001 Microphone module (not illustrated) L58696-001 Display cable For use in non-touch models L58713-001 For use in non-touch models, privacy...
-
Page 34: Mass Storage Devices
Mass storage devices Table 3-5 Mass storage devices and their descriptions Item Component Spare part number Hard drive 1 TB, 7200 rpm L06427-850 500 GB, 7200 rpm 703267-001 500 GB, 7200 rpm, FIPS 140-2 820572-001 Hard drive cover (included in Bracket Kit) L59054-001 Solid-state drive (M.2) 1 TB, PCle, NVMe, TLC... -
Page 35: Plastics
Table 3-5 Mass storage devices and their descriptions (continued) Item Component Spare part number 512 GB, SATA-3, TLC, FIPS 140-2 L12810-001 512 GB, PCIe, NVMe, TLC L12811-001 512 GB, PCIe, NVMe, value L58065-001 256 GB, PCIe, NVMe, TLC L12807-001 256 GB, PCIe, NVMe, value L12808-001 256 GB, SATA-3, self-encrypting drive (SED), Opal 2 L12803-001... -
Page 36: Miscellaneous Parts
Miscellaneous parts Table 3-7 Miscellaneous parts and their descriptions Component Spare part number AC adapter 65 W AC adapter, nPFC, S-3P, 4.5 mm 710412-001 65 W AC adapter, nPFC, SMART, RC, 4.5 mm, EM 913691-850 65 W USB Type-C AC adapter, 1.8 m L32392-001 45 W AC adapter, nPFC, SMART, RC, 4.5 mm, non-slim 741727-001... - Page 37 Table 3-7 Miscellaneous parts and their descriptions (continued) Component Spare part number For use in Israel L19362-002 For use in Italy L19364-002 For use in Japan L19365-002 For use in North America L19367-002 For use in the People’s Republic of China L19368-002 For use in South Africa L19369-002...
- Page 38 Table 3-7 Miscellaneous parts and their descriptions (continued) Component Spare part number Pointing stick covers (20 pieces) L15396-001 Protective tape (insulator, power) L26673-001 Screw Kit L58723-001 Chapter 3 Illustrated parts catalog...
-
Page 39: Removal And Replacement Procedures Preliminary Requirements
Removal and replacement procedures preliminary requirements Tools required You will need the following tools to complete the removal and replacement procedures: Non-conductive, non-marking pry tool ● Magnetic Phillips P1 screwdriver ● Service considerations The following sections include some of the considerations that you must keep in mind during disassembly and assembly procedures. -
Page 40: Drive Handling
Drive handling IMPORTANT: Drives are fragile components that must be handled with care. To prevent damage to the computer, damage to a drive, or loss of information, observe these precautions: Before removing or inserting a hard drive, shut down the computer. If you are unsure whether the computer is off or in Hibernation, turn the computer on, and then shut it down through the operating system. -
Page 41: Generating Static Electricity
IMPORTANT: To prevent damage to the device when you are removing or installing internal components, observe these precautions: Keep components in their electrostatic-safe containers until you are ready to install them. Before touching an electronic component, discharge static electricity by using the guidelines described in this section. -
Page 42: Personal Grounding Methods And Equipment
Use field service tools, such as cutters, screwdrivers, and vacuums, that are conductive. ● Recommended materials and equipment HP recommends the following materials and equipment to prevent static electricity: ● Antistatic tape ● Antistatic smocks, aprons, or sleeve protectors Conductive bins and other assembly or soldering aids ●... -
Page 43: Packaging And Transporting Guidelines
Static-dissipative table or floor mats with hard tie to ground ● ● Field service kits ● Static awareness labels ● Wrist straps and footwear straps providing 1 MΩ ±10% resistance ● Material handling packages ● Conductive plastic bags ● Conductive plastic tubes Conductive tote boxes ●... -
Page 44: Removal And Replacement Procedures For Customer Self-Repair Parts
NOTE: HP continually improves and changes product parts. For complete and current information on supported parts for your computer, go to http://partsurfer.hp.com, select your country or region, and then follow the on-screen instructions. There are as many as 24 screws that must be removed, replaced, and/or loosened when servicing Customer Self-Repair parts. -
Page 45: Bottom Cover
Bottom cover Table 5-1 Bottom cover description and part number Description Spare part number Bottom cover L58712-001 Prepare the computer for disassembly (Preparation for disassembly on page 34). ▲ Remove the bottom cover: Loosen the eight Phillips screws (1) that secure the cover to the computer. Using a plastic tool and starting at the rear of the computer, release the cover (2), and then remove it from the computer (3). -
Page 46: Battery
Battery Table 5-2 Battery description and part number Description Spare part number Battery (3 cell, 48 Wh, 4.21 Ah) 931719-850 Before removing the battery, follow these steps: Prepare the computer for disassembly (Preparation for disassembly on page 34). Remove the bottom cover (see Bottom cover on page 35). -
Page 47: Memory
Memory Table 5-3 Memory module descriptions and part numbers Description Spare part number Memory module, 16 GB 937438-850 Memory module, 8 GB 937236-850 Memory module, 4 GB L10598-850 Before removing the memory module, follow these steps: Prepare the computer for disassembly (Preparation for disassembly on page 34). - Page 48 Align the notched edge of the memory module with the tab in the memory module slot (1). Press the module into the slot until seated (2). Gently press down on the module edges until the side retention clips snap into place (3). Chapter 5 Removal and replacement procedures for Customer Self-Repair parts...
-
Page 49: Optical Drive
Optical drive Table 5-4 Optical drive descriptions and part numbers Description Spare part number DVD-ROM combo drive L23122-001 DVD writer drive L23123-001 Before removing the optical drive, follow these steps: Prepare the computer for disassembly (Preparation for disassembly on page 34). -
Page 50: Hard Drive
Hard drive Table 5-5 Hard drive description and part number Description Spare part number Hard drive, 1 TB, 7200 rpm L06427-850 Hard drive, 500 GB, 7200 rpm 703267-001 Hard drive, 500 GB, 7200 rpm, FIPS 140-2 820572-001 Hard drive cover (included in Bracket Kit) L59054-001 Before removing the hard drive, follow these steps: Prepare the computer for disassembly... - Page 51 If it is necessary to disassemble the hard drive, remove the four Phillips M3.0 × 3.0 screws (1), and then slide the drive out of the drive cover (2). Reverse this procedure to reassemble and install the hard drive. Component replacement procedures...
-
Page 52: Solid-State Drive
Solid-state drive Table 5-6 Solid-state drive descriptions and part numbers Description Spare part number 1 TB, PCle, NVMe, TLC L12805-001 512 GB, SATA-3, TLC, FIPS 140-2 L12810-001 512 GB, PCIe, NVMe, TLC L12811-001 512 GB, PCIe, NVMe, value L58065-001 256 GB, PCIe, NVMe, TLC L12807-001 256 GB, PCIe, NVMe, value L12808-001... -
Page 53: Removal And Replacement Procedures For Authorized Service Provider Parts
NOTE: HP continually improves and changes product parts. For complete and current information on supported parts for your computer, go to http://partsurfer.hp.com, select your country or region, and then follow the on-screen instructions. There are as many as 64 screws that must be removed, replaced, and/or loosened when servicing Authorized Service Provider only parts. - Page 54 Remove the Phillips M2.0 × 3.0 screw (2), and then pull the module out of the socket (3). Reverse this procedure to install the WWAN module. Chapter 6 Removal and replacement procedures for Authorized Service Provider parts...
-
Page 55: Wlan Module
WLAN module NOTE: On models so equipped, the WLAN module is located under the WWAN module. Table 6-2 WLAN module descriptions and part numbers Description Spare part number Intel Wireless-AC 9560 802.11ac 2 × 2 Wi-Fi + Bluetooth 5 (non-vPro) L22634-001 Intel Wireless-AC 9560 802.11ac 2 ×... - Page 56 Remove the Phillips M2.0 × 3.0 screw (2), and then pull the module out of the socket (3). Reverse this procedure to install the WLAN module. Chapter 6 Removal and replacement procedures for Authorized Service Provider parts...
-
Page 57: Keyboard
Keyboard In this section, the first table provides the main spare part numbers for the keyboard. The second table provides the country codes. Table 6-3 Keyboard descriptions and part numbers Description Spare part number Keyboard, backlit with pointing stick L09595-xx1 Keyboard, backlit L09593-xx1 Keyboard, backlit, privacy... - Page 58 Position the computer on its side and open it so that you can access the bottom. Insert a blunt tool into the keyboard release opening near the fan, and then press gently on the back of the keyboard until it releases from the computer. IMPORTANT: Press gently to avoid damaging the keyboard.
- Page 59 Press the keyboard downward slightly so that you can release the top (1), and then lift and rotate the keyboard up and over onto the palm rest (2). Release and disconnect the following connectors and cables located underneath the installed keyboard: Release the keyboard cable connector (1) and then remove the cable (2).
- Page 60 Remove the keyboard from the computer (7). Reverse this procedure to install the keyboard. Chapter 6 Removal and replacement procedures for Authorized Service Provider parts...
-
Page 61: Internal Frame
Internal frame Table 6-5 Internal frame description and part number Description Spare part number Internal frame L58719-001 Before removing the internal frame, follow these steps: Prepare the computer for disassembly (Preparation for disassembly on page 34). Remove the following components: Bottom cover (see Bottom cover on page Battery (see... - Page 62 Remove the following screws that secure the frame to the computer: (1): 5 Torx T8M 2.5 × 2.5 screws (2): 15 Torx T8M 2.5 × 6.0 screws Remove the frame from the computer. Reverse this procedure to install the internal frame. Chapter 6 Removal and replacement procedures for Authorized Service Provider parts...
-
Page 63: Fan
Table 6-6 Fan description and part number Description Spare part number L58715-001 Before removing the fan, follow these steps: Prepare the computer for disassembly (Preparation for disassembly on page 34). Remove the following components: Bottom cover (see Bottom cover on page Battery (see Battery on page Optical drive (see... -
Page 64: Heat Sink Assembly
Heat sink assembly Table 6-7 Heat sink assembly descriptions and part numbers Description Spare part number Heat sink assembly for use in models with discrete graphics L58716-001 Heat sink assembly for use in models with integrated UMA graphics L58717-001 Before removing the heat sink, follow these steps: Prepare the computer for disassembly (Preparation for disassembly on page 34). - Page 65 Lift the heat sink assembly from the computer (2). Thoroughly clean the thermal material from the surfaces of the system board components (1) and the heat sink (2) each time you remove the heat sink. Replacement thermal material is included with the heat sink and system board spare part kits.
- Page 66 To remove the heat sink assembly for products with discrete graphics: In the order indicated on the heat sink assembly, loosen the six captive Phillips screws that secure the assembly to the computer (1). Lift the heat sink assembly from the computer (2). Thoroughly clean the thermal material from the surfaces of the system board components (1)(3) and the heat sink (2)(4) each time you remove the heat sink.
-
Page 67: Touchpad Button Board
Touchpad button board Table 6-8 Touchpad button board descriptions and part numbers Description Spare part number Touchpad button board L09589-001 Touchpad button board cable (included in Cable Kit) L09583-001 Before removing the touchpad button board, follow these steps: Prepare the computer for disassembly (Preparation for disassembly on page 34). - Page 68 Remove the six Phillips M2.0 × 2.0 screws (3), and then remove the touchpad button board from the computer (4). Reverse this procedure to install the touchpad button board. Chapter 6 Removal and replacement procedures for Authorized Service Provider parts...
-
Page 69: Touchpad
Touchpad Table 6-9 Touchpad descriptions and part numbers Description Spare part number Touchpad module for use in models with a pointing stick L65634-001 Touchpad module for use in models with a pointing stick (includes NFC antenna) L65635-001 Before removing the touchpad, follow these steps: Prepare the computer for disassembly (Preparation for disassembly on page 34). - Page 70 Remove the seven Phillips M2.0 × 2.0 screws (3), and then remove the touchpad (4). Reverse this procedure to install the touchpad. Chapter 6 Removal and replacement procedures for Authorized Service Provider parts...
-
Page 71: Near Field Communication (Nfc) Module
Near Field Communication (NFC) module Table 6-10 NFC module descriptions and part numbers Description Spare part number NFC module L09554-001 NFC antenna L09573-001 NFC cable (included in Cable Kit) L09583-001 Before removing the NFC module, follow these steps: Prepare the computer for disassembly (Preparation for disassembly on page 34). - Page 72 Use a tool to release the NFC module from the computer (3). Reverse this procedure to replace the NFC module. Chapter 6 Removal and replacement procedures for Authorized Service Provider parts...
-
Page 73: Smart Card Reader
Smart card reader Table 6-11 Smart card reader descriptions and part numbers Description Spare part number Smart card reader board L58695-001 Smart card reader bracket (included in Bracket Kit) L59054-001 Smart card reader cable (included in Cable Kit) L09583-001 Before removing the smart card reader, follow these steps: Prepare the computer for disassembly (Preparation for disassembly on page 34). - Page 74 Remove the three Phillips M2.0 × 2.5 screws (2), and then remove the smart card reader board from the computer (3). Reverse this procedure to install the smart card reader. Chapter 6 Removal and replacement procedures for Authorized Service Provider parts...
-
Page 75: Rtc Battery
RTC battery Table 6-12 RTC battery description and part number Description Spare part number RTC battery L23943-001 Before removing the RTC battery, follow these steps: Prepare the computer for disassembly (Preparation for disassembly on page 34). Remove the following components: Bottom cover (see Bottom cover on page Battery (see... -
Page 76: Serial Port Board Or Vga Port Board
Serial port board or VGA port board IMPORTANT: You can install either a serial port board or a VGA port board in the computer. Table 6-13 Serial port board and VGA port board descriptions and part numbers Description Spare part number Serial port board L09598-001 VGA port board... -
Page 77: Power Button Board
Power button board Table 6-14 Power button board description and part number Description Spare part number Power button board (includes cable) L09596-001 Before removing the power button board, follow these steps: Prepare the computer for disassembly (Preparation for disassembly on page 34). - Page 78 Remove the protective tape from the board (1). Lift the cable up to release it from the adhesive that secures it to the speaker and chassis (2). Remove the Phillips M2.0 × 3.0 screw (3) that secures the board to the computer. Pull the tab away from the board (4).
-
Page 79: System Board
System board NOTE: All system board spare part kits include replacement thermal material. All system boards use the following part numbers: xxxxxx-001: Non-Windows operating systems xxxxxx-601: Windows operating system Table 6-15 System board descriptions and part numbers Description Spare part number System board for use in models with discrete graphics memory: Intel Core i7-8665U processor L58729-xx1... - Page 80 Internal frame (see Internal frame on page Serial port board or VGA port board (see Serial port board or VGA port board on page 66). Remove the system board: Position the computer upright and open. Disconnect the following cables from the system board: (1) Power button board cable (2) Speaker cable (3) Fingerprint reader cable...
- Page 81 Disconnect the following cables from the system board: (1) Display cable (2) Smart card reader cable (3) Touchpad cable (4) NFC module cable Remove the Phillips M2.0 × 2.5 screw (1), and then loosen captive Phillips screw (2) on the fan. Component replacement procedures...
- Page 82 Lift the right side of the system board (1), and then pull it to the right to remove it from the computer (2). Reverse this procedure to install the system board. Chapter 6 Removal and replacement procedures for Authorized Service Provider parts...
-
Page 83: Speaker
Speaker Table 6-16 Speaker description and part number Description Spare part number Speaker Kit L09601-001 Before removing the speaker, follow these steps: Prepare the computer for disassembly (Preparation for disassembly on page 34). Remove the following components: Bottom cover (see Bottom cover on page Battery (see Battery on page... -
Page 84: Fingerprint Reader Assembly
Fingerprint reader assembly Table 6-17 Fingerprint reader assembly descriptions and part numbers Description Spare part number Fingerprint reader assembly (includes cable and gasket) L58718-001 Fingerprint reader bracket (included in Bracket Kit) L59054-001 Before removing the fingerprint reader assembly, follow these steps: Prepare the computer for disassembly (Preparation for disassembly on page 34). - Page 85 Use a tool to release the fingerprint reader board from the computer (3). Reverse this procedure to install the fingerprint reader assembly. Component replacement procedures...
-
Page 86: Display Assembly
Display assembly Display assemblies are available as spare parts at the subcomponent level only. Before removing the display panel, follow these steps: Prepare the computer for disassembly (Preparation for disassembly on page 34). Remove the following components: Bottom cover (see Bottom cover on page Battery (see Battery on page... - Page 87 Pull the display away from the computer (3). Remove the display assembly components: If it is necessary to replace the display bezel: Use a non-marking tool to separate the display from the display cover (1). Rotate the display over and place it next to the display cover (2). Display bezels are available using the following spare part numbers: –...
- Page 88 Disconnect the cable (2) from the camera. The camera module is available as spare part number L58702-001. The microphone module is available as spare part number L58696-001. If it is necessary to replace the display panel: Lift the tape on the main connector (1). Squeeze both sides of main connector on the panel, and then pull the cable from the connector (2).
- Page 89 (Touch models only) Lift the tape on the touch board connector (3), and then pull the cable from the connector (4). Raw display panels are available using the following spare part numbers: – Non-touch, FHD: L58720-001 – Non-touch, FHD, privacy: L58721-001 –...
- Page 90 Lift the panel from the display cover (2). If it is necessary remove the hinge covers, remove the Phillips M2.0 × 3.0 screw from each hinge cover (1). Use a thin tool to pry up at the seam under each hinge cover, between the hinge cover and bottom of the display cover (2).
- Page 91 Remove the hinge covers from the display cover (3). Display hinge covers are available as spare part number L09592-001. If it is necessary to replace the hinge brackets, remove the three Phillips M2.5 × 3.0 screws from the bottom of each hinge (1) and the Phillips M2.0 × 3.0 screw from the top of each hinge (2). Remove the hinges from the display cover (3).
- Page 92 Peel the antennas from the top of the display cover (2), and then remove the WLAN antenna cables from the channels along the sides of the display cover (3). Remove the antenna cables from the display cover (4). WLAN antennas are available in the Antenna Kit as spare part number L09572-001. If it is necessary to replace the WWAN antenna cables, note the proper cable routing through the right hinge (1).
- Page 93 Remove the antenna cables from the display cover (4). WWAN antennas are available in the Antenna Kit as spare part number L09572-001. The display rear cover is available as spare part number L58711-001 for non-touch models or L64873-001 for touch models. The display cable is available as spare part number L58713-001 for non-touch models, L64874-001 for non- touch, privacy models, or L64875-001 for touch models.
-
Page 94: Computer Setup (Bios), Tpm, And Hp Sure Start
Use extreme care when making changes in Computer Setup. Errors can prevent the computer from operating properly. Starting Computer Setup ▲ Turn on or restart the computer, and when the HP logo appears, press to enter Computer Setup. Navigating and selecting in Computer Setup ●... -
Page 95: Updating The Bios
Do not shut down the computer or initiate Sleep. Do not insert, remove, connect, or disconnect any device, cable, or cord. Type support in the taskbar search box, and then select the HP Support Assistant app. – or – Select the question mark icon in the taskbar. -
Page 96: Changing The Boot Order Using The F9 Prompt
For any compliance issues arising from your operation/usage of TPM which violates the above mentioned requirement, you shall bear all the liabilities wholly and solely. HP will not be responsible for any related liabilities. -
Page 97: Using Hp Sure Start (Select Products Only)
If the BIOS becomes corrupted or is attacked, HP Sure Start automatically restores the BIOS to its previously safe state, without user intervention. HP Sure Start is configured and already enabled so that most users can use the HP Sure Start default configuration. The default configuration can be customized by advanced users. -
Page 98: Using Hp Pc Hardware Diagnostics
The tool runs within the Windows operating system in order to diagnose hardware failures. If HP PC Hardware Diagnostics Windows is not installed on your computer, first you must download and install it. To download HP PC Hardware Diagnostics Windows, see... -
Page 99: Downloading The Latest Hp Pc Hardware Diagnostics Windows Version
If your PC will not boot into Windows, you can use HP PC Hardware Diagnostics UEFI to diagnose hardware issues. -
Page 100: Starting Hp Pc Hardware Diagnostics Uefi
Downloading HP PC Hardware Diagnostics UEFI to a USB flash drive Downloading HP PC Hardware Diagnostics UEFI to a USB flash drive can be useful in the following situations: ● HP PC Hardware Diagnostics UEFI is not included in the preinstall image. -
Page 101: Using Remote Hp Pc Hardware Diagnostics Uefi Settings (Select Products Only)
Find out more. Downloading Remote HP PC Hardware Diagnostics UEFI NOTE: HP Remote PC Hardware Diagnostics UEFI is also available as a Softpaq that can be downloaded to a server. Downloading the latest Remote HP PC Hardware Diagnostics UEFI version To download the latest Remote HP PC Hardware Diagnostics UEFI version, follow these steps: Go to http://www.hp.com/go/techcenter/pcdiags. - Page 102 Display status information about the diagnostics run previously. ● To customize Remote HP PC Hardware Diagnostics UEFI settings, follow these steps: Turn on or restart the computer, and when the HP logo appears, press to enter Computer Setup. Select Advanced, and then select Settings.
-
Page 103: Backing Up, Restoring, And Recovering
Using the HP Cloud Recovery Download Tool to create recovery media (select products only) You can use the HP Cloud Recovery Download Tool to create HP Recovery media on a bootable USB flash drive. To download the tool: Go to the Microsoft Store and search for HP Cloud Recovery. -
Page 104: Restoring And Recovery
HP Recovery media is used to recover the original operating system and software programs that were installed at the factory. On select products, it can be created on a bootable USB flash drive using the HP Cloud Recovery Download Tool. For details, see... -
Page 105: 10 Specifications
10 Specifications Computer specifications Metric U.S. Dimensions Length 257.0 mm 10.12 in Width 377.0 mm 14.85 in Height (non-touch) 23.9 mm 0.95 in Height (touch) 24.9 mm 0.99 in Weight Non-touch display 2.18 kg 4.8 lbs Touch display 2.40 kg 5.29 lbs Input power Operating voltage... -
Page 106: 35.6 Cm (14.0 In) Display Specifications
35.6 cm (14.0 in) display specifications Metric U.S. Active diagonal size 35.6 cm 14.0 in Resolution FHD: 1920 × 1080 HD: 1366 × 768 Surface treatment Antiglare (except touch screen) Brightness 45% CG: 220 nits Viewing angle Backlight Aspect ratio 16:9 Display panel interface eDP 1.2... -
Page 107: M.2 Pcie Solid-State Drive Specifications
M.2 PCIe solid-state drive specifications 256 GB* 512 GB* 1 TB* Dimensions Height 1 mm 1 mm 1 mm Length 50.8 mm 50.8 mm 50.8 mm Width 28.9 mm 28.9 mm 28.9 mm Weight < 10 g < 10 g <... -
Page 108: M.2 Sata Solid-State Drive Specifications
M.2 SATA solid-state drive specifications 128 GB* 256 GB* 512 GB* Height 1.35 mm 1.35 mm 1.35 mm Weight < 10 g < 10 g < 10 g Form factor M.2 2280-D2-B-M M.2 2280-D2-B-M M.2 2280-D2-B-M Transfer rate up to 540 MB/sec up to 540 MB/sec up to 540 MB/sec Interface type... -
Page 109: Hard Drive Specifications
Hard drive specifications 1 TB* 500 GB* Dimensions Height 7.0 mm or 9.5 mm 7.0 mm Length 100.4 mm 100.6 mm Width 69.9 mm 70.1 mm Weight 107.0 g 92.0 g Interface type SATA SATA Transfer rate Synchronous (maximum) 300 MB/sec 300 MB/sec Security ATA security... -
Page 110: 11 Power Cord Set Requirements
11 Power cord set requirements The wide-range input feature of the computer permits it to operate from any line voltage from 100 to 120 V ac, or from 220 to 240 V ac. The 3-conductor power cord set included with the computer meets the requirements for use in the country or region where the equipment is purchased. -
Page 111: Requirements For Specific Countries And Regions
Requirements for specific countries and regions Table 11-1 Power cord requirements for specific countries and regions Country/region Accredited agency Applicable note number Argentina IRAM Australia Austria Belgium CEBEC Brazil ABNT Canada Chile Denmark DEMKO Finland FIMKO France Germany India Israel Italy Japan The Netherlands... - Page 112 Table 11-1 Power cord requirements for specific countries and regions (continued) Country/region Accredited agency Applicable note number The flexible cord must be Type SVT/SJT or equivalent, No. 18 AWG, 3-conductor. The wall plug must be a two-pole grounding type with a NEMA 5-15P (15 A, 125 V ac) or NEMA 6-15P (15 A, 250 V ac) configuration. CSA or C-UL mark. UL file number must be on each element.
-
Page 113: 12 Statement Of Memory Volatility
Intel-based and AMD-based system boards contain nonvolatile memory subcomponents as originally shipped from HP, assuming that no subsequent modifications have been made to the system and assuming that no applications, features, or functionality have been added to or installed on the system. - Page 114 If a DriveLock password is set, select the Security menu, and scroll down to Hard Drive Utilities under the Utilities menu. Select Hard Drive Utilities, select DriveLock, then uncheck the checkbox for DriveLock password on restart. Select OK to proceed. Select the Main menu, and then select Reset BIOS Security to factory default.
-
Page 115: Nonvolatile Memory Usage
HP Sure Start only) backup of The content is managed Embedded Controller. critical System solely by the HP Sure Start BIOS code, EC Embedded Controller. firmware, and critical computer configuration data for select... - Page 116 A utility must be used for Computer Setup (BIOS) or a writing data to this custom utility. memory and is available on the HP website; go to http://www.hp.com/ support. Select Find your product, and then follow the on-screen instructions.
-
Page 117: Questions And Answers
HP has provided options in Computer Setup (BIOS) to allow you to run in legacy BIOS, if required by the operating system. Examples of this requirement would be if you upgrade or downgrade the OS. -
Page 118: Using Hp Sure Start (Select Models Only)
BIOS to its previously safe state, without user intervention. Those select computer models ship with HP Sure Start configured and enabled. HP Sure Start is configured and already enabled so that most users can use the HP Sure Start default configuration. The default configuration can be customized by advanced users. -
Page 119: 13 Recycling
Follow the local laws and regulations in your area for battery disposal. HP encourages customers to recycle used electronic hardware, HP original print cartridges, and rechargeable batteries. For more information about recycling programs, see the HP Web site at http://www.hp.com/recycle. -
Page 120: Index
Index camera module DVD combo drive AC adapter, spare part numbers 26 spare part number 23 spare part number 25, 39 action keys camera privacy cover DVD writer drive identifying 14 spare part number 22 spare part number 25, 39 audio, product description 2 caps lock light, identifying 12 audio-out (headphone)/audio-in... - Page 121 16 network jack, identifying 8 scroll lock 15 WLAN 16 using 15 left side components 9 removal 61 HP PC Hardware Diagnostics UEFI lights spare part numbers 61 downloading 90 AC adapter and battery 8 NFC module starting 90...
- Page 122 USB SuperSpeed port with HP slots Sleep and Charge 7 recovery 93 security cable 9 USB Type-C SuperSpeed 7 discs 94 smart card 9 VGA 8 HP Recovery partition 94 smart card reader power button board media 94 removal 63...
- Page 123 82 traveling with the computer 16 WWAN antennas, identifying 10 WWAN module spare part number 18 USB SuperSpeed port with HP Sleep WWAN module bracket and Charge, identifying 7 spare part number 18 USB SuperSpeed port, identifying 8 USB Type-C SuperSpeed port,...
Need help?
Do you have a question about the ProBook 650 G5 and is the answer not in the manual?
Questions and answers