Table of Contents
Advertisement
Quick Links
MOTO GUZZI WOULD LIKE TO THANK YOU
for choosing one of its products. We have drawn up this manual to show you all the features of your motorcycle. Please read it carefully before riding
the motorcycle for the first time. It contains information, tips and precautions for using your vehicle. You will also discover features, details and devices
which will reassure you that you have made the right choice. We believe that if you follow our suggestions, you will soon get to know your new motorbike
inside and out and it will serve you well for a long time to come. This booklet is an integral part of the vehicle; should the vehicle be sold, it must be
transferred to the new owner.
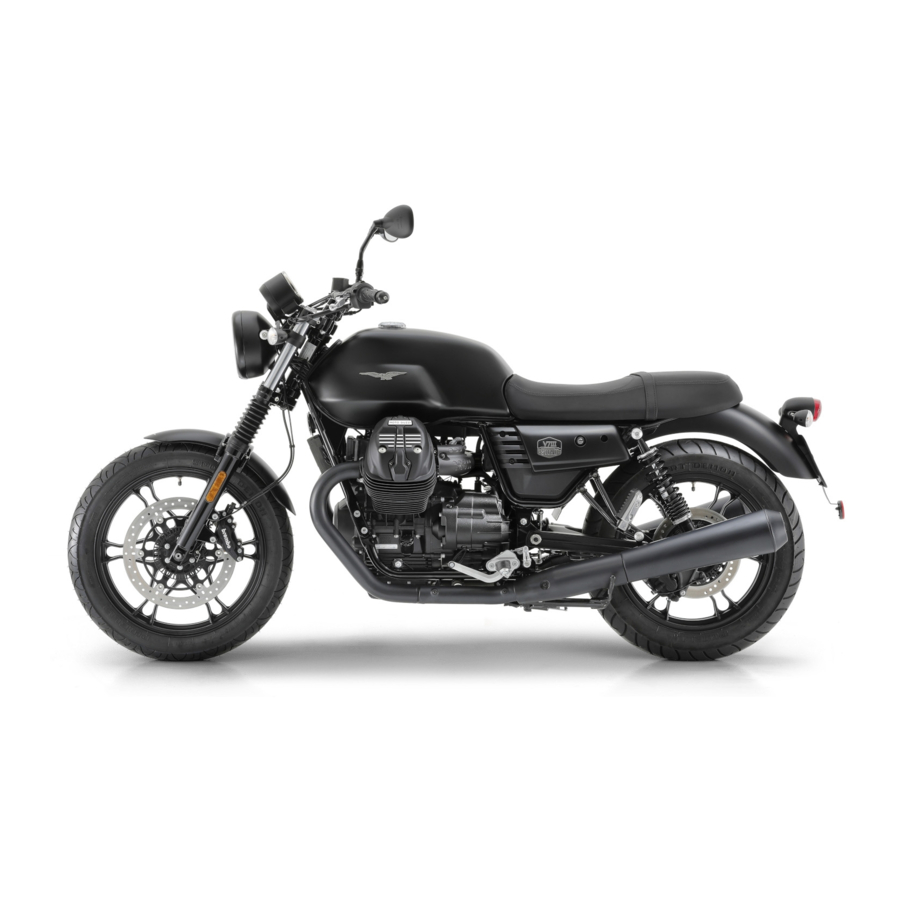
V7 III
Ed. 01_11/2019 Cod. 2Q000411 (ENUS-FR-ES-IT)
Advertisement
Table of Contents

Related Manuals for MOTO GUZZI V7 III


Summary of Contents for MOTO GUZZI V7 III
- Page 1 MOTO GUZZI WOULD LIKE TO THANK YOU for choosing one of its products. We have drawn up this manual to show you all the features of your motorcycle. Please read it carefully before riding the motorcycle for the first time. It contains information, tips and precautions for using your vehicle. You will also discover features, details and devices which will reassure you that you have made the right choice.
- Page 2 The instructions contained in this booklet were written to provide a simple and clear guide for use of the vehicle. The manual also details routine maintenance procedures and regular checks that should be carried out on the vehicle at an authorized Moto Guzzi Dealer or Service Center, as well as instructions for some simple maintenance items.
- Page 3 Personal safety Failure to completely observe these instructions will result in serious risk of personal injury. Protecting the environment Sections marked with this symbol indicate the correct use of the vehicle to prevent dam- aging the environment. Vehicle condition The incomplete or lack of observance to these regulations can lead to risk of serious damage to the vehicle and may even invalidate the warranty.
-
Page 5: Table Of Contents
Start-up Button................56 Label 2..................21 Engine Stop Switch..............57 Label 3..................21 ABS system................57 Label 4..................22 MGCT system (Moto Guzzi Controllo Trazione)....... 60 Label 5..................22 The saddle................65 Label 6..................23 Opening the saddle............... 67 Label 7..................23 Saddle guard................. - Page 6 Running-In................84 TECHNICAL DATA..............149 Starting the engine..............85 Toolkit..................157 Moving off / riding..............86 SCHEDULED MAINTENANCE............ 159 Stopping the engine..............90 Scheduled servicing table............160 Parking..................91 Recommended Products............163 Catalytic silencer............... 92 SPECIAL FITTINGS..............165 Stand..................93 Index accessoires..............
-
Page 7: General Rules
V7 III Chap. 01 General rules... -
Page 8: General Safety Rules
SHOULD ALWAYS BE KEPT TOGETHER WITH THE VEHICLE. IF THE VEHICLE IS SOLD, PLEASE GIVE THIS BOOKLET TO THE NEW OWNER. Moto Guzzi created this use and maintenance booklet to provide you, as the rider, with correct and current information. However, given the fact that Moto Guzzi is con-... -
Page 9: Carbon Monoxide
This use and maintenance booklet is protected by copyright law in all countries, and total or partial reproduction using any printing or electronic method is prohibited. Carbon Monoxide IMPORTANT EXHAUST FUMES CONTAIN CARBON MONOXIDE, A POISONOUS GAS WHICH CAN CAUSE LOSS OF CONSCIOUSNESS AND EVEN DEATH. IMPORTANT CARBON MONOXIDE IS ODORLESS AND COLORLESS. -
Page 10: Hot Components
TACT WITH NAKED FLAME, SPARKS OR OTHER HEAT SOURCES WHICH MAY CAUSE IGNITION OR EXPLOSION. DO NOT ALLOW FUEL TO DISPERSE INTO THE ENVIRONMENT. KEEP OUT OF THE REACH OF CHILDREN. A FALL OR EXCESSIVE TILTING OF THE VEHICLE COULD CAUSE FUEL TO SPILL. -
Page 11: Warning Lights
PERFORM THE MOTOR OIL LEVEL CHECK. IF THE INSUFFICIENT MOTOR OIL PRESSURE LIGHT STAYS ON DESPITE THE ABOVE PROCEDURE BEING PER- FORMED CORRECTLY, CONTACT AN AUTHORIZED Moto Guzzi Dealer TO HAVE THE SYSTEM CHECKED. Used Engine Oil and Gearbox Oil... -
Page 12: Brake Fluid
THAT YOU WEAR LATEX GLOVES OR THE EQUIVALENT NON-LATEX PROD- UCT WHILE PERFORMING VEHICLE MAINTENANCE. ALWAYS USE APPROPRIATE DISPOSAL METHODS. OIL IS DANGEROUS FOR THE ENVIRONMENT AND FEDERAL LAW PROHIBITS UNAUTHORIZED DIS- POSAL. BRING USED OIL TO AN APPROPRIATE OIL COLLECTION CENTER OR ASK THAT IT BE TAKEN AWAY BY THE USED OIL COLLECTION COMPANY NEAREST TO YOU. -
Page 13: General Precautions And Warnings
THE SKIN. WHEN HANDLING BATTERY ELECTROLYTE, WEAR TIGHT-FITTING GLOVES AND PROTECTIVE APPAREL. IN THE EVENT OF SKIN CONTACT WITH THE ELECTROLYTIC FLUID, RINSE WELL WITH PLENTY OF CLEAN WATER. IT IS PARTICULARLY IMPORTANT TO PROTECT YOUR EYES BECAUSE EVEN TINY AMOUNTS OF BATTERY ACID MAY CAUSE BLINDNESS. IN THE EVENT OF CONTACT WITH THE EYES, RINSE WITH PLENTY OF WATER FOR FIFTEEN MINUTES AND CONSULT AN EYE SPECIALIST IMMEDIATELY. -
Page 14: Road Regulations And Use Of The Motorcycle
Moto Guzzi. In the event that the NHTSA receives other similar information it could open an investigation, and if a safety defect is detected concerning a group of vehicles it could require the recall or the application of corrective measures. -
Page 15: Noise Emission Warranty
U.S. EPA federal noise emission standards. Any questions regarding the exhaust system of this vehicle should be directed to any Authorized Moto Guzzi Dealer or to Moto Guzzi Customer Care at (212) 380 4433, or by writing to: Moto Guzzi Customer Care c/o Piaggio Group Americas, Inc. -
Page 16: Tampering
PHOTOCHEMICAL SMOG. CARBON MONOXIDE DOES NOT REACT IN THE SAME WAY, BUT IT IS TOXIC AND HARMFUL. Moto Guzzi USES A CARBURETOR SYSTEM BASED ON A "LEAN" FUEL MIX AND OTHER SYSTEMS TO REDUCE THE PRODUCTION OF CARBON MONOXIDE AND HYDROCARBONS. -
Page 17: Problems That May Affect The Motorcycle Emissions
The owner of the vehicle must recognize that Piaggio Group Americas, Inc. / Moto Guzzi USA will not recognize any warranty when the vehicle or any of its components are damaged or... - Page 18 01_01...
- Page 19 01_02...
-
Page 20: Label 1
Label 1 (01_03, 01_04) 01_03 01_04... -
Page 21: Label 2
Label 2 (01_05) 01_05 Label 3 (01_06) 01_06... -
Page 22: Label 4
Label 4 (01_07) 01_07 Label 5 (01_08) 01_08... -
Page 23: Label 6
Label 6 (01_09) 01_09 Label 7 (01_10) 01_10... -
Page 24: Label 8
Label 8 (01_11) 01_11 Label 9 (01_12) 01_12... - Page 25 Label 10 (01_13) 01_13 Label 11 (01_14) 01_14...
- Page 26 Label 12 (01_15) 01_15 Label 13 (01_16) 01_16 Label 14 (01_17)
-
Page 27: California Evaporative Emission System
(RACER) 01_17 California evaporative emission system (01_18) - Page 28 01_18 Key: 1. Canister 2. Hose clamp 3. SAE hose 30 R12A-3/16 4. Clamp 12.5x8 5. Pressure valve 6. Clamp 7. SAE hose 30 d.12.7x6.35 8. Clamp 7.6x380...
-
Page 29: Your Warranty Rights And Obligations
Your Warranty Rights and Obligations The United States Environmental Protection Agency, the California Air Resources Board and the Moto Guzzi Division of Piaggio & C. S.p.A. (hereafter "Moto Guzzi") are pleased to present the emission control system warranty for your motorcycle pro- duced in 1999 or thereafter. -
Page 30: Owner's Warranty Responsibilities
If an emission control related component on your motorcycle is defective, it will be repaired or replaced by Moto Guzzi. This is your WARRANTY ON DEFECTS for the emission control system. Moto Guzzi - LIMITED WARRANTY DECLARATION ON THE EMISSIONS CON- TROL SYSTEM (ONLY FOR THE USA MARKET) Piaggio &... - Page 31 Official Moto Guzzi Dealership. An emergency situation is one in which an Of- ficial Moto Guzzi Dealership is not available, or a part is not available and will not be...
- Page 32 (2) improper use, (3) improperly conducted repairs or incorrectly installed replacement parts, (4) use of spare parts or accessories that are not in compliance with Moto Guzzi specifications and which could negatively affect performance, (5) use in competitions, Track Days and other similar events.
- Page 33 ITATIONS ON THE LENGTH OF THE IMPLICIT WARRANTY AND FOR THIS REASON THE ABOVE-MENTIONED LIMITATIONS MAY NOT APPLY IN YOUR CASE, c) No Dealership is authorized to modify the conditions of the Moto Guzzi Emissions Control Warranty. IV - Legal rights THIS WARRANTY PROVIDES YOU WITH SPECIFIC LEGAL RIGHTS AND OTHER RIGHTS THAT MAY VARY FROM STATE TO STATE.
- Page 34 However, Moto Guzzi does not assume any responsibility for these parts. The owner is responsible for performance of all scheduled maintenance. This maintenance may be performed by an Authorized Moto Guzzi Dealer or by the owner. The warranty is valid from the first delivery date to a retail customer.
-
Page 35: Vehicle
V7 III Chap. 02 Vehicle... -
Page 36: Arrangement Of The Main Components
Arrangement of the Main Components (02_01, 02_02) 02_01... - Page 37 02_02 Key: 1. Front headlight 2. Front left turn indicator 3. Instrument panel 4. Clutch lever 5. Left rear-view mirror 6. Left light switch 7. Fuel tank cap...
- Page 38 8. Fuel tank 9. Left side fairing 10. Air filter 11. Saddle 12. Taillight 13. Rear left turn indicator 14. Rear left shock absorber 15. Left silencer 16. Rear brake disc 17. Rear tone wheel 18. Rear speed sensor 19. Rear brake calliper 20.
- Page 39 31. Front left fork 32. Front left hand reflector 33. Fuse box 34. Battery 35. Right side fairing 36. Right light switch 37. Right rear-view mirror 38. Front brake fluid reservoir 39. Front brake lever 40. Front right turn indicator 41.
-
Page 40: Dashboard
(IF AVAILABLE) IMPORTANT ANY IMPERFECTION OF THE TANK STRAP IS DUE TO THE NATURAL MATE- RIAL, LEATHER, WITH WHICH IT IS MADE AND WHICH OVER TIME CAN SHOW NORMAL SIGNS OF WEAR. NOTE ELECTRICAL COMPONENTS FUNCTION ONLY WHEN THE IGNITION KEY IS SET TO "ON"... - Page 41 02_03 Key: 1. Clutch control lever 2. Ignition / steering lock switch 3. Instruments and gages 4. Front brake lever 5. Throttle grip 6. High beam flasher switch 7. "MODE" button 8. Flashers switch 9. Horn button 10. Light switch 11.
-
Page 42: Instrument Panel
12. Engine start/MGCT button Instrument panel (02_04) Key: 1. Multifunctional digital display 2. Speedometer 3. RPM gauge (WHERE PROVIDED) 4. Warning lights NOTE THE DIGITAL DISPLAY (1) SHOWS THE INFORMATION ONLY IN ENGLISH. THE 02_04 DISPLAY LANGUAGE CANNOT BE CHANGED. Light Unit (02_05) Key: 1. -
Page 43: Digital Lcd Display
Digital LCD Display (02_06, 02_07, 02_08, 02_09) • If the ignition key is turned to "ON," the system will respond in the following way: - all the warning lights will illuminate at the same time for three seconds (lamp check); - the arrows will reset to the 0 position, travel to their maximum point, then return again to zero - the backlighting is momentarily set to the maximum level;... -
Page 44: Alarms
- when the maintenance intervals are reached (except for the first one), a wrench icon will appear on the LCD display. • To reset the Service it is necessary to contact an Official Moto Guzzi Deal- ership. 02_09 Alarms (02_10, 02_11) -
Page 45: Control Buttons
TAKE THE MOTORCYCLE TO AN Official Moto Guzzi Dealership USING A ROADSIDE ASSISTANCE VEHICLE. OIL SENSOR ALARM: IN THE EVENT OF AN OIL PRESSURE SENSOR FAULT, THE WARNING LIGHT STAYS ON. AS SOON AS POSSIBLE TAKE THE MOTOR- CYCLE TO AN Official Moto Guzzi Dealership. - Page 46 9) CLOCK (CLOCK) Total odometer (Odometer) Unit of measurement for the count: Miles or Km. Viewing: on the LCD display. • The data is recorded permanently. • It cannot be reset. • The engaged gear cannot be viewed (calculated). • The total odometer displays the information shown in the figure: - if the value exceeds 999999 it no longer resets.
- Page 47 Trip time (Time) Unit of measurement for the count: hh:mm (hours and minutes). Viewing: on the LCD display. • The data is recorded. • The counter can be reset by long pressing the "MODE" button or each time the battery is connected. •...
- Page 48 Current fuel consumption (Fuel) Unit of measurement for the count: US mpg or IMP mpg or Km/l or L/100 km Viewing: on the LCD display. • At each vehicle start up the information is set to 0.0 • The information shown in the figure is displayed: - the text "FUEL MPG"...
-
Page 49: Advanced Functions
Clock adjustment In the "CLOCK" function the time can be set. To access this function, long press the "MODE" button. Each time it is pressed, the hour value changes. When the value of 12 is reached, at the next press, the value returns to 1. Long pressing the "MODE"... - Page 50 - the text "TRIP FUEL" activates; - the initial value is "0.0" Backlight "Instrument backlighting adjustment" It is possible to adjust the instrument backlighting (index of the display level) between three levels. This parameter can be adjusted during the initial check. Short-press the "MODE" but- ton to access the function.
- Page 51 Gear Shift "Gear shift threshold" In this mode the gear shift threshold is set. Enter the settings from the menu by long pressing the "MODE" button. Select the desired setting with each time the "MODE" button is pressed. • SET GEAR SHIFT L: 4500 revolutions/min (rpm) (break-in rpm) •...
- Page 52 Select unit (mi/Km) "Change odometer unit of measurement" Within this function you can change the unit of measurement to "mi or Km" by short pressing the "MODE" button. The change affects all the instrument panel settings which use these units of measurement. Select unit (US mpg - IMP mpg - L/100 - Km/L) "Change mileage gages unit of measurement "...
-
Page 53: Ignition Switch
Ignition Switch (02_28) The ignition switch is located on the headstock upper plate. The vehicle is supplied with two keys (one is the spare key). The lights switch off when the ignition switch is set to «OFF» NOTE THE KEY IS USED IN THE IGNITION/STEERING LOCK SWITCH, THE KEYHOLE FOR THE FUEL TANK CAP, AND FOR THE SADDLE COMPARTMENT. -
Page 54: Locking The Handlebar
Locking the Handlebar (02_29) NEVER TURN THE KEY TO POSITION «LOCK» WHILE RIDING OR YOU MIGHT LOSE CONTROL OF THE VEHICLE. To block the steering: • Turn the handlebar completely to the left. • Turn the key to "OFF." • Push in the key and turn it counterclockwise (to the left), turn the handlebar slowly until the key is set to position «LOCK». -
Page 55: Turn Signal Selector
Turn Signal Selector (02_31) Move the switch towards the left to indicate a left turn; move the switch to the right, to indicate a right turn. Push the central part of the switch to deactivate the turn signal. IMPORTANT IF THE INDICATOR LIGHT WITH ARROWS FLASHES QUICKLY, IT MEANS THAT ONE OR BOTH TURN SIGNALS LIGHT BULBS ARE BURNT OUT. -
Page 56: Passing Button
Passing Button (02_33) Uses the high beam flash in case of danger or emergency. Releasing the switch deactivates the high beam flash. 02_33 Start-up Button (02_34) • When the button is pressed, the starter motor will start the engine. • After starting the engine, a long press (3 seconds) of the button activates/ deactivates the MGCT control system. -
Page 57: Engine Stop Switch
Engine Stop Switch (02_35) It acts as a safety or emergency switch. With the switch pressed in the 'KEY ON' position, you can start the engine; pressing it in the 'KEY OFF' position will turn off the engine. IMPORTANT 02_35 DO NOT ACTIVATE THE ENGINE STOP SWITCH WHILE RIDING THE VEHICLE. - Page 58 B: Speed sensor In case of failure of the ABS system, immediately reported to the rider with ABS warn- ing light on the instrument panel, the vehicle retains the characteristics of a conven- tional braking system. In case of ABS warning light, reduce speed and go to an Authorized Service Center for the appropriate checks.
- Page 59 CHECK THAT THE DISTANCE FROM THE SENSOR IS CONSTANT ON ALL 360 DEGREES. SHOULD THE WHEELS BE REMOVED AND REFITTED, IT IS VERY IMPORTANT TO CHECK THAT THE DISTANCE BETWEEN TONE WHEEL AND SENSOR IS THE ONE SPECIFIED. FOR CHECKING AND ADJUSTMENT, CON- TACT AN Authorised Moto Guzzi Garage.
-
Page 60: Mgct System (Moto Guzzi Controllo Trazione) (02_39, 02_40
SUCH BEHAVIOR IS TO BE CONSIDERED NORMAL AND DOES NOT CREATE MALFUNCTIONS IN THE SYSTEM. IF THE GAP FOR ONE OR BOTH SENSORS IS NOT WITHIN THE TOLERANCE INDICATED BELOW, TAKE THE MOTORCYCLE TO AN Official Moto Guzzi Deal- Characteristic Distance between the phonic wheel and the front sensor 0.012 - 0.079 in (0.3 - 2.00 mm) - Page 61 surfaces or in conditions that can cause sudden slippage of the rear wheel. The MGCT in these situations automatically intervenes by reducing engine output within the limit imposed by the grip conditions, contributing significantly to the maintenance of stability of the vehicle. It is the rider's responsibility to drive at a suitable speed, taking into account the weather conditions, the road surface, the motorcycle load and the condi- tion of the tires, maintaining a necessary safety margin, always remembering not to exceed the physical limits of stability.
- Page 62 • BUTTON (1) (engine running): long press activation / deactivation, short press changes the level (1 and 2). • ICON (2): icon indicating operation. Flashing mode: - Off with the vehicle in gear:: the system is working, but is not active (normal condi- tion).
- Page 63 NOTE AT VEHICLE START-UP THE MGCT WARNING LIGHT FLASHES AT THE SAME FREQUENCY AS THE ABS WARNING LIGHT, INDICATING A DIAGNOSTIC PHASE OF THE SYSTEM. IF THERE ARE NO ERRORS, BOTH THE LIGHTS TURN OFF SIMULTANEOUSLY WHEN EXCEEDING 3.11 mph (5 kph). IN CASE OF ABSENCE OF FLASHING AT START-UP, THE SYSTEM MAY NOT WORKING, PLEASE CONTACT AN AUTHORIZED SERVICE CENTER.
- Page 64 IMPORTANT A POOR STATE OF MAINTENANCE OF THE TYRES (PRESSURE TOO LOW OR FLAT TYRES/WEAR) CAN RESULT IN ABNORMAL OPERATION OF THE MGCT SYSTEM. IN CASE OF REPEATED INTERVENTIONS OF THE MGCT SYSTEM, EVEN ON ROAD SURFACES WITH GOOD GRIP OR SMALL THROTTLE OPENINGS, IT IS NECESSARY TO CHECK FOR WEAR AND/OR THE STATE OF INFLATION OF TYRES FIRST.
-
Page 65: The Saddle
• Accelerate to a constant speed of 18.64 mph (30 kph) and maintain it for at least 8 seconds. • The end of the procedure will be indicated by the flashing of the MGCT warning light (2). The MGCT system is active. •... - Page 66 The vehicle is equipped with a two-seater saddle and a passenger belt, to take ad- vantage of the passenger seat, perform the following procedure: • Remove the saddle • Undo and remove the four screws (1) • Undo and remove the four screws (2) •...
-
Page 67: Opening The Saddle
Opening the saddle (02_44) • Place the vehicle on the stand. • Insert the key in the saddle compartment keyhole. • Turn the key clockwise, lightly pressing in the center of the rear part of the seat, to unhook the hook of the pin. Lift up and slide out the saddle from the rear. - Page 68 IMPORTANT BEFORE LOWERING AND LOCKING THE SEAT, MAKE SURE THAT THE SEAT PROTECTION'S CONTAINMENT BAG IS NOT OBSTRUCTING THE FILTER CA- SING'S AIR INTAKE. 02_45 THE SEAT IS MADE WITH REFINED MATERIAL, WHICH IS WHY IN THE EVENT OF ADVERSE WEATHER CONDITIONS OR IF THE MOTORCYCLE IS TO BE WASHED, IT MUST BE PROTECTED WITH THE SPECIAL SEAT PROTECTOR (1).
-
Page 69: The Identification
After use: • Remove the seat. • Extract the seat from the seat protector (1) and place it in dry area. • Insert the seat protector (1) into the containment bag. • Replace the seat. The identification (02_47, 02_48) Write down the chassis and engine number in the specific space in this booklet. The chassis number is handy when purchasing spare parts. - Page 70 ENGINE NUMBER The engine number is stamped on the left side, near the engine oil level check cap. Engine No..... 02_48...
-
Page 71: Use
V7 III Chap. 03... -
Page 72: Checks
VEHICLE, FOR CORRECT AND SAFE OPERATION. FAILURE TO DO SO MAY LEAD TO SEVERE PERSONAL INJURY OR VEHICLE DAMAGE. DO NOT HESI- TATE TO CONTACT AN Official Moto Guzzi Dealer IF YOU DO NOT UNDER- STAND HOW SOME CONTROLS WORK OR IF MALFUNCTIONING IS DETECTED OR SUSPECTED. - Page 73 brake pads for wear. If necessary top-up with brake fluid. Throttle grip Check that the throttle functions smoothly and can be fully opened and closed in all steering positions. Adjust and/or lubricate if necessary. Engine oil Check and/or top-up as required. Wheels/ tyres Check that tyres are in good conditions.
- Page 74 Replace bulbs or repair any faults devices noted. Transmission oil - Guzzi Check. Should top-up be necessary, please refer to an authorised Moto Guzzi repair shop. Tone wheels Check that the tone wheels are perfectly clean good...
-
Page 75: Refueling
Refueling (03_02) IMPORTANT THE FUEL IS EXTREMELY FLAMMABLE AND IN CERTAIN CONDITIONS MAY BECOME EXPLOSIVE. FOR THIS REASON, THE VEHICLE REFUELLING AND THE MAINTENANCE OP- ERATIONS THAT INVOLVE THE FUEL SYSTEM MUST BE CARRIED OUT IN A WELL-VENTILATED AREA WITH THE ENGINE OFF. DO NOT REFUEL OR CARRY OUT MAINTENANCE OPERATIONS WHILE THE ENGINE IS ON. - Page 76 DRINK A HIGH QUANTITY OF MILK OR WATER AND IMMEDIATELY CONTACT THE DOCTOR. IF YOUR VEHICLE TILTS, IT WILL LOSE FUEL THAT IS EXTREMELY FLAMMA- BLE. FLAMES AND SPARKS CAN CAUSE SERIOUS FIRES THAT WILL NOT ONLY DESTROY YOUR VEHICLE, BUT THEY WILL BE EXTREMELY DANGER- OUS ALSO FOR THE VEHICLES AND SURROUNDING BUILDINGS AND THUS CAUSING VERY SERIOUS INJURIES AND EVEN DEATH.
- Page 77 IMPORTANT DO NOT ADD ADDITIVES OR ANY OTHER SUBSTANCES TO THE FUEL. WHEN USING A FUNNEL, ENSURE THAT IT IS PERFECTLY CLEAN. DURING REFUELLING AVOID FUEL LEAKAGES, WHICH MAY CAUSE DAMAGE TO THINGS OR PERSONS AND FIRE HAZARD. DURING REFUELLING, AVOID THE USE OF ELECTRIC DEVICES AND/OR MO- BILE PHONES, BECAUSE FUEL VAPOURS MAY CAUSE DAMAGE TO OBJECTS AND/OR PERSONAL INJURIES.
-
Page 78: Rear Shock Absorbers Adjustment
5.55 US gal (4.62 UK gal; 21 l) Fuel tank reserve capacity 1.06 US gal (0.88 UK gal; 4 l) Rear shock absorbers adjustment (03_03, 03_04) (STANDARD SHOCK ABSORBER) The shock absorber has an adjuster ring (1) for setting spring pre-load (2) and a locking ring nut (3). - Page 79 FOR PROPER VEHICLE STABILITY IT IS ALWAYS A GOOD IDEA TO MAKE SURE THAT BOTH SHOCK ABSORBERS ARE SET TO THE SAME POSITION. IF NECESSARY, CONTACT AN Official Moto Guzzi Dealership. (RACE SHOCK ABSORBER) The shock absorber has an adjustment screw for regulating the rebound braking (1), an adjustment screw for regulating the compression braking (2), a ring nut adjuster (3) and a lock ring adjuster (5) for setting the spring pre-load (4).
- Page 80 RIDER ONLY (STANDARD RIDER + PASSENGER ADJUSTMENT) Compression adjustment 15 clicks (from all the way closed) 15 clicks (from all the way closed) Rebound adjustment 18 clicks (from all the way closed) 18 clicks (from all the way closed) Spring pre-load adjuster ring 10 turns clockwise (from all the way open) 5 turns clockwise (from rider only adjustment) Spring pre-load...
- Page 81 IMPORTANT FOR PROPER VEHICLE STABILITY IT IS ALWAYS A GOOD IDEA TO MAKE SURE THAT BOTH SHOCK ABSORBERS ARE SET TO THE SAME POSITION. IF NECESSARY, CONTACT AN Official Moto Guzzi Dealership.
-
Page 82: Check Front Fork
The clearance should be 0.08 in (2 mm). IMPORTANT IF THE FRONT BRAKE LEVER MUST BE REMOVED, CHECKED AND CHANGED BY AN Authorised Moto Guzzi Dealership 03_06 Rear brake pedal adjustment IMPORTANT... -
Page 83: Clutch Lever Adjustment
Reposition the protective casing (1) • If after the adjustment in point 3 it is not possible to ascertain the condition of "point 6", contact an Authorized Moto Guzzi Dealer to verify the proper operation of the clutch control. •... -
Page 84: Gear Pedal Adjustment
Gear pedal adjustment IMPORTANT TO REMOVE AND REPLACE THE GEAR SHIFT LEVER, CONTACT AN Author- ized Moto Guzzi Dealer Running-In Running in is essential to ensure the durability of the vehicle. During the first 932.06 mi (1500 km), observe the following rules to ensure the reliability and performance of the vehicle throughout its lifetime: •... -
Page 85: Starting The Engine
TO PREVENT THE RISK OF INJURY TO YOURSELF OR OTHERS AND/OR DAM- AGE TO THE VEHICLE, TAKE THE YOUR MOTORCYCLE TO AN AUTHORISED Moto Guzzi DEALER AT THE SPECIFIED MILEAGE INTERVALS TO HAVE THE CHECKS LISTED IN THE "MAINTENANCE SCHEDULE" TABLE CARRIED OUT. -
Page 86: Moving Off / Riding
• Get on the motorcycle, assuming the correct driving posture. • Make sure that the side stand has been retracted completely. • Operate the front or rear brake (or both). • Operate the clutch lever and make sure that the transmission is in neutral position. - Page 87 IF THE LOW GASOLINE WARNING LIGHTS UP ON THE INSTRUMENT PANEL, REFUEL THE VEHICLE AS SOON AS POSSIBLE. WARNING IF THE MOTORCYCLE TURNS OFF ACCIDENTALLY THE ECU ALLOWS A RE- START WITHIN THE NEXT 5 SECONDS. ONCE THIS PERIOD OF TIME HAS PASSED THE ECU WILL PREVENT STARTING FOR ANOTHER 3 SECONDS AND ONLY THEN WILL IT BE POSSIBLE TO START THE MOTORCYCLE.
- Page 88 WIDE-ANGLE VIEW AND ONLY EXPERIENCE HELPS YOU JUDGE THE DIS- TANCE SEPARATING YOU AND THE VEHICLE BEHIND. • With the throttle grip closed (Pos.A) and with the engine at idle, operate the clutch lever. • Push the gearbox lever (1) down to select the first gear. •...
- Page 89 • Repeat the last two operations to pass to the higher gears. IT IS RECOMMENDED TO SWITCH FROM A HIGHER GEAR TO A LOWER GEAR: • When going downhill and when braking, to increase braking power by using the engine's compression. •...
-
Page 90: Stopping The Engine
OPERATING SOLELY THE FRONT BRAKE OR THE REAR BRAKE SIGNIFI- CANTLY REDUCES THE VEHICLE'S BRAKING FORCE. WHEN STOPPING UPHILL, DECELERATE COMPLETELY AND ONLY USE THE BRAKES TO MAINTAIN THE VEHICLE IN THE STOPPED POSITION. USING THE ENGINE TO KEEP THE MOTORCYCLE STOPPED COULD CAUSE THE CLUTCH TO OVERHEAT. -
Page 91: Parking
IMPORTANT WHENEVER POSSIBLE, AVOID ROUGH BRAKING, SUDDEN DECELERATION AND BRAKING IN EXCESS. Parking It is very important to select an appropriate parking spot, in compliance with road indications and the guidelines described below. IMPORTANT PARK THE VEHICLE ON FIRM AND LEVEL GROUND TO PREVENT IT FROM FALLING OVER. -
Page 92: Catalytic Silencer
DO NOT PUT YOUR WEIGHT, NOR THAT OF A PASSENGER ON THE SIDE STAND. Catalytic silencer The vehicle has a metal trivalent catalytic muffler (platinum, palladium, rhodium). This device is used to oxidize the CO (Carbon Monoxide) converting it into carbon dioxide, the HC (unburned hydrocarbons) converting them into water vapor and to reduce the NOX (Nitrous Oxide) converting it into oxygen and nitrogen in the exhaust. -
Page 93: Stand
In the case that the noises produced by the exhaust system increase, immediately contact an authorized Moto Guzzi Dealership or Service Center. NOTE DO NOT TAMPER WITH THE EXHAUST SYSTEM. - Page 94 DO NOT PUT YOUR WEIGHT, NOR THAT OF A PASSENGER ON THE SIDE STAND. THE SIDE STAND MUST ROTATE FREELY. IF NECESSARY GREASE THE JOINT. SIDE STAND If the stand has been folded up for any manoeuvre (for example, when the vehicle is in motion), place the vehicle on the stand again as follows: •...
-
Page 95: Suggestion To Prevent Theft
Suggestion to prevent theft IMPORTANT IF YOU USE A DISC-LOCKING DEVICE, ALWAYS MAKE SURE THAT YOU RE- MOVE IT BEFORE BEGINNING TO RIDE YOUR VEHICLE. NOT RESPECTING THIS RECOMMENDATION COULD CAUSE SERIOUS DAMAGE TO THE BRAK- ING SYSTEM, PROVOKING ACCIDENTS, WITH CONSEQUENT SERIOUS IN- JURY AND EVEN DEATH. -
Page 96: Safe Riding
Safe riding (03_17, 03_18, 03_19, 03_20, 03_21, 03_22, 03_23, 03_24, 03_25, 03_26, 03_27, 03_28, 03_29, 03_30, 03_31, 03_32, 03_33, 03_34, 03_35, 03_36, 03_37, 03_38, 03_39) BASIC SAFETY RULES The following instructions refer to normal use of your vehicle, and should be respected. Observing these rules will allow you to increase your level of safety and that of those around you, as well as increasing the life and usefulness of your vehicle. - Page 97 a two-wheeled vehicle safely. NEVER lend your vehicle to other people if you are not sure that they are experts, and have a motorcycle rider's license. Respect all the rules of the road. In particular, pay attention to all warning, traffic and informational signs. Avoid showing off with dangerous moves (for example wheelies).
- Page 98 DLEBAR. NEVER USE THE VEHICLE IF THE THROTTLE GRIP DOES NOT AU- TOMATICALLY AND COMPLETELY RETURN TO THE NEUTRAL POSITION WHEN YOU LET GO OF IT ON. CONTACT YOUR LOCAL Official Moto Guzzi Dealership FOR REPAIRS. NOT OBSERVING THESE WARNINGS MAY LEAD TO SERIOUS ACCIDENTS CAUSING SERIOUS INJURY AND EVEN DEATH.
- Page 99 This vehicle was not designed to carry a sidecar, nor to be used to haul trailers or other vehicles. Moto Guzzi does not produce sidecars or trailers, and for this reason is not able to 03_26 predict the consequences that these accessories could have on the stability and ma-...
- Page 100 negative effect on your vehicle, and the warranty will not be recognized for any dam- ages the vehicle or its components may sustain due to a use of this type of accessory. Never use your vehicle to race other vehicles. When braking use both the front and rear brake.
- Page 101 Always respect speed limits, remembering that it is not always safe to ride at the max- imum of the limits under all road conditions. Slowing down slightly greatly increases your safety under all road conditions. Do not drive the vehicle off-road. Do not tamper with the exhaust or emissions control system, not only because it could harm the environment, but also because you could risk penal sanctions.
- Page 102 Windshields are particularly dangerous in the case of accidents, because they can break and injure or cut the rider. In case of doubt about any accessory or instal- lation or any freight to be carried, it is recommended that you first consult with your local Moto Guzzi Dealership. 03_35...
- Page 103 Use only original Moto Guzzi accessories. LOADING Do not overload your vehicle.
- Page 104 When you carry a passenger, always remember that the vehicle's manageability is reduced, the brakes are less efficient, and the center of gravity is higher and farther back. This increases the possibility of the front wheel losing contact with the ground, espe- cially while accelerating.
-
Page 105: Basic Safety Rules
Basic safety rules (03_40, 03_41, 03_42, 03_43, 03_44) The following recommendations should receive your maximum attention, because they are provided to increase your safety, and decrease damage to people, things and vehicles, in the case of a fall of the rider or passenger from the vehicle and/or from the fall or overturning of the vehicle. - Page 106 In any case, the passenger should mount and dismount the vehicle using caution to avoid causing the vehicle or the rider to lose balance. IMPORTANT IT IS THE RESPONSIBILITY OF THE RIDER TO INSTRUCT THE PASSENGER ABOUT THE PROPER WAY TO MOUNT AND DISMOUNT FROM THE VEHICLE. THE VEHICLE INCLUDES PASSENGER FOOTRESTS WHICH SHOULD BE USED DURING MOUNTING AND DISMOUNTING.
- Page 107 MOUNTING • Grip the handlebar properly and mount the vehicle without placing your weight upon the side stand. IMPORTANT IN THE CASE THAT YOU ARE NOT ABLE TO REST BOTH FEET ON THE GROUND, PUT THE RIGHT FOOT ON THE GROUND, (IN THE CASE OF A LOSS OF BALANCE THE LEFT SIDE IS "PROTECTED"...
- Page 108 • Use the heel of your left foot to completely open the side stand. IMPORTANT IN THE CASE THAT YOU ARE NOT ABLE TO REST BOTH FEET ON THE GROUND, PUT THE RIGHT FOOT ON THE GROUND, (IN THE CASE OF A LOSS OF BALANCE THE LEFT SIDE IS "PROTECTED"...
-
Page 109: Maintenance
V7 III Chap. 04 Maintenance... -
Page 110: Foreword
Foreword Normally, ordinary maintenance can be performed by the rider, but at times it will require the use of specific tools and technical preparation. In the case of periodic maintenance, or if you need assistance or technical advice, consult an Official Moto Guzzi Dealer who will provide precise and quick service. - Page 111 OF DANGEROUS ACCIDENTS AND SITUATIONS.. IN CASE OF OIL LEAKAGE, DO NOT DRIVE YOUR VEHICLE. BEFORE USING THE VEHICLE, HAVE IT REPAIRED BY AN Official Moto Guzzi Dealer. IF THE ENGINE OIL PRESSURE WARNING LIGHT REMAINS LIT AFTER THE ENGINE HAS BEEN STARTED UP, OR LIGHTS UP WHILE YOU ARE RIDING, THIS MEANS THAT THE OIL SYSTEM IS NOT CREATING ENOUGH PRESSURE.
-
Page 112: Engine Oil Level Check
Engine oil level check (04_01, 04_02) Check the engine oil level according to the indications in the periodic maintenance table. To check: THE ENGINE OIL LEVEL MUST BE CHECK WITH THE ENGINE WAR AFTER HAVING TRAVELED APPROXIMATELY 9.32 mi (15 km) ON OFF-ROAD 04_01 ( ENOUGH TO WARM UP THE ENGINE OIL). -
Page 113: Engine Oil Top Off
THE OPERATIONS FOR SUBSTITUTING ENGINE OIL AND THE OIL FILTER COULD BE DIFFICULT AND COMPLEX FOR A NON-EXPERT. IF NECESSARY, CONTACT AN Official Moto Guzzi Dealership. IF INSTEAD YOU WOULD LIKE TO PERSONALLY PERFORM THE PROCEDURE, ABIDE BY THE FOLLOWING INSTRUCTIONS. - Page 114 Periodically check the motor oil level. To replace: IMPORTANT HOT OIL IS MORE FLUID AND WILL DRAIN OUT MORE EASILY AND COM- PLETELY; IDEAL TEMPERATURE IS REACHED AFTER THE ENGINE HAS RUN FOR ABOUT TWENTY MINUTES. OIL BECOMES VERY HOT WHEN THE ENGINE IS HOT; BE CAREFUL NOT TO GET BURNED WHEN CARRYING OUT THE OPERATIONS DESCRIBED BELOW.
-
Page 115: Bevel Gear Pair Oil Level
IMPORTANT REPLACE THE ENGINE OIL FILTER EVERY 6213.71 mi (10,000 km) (OR AT EV- ERY ENGINE OIL CHANGE). • Unscrew the screw (2) and remove the cover (3). • Remove the engine oil filter (5). NOTE NEVER REUSE AN OLD FILTER. 04_04 •... -
Page 116: Gearbox Oil Level
IT IS ALSO RECOMMENDED TO REPLACE SUCH WASHER AT AN AUTHOR- ISED Moto Guzzi Dealer. IMPORTANT TO TOP-UP OR CHANGE THE OIL IN THE CARDAN SHAFT TRANSMISSION UNIT, CONTACT AN Authorised Moto Guzzi Dealer. Gearbox oil level IMPORTANT FOR GEARBOX OIL DEMOUNTING, CHECKING AND REPLACING, PLEASE CONTACT AN Official Moto Guzzi Dealership. - Page 117 IMPORTANT TO ALLOW THE QUICK REACHING OF THE PERFECT GRIP OF NEW TIRES AT THE FIRST MILEAGE, IT IS RECOMMENDED A PARTICULARLY CAREFUL GUIDE OF THE MOTORCYCLE, AVOIDING SUDDEN STEERING OR VIOLENT ACCELERATION AND BRAKING. IMPORTANT 04_07 CHECK TYRE INFLATION PRESSURE REGULARLY AT AMBIENT TEMPERA- TURE.
- Page 118 OR IF THERE IS A PUNCTURE LARGER THAN 0.197 in (5 mm) IN THE TREAD AREA. WHEEL MUST BE BALANCED AFTER A TYRE IS MENDED. USE ONLY TYRE SIZES INDICATED BY THE MANUFACTURER. DO NOT FIT TYRES WITH INNER TUBES ON RIMS FOR TUBELESS TYRES OR VICE VERSA. CHECK THAT THE INFLATION VALVES HAVE THEIR CAPS FITTED TO AVOID UNEXPECTED FLAT TYRES.
-
Page 119: Spark Plug Removal
Spark plug removal IMPORTANT FOR REMOVAL, CHECK, AND REPLACEMENT OF THE SPARK PLUGS CON- TACT AN OFFICIAL Moto Guzzi Dealer. Side panel disassembly (04_10) NOTE HANDLE PAINTED AND PLASTIC COMPONENTS WITH CARE; BE CAREFUL NOT TO SCRATCH OR DAMAGE THEM. -
Page 120: Air Filter Removal
Air filter removal IMPORTANT FOR REMOVAL, CHECK, AND REPLACEMENT OF THE AIR FILTER CONTACT AN OFFICIAL Moto Guzzi dealer Moto Guzzi. Checking the brake fluid level (04_11, 04_12, 04_13) FRONT BRAKE CHECK • Rest the vehicle on its stand •... - Page 121 • Check the brake pads and discs for wear. If the pads and/or the disc do not need to be replaced, have the braking system checked by an Official Moto Guzzi Dealership. (IF AVAILABLE) • Check, through the opening in the side panel (indicated in the figure), that the liquid contained in the tank exceeds the "MIN"...
-
Page 122: Braking System Fluid Top Up
Official Moto Guzzi Dealership. Braking system fluid top up IMPORTANT TO TOP UP THE BRAKE SYSTEM FLUID CONTACT AN Official Moto Guzzi Deal- Use of a new battery (04_14) • Make sure the ignition switch is set to "KEY OFF". -
Page 123: Electrolyte Level Check
IMPORTANT WHEN REFITTING, CONNECT THE LEAD TO THE POSITIVE TERMINAL (+) FIRST AND AFTERWARDS THE LEAD TO THE NEGATIVE TERMINAL (-). CHECK THAT THE CABLE TERMINALS AND BATTERY LEADS ARE: • IN GOOD CONDITION (NOT CORRODED OR COVERED BY DEPOSITS); •... -
Page 124: Charging The Battery
Charging the Battery • Remove the battery. • Get an adequate battery charger. • Set the battery charger for the recharge type indicated. • Connect the battery to the battery charger. IMPORTANT WHEN RECHARGING OR USING THE BATTERY, BE CAREFUL TO HAVE THE ROOM ADEQUATELY AIRED. -
Page 125: Fuses
In winter or when the motorcycle remains stopped, check the charge frequently (about once a month) to avoid deterioration. • Fully recharge with an ordinary charge. If the battery is still on the motorcycle, disconnect the cables of the terminals. Checking and cleaning leads and terminals •... - Page 126 To check: • Set the ignition switch to 'OFF' to avoid an accidental short circuit. • Remove the saddle. • Remove the fuse box cover. • Take out one fuse at a time and check if the filament is broken. •...
-
Page 127: Lights
(LED) FUSE DISTRIBUTION 1. Main fuse, coil 1 and 2, fuel pump, injectors 1 and 2, oxygen sensor 1 and 2, secondary air (30 A). 2. (Battery positive) MIU G3 ECU (5 A). 3. (Battery positive) Instrument panel, turn indicators, Blue Dash prewiring (5 4. - Page 128 POSITE DIRECTION AND IT CAN ALSO DECREASE THE DRIVER'S ABILITY TO SEE THE OBSTACLES ALONG THE ROAD DURING NIGHT-TIME DRIVING. IT IS ALWAYS RECOMMENDED TO DECREASE THE SPEED WHEN DRIVING AT NIGHT AND IN THE DARK SO AS TO HAVE THE NECESSARY TIME TO AVOID ANY OBSTACLES AND ADAPT TO THE LOW VISIBILITY THAT CANNOT BE AVOIDED DURING NIGHT-TIME.
- Page 129 BULB LAYOUT The headlamp unit contains the following bulbs: • one high beam / low beam bulb (1) (upper); • one tail light bulb (2) (lower); FRONT HEADLAMP BULB REPLACEMENT • Rest the vehicle on its stand. • Remove the complete parabola from the headlight body by undoing the screw (3).
-
Page 130: Headlight Adjustment
(LED) IMPORTANT TO REMOVE, CHECK AND REPLACE THE FRONT LIGHT ASSEMBLY LAMPS, CONTACT AN Authorised Moto Guzzi Dealership Headlight adjustment (04_22, 04_23, 04_24, 04_25) NOTE IN COMPLIANCE WITH LOCAL LEGAL REQUIREMENTS, SPECIFIC PROCE- DURES MUST BE FOLLOWED WHEN CHECKING LIGHT BEAM ADJUSTMENT. - Page 131 To carry out vertical adjustment of the light beam: • Stand the motorcycle in a vertical position. • Slightly loosen the headlight fixing screws (1), and move the light beam man- ually to the desired position. • Once the adjustment is finished tighten the screws (1). After adjusting: NOTE CHECK THAT THE LIGHT BEAM VERTICAL DIRECTION IS CORRECT.
-
Page 132: Front Direction Indicators
To carry out vertical adjustment of the light beam: • Stand the motorcycle in a vertical position. • Slightly loosen the headlight fixing screws (1), and move the light beam man- ually to the desired position. • Once the adjustment is finished tighten the screws (1). After adjusting: NOTE CHECK THAT THE LIGHT BEAM VERTICAL DIRECTION IS CORRECT. - Page 133 IF THE BULB HOLDER «4» IS STICKS OUT ITS FITTING, INSERT IT AGAIN COR- RECTLY BY MATCHING THE BULB HOLDER RADIAL OPENING WITH THE SCREW SEAT. (LED) NOTE TO REMOVE, CHECK AND REPLACE THE FRONT TURN INDICATORS, PLEASE CONTACT AN Authorised Moto Guzzi Dealership...
-
Page 134: Rear Lights
Carefully put the protective glass (2) back into position and tighten the two screws (1) carefully and moderately so as to avoid damaging the protective glass (2). 04_29 (LED) IMPORTANT TO REMOVE, CHECK AND REPLACE THE REAR LIGHT ASSEMBLY, CONTACT AN Authorised Moto Guzzi Dealership. -
Page 135: Rear Turn Signals
Rear turn signals (04_30, 04_31) (HALOGEN) • Rest the vehicle on its stand. • Loosen and remove screw (1). NOTE REMOVE THE PROTECTION GLASS WITH CAUTION SO AS NOT TO BREAK THE FITTING TOOTH. 04_30 • Remove the protective glass (2). IMPORTANT UPON REFITTING, POSITION THE PROTECTIVE GLASS CORRECTLY IN ITS POSITION. -
Page 136: Rear-View Mirrors
SCREW SEAT. (LED) NOTE FOR DISASSEMBLY, VERIFICATION AND REPLACEMENT OF REAR INDICA- TORS PLEASE CONTACT AN Official Moto Guzzi Dealership Rear-view mirrors (04_32, 04_33) DO NOT RIDE WITH REAR-VIEW MIRRORS INCORRECTLY SET. ALWAYS CHECK THAT THE MIRRORS ARE ADJUSTED CORRECTLY BEFORE... -
Page 137: Front And Rear Disc Brake
To remove the rearview mirrors: • Place the vehicle on the stand. • Loosen the locknut. • Slide up and remove the complete rearview mirror unit. If necessary, repeat this operation for the removal of other rearview mirror units. UPON REFITTING AND BEFORE TIGHTENING THE LOCKING NUT, MAKE SURE 04_32 THAT THE REAR VIEW MIRROR SUPPORT STEM IS ALIGNED WITH THE HAN- DLEBAR. - Page 138 PROBLEM WITH THE HYDRAULIC SYSTEM. IF YOU HAVE ANY DOUBT THAT YOUR BRAKES MAY NOT BE PERFORMING PERFECTLY, AND FOR NORMAL PERIODIC CHECKS, CONTACT AN Official Moto Guzzi Dealership BEFORE RIDING YOUR VEHICLE. PAY PARTICULAR ATTENTION TO THE DISCS AND THEIR GRIPPING CAPACI- TY, MAKING SURE THAT THEY ARE NOT DIRTY OR OILY, ESPECIALLY AFTER MAINTENANCE OR INSPECTIONS.
- Page 139 REPLACE DIRTY PADS AND CLEAN AGAIN THE DIRTY DISC USING A TOP QUALITY DEGREASING PRODUCT. IMPORTANT TAKE YOUR VEHICLE TO AN Authorised Moto Guzzi Dealer TO HAVE THE FRONT WHEEL REMOVED. IMPORTANT CHECK BRAKE PADS FOR WEAR MAINLY BEFORE EACH RIDE.
-
Page 140: Periods Of Inactivity
If the thickness of the abrasive material (even if only of the front or rear brake disc is reduced to an approximate value of 0.059 in (1.5 mm) (or even if only one of the wear indicators is no longer visible) have all brake discs replaced by an Official Moto Guzzi Dealership. - Page 141 IMPORTANT TO AVOID BATTERY DETERIORATION, FOLLOW THE RECOMMENDED STEPS FOR PROLONGED ACTIVITY. AFTER STORAGE NOTE TAKE THE PLASTIC BAGS OFF THE EXHAUST PIPE OPENING. • Uncover and clean the vehicle. • Check that the battery charge is OK and fit it. •...
-
Page 142: Cleaning The Vehicle
Cleaning the vehicle (04_37, 04_38, 04_39) Moto Guzzi recommends using quality products for cleaning the vehicle. The use of unsuitable products can damage vehicle components. For cleaning do not use sol- vents such as "nitro thinner", "cold cleaning agents", or similar fuels, or cleaning products that contain alcohol. - Page 143 droppings should be removed immediately, otherwise the stains risk becoming per- manent. After washing it is easy to identify halos and residual marks. Remove any of these from the body using soft cloths and finishing polishes (we recommend trying the prod- uct first in an unexposed area).
- Page 144 DO NOT USE BRUSHES THAT CAN DAMAGE THE SURFACE. TANK (CHROME-PLATED, MATTE) The tank of your V7 III with matte chrome-plated tank has a particularly precious sur- face finish. To clean the tank, we recommend using a cloth dampened with denatured ethyl alcohol and then finishing with a dry cloth.
- Page 145 BORN DIRT) OR BRUSHES THAT COULD DAMAGE THE SURFACE. YOU CAN USE A SOFT CLOTH AND FINISHING POLISHES (WE RECOMMEND TRYING THE PRODUCT FIRST IN AN UNEXPOSED AREA). RUBBER PARTS Clean the rubber parts using water and mild shampoo (brand-name, suitable for car bodies) THE USE OF SILICONE SPRAY TO CLEAN THE RUBBER SEALS MAY CAUSE DAMAGE.
- Page 146 IMPORTANT CLEAN THE INSTRUMENT PANEL WITH A SOFT CLOTH MOISTENED WITH WATER. IMPORTANT AFTER CLEANING YOUR MOTORCYCLE, BRAKING EFFICIENCY MAY BE TEM- PORARILY AFFECTED DUE TO THE PRESENCE OF WATER ON THE FRICTION SURFACES OF THE BRAKING CIRCUIT. ALLOW LONGER BRAKING DISTAN- CES TO PREVENT ACCIDENTS.
- Page 147 IMPORTANT DO NOT USE WATER (OR LIQUIDS) AT TEMPERATURES OVER 40°C (104°F) WHEN CLEANING THE VEHICLE PLASTIC PARTS. DO NOT AIM HIGH PRES- SURE AIR/WATER JETS OR STEAM JETS DIRECTLY ON THESE COMPO- NENTS. DO NOT USE ALCOHOL OR SOLVENTS TO CLEAN ANY RUBBER OR PLASTIC SADDLE COMPONENTS USE WATER AND MILD SOAP.
-
Page 148: Transport
Transport (04_40) NOTE EMPTY THE FUEL TANK COMPLETELY AND MAKE SURE IT IS DRY BEFORE MOVING THE VEHICLE. DURING THE TRANSFER, THE VEHICLE MUST REMAIN SOLIDLY ANCHORED IN A VERTICAL POSITION AND THE FIRST GEAR MUST BE ENGAGED; IN OR- 04_40 DER TO AVOID GASOLINE, OIL, AND COOLANT LEAKS. -
Page 149: Technical Data
V7 III Chap. 05 Technical data... - Page 150 DIMENSIONS AND MASS Max. length (halogen headlamps) 86.02 in (2185 mm) Max. length (led headlamps) 87.01 in (2210 mm) Max. width 31.50 in (800 mm) Max. width (Racer) 29.72 in (755 mm) Max. height 43.31 in (1100 mm) Max. height (to top fairing) 46.06 in (1170 mm) Wheelbase 56.89 in (1445 mm)
- Page 151 Bore / stroke 3.15x2.91 in (80x74 mm) Compression ratio 10.5 +/- 0.5: 1 Starting Electric Idle engine speed 1,250 +/- 100 (rpm) Clutch single disc dry clutch with flexible coupling Lubrication system pressure-fed, controlled by valves and trochoidal pump Air filter cartridge-type dry filter Cooling GEARBOX...
- Page 152 Fuel tank reserve capacity 1.06 US gal (0.88 UK gal; 4 l) Engine oil change filter replacement: 122.05 cu.in. (2000 cm³) Gearbox oil 30.51 cu.in. (500 cm³) Transmission oil 10.37 cu.in. (170 cm³) Seats Maximum weight limit 924 lb (419 kg) (rider + passenger + luggage) Maximum weight limit (Special) 933 lb (423 kg) (rider + passenger...
- Page 153 Final drive with shaft, ratio 8 / 33 = 1 : 4,125 POWER SUPPLY Type Electronic injection (Marelli MIU Diffuser diam. 1.50 in (38 mm) Fuel Unleaded gasoline E10 (95 R.O.N.) CHASSIS Type Modular double cradle, high- strength steel tubular chassis Steering rake angle 26°...
- Page 154 Travel 5.39 in (137 mm) Rear (standard) Swingarm in die-cast light alloy, 2 shock absorbers with adjustable spring pre-loading Rear (race) Swingarm in die-cast light alloy, 2 shock absorbers with adjustable extension, compression and spring pre-loading Stroke (standard) 3.15 in (80 mm) Stroke (race) 2.95 in (75 mm) BRAKES...
- Page 155 Front 2.5''x18'' Rear 3.50" x 17'' TYRES Front (size) 100 / 90 - 18 56H Front (size) (alternative) 110 / 80 - R18 58H Front (inflation pressure) 2.5 bar (250 kPa) (36.26 PSI) Front (inflation pressure with 2.6 bar (260 kPa) (37.71 PSI) passenger) Rear (size) 130 / 80 - 17 65H...
- Page 156 ELECTRICAL SYSTEM Battery 12 V - 12 Ah Permanent magnet alternator 12V - 268W Fuses (halogen headlamps) 5 (2) - 15 (3) - 20 - 30 A (led headlamps) 5 (2) - 7.5 - 15 (2) - 20 - 30 A High beam/low beam light (halogen 12 V - 55 W / 60 W H4) or (led)
-
Page 157: Toolkit
MI warning light ABS warning light MGCT warning light Toolkit (05_01) The motorcycle is equipped with tool box (1) under the saddle. Inside there is a hook spanner (2) and a fuse extractor (3). 05_01... -
Page 159: Scheduled Maintenance
V7 III Chap. 06 Scheduled maintenance... -
Page 160: Scheduled Servicing Table
Scheduled servicing table (06_01) Adequate maintenance is fundamental to ensure long-lasting, optimum operation and performance of your vehicle. For this reason a series of checks and maintenance services has been prepared, available for purchase separately, listed together in the chart on the following page. It is a good idea to report small performance anomalies right away to an Authorised Service Centre, without waiting for the next scheduled service, so they can be re- paired immediately. - Page 161 (7): Replace at whichever of the following occurs first: 40,000 km (24,855 miles) or 4 years (8): At each service (except the first one), check inside the filter box, if there is oil. Clean if necessary SCHEDULED MAINTENANCE TABLE EVERY EVERY km x 1,000 (mi x 1,000) (0.9)
- Page 162 EVERY EVERY km x 1,000 (mi x 1,000) (0.9) (6.2) (12.4) (18.6) (24.9) (31.1) (37.3) MONTHS MONTHS Brake Fluid Gearbox oil Fork oil (7) Engine oil (5) Final drive oil Headlight aiming Fork oil seals (1) Tyres - pressure / wear (4) Clutch clearance adjustment Nut/bolt tightness Battery terminals tightening...
-
Page 163: Recommended Products
Recommended Products (06_02) Piaggio Group recommends the use of products from its Castrol official partner for the scheduled maintenance of its vehicles. Only use lubricants and fluids which meet or exceed the performance characteristics specified. This also applies when topping up only. 06_02 TABLE OF RECOMMENDED PRODUCTS Product... -
Page 165: Special Fittings
V7 III Chap. 07 Special fittings... -
Page 166: Index Accessoires
Index accessoires For this vehicle there are accessories and clothing. For more information contact your dealer or visit our website: www.motoguzzi.com... - Page 167 INDEX Display: 43 Instrument Panel: 42 Tires: 116 Turn signals: 135 ABS: 57 Advanced functions: 49 Air filter: 120 Engine oil: 11, 110, 112, 113 Maintenance: 109, 159 Alarms: 44 Engine stop: 57 Mirrors: 136 Use: 14, 71, 122 Battery: 12, 122, 124 Fork: 82 Recommended products: Warning lights: 11...
- Page 168 Only by requesting Moto Guzzi original spare parts can you be sure of purchasing products that were developed and tested during the actual vehicle design stage. All Moto Guzzi original spare parts undergo quality control procedures to guarantee reliability and durability.
Need help?
Do you have a question about the V7 III and is the answer not in the manual?
Questions and answers