Table of Contents
Advertisement
Quick Links
Instructions
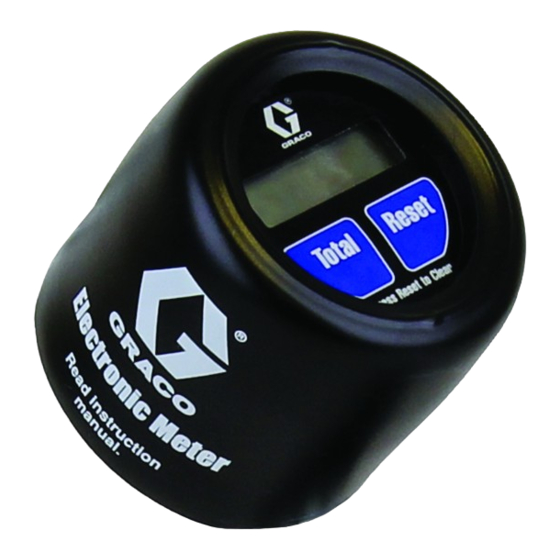
XDI12 Electronic
Lubricant Meter
For use with petroleum-based lubricants only. Not approved for use in explosive
atmospheres or hazardous locations. For professional use only.
Models: 24V553
Measures in gallons, quarts, pints and liters*
*Meter is factory set in quarts.
Calibrate after electronic module replacement.
1500 psi (10.3 MPa, 103 bar) Maximum Working Pressure
Important Safety Instructions
Read all warnings and instructions in this
manual. Save these instructions.
334852D
EN
Advertisement
Table of Contents

Related Manuals for Graco XDI12


Summary of Contents for Graco XDI12
- Page 1 Instructions XDI12 Electronic Lubricant Meter 334852D For use with petroleum-based lubricants only. Not approved for use in explosive atmospheres or hazardous locations. For professional use only. Models: 24V553 Measures in gallons, quarts, pints and liters* *Meter is factory set in quarts.
- Page 2 Warnings Warnings The following warnings are for the setup, use, grounding, maintenance, and repair of this equipment. The exclama- tion point symbol alerts you to a general warning and the hazard symbols refer to procedure-specific risks. When these symbols appear in the body of this manual or on warning labels, refer back to these Warnings. Product-specific hazard symbols and warnings not covered in this section may appear throughout the body of this manual where applicable.
-
Page 3: Typical Installation
The typical installation shown in F . 1 is only a guide for selecting and installing an in-line meter. It is not an actual system design. Contact your Graco representative for assistance in designing a system to suit your needs. Key:... -
Page 4: Operation
Operation Operation To Activate the Digital Display Function of TOTAL Press the RESET key to clear the meter before starting To see the accumulated total of fluid dispensed through a new dispense cycle. This is the best way to activate the meter, press the TOTAL key. -
Page 5: Setup Mode
Operation Setup Mode the meter, see Calibration Mode instructions in the following section of this manual. 1. Press the TOTAL and RESET buttons (F . 5) together. Calibration Mode • All segments of the digital display illuminate for approximately 4 seconds. •... - Page 6 Operation NOTE: To Verify the Accuracy of an • To interrupt or restart the calibration dispense at any Electronic Meter time during the dispense, push the TOTAL button. This will reset the display back to 00.00 to start over. 1. Use a clean, calibrated container. If using a single container, be sure to clean it after each dispense.
-
Page 7: Troubleshooting
Troubleshooting Troubleshooting NOTE: • Relieve pressure. See pressure relief procedure included in your dispense valve instruction manual. • Before you check or repair the meter, be sure the pump and all other valves and controls are operat- ing properly. Problem Cause Solution Digital display is dim. -
Page 8: Battery Installation
Repair Repair The reference numbers used in the following Repair 5. Insert the new battery with the negative side of the instructions refer to the Parts, page 10. battery position to the bottom of the battery holder. Press the battery firmly down until the positive ter- minal clips above the battery. - Page 9 Repair Electronic Control Module Replacement (3). Remove and discard the large o-ring (4), screws and electronic control according to all standards for disposal. 1. Relieve pressure. See pressure relief procedure 4. Install the new large o-ring (4) over the lip on the top included in your dispense valve instruction manual.
- Page 10 Parts Parts Underside view Model 24V553, Gallon/Quart/Pint/Liter Ref. Part Description Qty. 191782 GUARD, impact METERING UNIT, gal- lon/quart/pint/liter 3 24V554 KIT, electronic control 109137 O-RING 112093 SCREW 7 BATTERY *These parts are included in Kit 24V554. This kit also includes a disposable grounding strap (not shown).
-
Page 11: Technical Data
Parts Accessories Shutoff Valve 108458 Install upstream from the meter. Shuts off fluid supply from the pump. 1/2-14 npt(f) both ends. Strainer 223179 Install between the shutoff valve and the meter. Removes particles from the lubricant. 40 mesh. 1/2 in. npt (m x f) Technical Data In-Line Electronic Lubricant Meter... -
Page 12: Graco 7-Year Meter And Valve Warranty
With the exception of any special, extended or limited warranty published by Graco, Graco will, for a period from the date of sale as defined in the table shown below, repair or replace equipment covered by this warranty and determined by Graco to be defective.
Need help?
Do you have a question about the XDI12 and is the answer not in the manual?
Questions and answers