Table of Contents
Advertisement
Quick Links
Advertisement
Table of Contents

Subscribe to Our Youtube Channel
Related Manuals for Bartscher DS 901


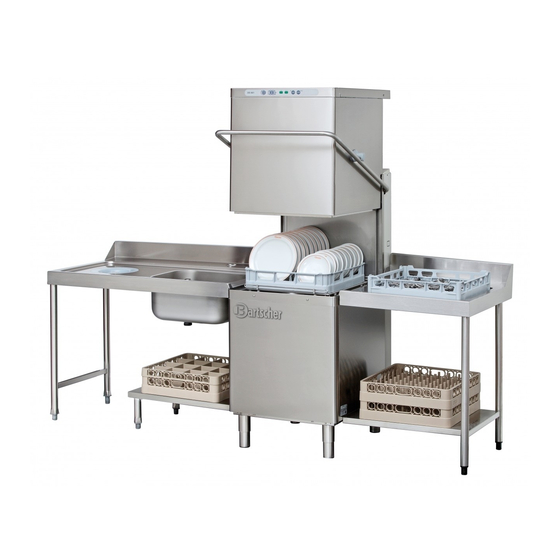
Summary of Contents for Bartscher DS 901
- Page 1 DS 901 / 109242 V1/0216...
-
Page 2: Table Of Contents
USE AND MAINTENANCE MANUAL Pag. 1 CONTENTS CHAP.1 INTRODUCTION......................3 CHAP.2 INSTALLATION ......................3 2.1 HANDLING AND UNPACKING ....................3 ELECTRICAL CONNECTION ................... 4 2.3 WATER CONNECTION....................... 4 CONNECTION TO THE DRAIN LINE ................5 2.5 OPERATIVE TEMPERATURE ADJUSTMENT ..............5 2.6 RINSE AID DISPENSER ADJUSTMENT(For dishwashers with hydraulic dispenser, only) ... - Page 3 USE AND MAINTENANCE MANUAL Pag. 2...
-
Page 4: Chap.1
USE AND MAINTENANCE MANUAL Pag. 3 CHAP.1 INTRODUCTION The warnings contained in this manual provide important information for safely installing, using and servicing this machine. The operator is required to read this manual before starting operation involving handling, installation, use, maintenance or disassembly of the machine. -
Page 5: Electrical Connection
USE AND MAINTENANCE MANUAL Pag. 4 ELECTRICAL CONNECTION 1. Connection to the power supply must be made with a main switch (H) it must be omnipolar and interrupt all contacts including neutral. There must be a distance of at least 3 mm between open contacts, and it must have a thermal magnetic safety switch or fuses which are able to withstand the maximum power indicated on the plate. -
Page 6: Connection To The Drain Line
USE AND MAINTENANCE MANUAL Pag. 5 Specification From French degrees Hardness German degrees 7’5 °dH English degrees °e Parts per million Residual Minerals Maximum 300/400 mg/l CONNECTION TO THE DRAIN LINE The tank empties by gravity, so the drain needs to be situated below the base of the machine. -
Page 7: Rinse Aid Dispenser Adjustment(For Dishwashers With Hydraulic Dispenser, Only)
USE AND MAINTENANCE MANUAL Pag. 6 Set washing tank temperature: Press A push-button several times until wording “ t ” “55” is displayed; then adjust it by means of G and L push-buttons. Once the temperatures have been set, just hold push-button A pressed to return to the previous condition. -
Page 8: Detergent Quantity Adjustment (Dishwasher With Detergent Dispenser, To Be Adjusted Via A Trimmer)
USE AND MAINTENANCE MANUAL Pag. 7 The above amounts are for water with a hardness of 5-10°F (French degrees). DETERGENT QUANTITY ADJUSTMENT (Dishwasher with detergent dispenser, to be adjusted via a trimmer) Adjustments: Turn trimmer (A) to define the switching on / switching off time, and consequently also the quantity of detergent to be used. -
Page 9: Chap.3 Safety Recommendations
USE AND MAINTENANCE MANUAL Pag. 8 In the second dial the display shows the set value in seconds; it is possible to increase or decrease the switching time through L and G push-buttons. Note: The point indicates ½ second. Rinse aid Once the detergent has been adjusted press push-button "A"... -
Page 10: Viewing The Number Of Washing Cycles Carried Out
USE AND MAINTENANCE MANUAL Pag. 9 VIEWING THE NUMBER OF WASHING CYCLES CARRIED OUT The number of washing cycles performed can be displayed. Just press push-button L for a few seconds and the display will show the figure, as indicated in the picture The display first shows thousands and hundreds, then tens and units. - Page 11 USE AND MAINTENANCE MANUAL Pag. 10 The boiler temperature did not reach the set point within the extension of “Er. Thermostop timeout the operating cycle washing phase. The boiler heating is disabled. 03” Contact the authorised service centre. Water level inside the washing tank not reached. Turn the machine off “Er.
-
Page 12: Chap.4 Use Of Machine
USE AND MAINTENANCE MANUAL Pag. 11 CHAP.4 USE OF MACHINE DESCRIPTION OF THE COMMANDS Push-button / warning Function Machine on / off push-button. Line warning light on. Washing temperature display. Rinse temperature display. Machine ready for use warning light. Automatic start enabled warning light. -
Page 13: Use Instructions
USE AND MAINTENANCE MANUAL Pag. 12 USE INSTRUCTIONS 1. To turn the machine on, press the button indicated left/right (the corresponding warning light will light up). 2. The machine is ready to use when the light comes on. (Red = heating in progress). -
Page 14: Automatic Water Drain In Tank (Optional)
USE AND MAINTENANCE MANUAL Pag. 13 To carry out washing cycles starting when hood is closed, press the indicated side key, and the corresponding warning light will come on. 4.2.1 AUTOMATIC WATER DRAIN IN TANK (OPTIONAL) Press button indicated left/right and select the drainage programme (the corresponding... -
Page 15: Final Operations
USE AND MAINTENANCE MANUAL Pag. 14 detergent and electricity only wash when the baskets are full, but do not overload them. Avoid stacking glassware. • WE RECOMMEND TO PRE-CLEAN the glassware in order to minimize maintenance. The quality of final wash results will be greatly improved by first removing food particles, lemon peels, toothpicks, olive pits, etc. -
Page 16: Chap.5 Maintenance
USE AND MAINTENANCE MANUAL Pag. 15 REMARK: Do not wash the equipment with direct jet or at another pressure because eventual infiltrations to the electric components may harm the regular working of the equipment or of the single safety systems, and penalty for this would be the loss of guarantee. -
Page 17: Chap.6 Recycling And Disposal
USE AND MAINTENANCE MANUAL Pag. 16 • Lime deposits and scale will build up on the inner surfaces of the boiler, tank and pipelines due to calcium and magnesium salts present in the water. These scales and deposits can prejudice proper apppliance operation.
Need help?
Do you have a question about the DS 901 and is the answer not in the manual?
Questions and answers