
Related Manuals for Pfaff Industrial 3819


Summary of Contents for Pfaff Industrial 3819
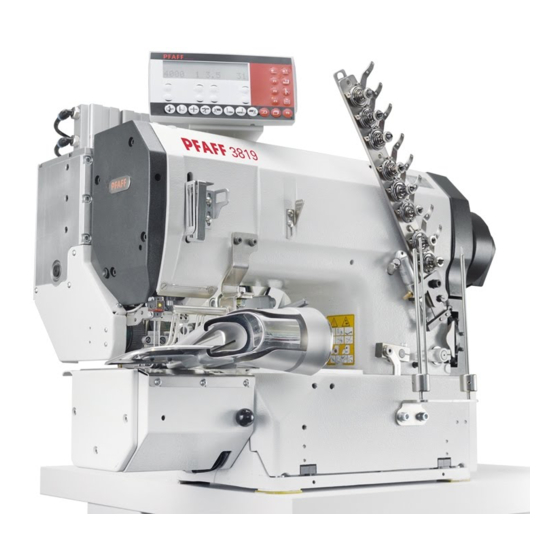
- Page 1 3819 -20/02 -40/01 ADJUSTMENT MANUAL This adjustment manual applies to machines from the following serial numbers onwards: # 2 808 742 296-12-19 291/002 Adjustment manual engl. 11.15...
- Page 2 Reprinting, reproduction and/or translation of PFAFF instruction manuals (including parts thereof) is only permitted with our prior agreement and citation of the source. PFAFF Industriesysteme und Maschinen GmbH Hans-Geiger-Str. 12 - IG Nord D-67661 Kaiserslautern...
-
Page 3: Table Of Contents
Table of Contents Contents ....................Page Adjustment ........................... 4 Notes on adjustment ......................4 Tools, gauges and other accessories ..................4 Abbreviations ......................... 4 Explanation of symbols ......................4 Adjusting basic machine ......................5 .05.01 Needle height (pre-calibrating) ....................5 .05.02 Hook driving eccentric (pre-calibrating) .................. -
Page 4: Adjustment
Adjustment Adjustment Observe and comply with all instructions in the operating manual's chapter 1 Safety! In particular make sure that all safety covers are installed again correct- ly after making adjustments, see chapter 1.06 Operating manual hazard infor- mation! Unless otherwise stated, the machine must be disconnected from the power supply before all adjustment work! Risk of injury due to accidental machine start-up! Notes on adjustment... -
Page 5: Adjusting Basic Machine
Adjustment Adjusting basic machine Needle height .05.01 (pre-calibrating) Rule When the needle bar is at t.d.c., the clearance between the needle point and needle plate should be approx. 12 mm with a needle bar stroke of 36 mm. 12 mm Fig. -
Page 6: Hook Driving Eccentric (Pre-Calibrating)
Adjustment Hook driving eccentric .05.02 (pre-calibrating) Rule When the needle bar is in b.d.c., the round side of the adjustment pin 1 (order no. 61-111 643-55) should engage in the groove 5. Fig. 13 - 02 Insert the adjustment pin 1 in the hole 2. ... -
Page 7: Feed Lifting Eccentric
Adjustment Feed lifting eccentric .05.03 Rule When the needle bar is in b.d.c., the groove 3 should be positioned vertically above the shaft 4. Fig. 13 - 03 Turn the eccentric 1 (screws 2) according to the rule. -
Page 8: Spreader Driving Eccentric
Adjustment Spreader driving eccentric .05.04 Rule 1. When the needle bar is in b.d.c., the groove 5 of the eccentric 1 should be positioned vertically above the shaft 3. 2. The spreader holder 4 should move 6 mm. Fig. 13 - 04 ... -
Page 9: Feed Driving Eccentric And Drive To Needle Bar Frame
Adjustment Feed driving eccentric and drive to needle bar frame .05.05 Rule When the needle bar is in b.d.c., 1. the groove 7 of the eccentric 1 should be positioned vertically above the shaft 5 and 2. the crank 3 should be positioned vertically to the shaft 6 Fig. -
Page 10: Feed Dog Position
Adjustment Feed dog position .05.06 Rule The feed dog 4 should move laterally and longitudinally in the centre of the needle plate recess at maximum stitch length. Fig. 13 - 06 Align the attachment 1 (screws 2 and 3) according to the rule. -
Page 11: Feed Dog Height
Adjustment Feed dog height .05.07 Rule When the needle bar is in b.d.c. and with maximum stitch length regulation, the front teeth of the feed dog 3 should be positioned 1.1 mm above the needle plate. Fig. 13 - 07 ... -
Page 12: Needle Position To Needle Hole
Adjustment Needle position to needle hole .05.08 Rule 1. The needle should pierce the middle of the needle hole crossways to the sewing direction. 2. When the needle bar is in b.d.c., there should be a clearance of 0.8 mm between the needle and the front edge of the needle hole. -
Page 13: Hook Position Crossways To Sewing Direction
Adjustment Hook position crossways to sewing direction .05.09 Rule The hooks 1 should be parallel to the needle plate recess 1. if the hook points are at the needle midpoint, 2. there should be a clearance of 0.1 mm between the hook point and the needle. 0.1 mm Fig. -
Page 14: Hook Position To Sewing Direction / Readjusting Hook Eccentric
Adjustment Hook position to sewing direction / readjusting hook eccentric .05.10 Rule When the needle bar is positioned 6.0 mm after b.d.c. and stitch length regulation is 6.0 mm, the hook point should be at the needle midpoint. Fig. 13 - 10 Setting the maximum stitch length ... -
Page 15: Readjusting Needle Height
Adjustment Readjusting needle height .05.11 Rule If the hook point aligns with the front of the needle at maximum stitch length coming from behind, the lower edge of the hook should be positioned 1.5 – 2 mm above the needle eye. Fig. -
Page 16: Spreader Position In Sewing Direction
Adjustment Spreader position in sewing direction .05.12 Rule 1. The spreader tip should be inclined approx. 45° downwards and be 11 mm away from the spreader holder. 2. The clearance between the tip of spreader 1 and the needle should be 4 mm with maximum stitch length regulation and the needle bar positioned in b.d.c. -
Page 17: Spreader Position Crossways To Sewing Direction
Adjustment Spreader position crossways to sewing direction .05.13 Rule 1. The tips of the spreader 1 should be 0.1 mm away from the hook at the side. 2. The tips of the spreader 1 should be positioned 0.1 mm above the back of the hook. 0.1 mm 0.1 mm Fig. -
Page 18: Needle Guard And Thread-Loop Support
Adjustment Needle guard and thread-loop support .05.14 Rule If the hook point is positioned at the needle midpoint coming from behind, the 1. guard 1 should rest gently on the needle and the lower edge of it should be posi- tioned 0.5 mm above the needle point. -
Page 19: Compensation Weight
Adjustment Compensation weight .05.15 Rule When the needle bar is in t.d.c., the largest eccentricity of the compensation weight 1 should be in the bottom position. Fig. 13- 15 Turn the compensation weight 1 (screw 2) according to the rule. -
Page 20: Feed Difference
Adjustment Feed difference .05.16 Rule The needle and bottom transporter should feed in the same way with maximum stitch length regulation and when turning the handwheel. Fig. 13 - 16 Adjust the connecting rod 1 (nut 2) according to the rule. ... -
Page 21: Clearance Between Presser Foot And Needle Plate
Adjustment Clearance between presser foot and needle plate .05.17 Rule There should be a clearance of approx. 11 mm between the presser foot 1 and needle plate when the presser foot 1 is raised. Fig. 13 - 17 Raise the presser foot 1 above the cylinder 2. ... -
Page 22: Needle Thread Regulation And Take-Up Lever Guard
Adjustment Needle thread regulation and take-up lever guard .05.18 Rule 1. When the needle bar is in b.d.c., there should be a clearance of approx. 1 mm be- tween the thread lever 8 and the take-up lever guard 1. 2. The thread lever 8 should be positioned centrally to the take-up lever guard 1 looking from the side. -
Page 23: Looper Thread Regulation
Adjustment Looper thread regulation .05.19 Rule 1. The clearance between the thread puller 1 in its upper turning point and the upper edge of the bed plate should be 28 mm with maximum stitch length regulation. 2. The eyes of the thread puller 3 should align with the eyes of the thread puller 1. Fig. -
Page 24: Stitch Length Limitation
Adjustment Stitch length limitation .05.20 Rule The stop element 1 should rest on the stop 3 at the desired stitch length. Fig. 13 - 20 Turn the stop element 1 (screws 2) according to the rule. -
Page 25: Puller: Roller Clearance Setting
Adjustment Puller: roller clearance setting .05.21 Rule The puller rollers should be positioned 0.2 mm above the sewing table or roller in b.d.c. They are adjusted via the nuts 1 on the piston rod of the pneumatic cylinder. Fig. 13 - 21 ... -
Page 26: Pressure Tank
Adjustment Pressure tank .05.22 Rule The operating pressure of the pressure tank 1 for the puller roll on the left and right should be set to 1.5 bar. Different pressure settings can infl uence the sewing result. Fig. 13- 22 ... -
Page 27: Cutting Unit
Adjustment Cutting unit .05.23 Rule The cutting blade 1 should be positioned 5 mm below the stationary blade 2 in b.d.c. Fig. 13 - 23 Turn the piston rod and the nut 4 on the piston rod according to the rule. The switching time for the cut is controlled via software using parameter 404 depending on the tape width. -
Page 28: Skip Stitch System
Adjustment Skip stitch system .05.24 Rule The function of the skip stitch system is effected by a sewing sample. An off-size setting of the basic adjustment is possible. Fig. 12 - 24 Loosen the screws 1 and move the adjustment elements 2 and 3 accordingly. -
Page 29: Pleating Attachment
Adjustment Pleating attachment .05.25 Rule The pleating attachment should be adjusted according to the sewing result. Fig. 13 - 25 Adjust or turn the pleating attachment with the screws 1, 2 and 3. Adjust the stop 4 with the screws 5. -
Page 30: Circuit Diagrams
Circuit Diagrams Circuit Diagrams Circuit diagrams Reference list for the circuit diagrams 91-191 597-95 Controlbox P320ED Control panel BDF- S3 OTE Sewing head recognition system Skip Stich Light barrier Cutter Light barrier Sewing motor Stepping motor Puller Main Switch Mains plug Control panel BDF S3 Sewing head recognition system (OTE) Incremental transmitter (sewing motor) - Page 31 Circuit Diagrams Stromlaufplan Version 12.02.16 91-191 597-95 Teil 1...
- Page 32 Circuit Diagrams 91-191 597-95 Teil 2 Version 12.02.16 Stromlaufplan...
- Page 33 Circuit Diagrams Stromlaufplan Version 12.02.16 91-191 597-95 Teil 3...
- Page 34 Circuit Diagrams 91-191 597-95 Teil 4 Version 12.02.16 Stromlaufplan...
- Page 35 Notes...
- Page 36 PFAFF Industriesysteme und Maschinen GmbH Hans-Geiger-Str. 12 - IG Nord D-67661 Kaiserslautern Telefon: +49 - 6301 3205 - 0 Telefax: +49 - 6301 3205 - 1386 E-mail: info@pfaff-industrial.com Gedruckt in der BRD / Printed in Germany / Imprimé en la R.F.A. / Impreso en la R.F.A...
Need help?
Do you have a question about the 3819 and is the answer not in the manual?
Questions and answers