
Related Manuals for Pfaff Industrial 3371-1/01


Summary of Contents for Pfaff Industrial 3371-1/01
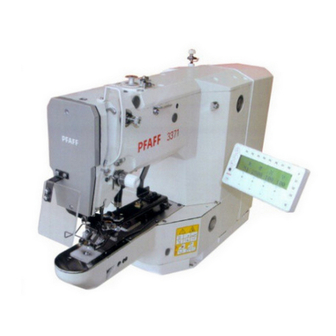
- Page 1 3371 -1/.. SERVICE MANUAL This service manual applies to machines from serial number 2 780 933 and software version 0335/022 onwards 296-12-18 982/002 Justieranleitung engl. 01.11...
- Page 2 The reprinting, copying or translation of PFAFF Service Manuals, whether in whole or in part, is only permitted with our previous authorization and with written reference to the source. PFAFF Industriesysteme und Maschinen AG Hans-Geiger-Str. 12 - IG Nord D-67661 Kaiserslautern...
-
Page 3: Table Of Contents
Index Contents ................Page Adjustment ........................... 4 Notes on adjustment ......................4 Tools, gauges and other accessories for adjusting ............... 4 Abbreviations ......................... 4 Explanation of the symbols ....................4 Basic position of the machine ....................5 Work clamp zero point ......................6 Aligning the work clamp ...................... -
Page 4: Adjustment
Adjustment Adjustment Please observe all notes from Chapter 1 Safety of the instruction manual! In particular care must be taken to see that all protective devices are refi tted properly after adjustment, see Chapter 1.06 Danger warnings of the instruc- tion manual! If not otherwise stated, the machine must be disconnected from the electrical power supply. -
Page 5: Basic Position Of The Machine
Adjustment Basic position of the machine Requirement After being switched on the machine should position approx. 3 – 4 mm before t.d.c. take-up lever. 3,5 mm Fig. 1 - 01 ● Switch on the machine. ● Press the TE key. ●... -
Page 6: Work Clamp Zero Point
Adjustment Work clamp zero point Requirement After the machine ahs been switched on and parameter "608" selected, 1. the needle should be centred to the hole in the adjustment gauge, 2. the switch lugs 2 and 4 should be centred to the respective initiator. Fig. - Page 7 Adjustment Fine adjustment ● Switch on the machine. ● In the input mode, select parameter "608", see Chapter 11.03 Parameter input in the instruction manual. ● If necessary, enter the access code, see Chapter 11.04.01 Entering the access code in the instruction manual.
-
Page 8: Aligning The Work Clamp
Adjustment Aligning the work clamp Requirement The work clamp should be aligned in "X" and "Y" direction, so that it does not touch the needle during sewing. Fig. 1 - 03 ● Switch on the machine. ● Set the sewing area size (see Chapter 9.07 Adjusting the size of sewing area in the in- struction manual) ●... - Page 9 Adjustment Checking the "Y-direction" ● To check this adjustment, move along the maximum set sewing area size in "Y-direction" by pressing the corresponding plus/minus keys (readjust if necessary). ● Call up parameter "609". Checking the "X-direction" ● Move along the maximum set sewing area size in "X-direction" by pressing the corresponding plus/minus keys.
-
Page 10: Hook Driver
Adjustment Hook driver Requirement 1. When the balance wheel is turned, the machine should not bind. 2. The play of catch 7 should be less than 0.1 mm. Fig. 1 - 04 ● Remove the hook. ● Loosen screws 1, 2 and 3 (remove motor 4). ●... -
Page 11: Preadjusting The Needle Height
Adjustment Preadjusting the needle height Requirement With the needle bar in b.d.c., the upper marking on the needle bar 1 should be fl ush with the lower edge of the needle bar bush. Fig. 1 - 05 ● Adjust needle bar 1 (screw 2) in accordance with the requirement. -
Page 12: Hook-To-Needle Clearance
Adjustment Hook-to-needle clearance Requirement With the needle at 2.4 mm after BDC, 1. the hook 5 should be 0.05 – 0.1 mm behind the needle, 2. the top edge of the needle eye must be 0.8 mm below the hook point and 3. -
Page 13: Needle Rise And Needle Guard
Adjustment Needle rise and needle guard Requirement With the needle at 2.4 mm after BDC, 1. the hook point should be centred to the needle and 2. the needle guard (see arrow) should slightly touch the needle. Fig. 1 - 07 ●... -
Page 14: Aligning The Hook Race Cover
Adjustment Aligning the hook race cover Requirement The needle should be centred to cutout B and the rear side of the needle fl ush to the imaginary line A. Fig. 1 - 08 ● Move the hook race cover 1 (screws 2) in accordance with the requirement. -
Page 15: Work Clamp Height
Adjustment Work clamp height Requirement 1. The work clamp should be 13 mm above the upper edge of the needle plate. 2. Both halves of the work clamp should be parallel to each other. 13 mm Fig. 1 - 09 ●... -
Page 16: Position Of The Thread Wiper
Adjustment Position of the thread wiper Requirement When the thread wiper is centred to the needle, its lower edge should be 14 – 15 mm above the upper edge of the needle plate. 14 - 15 mm Fig. 1 - 10 ●... -
Page 17: Position Of The Control Cam
Adjustment Position of the control cam Requirement 1. The markings on control cam 1 and arm shaft 3 should correspond with each other. 2. The outer edge of control cam 1 should be at a distance of 32.5 mm from the metal surface of the case. -
Page 18: Position Of The Control Roller
Adjustment Position of the control roller Requirement When the needle bar is at its b.d.c., the control roller should be centred to the running path of control cam 2. Fig. 1 - 12 ● Turn screw 3 (nut 4) in accordance with the requirement. ●... -
Page 19: Position Of The Drive Shaft Of The Thread Trimmer
Adjustment Position of the drive shaft of the thread trimmer Requirement When the thread trimmer is in its basic position, shaft 1 should be fl ush with the metal edge of the machine case. Fig. 1 - 13 ● Move shaft 1 (screws 2 and 3) in accordance with the requirement. -
Page 20: Aligning The Stop Plate
Adjustment Aligning the stop plate Requirement When the thread trimmer is in its basic position, there should be a clearance of 0.3 mm between lever 3 and plate 1. Fig. 1 - 14 ● Move plate 1 (screws 2) in accordance with the requirement. -
Page 21: Adjusting The Trimmer Solenoid
Adjustment Adjusting the trimmer solenoid Requirement When the thread trimmer is in its neutral position, solenoid 1 should be at a distance of 5 mm from the case. 5 mm Fig. 1 - 15 ● Turn nut 1 (nut 2) in accordance with the requirement. -
Page 22: Adjusting The Engaging Lever
Adjustment Adjusting the engaging lever Requirement When the thread trimmer is in its neutral position, pin 3 should be at a distance of 0.5 mm from release trip 4. 0,5 mm Fig. 1 - 16 ● Move lever 1 (screws 2) in accordance with the requirement. -
Page 23: Position Of The Thread Catcher And Knife
Adjustment Position of the thread catcher and knife Requirement When the machine is in its basic position 1. the tip of the thread catcher 1 should be at a distance of 4.5 mm from the centre of the needle hole. 2. -
Page 24: Position Of The Release Trip
Adjustment Position of the release trip Requirement The slots of trip 1 should be touching screws 2 on the right side. Fig. 1 - 18 ● Move trip 1 (screws 2) in accordance with the requirement. If the needle thread is too short after trimming, trip 1 can be slightly readjusted. -
Page 25: Position Of The Release Catch
Adjustment Position of the release catch Requirement When lever 6 is touching release catch 7, there should be a distance of 0.3 mm between drive lever 5 and pin 1. Fig. 1 - 19 ● Turn the balance wheel until pin 1 is no longer on the release trip 2. ●... -
Page 26: Needle Thread Tension Release
Adjustment Needle thread tension release Requirement After thread trimming the distance X between tension discs 3 should be 0.6 – 0.8 mm for normal materials and 0.8 – 1.0 mm for heavy materials. Fig. 1 - 20 ● Bring the machine into the cutting position by hand. ●... -
Page 27: Thread Check Spring And Thread Regulator
Adjustment Thread check spring and thread regulator Requirement 1. The thread check spring 1 should have a 6 – 8 mm stroke. 2. Screw 4 should be positioned in the centre of the slot of thread regulator 3. Fig. 1 - 21 ●... -
Page 28: Bobbin Winder Drive Wheel
Adjustment Bobbin winder drive wheel Requirement 1. The should be a distance of approx. 40 mm between drive wheel 1 and the metal edge of the machine case. 2. When the bobbin winder is switched on, its friction wheel should be driven by drive wheel 1. -
Page 29: Work Clamp Initiator
Adjustment Work clamp initiator Requirement When the work clamp is lowered and shortly before lever 5 in the machine arm touches stop 6, the initiator should switch on (input "3" parameter "601" is positioned at "off"). Fig. 1 - 23 ●... -
Page 30: Changing The Work Clamp
Adjustment Changing the work clamp Fig. 1 - 24 ● Measure the cutout of the new work clamp in X- and Y-direction. ● Adjust the sewing area size as described in Chapter 9.07 of the instruction manual. ● Fit the new work clamp and align it in as described in Chapter 15.07. ●... -
Page 31: Cold Start
Adjustment Cold start When a cold start is carried out, the seam patterns 50 – 99 and all altered parameter settings are deleted! The machine is reset to its condition on delivery, the machine’s zero points remain unaffected. ● Switch on the machine. ●... -
Page 32: Internet Update Of The Machine Software
Adjustment Internet update of the machine software The machine software can be updated with PFAFF fl ash programming. For this purpose the PFP boot program and the appropriate control software for the machine type must be instal- led on a PC. To transfer the data to the machine, the PC and the machine control unit must be connected with an appropriate null modem cable (part no. -
Page 33: List Of Parameters
Adjustment List of parameters The parameter setting values my only be altered by appropriately trained staff! Group Parameter Description Setting Set value Gruppe Parameter Bedeutung range Maximum speed 500 - 2700 2700 This parameter is used to fi x the max. sewing speed (upper limit). - Page 34 Adjustment Group Parameter Description Setting Set value Gruppe Parameter Bedeutung range Reversing after thread trimming ON - OFF Reverse position [°] 0 - 14 With this parameter it is possible to switch the automatic reversing func- tion after thread trimming on or off. If the reversing function is switched on, the reverse position can be set by tur- ning the balance wheel.
- Page 35 Adjustment Group Parameter Description Setting Set value Gruppe Parameter Bedeutung range NIS "needle in material" [°] 65 -166 This parameter is used to set the NIS signal. If the function is executed, the position can be entered by turning the balance wheel.
- Page 36 Adjustment Group Parameter Description Setting Set value Gruppe Parameter Bedeutung range Thread take-up lever t.d.c. [°] 45 - 53 The position for the t.d.c. thread take- up lever is entered here. If the func- tion is executed, the position can be set by turning the balance wheel.
- Page 37 Adjustment Group Parameter Description Setting Set value Gruppe Parameter Bedeutung range Display inputs With this function the digital inputs can be checked. "IN" shows the input numbers (1 - 16). Under "VAL" the re- spective switch status is displayed. IN1, programmable input 1 IN2, programmable input 2...
- Page 38 Adjustment Group Parameter Description Setting Set value Gruppe Parameter Bedeutung range Connect outputs With this function the outlets can be connected. "OUT" shows the outlet selected (1-16). Under "VAL" the selected output is set (S) with the plus/minus key (+), and reset (R) with the plus/minus key.
- Page 39 Adjustment Group Parameter Description Setting Set value Gruppe Parameter Bedeutung range Thread trimming sequence The sequence for a complete thread trimming cycle is started with the +/- key (+) below CUT and below THR. Cold start (RESET) With this function the control unit carries out a cold start (RESET) with which the data is reset.
-
Page 40: Error Messages On The Display
Adjustment Group Parameter Description Setting Set value Gruppe Parameter Bedeutung range Automatic clamp opening off ON - OFF With this function the automatic ope- ning of the clamp after thread trim- ming can be switched off. After the machine has been switched off, the automatic clamp opening function is always activated. - Page 41 Adjustment ERROR: 5 Processor error ILLEGAL_WORD_OPERAND ERROR: 6 Processor error ILLEGAL_INSTRUCTION ERROR: 7 Processor error ILLEGAL_BUS_ACCESS ERROR: 8 Processor error NMI ERROR: 10 OTE (Sewing head recognition unit) not attached ERROR: 11 OTE not programmed (new) ERROR: 12 OTE check sum error ERROR: 13 OTE header invalid ERROR: 14...
-
Page 42: Sewing Motor Errors
Adjustment ERROR: 409 Zero point not found ERROR: 416 Error in SD-memory card reader 1: No SD-memory card inserted 2: Wrong SD-memory card (does not match the machine) 3: SD-memory card not inserted correctly 4: SD-memory card with write protection 5: Data error on SD-memory card 6: Formatting failed 7: File does not match machine... -
Page 43: Circuit Diagrams
Circuit diagrams Stromlaufpläne Circuit diagrams Circuit diagram reference list Controller P 320MS Control panel S3A Sewing head recognition system (OTE) Hybrid light barrier Y axis Hybrid light barrier X axis Hybrid light barrier clamp monitoring Sewing lamp Sewing motor Sewing motor Y axis Sewing motor X axis Main switch Pedal speed control unit... - Page 44 91-191 506-95 Circuit diagrams Version 07 .07 .06 Page 1...
- Page 45 Circuit diagrams 91-191 506-95 Version 07 .07 .06 Page 2...
- Page 46 91-191 506-95 Circuit diagrams Version 07 .07 .06 Page 3...
- Page 47 Circuit diagrams 91-191 506-95 Version 07 .07 .06 Page 4...
- Page 48 PFAFF Industriesysteme und Maschinen AG Hans-Geiger-Str. 12 - IG Nord D-67661 Kaiserslautern Phone: +49 - 6301 3205 - 0 Fax: +49 - 6301 3205 1386 E-mail: info@pfaff-industrial.com Hotlines: Technical service: +49 - 175/2243-101 Application consultance: +49 - 175/2243-102 Spare-parts hotline: +49 - 175/2243-103 Printed in Germany...
Need help?
Do you have a question about the 3371-1/01 and is the answer not in the manual?
Questions and answers