
Related Manuals for Pfaff Industrial 1163


Summary of Contents for Pfaff Industrial 1163
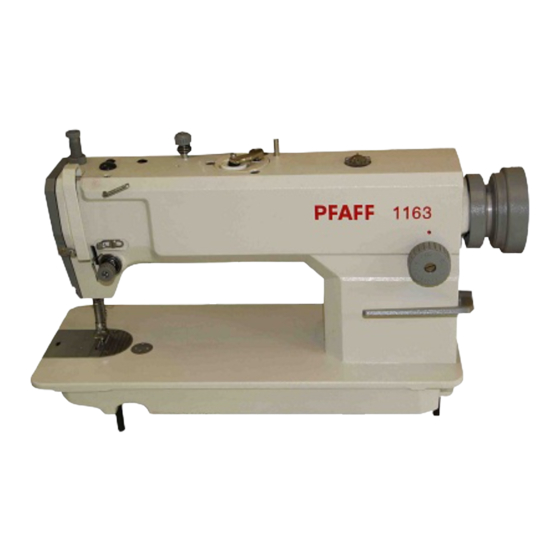
- Page 1 1163 ADJUSTMENT MANUAL This Adjustment Manual is valid for machines from the following serial numbers onwards: # 6 001 000 296-12-19 175/002 Justieranleitung engl. 03.12...
- Page 2 The reprinting, copying or translation of PFAFF Service Manuals, whether in whole or in part, is only permitted with our previous authorization and with written reference to the source. PFAFF Industriesysteme und Maschinen AG Hans-Geiger-Str. 12 - IG Nord D-67661 Kaiserslautern...
-
Page 3: Table Of Contents
Needle thread tension release ..................... 16 Adjusting the thread wiper -909/93 ..................17 Adjusting the automatic presser foot lift -910/93 ..............18 Adjusting the backtacking mechanism -911/93 ..............19 Parameter settings (for MH-4-7W-215-CE ) ................. 20 Block diagram PFAFF 1163 with MH-4-7W-215-CE ............21... -
Page 4: Adjustment
Adjustment Adjustment Please observe all notes from Chapter 1 Safety of the instruction manual! In particular care must be taken to see that all protective devices are refi tted properly after adjustment, see Chapter 1.06 Danger warnings of the instruction manual! If not otherwise stated, the machine must be disconnected from the electrical power supply. -
Page 5: Adjusting The Basic Machine
Adjustment Adjusting the basic machine Pre-adjusting the needle height .05.01 Requirement With the needle bar at TDC, the distance between the needle point and the needle plate must be 16 mm. 16 mm Fig. 5 - 01 ● Without twisting it, adjust needle bar 1 (screw 2) in accordance with the requirement. -
Page 6: Setting The Bottom Feed Dog At Its Neutral Position
Adjustment Setting the bottom feed dog at its neutral position .05.02 Requirement With the stitch length set at "0", cranks 1 and 3 should be in alignment, and there should be no feeding motion of the bottom feed dog when the balance wheel is turned. 76-026 Fig. -
Page 7: Bottom Feed Dog Motion
Adjustment Bottom feed dog motion .05.03 Requirement 1. When the needle bar is at its t.d.c., the bottom feed dog should be in its top point of reversal when the stitch length is set at "0". 2. When the needle bar is positioned 0.6 after t.d.c. and the largest stitch length is set, the bottom feed dog should not move when the reverse feed switch 3 is operated. -
Page 8: Bottom Feed Dog Position
Adjustment Bottom feed dog position .05.04 Requirement When the stitch length is set at "0" and the bottom feed dog 5 is at t.d.c., it should 1. Be positioned in the centre of the needle plate cutout in the feeding direction. 2. -
Page 9: Needle Rise, Hook Clearance, Needle Height And Bobbin Case Position Fi Nger
Adjustment Needle rise, hook clearance, needle height and bobbin case position fi nger .05.05 Requirement When the needle bar is positioned 1.8 mm above BDC, 1. the point of hook 1 should be centred to the needle and at a distance of 0.04 – 0.10 mm from the groove of the needle, and 2. -
Page 10: Thread Check Spring And Thread Regulator
Adjustment Thread check spring and thread regulator .05.06 Requirement 1. 1. The movement of the thread check spring should be completed, when the needle point penetrates the material (spring stroke approx. 7 mm). 2. 2. When the thread is being looped round the hook and the loop is at its largest, the thread check spring should have moved approx. -
Page 11: Knee Lever Stop
Adjustment Knee lever stop .05.07 Requirement When knee lever 3 has been moved as far as possible, the presser foot should rise approx. 9 mm above the needle plate. Fig. 5 - 07 ● Adjust screw 1 (nut 2) in accordance with the requirement. -
Page 12: Presser Foot Pressure
Adjustment Presser foot pressure .05.08 Requirement The material should be fed without diffi culty at all times and there should be no sign of pressure marks on the material. Fig. 5 - 08 ● Adjust milled screw 1 (milled nut 2) in accordance with the requirement. -
Page 13: Adjusting The Thread Trimmer -900/93
Adjustment Adjusting the thread trimmer -900/93 Adjusting the synchronizer .06.01 Requirement 1. When the machine has stopped it should be positioned in b.d.c. needle bar. 2. After thread trimming the machine should be positioned in t.d.c. take-up lever. Fig. 5 - 09 ●... -
Page 14: Adjusting The Control Cam
Adjustment Adjusting the control cam .06.02 Requirement When the take-up lever is at its t.d.c., the cutting operation should have been concluded (roller lever is pushed out of the control cam). Fig. 5 - 10 ● Adjust control cam 1 (screws 2) in accordance with the requirement. Make sure that the control cam 1 is touching retaining collar 3, when the screws 2 are tightened! -
Page 15: Position Of The Stationary Knife
Adjustment Position of the stationary knife .06.03 Requirement The centre of the stationary knife 1 should be at needle hights and should have a distance of 3.5 mm . Fig. 5 - 11 ● Adjust stationary knife 1 (screws 2) in accordance with the requirement. For technical reasons it may be necessary to alter the specifi... -
Page 16: Needle Thread Tension Release
Adjustment Needle thread tension release .06.04 Requirement When magnets 3 are attracted, there should be a distance between the tension disks 4 of at least 0.5 mm. 0,5 mm Fig. 5 - 12 ● Adjust tension cable 1 (nuts 2) in accordance with the requirement. -
Page 17: Adjusting The Thread Wiper -909/93
Adjustment Adjusting the thread wiper -909/93 Requirement 1. During its movement thread wiper 1 should not have any contact. 2. When the take-up lever is at its t.d.c., and the thread wiping device is switched on, the thread wiper 1 should pass behind the needle point with a clearance of approx. 1 mm and under it with a clearance of approx. -
Page 18: Adjusting The Automatic Presser Foot Lift -910/93
Adjustment Adjusting the automatic presser foot lift -910/93 Requirement When the automatic presser foot lift is operated, the presser foot should be 9 mm above the needle plate. Fig. 5 - 14 ● Adjust shaft 1 (screw 2) in accordance with the requirement. -
Page 19: Adjusting The Backtacking Mechanism -911/93
Adjustment Adjusting the backtacking mechanism -911/93 Requirement When the reverse feed switch 3 (reverse sewing) is operated, the stitch length should be the same as during sewing. Fig. 5 - 15 ● Adjust solenoid 1 (screws 2) in accordance with the requirement. -
Page 20: Parameter Settings (For Mh-4-7W-215-Ce )
Adjustment Parameter settings (for MH-4-7W-215-CE ) ● Parameter settings are described in the separate operations manual for the drive, and may only be changed by qualifi ed technicians! -
Page 21: Block Diagram Pfaff 1163 With Mh-4-7W-215-Ce
Block diagram Version 08.01.10 Block diagram PFAFF 1163 with MH-4-7W-215-CE 1163 Synchronizer Control panel C 200 - 2.0 Speedcontrolunit Control unit Power switch Mains plug... - Page 22 PFAFF Industriesysteme und Maschinen AG Hans-Geiger-Str. 12 - IG Nord D-67661 Kaiserslautern Phone: +49 - 6301 3205 - 0 Fax: +49 - 6301 3205 1386 E-mail: info@pfaff-industrial.com Hotlines: Technical service: +49 - 175/2243-101 Application consultance: +49 - 175/2243-102 Spare-parts hotline: +49 - 175/2243-103 Printed in Germany...
Need help?
Do you have a question about the 1163 and is the answer not in the manual?
Questions and answers