
Subscribe to Our Youtube Channel
Related Manuals for Strong SRT 497S


Summary of Contents for Strong SRT 497S
- Page 1 DIGITAL HIGH DEFINITION SATELLITE TV RECEIVER & RECORDER USER MANUAL www.stronghd.tv...
-
Page 2: Table Of Contents
CONTENTS CONTENTS ..........................2 Safety inductions ........................4 Unpacking and setup hardware ....................5 Remote Control Unit ....................... 6 Installation guide ........................7 How to add or delete satellite? ..................7 How to setup a USALS Motorized System ................. 7 How to setup DiSEqC 1.2 System .................. - Page 3 No signal on the HDTV ......................26 Cannot connect to network ..................26 Some HDTV cannot display the entire picture ............26 The remote control does not work ................26 No picture or sound ...................... 27...
-
Page 4: Safety Inductions
Safety inductions It is recommended to read this User's Manual before starting the operation of the receiver. 2. Do not touch power cord with wet hands as it may cause electric shock. 3. Never open the cover. It is very dangerous to touch the inside of the unit due to the possibility of an electric shock. -
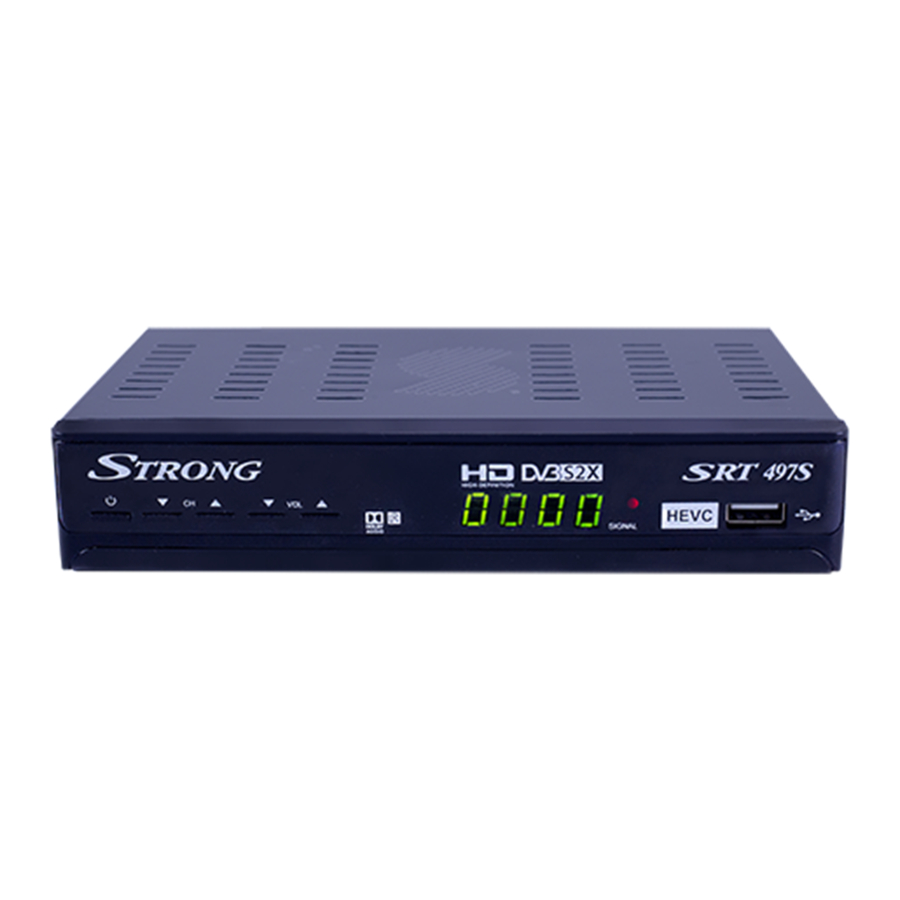
Page 5: Unpacking And Setup Hardware
Unpacking and setup hardware Below pictures show how our product looks like and the way the hardware is installed. Front panel Rear panel NOTICE: The pictures are for references only; please consider the object as the standard. Hardware Installation As shown, connect the interfaces on your television with the corresponding interfaces... -
Page 6: Remote Control Unit
Remote Control Unit... -
Page 7: Installation Guide
Installation guide This receiver is preinstalled with Satellites. After turning on the receiver follow the first installation , guide to choose preferred menu language, HDMI output resolution, screen size and configure internet connection through Ethernet or Wi-Fi. Also, the first Installation guide helps you to search satellite TV / Radio channel manually, load backup channel list from USB / SD card storage or load channel list from internet. -
Page 8: How To Setup Diseqc 1.2 System
How to setup DiSEqC 1.2 System 1. Press MENU button on the remote to display the main menu. 2. Go to the first line (DVB-S2X Installation) and move to right, choose ‘’Motorized Setting‘’, press button, to display the “Motorized setting” menu. 3. -
Page 9: Auto Scan
Auto Scan 1. Press MENU button on the remote to display the main menu. 2. Go to the first line(DVB-S2X Installation) and move to right , select “Auto Scan” and press button, the “Auto Scan” menu will be displayed. 3. Using the button on the remote to select satellite. -
Page 10: Blind Scan
Blind Scan 1. Press MENU button on the remote to display the main menu. 2. Go to the first line(DVB-S2X Installation) and move to right select “Blind Scan” and press , button, the “Blind Scan” menu will be displayed. 3. Using the button on the remote to select satellite. -
Page 11: Channel Manager
Channel Manager Notes: The default password is 0000 for this media box. 1. Press MENU button on the remote to display the main menu. Choose the “Channel Manager” and press button, the password input dialog will ◀/▶/ disappeared, Input the password “0000”. Select the operation you want to do press button on the remote... - Page 12 Move Channels Select the channel you want to move, press button to mark the channel. You can choose more than one channel. Press INFO button to start move, using the ▲/▼ button to select a new position then press OK to move the marked channels to this position.
- Page 13 Skip Channels Select the channel you need to skip, press button on the remote. Delete Channels Select the channel you need to delete, press button on the remote.
- Page 14 Set Channels Select the favorite group you want to add channels to, press button on the remote, the channels list will displayed. Press OK button to add channels to the favorite group. Add Channels After you edit the information of the channel, press YELLOW button to save.
-
Page 15: Channel Selection
When you are done with all this operation, please select “YES” in the dialog to save. Channel Selection If you know the channel number, enter the channel number by using numeric buttons on the ■ remote and wait for 1 second until the selected channel is displayed. Then if you press button, channel list will be displayed. -
Page 16: Epg (Electronic Program Guide)
PAGE: Move page up / page down. - RED Display all channels / FTA channels / CAS channels / HD channels in current satellite. - GREEN ): To find channel by input channel name. - YELLOW Display channels sorted by NAME/FREE/SCRAMBL/LOCK/TP, etc. - BLUE Display channels sorted by alphabetical order. -
Page 17: Conditional Access
Conditional Access 1. Press MENU button on the remote to display the main menu. 2. Go to the last line (Conditional Access), show the Conditional Access items. Note: The default pin is 000000 for the media box. Watching Level Set 1. - Page 18 press OK button on the remote. 3. Enter the pin, use button on the remote to change Watching Level. ◀/▶ 4. Move the highlighter to the OK button press OK button on the remote. , Password Modify 1. Press MENU button on the remote to display the main menu.
- Page 19 Product Accredit Info 1. Press MENU button on the remote to display the main menu. 2. Go to the last line(Conditional Access) and move to right select “Product Accredit Info” and , press OK button. The product accredit information will show. Email 1.
-
Page 20: System Setting
System Setting Language Settings 1. Press MENU button on the remote to display the main menu. 2. Go to the “System” and move to right select “language” and press OK button , 3. Use button on the remote to change language. We can change the language one by one, ◀/▶... -
Page 21: Time Setting
Time Setting This submenu arrows you to set your local time 1. Press MENU button on the remote to display the main menu. 2. Go to the “System” and move to right , select “Local Time Setting” and press button, the “Local Time Setting”... -
Page 22: Factory Setting
Factory Setting Notes: The default password is 0000 for this media box. 1. Press MENU button on the remote to display the main menu. 2. Go to the “System” and move to right , select “Factory Setting” . 3. Press button then input the password, choose the “Yes”... -
Page 23: Parental Lock
Parental Lock 1. Press MENU button on the remote to display the main menu. 2. Go to the “System” and move to right select “Parental Lock” and press button, the “Parental , Lock” menu will be displayed. Menu Lock: Lock the “channel manager” menu or not. Channel Lock: Set the channel lock. -
Page 24: Usb Upgrade
USB Upgrade 1. Insert USB Memory Stick to USB port. 2. Press MENU button on the remote to display the main menu. 3. Go to the “System” and move to right , select “USB Upgrade” and press button, the “USB Upgrade”... -
Page 25: Usb Backup
USB Backup 1. Insert USB Memory Stick to USB port. 2. Press MENU button on the remote to display the main menu. 3. Go to the “System” and move to right select “USB Backup” and press button, the “USB , Backup”... -
Page 26: Troubleshooting
Troubleshooting No signal on the HDTV Check if the HDMI cable is securely connected. Check if you have selected the correct HDMI input on your HDTV. Check the antenna cable, replace the cable, or connect the cable to the receiver tightly. ... - Page 27 remote control. Make sure no objects block the path between the remote control and the signal sensor your receiver. Make sure the distance between the remote control and your receiver is no more than 5 meters. Check the power of your batteries, in case it is depleted, please get them replaced with ...
- Page 28 RECEPTEUR & ENREGISTREUR DE TELEVISION NUMERIQUE PAR SATELLITE DE HAUTE DEFINION www.stronghd.tv...
Need help?
Do you have a question about the SRT 497S and is the answer not in the manual?
Questions and answers
How to use it
To use the Strong SRT 497S, follow these steps:
1. Setup the Hardware
- Connect the decoder to your TV using an HDMI or AV cable.
- Attach the dish and LNB, ensuring proper alignment.
- Plug in the power adapter and turn on the device.
2. Initial Configuration
- Follow on-screen instructions to set up language, time, and network connections.
- Use the auto or manual channel search function to scan for available satellite channels.
3. Using the Features
- Insert a USB storage device to enable recording and time-shift functions.
- Connect a Wi-Fi adapter or 3G modem to access network features.
- Navigate channels using the remote control.
4. Troubleshooting
- If there is no signal, check cable connections and dish alignment.
- If the remote isn't working, replace the batteries.
- Ensure the TV is set to the correct input source.
5. Safety Guidelines
- Do not touch the power cord with wet hands.
- Keep the unit in a well-ventilated area.
- Unplug the device if not in use for a long time.
For any issues, consult the user manual or contact a local service center.
This answer is automatically generated