Table of Contents
Advertisement
Advertisement
Table of Contents

Related Manuals for PS Audio Stellar Strata


Summary of Contents for PS Audio Stellar Strata
- Page 1 Owner’s Reference Stellar Strata Amplifier ™ ®...
-
Page 2: Table Of Contents
Table of Contents Stellar Strata Amplifier ® Safety Information Introduction Thank You Contact Information Symbols Found On the Stellar Strata Getting Started 5-12 Included With the Stellar Strata The Remote Front Panel View Rear Panel View Installation Considerations Plugging In The Power Cable... - Page 3 Table of Contents Stellar Strata Amplifier ® Menu Features Balance Phase Filter Version Audio Sub Menu Input Names Volume Trim Headphone Trim Speaker Maximum Volume Analog 3 Fixed Volume System Sub Menu Trigger Delay Backlight Display Timeout Display Metadata PS Audio Access...
-
Page 4: Safety Information
® Do not remove or bypass the ground pin on the end of the AC cord. All PS Audio products ship with a grounding-type plug. If the provided plug does not fit into your outlet, consult an electrician for replacement of the obsolete outlet. -
Page 5: Introduction
Operator’s Guide, intended to provide a full overview of the Stellar Strata Amplifier’s functions and capabilities. It is our intention to provide you with full details about the Stellar Strata Amplifier and to answer any and all questions you may have. If you have additional questions or concerns that are not addressed in this guide, please contact us and we will be happy to assist you. -
Page 6: Getting Started
Getting Started Stellar Strata Amplifier ®... -
Page 7: The Remote
Getting Started Stellar Strata Amplifier ® Included With • 6-foot Power Cable The Stellar • Owner’s Reference Manual Strata • Remote Control • 2 AAA batteries The Remote The Off button. This turns the Strata off. Fixed Volume Button (Home Theater). This toggles Fixed Volume mode on or off. -
Page 8: Front Panel View
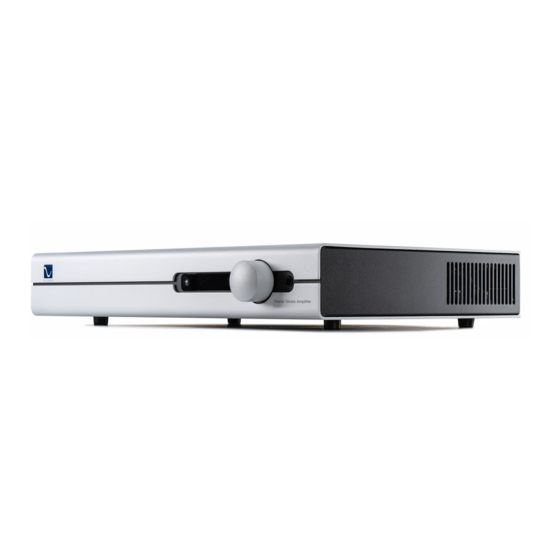
Getting Started Stellar Strata Amplifier ® Front Panel View Logo/ Power On/Off Button Input Select and Menu Button IR sensor Display Volume Knob Headphone Output... -
Page 9: Rear Panel View
Getting Started Stellar Strata Amplifier ® Left analog output Rear Panel View Power switch Single ended analog input (# 3) IEC inlet Single ended analog input (# 2) USB firmware port Single ended analog input (# 1) Network input (# 9) -
Page 10: Installation Considerations
® Power Cable unit to AC power. For best results, we strongly recommend the use of a PS Audio PerfectWave Power AC cable, or any high-quality aftermarket power cable. It is always preferable to feed your equipment using an excellent power cable, as there will be a significant performance improvement over the stock power cable. -
Page 11: Analog Inputs
This is useful when using the Stellar Strata Amplifier as the front left and right channels in a system that also has a home theater processor. See the menu section of this manual for details on how to configure Input #3 for Fixed Volume mode. -
Page 12: Digital Inputs (Continued)
Because of the limitations of optical cable, the sample rate on this input may be limited to 96KHz. Input 8 is the USB input. If you are using USB, make sure both the computer and Stellar Strata Amplifier are connected and powered up. USB requires a driver to operate properly. Mac computers running OSX have the driver built in. -
Page 13: Connecting The Speaker Cables
The master power switch on the rear panel should remain on at all times. When your connected equipment is not in use, the Stellar Strata can be placed in Idle mode. Putting your unit in Idle mode will deactivate all of its output relays. -
Page 14: Operation Guide
Press the logo/button to activate your amplifier. The button will illuminate and the display will show the PS Audio logo for a moment. After that you will see a “0” on the screen. This is your volume setting. The unit is now ready for setup and initial operation. -
Page 15: Using The Remote
One set is the bar with “-“ and “+” symbols on it. The other set of volume controls is the up and down arrows. Input Select There are 9 input buttons that allow you to directly select any of the Stellar Strata Amplifier’s sources. Filter and Phase The Strata has a digital filter that can tailor the sound of digital sources to the listener’s... -
Page 16: Menu Features
It’s a good idea to familiarize yourself with the different functions in the Stellar Strata Amplifier’s menu. To access the menu, simply press and hold the menu button to the left of the display. A gear icon will appear in the upper right corner showing that you are in the Settings menu. -
Page 17: Filter
A sharp filter allows the most high-frequency signal to pass through, but at the expense of greater ringing. There are three filter options in the Stellar Strata Amplifier. Filter 1 is “Fast Roll-off Linear Phase”. This filter has very good high frequency response. It has slightly less ringing than Filter 2 but it does exhibit pre-ringing. -
Page 18: Version
Operation Guide Stellar Strata Amplifier ® Menu Features Version (Continued) This menu display shows the versions of the Strata’s firmware. If you need to contact our customer service team for help with your unit, please have this information ready. More Settings There are additional, less often used features in the Settings sub-menus. -
Page 19: Volume Trim
Operation Guide Stellar Strata Amplifier ® Menu Features Volume Trim sub-menu (double press to open) (Continued) This feature allows you to adjust the relative volume level of each input. This is useful if you have sources that are especially louder or softer than others. You can trim their volume so that changing inputs does not require a large compensating change to the volume setting. -
Page 20: Analog 3 Fixed Volume
The Fixed Input feature allows you to configure Analog Input #3 to always have the same fixed volume setting. This is useful if you are using the Stellar Strata Amplifier to power the front channels in a surround sound system. In this configuration, the output of your surround receiver would be connected to Analog Input #3. -
Page 21: Display Timeout
PS Audio access Enable this feature to allow PS Audio Customer Support remote access to the Strata. Note that you will need to have the Strata connected to your network to use this feature. For more information please reach out to us at: PS Audio, Inc. -
Page 22: Update
Operation Guide Stellar Strata Amplifier ® Menu Features Update sub-menu (double click to open) (Continued) This feature will automatically update the firmware in the Strata. The firmware will be downloaded over your network so the unit will need to be connected to the internet via Cat 5 or Wi-Fi. -
Page 23: Wi-Fi
Operation Guide Stellar Strata Amplifier ® Wi-Fi Enable Menu Features (Continued) This feature allows you to enable/ disable the wireless (Wi-Fi) functionality. Rotate the volume knob to turn the Wi-Fi on or off. Wi-Fi WPS This feature is for using WPS, or Wi-Fi Protected Setup, to configure your Strata with your network without the need to enter passwords. -
Page 24: Password Screen
Operation Guide Stellar Strata Amplifier ® Menu Features SSID accept screen (Continued) Available network resources are identified by their SSID. Rotate the volume knob to Accept or Cancel the AP SSID selection Password screen Rotate the volume knob to find each character. Press the menu select button to select the character. -
Page 25: Specifications
Specifications Stellar Strata Amplifier ®... - Page 26 Specifications Stellar Strata Amplifier ® General Color Options Black Silver Voltage Options Japan 100V (+/-10%) North America 120V (+/-10%) Europe/Asia 230V (+/-10%) Mains Power Input IEC C14 Fuses T250V-250mAH (1/4A Slow Blow) Accessories Included Remote Control Line cord(s) US (NEMA 5-15P) (all versions)
- Page 27 Specifications Stellar Strata Amplifier ® Mechanical Width 17.0” Height 2.8” (not including feet) Depth 12.0” (chassis only) 13.5” (including connectors and knobs) Weight 21lbs Shipping Width 22” Shipping Height 8” Shipping Depth 17” Shipping Weight 25lbs Environmental Location Indoor use only...
- Page 28 Specifications Stellar Strata Amplifier ® Performance Unless otherwise noted, all measurements are specified under the following conditions: • Mains voltage 120VAC • Balanced analog input • Both channels operating • Volume set to 76 (unity gain) • 2.8VRMS output, 4Ω load.
- Page 29 Specifications Stellar Strata Amplifier ® Headphone Output Gain (relative to line output) 16.5dB Output Power 300Ω, 1KHz, 1% 300mW 16Ω, 1KHz, 1% 3.25W Frequency Response +/-1dB 7Hz – 40KHz 1KHz, 1 VRMS 300Ω <0.02% 16Ω <0.02% S/N Ratio 1KHz >110dB (max output) Output Noise <-90dBV...
-
Page 30: Warranty
By registering your product, you are validating the start date of your limited warranty. This Product limited warranty is in effect for 3 years from the date the unit was first purchased from PS Audio or its dealers and agents. If you do not register your product within 30 days of service, a copy of your purchase receipt from an authorized PS Audio dealer may be used as proof of purchase to establish the warranty start date. -
Page 31: Limitations Under This Warranty
Stellar Strata Amplifier ® Limitations Under In no event will PS Audio’s liability to you exceed the original purchase price of your unit. This Warranty This warranty does not cover the cost of custom installation, customer instruction, setup adjustments, or signal reception problems. Consequential and incidental damages are not covered under this warranty. -
Page 32: Service Information
Number (RMA#) prior to returning any item. Please contact PS Audio or an authorized PS Audio repair center to receive an RMA Number. The RMA Number must be on all returned items. If it is not clearly marked, PS Audio will return the package back to you, freight collect. Packaging and Shipping Original packaging should be used for the safe transit of your PS Audio unit to the repair center. -
Page 34: Your Product
Your Product Stellar Strata Amplifier ® Your Serial Number Your Purchase Information Date of Purchase...
Need help?
Do you have a question about the Stellar Strata and is the answer not in the manual?
Questions and answers