Table of Contents
Advertisement
Advertisement
Table of Contents

Related Manuals for PS Audio BHK Signature Preamplifier


Summary of Contents for PS Audio BHK Signature Preamplifier
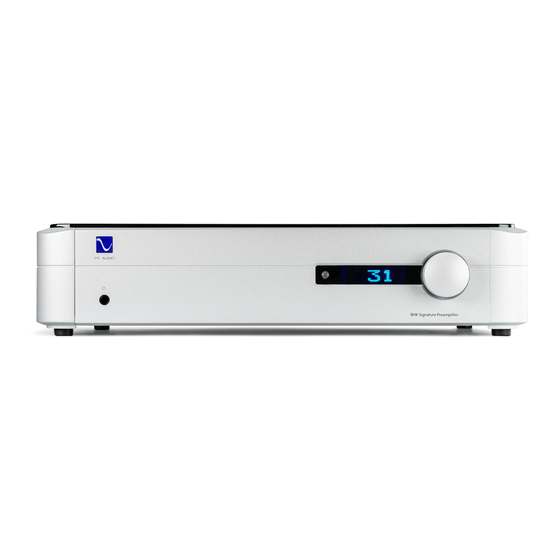
- Page 1 Owner’s Reference ® Owner’s Reference BHK Signature Preamplifier Instructions for Use BHK Signature Preamplifier ™ 4826 Sterling Drive, Boulder, CO 80301 PH: 720.406.8946 service@psaudio.com www.psaudio.com 15-071-01-1 Rev A ©2016 PS Audio Inc. All rights reserved.
-
Page 2: Important Safety Instructions
Please contact your authorized dealer, distributor, or PS Audio if you have any questions not addressed in this reference manual. PS Audio ® is a registered trademark of PS Audio Inc., and is restricted for use by PS Audio, Inc., its subsidiaries, and authorized agents. - Page 3 BHK to place his best efforts in this, his only signature preamplifier worthy of his namesake on the front panel. A special thank you must go to our engineering team and in particular, PS Audio Chief Engineer, Bob Stadtherr, for his tireless efforts and work building Bascom’s dream preamplifier. A true dream team.
- Page 4 Hand- selected through-hole PRP resistors, high grade Audiophile capacitors and the finest of discrete parts are used throughout the BHK Signature Preamplifier. Nothing was spared in its design. Even the solder we use has been auditioned for best sound.
- Page 5 The BHK Signature is the culmination of one man’s quest for musical perfection, coupled with one The Quest for company’s obsession to bring musical truth to as many people as it can. PS Audio has consistently Perfection sought out the finest design talent both from within and from outside, for the benefit of music lovers around the world.
-
Page 6: Unpacking The Unit
BHK’s IR sensor. The BHK Preamplifier is part of the PS Audio PerfectWave family and designed to stack on top of each other if they are not placed on separate shelves. To do this, remove the feet from the unit you wish to place on top of the stack. - Page 7 These options are available via the front panel command screen. Please refer to Names the front panel setup menu later in this manual, for details. 4826 Sterling Drive, Boulder, CO 80301 Getting Started PH: 720.406.8946 service@psaudio.com www.psaudio.com 15-071-01-1 ©2016 PS Audio Inc. All rights reserved. Rev A...
-
Page 8: Power Amplifier
Push the front panel PS Logo Standby/Operate button, located on the top left corner of the front panel of the BHK Preamplifier. Button 4826 Sterling Drive, Boulder, CO 80301 Getting Started PH: 720.406.8946 service@psaudio.com www.psaudio.com 15-071-01-1 ©2016 PS Audio Inc. All rights reserved. Rev A... -
Page 9: Select The Input
The input already selected will appear. Depress and hold the selector button until the Name Edit Screen is displayed. 4826 Sterling Drive, Boulder, CO 80301 Getting Started PH: 720.406.8946 service@psaudio.com www.psaudio.com 15-071-01-1 ©2016 PS Audio Inc. All rights reserved. Rev A... -
Page 10: Home Theater Bypass
BHK Preamplifier. In some cases, home 4826 Sterling Drive, Boulder, CO 80301 Getting Started PH: 720.406.8946 service@psaudio.com www.psaudio.com 15-071-01-1 ©2016 PS Audio Inc. All rights reserved. Rev A... - Page 11 Next you need to set the level for the assigned channel. Once in HT mode, the assigned level will be 4826 Sterling Drive, Boulder, CO 80301 Getting Started PH: 720.406.8946 service@psaudio.com www.psaudio.com 15-071-01-1 ©2016 PS Audio Inc. All rights reserved. Rev A...
-
Page 12: Channel Balance
To go back to perfect balance, simply reverse the process of setting the channel imbalance. 4826 Sterling Drive, Boulder, CO 80301 Getting Started PH: 720.406.8946 service@psaudio.com www.psaudio.com 15-071-01-1 ©2016 PS Audio Inc. All rights reserved. Rev A... -
Page 13: Control Software
The display will show the Version of software installed. Changes to the software would be rare. Once in the setup menu, the version is displayed. 4826 Sterling Drive, Boulder, CO 80301 Getting Started PH: 720.406.8946 service@psaudio.com www.psaudio.com 15-071-01-1 ©2016 PS Audio Inc. All rights reserved. Rev A... -
Page 14: Changing Tubes
Remove the top cover grille using a small screwdriver. Carefully remove the tubes and replace with the new ones. Place the top cover back on before powering the unit back up again. 4826 Sterling Drive, Boulder, CO 80301 Getting Started PH: 720.406.8946 service@psaudio.com www.psaudio.com 15-071-01-1 ©2016 PS Audio Inc. All rights reserved. Rev A... -
Page 15: Headphone Amplifier
Designed with a love of high-end headphones in mind, Bascom King built a stunning amplification device internal to the preamplifier. 4826 Sterling Drive, Boulder, CO 80301 Getting Started PH: 720.406.8946 service@psaudio.com www.psaudio.com 15-071-01-1 ©2016 PS Audio Inc. All rights reserved. Rev A... -
Page 16: The Remote Control
We recommend using the remote OFF function when you have finished a listening session (or manually toggle it off from the front panel logo button). 4826 Sterling Drive, Boulder, CO 80301 Getting Started PH: 720.406.8946 service@psaudio.com www.psaudio.com 15-071-01-1 ©2016 PS Audio Inc. All rights reserved. Rev A... - Page 17 Getting Started ® Owner’s Reference BHK Signature Preamplifier The master ON button will take all PS Audio PerfectWave products out of Ready (Standby) mode. If just the BHK Preamplifier has been placed in Ready Mode, pressing this button will turn it back on without affecting any other piece of PerfectWave gear.
-
Page 18: Troubleshooting
AC outlet. Check to make sure the rear panel master power switch is in the UP and ON Turn On position. Press the front panel PS Audio Logo button, located on the far left corner of the preamplifier’s front panel. - Page 19 Then start adding back components one at a time until the hum returns. Finding the problem is 9/10th of the work in finding a solution. 4826 Sterling Drive, Boulder, CO 80301 Troubleshooting PH: 720.406.8946 service@psaudio.com www.psaudio.com 15-071-01-1 ©2016 PS Audio Inc. All rights reserved. Rev A...
-
Page 20: Limited Three Year Warranty
What Will PS Audio Do to Correct the Problem? In the event your product fails your sole remedy under this limited warranty shall be to return the product to PS Audio or an authorized PS Audio repair center. The product will be repaired without charge for parts or labor, replaced, or the purchase price refunded through the original point of purchase, at the option of PS Audio. - Page 21 Contact PS Audio or an authorized PS Audio repair center to receive an RMA#. • You must put the RMA# on all returns. If it is not clearly marked, PS Audio will return the package back to you, freight collect.
- Page 22 Changes to Our Products PS Audio reserves the right to modify the design of any product without obligation to purchasers of previously manufactured products and to change the prices or specifications of any products without notice or obligation to any person.
Need help?
Do you have a question about the BHK Signature Preamplifier and is the answer not in the manual?
Questions and answers