
Related Manuals for progeo EXELLE


Summary of Contents for progeo EXELLE
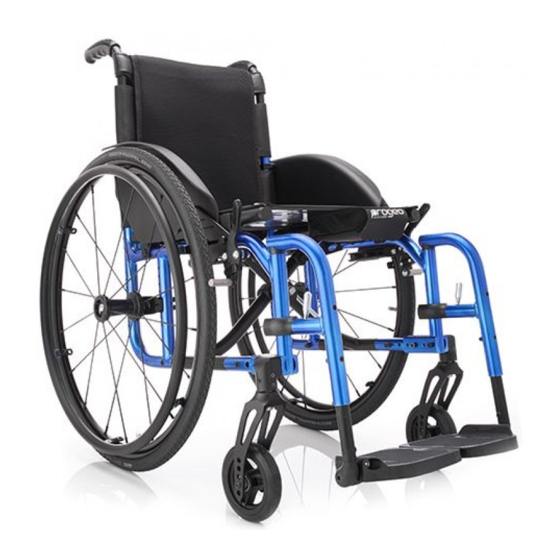
- Page 1 S E R V I C E M A N U A L EXELLE - EXELLE VARIO SERVICE MANUAL Rev. 0 - 06/05/2020 ENGLISH Service Manual EXELLE /EXELLE VARIO 1 REHATEAM s.r.l.—vicolo Negrelli 5—31040 Castagnole di Paese TV - www.rehateamprogeo.com...
- Page 2 RehaTEAM® disclaims any responsibility for damage to the product or the peo- ple due to any modification that is not properly performed or that, in any case, does not guarantee safety to the user. Service Manual EXELLE /EXELLE VARIO 2 REHATEAM s.r.l.—vicolo Negrelli 5—31040 Castagnole di Paese TV - www.rehateamprogeo.com...
- Page 3 BACKREST ANGLE Dynamic rear frame (first version) and Dynamic 2.0 QUICK RELEASE AXLE (rear wheel) SEAT WIDTH ENLARGEMENT Standard and Dynamic 2.0 rear frame FOOTPLATE FRAME LOCKING POSITION (only Exelle Vario) Service Manual EXELLE /EXELLE VARIO 3 REHATEAM s.r.l.—vicolo Negrelli 5—31040 Castagnole di Paese TV - www.rehateamprogeo.com...
- Page 4 Pay attention to the spacers between caster and fork. It is advisable to spread a drop of mild lock thread glue on the bolts V. Service Manual EXELLE /EXELLE VARIO 4 REHATEAM s.r.l.—vicolo Negrelli 5—31040 Castagnole di Paese TV - www.rehateamprogeo.com...
- Page 5 Remember that the front height adjustment can affect the seat inclination, so it is necessary to check and adjust the fork angle Service Manual EXELLE /EXELLE VARIO 5 REHATEAM s.r.l.—vicolo Negrelli 5—31040 Castagnole di Paese TV - www.rehateamprogeo.com...
- Page 6 To remove the support, unscrew the two bolts A. Insert the new support and fix it with the two bolts A. The model Exelle also has the spacer B between support and frame, and two cylindrical spacers C. Make sure to put back these two elements correctly.
- Page 7 The two cylindrical spacers C must always be present in the support fixing holes. Position the spacer B and fix the support with the two bolts A. EXELLE VARIO : the frame has 4 holes for support positioning, therefore, 2 possible positions. Screw off the two bolts A.
- Page 8 SERVICE MANUAL WORK ON A FLAT AND EVEN SURFACE. The adjustment is the same for both Exelle and Exelle Vario. The pictures show the assembly on the Exelle Vario. Unscrew the bolt V that fixes the nut D. Remove the nut D but leave the bolt on completely. You should not loosen the other bolt, in fact it will hold the fork while performing the adjustment.
- Page 9 Whenever the seat height is changed or as periodic maintenance, check the fork angle and, if necessary, adjust it in order to have the fork axis perpendicular to the ground. Exelle and Exelle Vario uses the same system (the pictures show the model Exelle).
- Page 10 If the wheelchair TURN LEFTT, the cause is one or more of the following: The LEFT fork is tilted inwardly and/or backward The RIGHT fork is tilted outwardly and/or frontward Follows next page Service Manual EXELLE /EXELLE VARIO 10 REHATEAM s.r.l.—vicolo Negrelli 5—31040 Castagnole di Paese TV - www.rehateamprogeo.com...
- Page 11 Plastic strapping For the adjustment of the fork angle and the removal of the fork support, see chapters “fork angle” and “fork support position” Service Manual EXELLE /EXELLE VARIO 11 REHATEAM s.r.l.—vicolo Negrelli 5—31040 Castagnole di Paese TV - www.rehateamprogeo.com...
- Page 12 Titanium frame Extended rear wheel plate for very prudential setting Rear wheel plate plus support for accessories Shaped rear wheel plate for higher rear heights Service Manual EXELLE /EXELLE VARIO 12 REHATEAM s.r.l.—vicolo Negrelli 5—31040 Castagnole di Paese TV - www.rehateamprogeo.com...
- Page 13 V on it and hit it with hammer. Removing R Follows next page Service Manual EXELLE /EXELLE VARIO 13 REHATEAM s.r.l.—vicolo Negrelli 5—31040 Castagnole di Paese TV - www.rehateamprogeo.com...
- Page 14 S2 of the picture in the middle and at right are in the same positions, but the arms are differently orientated. Follows next page Service Manual EXELLE /EXELLE VARIO 14 REHATEAM s.r.l.—vicolo Negrelli 5—31040 Castagnole di Paese TV - www.rehateamprogeo.com...
- Page 15 On the other hand, many more configurations with other settings are possible; this chart reports the three most common settings. If necessary, contact Rehateam s.r.l. for technical help. Service Manual EXELLE /EXELLE VARIO 15 REHATEAM s.r.l.—vicolo Negrelli 5—31040 Castagnole di Paese TV - www.rehateamprogeo.com...
- Page 16 “camber”. For the adjustment of the fork angle and the removal of the fork support, see chapters “fork angle” and “fork support position” Service Manual EXELLE /EXELLE VARIO 16 REHATEAM s.r.l.—vicolo Negrelli 5—31040 Castagnole di Paese TV - www.rehateamprogeo.com...
- Page 17 The extended rear wheel plate (only black colour), allows for 4 settings between prudential and Extreme and 2 Extremely Prudential (behind the backrest axis). Service Manual EXELLE /EXELLE VARIO 17 REHATEAM s.r.l.—vicolo Negrelli 5—31040 Castagnole di Paese TV - www.rehateamprogeo.com...
- Page 18 STANDARD (55 mm) ACTIVE (75 mm) EXTREME (95 mm) After changing the setting, adjust the mudguard and brake. Also, check and adjust the front fork angle. Service Manual EXELLE /EXELLE VARIO 18 REHATEAM s.r.l.—vicolo Negrelli 5—31040 Castagnole di Paese TV - www.rehateamprogeo.com...
-
Page 19: Side Guard
7. Assemble the side guard and slightly fix it with the bolt D. 8. Continue following the points 3 to 9 of the adjustment A. Follows next page Service Manual EXELLE /EXELLE VARIO 19 REHATEAM s.r.l.—vicolo Negrelli 5—31040 Castagnole di Paese TV - www.rehateamprogeo.com... - Page 20 9. If the slots of the plate B do not allow fixing the side guard, you may move it accordingly. 10.Finally check and, if necessary, adjust the brake. Service Manual EXELLE /EXELLE VARIO 20 REHATEAM s.r.l.—vicolo Negrelli 5—31040 Castagnole di Paese TV - www.rehateamprogeo.com...
- Page 21 It is advisable to spread a drop of mild lock thread glue on the grab screws C and G and on the bolt F. Follows next page Service Manual EXELLE /EXELLE VARIO 21 REHATEAM s.r.l.—vicolo Negrelli 5—31040 Castagnole di Paese TV - www.rehateamprogeo.com...
- Page 22 It is advisable to spread a drop of mild lock thread glue on the grab screws C and G and on the bolt F. Service Manual EXELLE /EXELLE VARIO 22 REHATEAM s.r.l.—vicolo Negrelli 5—31040 Castagnole di Paese TV - www.rehateamprogeo.com...
- Page 23 It is advisable to spread a drop of mild lock thread glue on the grab screws C and G and on the bolt F. Follows next page Service Manual EXELLE /EXELLE VARIO 23 REHATEAM s.r.l.—vicolo Negrelli 5—31040 Castagnole di Paese TV - www.rehateamprogeo.com...
- Page 24 9. To drill the third hole, remove the side guard, mark the point where to drill and follow instruction from 5 to 7. It is advisable to spread a drop of mild lock thread glue on the bolts E Follows next page and C. Service Manual EXELLE /EXELLE VARIO 24 REHATEAM s.r.l.—vicolo Negrelli 5—31040 Castagnole di Paese TV - www.rehateamprogeo.com...
- Page 25 WHEN YOU CHANGE BOTH THE REAR HEIGHT AND THE SETTING, you have to move the side guard up or down and forward or backward. Continue with instruction and, if necessary, instruction , too. Service Manual EXELLE /EXELLE VARIO 25 REHATEAM s.r.l.—vicolo Negrelli 5—31040 Castagnole di Paese TV - www.rehateamprogeo.com...
- Page 26 Standard rear frame SERVICE MANUAL The camber on the model Exelle/Exelle Vario standard frame is given by the inclination of the rear wheel plate b with respect to the frame A. 3° 1.5° 0° The inclination of the plate B depends on the presence or not of 0.5 mm washers properly positioned under the same plate.
- Page 27 (or of a support fixed to it) to the centre of the tyre. If the measurements L are different, it is necessary to adjust this aspect, too. WRONG Follows next page Service Manual EXELLE /EXELLE VARIO 27 REHATEAM s.r.l.—vicolo Negrelli 5—31040 Castagnole di Paese TV - www.rehateamprogeo.com...
- Page 28 After adjustment, tighten the nut D hard while holding the receiver B. It is not necessary to remove the wheel, but move it away just enough to make the receiver accessible. Service Manual EXELLE /EXELLE VARIO 28 REHATEAM s.r.l.—vicolo Negrelli 5—31040 Castagnole di Paese TV - www.rehateamprogeo.com...
- Page 29 (after removing its rear fixing bolt) and the brake by the same extent. Follows next page Service Manual EXELLE /EXELLE VARIO 29 REHATEAM s.r.l.—vicolo Negrelli 5—31040 Castagnole di Paese TV - www.rehateamprogeo.com...
- Page 30 You can adjust the brake position by sliding its rod through the support O after loosening the grab screw P. For the models EXELLE and EXELLE VARIO with plate of support, the adjustment of the brake is the same even if their frames are different from one another.
- Page 31 The adjustment for the sport brake is the same except for the dis- tance D, in fact, the brake, in its resting position is far away from the tyre. Just make a few tries. Service Manual EXELLE /EXELLE VARIO 31 REHATEAM s.r.l.—vicolo Negrelli 5—31040 Castagnole di Paese TV - www.rehateamprogeo.com...
- Page 32 Start screwing the two bolts B all the way down and then the two nuts G. Should the brake movement be hard, slightly loosen the bolts B. Service Manual EXELLE /EXELLE VARIO 32 REHATEAM s.r.l.—vicolo Negrelli 5—31040 Castagnole di Paese TV - www.rehateamprogeo.com...
- Page 33 After adjustment, check that between the lower side of the footplate and the ground there is at least 2 cm and that there is no interference between footplate and casters. Service Manual EXELLE /EXELLE VARIO 33 REHATEAM s.r.l.—vicolo Negrelli 5—31040 Castagnole di Paese TV - www.rehateamprogeo.com...
- Page 34 LH supports two RH supports Service Manual EXELLE /EXELLE VARIO 34 REHATEAM s.r.l.—vicolo Negrelli 5—31040 Castagnole di Paese TV - www.rehateamprogeo.com...
- Page 35 (or vice versa) or from 2/3 internal to 2/3 external (or vice versa). When reversing the footplate in either these two methods, you change the lock side, too. Follows next page Service Manual EXELLE /EXELLE VARIO 35 REHATEAM s.r.l.—vicolo Negrelli 5—31040 Castagnole di Paese TV - www.rehateamprogeo.com...
- Page 36 It may be necessary to hold the nut F with a wrench. Usually, when the footplate is lifted up the adjustment holds its position. Service Manual EXELLE /EXELLE VARIO 36 REHATEAM s.r.l.—vicolo Negrelli 5—31040 Castagnole di Paese TV - www.rehateamprogeo.com...
- Page 37 Remove the 4 bolts B and fix the plate using the other set of holes. The plate can be orientated with its curved side facing either back or front. Footplate tubular Follows next page Service Manual EXELLE /EXELLE VARIO 37 REHATEAM s.r.l.—vicolo Negrelli 5—31040 Castagnole di Paese TV - www.rehateamprogeo.com...
- Page 38 In fact, the movement of the footplate can lead that bolt to unscrew itself. Usually, when the footplate is lifted up the adjustment holds it in place. Service Manual EXELLE /EXELLE VARIO 38 REHATEAM s.r.l.—vicolo Negrelli 5—31040 Castagnole di Paese TV - www.rehateamprogeo.com...
- Page 39 A— see also “angle adjustment”. When reversing the footplate in either these two methods, you change the lock side, too. Follows next page Service Manual EXELLE /EXELLE VARIO 39 REHATEAM s.r.l.—vicolo Negrelli 5—31040 Castagnole di Paese TV - www.rehateamprogeo.com...
- Page 40 Usually, when the foot- plate is lifted up the adjustment holds it in place. Service Manual EXELLE /EXELLE VARIO 40 REHATEAM s.r.l.—vicolo Negrelli 5—31040 Castagnole di Paese TV - www.rehateamprogeo.com...
- Page 41 4 positions: internal; 2/3 internal; 2/3 externa (not present in the order form); external 10 cm INTERNAL 2/3 INTERNAL 2/3 EXTERNAL EXTERNAL Follows next page Service Manual EXELLE /EXELLE VARIO 41 REHATEAM s.r.l.—vicolo Negrelli 5—31040 Castagnole di Paese TV - www.rehateamprogeo.com...
- Page 42 (or vice versa) or from external to 2/3 external (or vice versa). Do not tighten the bolt D hard, in fact, it has to allow an easy Service Manual EXELLE /EXELLE VARIO 42 REHATEAM s.r.l.—vicolo Negrelli 5—31040 Castagnole di Paese TV - www.rehateamprogeo.com...
- Page 43 To prevent the bolt B from loosening accidentally, it is advisable to squeeze a little part of its Pulire le parti thread with a wrench, spread a drop of strong thread lock glue, insert it and screw it. Service Manual EXELLE /EXELLE VARIO 43 REHATEAM s.r.l.—vicolo Negrelli 5—31040 Castagnole di Paese TV - www.rehateamprogeo.com...
-
Page 44: Backrest Height
To reduce possible play and possible noise, you can put some sticky tape around the backrest tube at its bottom and at just above the last hole. Service Manual EXELLE /EXELLE VARIO 44 REHATEAM s.r.l.—vicolo Negrelli 5—31040 Castagnole di Paese TV - www.rehateamprogeo.com... - Page 45 To reduce possible play and possible noise, you can put some sticky tape around the inner tube at its bottom and at its fixing point (or just under it). Service Manual EXELLE /EXELLE VARIO 45 REHATEAM s.r.l.—vicolo Negrelli 5—31040 Castagnole di Paese TV - www.rehateamprogeo.com...
-
Page 46: Backrest Angle
In fact, if tilted backward (open angle) the wheelchair becomes less stable . It is advisable to spread a drop of mild lock thread glue on the bolts A. Service Manual EXELLE /EXELLE VARIO 46 REHATEAM s.r.l.—vicolo Negrelli 5—31040 Castagnole di Paese TV - www.rehateamprogeo.com... -
Page 47: Quick Release Axle
Do not unscrew the button too much: the pin will come off and, consequently, the balls will fall to the ground. Service Manual EXELLE /EXELLE VARIO 47 REHATEAM s.r.l.—vicolo Negrelli 5—31040 Castagnole di Paese TV - www.rehateamprogeo.com... - Page 48 Put washer and nuts and screw them without tightening because you will later need a little adjustment. During this step, the rear fixing of the side guard is free to slide. Follows next page Service Manual EXELLE /EXELLE VARIO 48 REHATEAM s.r.l.—vicolo Negrelli 5—31040 Castagnole di Paese TV - www.rehateamprogeo.com...
- Page 49 Advice: before removing the receiver, it is useful, as a try, put the spacer on the axle of the wheel and put it on. This way, you will immedi- ately see what spacer you need. Check and, if necessary, adjust the brakes. Service Manual EXELLE /EXELLE VARIO 49 REHATEAM s.r.l.—vicolo Negrelli 5—31040 Castagnole di Paese TV - www.rehateamprogeo.com...
- Page 50 The footrest plate is not designed to be turned for com- pensation. It is advisable to spread a drop of mild lock thread glue on the headless bolts B. Service Manual EXELLE /EXELLE VARIO 50 REHATEAM s.r.l.—vicolo Negrelli 5—31040 Castagnole di Paese TV - www.rehateamprogeo.com...
Need help?
Do you have a question about the EXELLE and is the answer not in the manual?
Questions and answers