Advertisement
Quick Links
Advertisement

Related Manuals for progeo ego


Summary of Contents for progeo ego
- Page 1 USER’S MANUAL ENGLISH REV.0 – 01.06.11/ENG...
- Page 3 Using the brakes Index: Safety belts and harness General information Introduction General Guide to symbols List of parts in standard set up General characteristics of the wheelchair Backrest height adjustment Backrest angle adjustment General advises General Rear wheel adjustment Safety Front height adjustment Movements: getting in and out of the wheelchair Fork angle adjustment...
-
Page 4: General Information
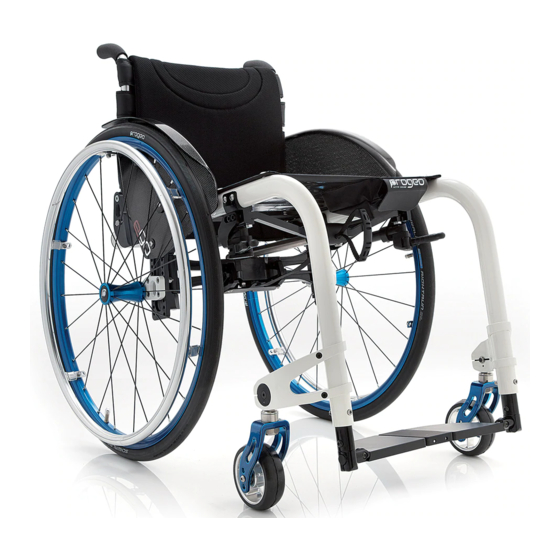
General characteristics of the wheelchair Guide to symbols The Progeo® EGO wheelchair presents a new concept in active In this manual you will often see the following symbols which are used ultra light folding frame. to highlight points which are of particular interest or importance... - Page 5 Safety The EGO wheelchair is self propelled which means that it The Progeo® EGO wheelchair is a medical device and can be moved manually by using the hand rims on the therefore it should not be lent to other users even for rear wheels.
- Page 6 Fig. 2 The general rules to respect while getting in or out of the wheelchair safely are: Ensure the wheelchair is parked on a solid, flat or regular surface. Do not get in or out of the wheelchair while on hills or uneven ground which could render the wheelchair unstable and cause the occupant to fall and/or the wheelchair to overbalance.
- Page 7 The model EGO allows you to adjust its setting (see chapter 6.5 Fig. 3 “Setting: moving the backrest support”) Remember that every adjustment of the seat affects the wheelchair's stability and could therefore increase the possibility of overbalancing. The correct positioning of the seat depends on many factors, among them: the occupant's weight, type of disability and ability to manoeuvre the wheelchair.
- Page 8 Going over obstacles alone Going up a step alone (see fig. Before attempting to go down a step or over any kind of general obstacle alone (without the presence of an Fig.5 attendant), you will need to have control over your wheelchair and know how to tip it while maintaining your balance over the rear wheels (see chapter 2.2 “Starting to use your wheelchair”).
- Page 9 the front of the wheelchair. raised in order to prevent the occupant from slipping out of the Keep the wheelchair in this position and accompany it down chair) until the rear wheels are over the step. the stairs one step at a time. The occupant seated in the chair Keeping the wheelchair tilted, move it away from the step can assist the attendant by using the hand rims.
- Page 10 We recommend that occupants who have not yet completely mastered safe use of the chair should mount Fig.8 the anti-tip system which is supplied as an accessory to this model and which is useful for preventing the chair from tipping over backwards (see chapter 7.3 “Anti-tip wheels”). Lean forwards and keep your weight forward in the chair in order to prevent the wheelchair from tipping over backwards.
- Page 11 tip up onto the front wheels and overbalance possibly causing Fig.10 harm both to the chair and the occupant. In order to ensure greater stability the occupant should hold on to the wheelchair with his or her free hand. Fig.9 Leaning out to the side (see fig.11) Do not move your upper body beyond the rear wheel as the...
- Page 12 A correct tyre pressure makes the wheelchair much T yr e pr e s s ur e more fluent and easier to move and control In order to guarantee consistent, precise running and braking, it is To inflate the tyres always use a compressor with a necessary to ensure that the tyres are correctly inflated.
- Page 13 carefully check that the two teeth “A” of the locking unit are fully Check the correct functioning engaged. If not, with one hand hold the front frame of the of the quick release axle wheelchair and with the other hand push the front central unit “B” without any person sitting on forward until the complete opening (an audible “click”...
- Page 14 With one piece footplate automatic closure (figure 16) there is no need for check, in fact this kind of footplate folds with the wheelchair. Fig. 17 Fig. 15 Should the wheelchair be equipped with double footplate (figure 17), 2.9 Footplate make sure that both plates are totally down before using the chair.
- Page 15 Fig. 19 Fig. 20 Fig. 21 2.12 Braccioli tubolari The model EGO can be provided with tubular armrests (figure 23) . Fig. 23 2.10 Calf strap In some cases, depending on the diameter of the front wheel and the width of the wheelchair, the front wheel, as it rotates for turns etc may come into contact with the occupant's heel.
- Page 16 2.13 Wheelchair lifetime always ensure that they are correctly positioned before use (see chapter 7.1 “Height adjustable, Under normal daily use the PROGEO® wheelchair has a lifetime removable, swing away armrests”). of 5 years provided that it receives careful maintenance at the correct intervals.
- Page 17 The lightness and reducibility of the EGO are very important The kind and level of the patient disability (his/her ability to control because they allow the wheelchair to be moved easily even by his/her upper body, arm and hand movements), physical strength those with limited physical strength.
- Page 18 Load the wheelchair into the car and then the rear wheels Loading the wheelchair without assistance figure 26). (see fig. 28, 29, 30, Thanks to its reduced encumbrance, the wheelchair can also be loaded between the front and rear seat of the car (figure The following actions have been designed for people with good 27).
- Page 19 General description of the wheelchair parts General description of the parts ( figure 32) Fig.32 Fig. 28 Fig. 29 1 Padded, breathable back support, fully adjustable with velcro straps 2 Backrest tubes – height adjustable every 1.5cm from 24,5 to 47cm 3 Side guards - carbon fiber mudguard - removable carbon fiber mudguard...
-
Page 20: Using The Wheelchair
7 Lateral plate with backrest support 8 Brakes: - bent lever - straight lever The EGO is an ultra light folding frame active wheelchair whose - with folding lever extension innovative extreme precision crossbar reaches and offers new 9 Quick release axle standards of convenience and manoeuvrability. - Page 21 5.2 Closing system The ultra light wheelchair EGO can be completely folded by means of its folding axles and backrests independently from one another. Closing the folding axles NEVER HOLD THE AXLES CONNECTION CENTRAL UNIT “C” AS SHOWN IN FIGURE 34. WHILE FOLDING Fig.
- Page 22 At this stage the two teeth “A” of the lock unit (see figure 39) Closing the backrest: are released and it is possible to fold the axles (front and rear) by pulling the release string “F” until the complete closure While folding the backrest, take great care not (figure 40), or by acting on both sides of the wheelchair and to trap your fingers between the backrest and...
- Page 23 To unfold the axles: Complete closure of the wheelchair: Fig. 46 With one hand hold the front To completely fold the wheelchair frame (right or left) of (see figure 44), fold the crossbar and wheelchair and with the other then the backrest or the other way hand push the axles connection round, in fact these two features are central unit “C”...
- Page 24 Lifting the wheelchair 5.5 Quick release rear wheels On this model it is possible to remove the rear wheels quickly and The wheelchair can be lifted and transported in many different easily, thereby reducing the size of the wheelchair. This can be ways.
- Page 25 Replacing the wheel Release the brakes To make this procedure easier, slightly raise the wheel using the handles on the back (figure 50). Take hold of the wheel by its spokes close to the axel bush, push in the release button and, without letting go, get the axel in correctly (figure 51).
- Page 26 The brake is a safety feature and must not be used Fig. 54 while the wheelchair is moving as this could cause the wheelchair to overturn with possible injury to the occupant. Safety belt and harness Both the waist belt (figure 53) and the harness (figure 55) are accessories to this model and must therefore be ordered separately.
- Page 27 ® PROGEO EGO wheelchair is a medical device based on the the wheelchair itself. patient detailed specifications that are reported on the original order form filled in by qualified personnel.
- Page 28 List of parts for standard set up Fork and support 1dx + 1sx (figure 58) Footplate and tubes 6–7 Rear wheel plate 1dx + 1sx List of parts in standard set up (figure 58) Rear wheel Rear wheel receiver Backrest tubes Seat canvas Seat canvas rail 13-14 Optional support right + left...
- Page 29 6.3 Backrest height adjustment Loosen “A” (13mm spanner). Now, with a 2.5mm Allen key, screw or unscrew the adjustment bolt “C”. After adjustment properly tighten all bolts and nuts. Fig. 59 Repeat same operation on the other side making sure both It is possible to adjust the back height in 1.5cm intervals (figure sides are adjusted at the...
- Page 30 The hole that the receiver “B” is fixed is not centred on Rear wheel adjustment the rear wheel plate “P” (see square figure 61), therefore it is possible to assemble the right side plate (turned up It is a very important adjustment to set the right configuration of the side down) to the left and vice-versa, in order to have wheelchair.
- Page 31 Remove the rear wheels (see chapter 5.5 “Quick release rear Move forward or backward the two rear height adjustment wheels”) plates “R” to one of the three possible positions. At this stage Unscrew the bolts “A” e “A ” (3 and 4mm Allen keys) and the lock unit (figure 63) slides along the axle connection tube remove the mudguard (figure 62).
- Page 32 The front height can also be changed by fixing the wheel in a Front height adjustment different pre-drilled holes on the fork. This adjustment is necessary in order to obtain the correct height Remove screws “F” (using a 4 mm Allen key) of the front of the wheelchair.
- Page 33 be indicated by the spirit level “L” whose air bubble will have The adjustment can be performed as follows: to be within the circle. Remove the fixing bolt “A” (4mm Allen key). Finally, tighten bolt “A” keeping the 2.5mm pin through hole Turn the fork support until the fork axle is perpendicular to the “C”...
- Page 34 Footplate distance adjustment Footplate adjustment The EGO model can be provided with five different kind of This adjustment (figure 67) serves to vary the distance of the footplate: one piece footplate with automatic closure (figures 68 footrest from the seat to enable the correct sitting position of the and 69);...
- Page 35 The angle adjustment of the one-piece flip-up footplate can be adjusted in the same manner as for the one piece automatic closure footplate (figure 69 – page 34). Flip-up one-piece and double footplates The EGO allows the use of flip- one-piece double footplates only in combination...
- Page 36 These configurations exclusively depend on how the parts are assembled. When raised, this footrest can be rotated by 180° assembled. (A 3 mm and a 5 mm Allen keys are necessary). (figure 82) so as to reduce the encumbrance if set as completely external One piece flip-up carbon fibre footplate This model can be raised by pulling up the carbon fibre plate with...
- Page 37 Here below the correct footrest sizes based on seat width are detailed Loosen the bolt “A” present on the support “S” (4 mm Allen key). Model EGO Footplate type Slide the brake forward or backward along the slot of the plate Seat width Footplate type “R”.
- Page 38 Once reached the correct adjustment, tighten the bolt “B”. The backrest can be adjusted to the user requirements by Repeat the same operation for both sides. tensioning or slackening the two special velcro straps hidden within the backrest itself . Check the correct functioning of the brakes by To carry out the adjustment, lift or remove the upholstery (figure 92), conducting specific brake tests.
- Page 39 Table 3: possible complete combinations Upper supports “S1” Lower supports “S2” A LEFT A RIGHT B LEFT B RIGHT C LEFT C RIGHT 180° Anti tip Anti tip Armrest Armrest Transit wheels Transit wheels wheel wheel Anti tip Armrest Armrest Tipping aid Transit wheels Transit wheels...
- Page 40 correctly it should be adjusted to a distance of 2-3 cm from the 7.2 Transit wheels ground. This accessory (figure The adjustment of the height is carried out as follows: necessary when the wheelchair is too wide to pass through narrow Remove the fixing screw “A”...
- Page 41 7.6 Other accessories This accessory (figure 98) has been designed to enable the Other accessories available for the model EGO: assistant to tip back the wheelchair without a great effort so as to go over small steps easily. With one foot, press down on the plastic Spoke Guards Fig.100...
- Page 42 Within 6 months from purchase, we recommend to go harness”). to an authorized PROGEO dealer for a complete check up of your wheelchair. The manufacturer will accept no responsibility in case of non compliance with the instructions or recommendations as set out...
- Page 43 For any questions relating to the adjustment and maintenance of be replaced with a new one. your PROGEO wheelchair, the experienced technical staff at RehaTEAM are at the complete disposal of all our clients. You can To re-fit an inner tube and tyre onto the wheel rim it is necessary to contact us directly at the address below: partially inflate the inner tube.
-
Page 44: Troubleshooting Guide
Inspection of components Problem Cause of the problem Solution The front fork are not Check front wheel angle As a daily check, we recommend the following operations: perpendicular to the ground. (see chapter 6.7) Check the tyre pressure (chapter 2.6) The front wheels have not Check front wheels height the same height. -
Page 45: Technical Data
9.0 Technical data Seat width Backrest height Encumbrance Backrest angle 33-36-39-42-45-48cm from 24,5 to 47cm 28cm approx. from 78° to 94° to the seat adjustable (with 0° camber) adjustable Seat depth front frame angle Weight of the wheelchair Camber 35-37,5-40 aluminium 85°... - Page 46 the replacement of the part itself. 10.0 Warranty The authorised distributor in cases of simple repairs may take action independently to eliminate the defect or bring the defect to the The warranty agreement exists only between RehaTEAM s.r.l. and attention of RehaTEAM s.r.l. in specific cases. its authorised dealers.
- Page 47 Vicolo Negrelli, 4 – 31040 Castagnole di Paese (TV) Italia declares that the product defined as WHEELCHAIR FOR DISABLED PERSONS , PROGEO series, model: which this declaration refers to, is in conformity with the guidelines as laid down by European Union Directive 2007/47/CE applied in Italy as D.L.gs 37/2010.
- Page 48 In compliance with article 13 of Italian law 675/96, at any moment you have the right to access, modify, delete or simply oppose the use of such information held by sending an email to the following address: progeo@rehateamprogeo.com...
- Page 51 direction.
- Page 52 Vicolo Negrelli, 4 – 31040 Castagnole di Paese (TV) Italy Tel. +39 0422 484657 ra Fax +39 0422 484661 http//www.rehateamprogeo.com progeo@rehateamprogeo.com MANUFACTURER Certified company TÜV Rheinland directive UNI/EN/ISO/9001 Rehateam® s.r.l. reserves the right to carry out modification and/or improvements to its products without prior notice.
Need help?
Do you have a question about the ego and is the answer not in the manual?
Questions and answers