Table of Contents

Related Manuals for Miele PDR 507 HP


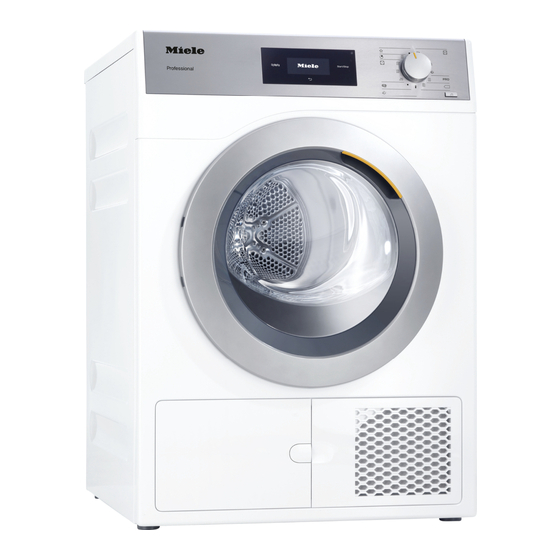
Summary of Contents for Miele PDR 507 HP
- Page 1 Operating and installation instructions Heat-pump tumble dryer It is essential to read these operating instructions before installing and using the appliance. This prevents both personal injury and damage to the appliance. en-AU, NZ M.-Nr. 11 420 910...
-
Page 2: Table Of Contents
Contents Caring for the environment ................. 6 Warning and Safety instructions ................. 7 Operating the tumble dryer ................ 19 Control panel ......................19 Symbols on the control panel ................20 Symbols in the display ..................21 Sensors and touch display with sensor controls ..........22 Main menu...................... - Page 3 Contents Selecting Extras..................... 32 Gentle tumble ....................32 Anti-crease ....................... 32 Selecting Delay start ..................... 33 5. Starting a programme .................. 34 Starting a programme ................... 34 6. End of programme - unloading the drum............ 35 At the end of the programme ................35 Removing the laundry ...................
- Page 4 Contents Cleaning the filter insert (in the plinth) ..............57 Removing the filter insert ................. 57 Checking the cooling fins on the heat exchanger ..........58 Refitting the filter insert in the plinth..............59 Refitting the fluff filter in the plinth ................ 59 Cleaning and closing the fluff filter flap ..............
- Page 5 Contents Supervisor level .................... 82 Opening the Supervisor level ................82 Access via code ....................82 Change code ....................82 Opening the Supervisor level ................82 Exiting the Supervisor level ................... 82 Language....................... 83 Brightness ......................83 Clock display......................83 Finish tone volume ....................
-
Page 6: Caring For The Environment
Caring for the environment Disposal of the packing Disposing of your old material appliance The transport and protective packaging Electrical and electronic appliances has been selected from materials which often contain valuable materials. They are environmentally friendly for also contain specific materials, disposal, and can normally be recycled. -
Page 7: Warning And Safety Instructions
“Installation”, as well as in the “Warning and Safety instructions”. Miele cannot be held liable for injury or damage caused by non- compliance with these instructions. Keep these operating instructions in a safe place and pass them on to any future owner. - Page 8 Warning and Safety instructions This tumble dryer is intended for commercial use in small businesses, care homes, sports clubs, hospitals and other similar commercial environments. This machine may also be operated by lay persons in public areas such as laundrettes, communal laundry rooms or similar.
- Page 9 (e.g. danger of overheating). If the electrical connection cable is faulty, it must only be replaced by a Miele authorised service technician to protect the user from danger. The electrical safety of this appliance can only be guaranteed when continuity is complete between it and an effective earthing system.
- Page 10 This special lamp must only be used for the purpose for which it is intended. It is not suitable for room lighting. Replacement lamps may only be fitted by a Miele authorised technician or by Miele Professional Service.
- Page 11 Warning and Safety instructions Information on the heat pump and refrigerant – This tumble dryer uses refrigerant gas which is not flammable and not explosive. – The humming noises caused by the heat pump during the drying process are normal. They do not impair the correct functioning of the dryer.
- Page 12 Warning and Safety instructions Correct use Warning: Risk of fire / Flammable materials. To avoid the possible danger of fire, please read these warnings carefully. A clogged filter is a fire hazard! The fluff filter must be cleaned after every programme. ...
- Page 13 Warning and Safety instructions The tumble dryer must not be used – without the fluff filters and the filter in the plinth in place. – without the bottom right grille fitted. – if the fluff filters or the filter in the plinth are damaged in any way. In case of damage, fluff filters and plinth filter must be replaced immediately.
- Page 14 Warning and Safety instructions To prevent the risk of fire, the following textiles must not be dried in the tumble dryer: – Items which have not been washed. – Items, such as workwear, which have not been thoroughly cleaned and are still soiled with grease, oil or other deposits (such as cooking oils, cosmetics, lotions, etc.).
- Page 15 (e.g. a timer or a peak-load switch-off device). The tumble dryer may only be operated with a peak-load device if this is connected to the tumble dryer via the Miele XCI box and the relevant settings have been configured on the tumble dryer.
- Page 16 Warning and Safety instructions Fabric softener and similar products must be used according to the instructions on the manufacturer's packaging. Do not store or use petrol, kerosene, paraffin or other flammable substances near the dryer. Risk of fire and explosion! ...
- Page 17 Warning and Safety instructions Using a fragrance flacon (optional accessory) Only ever use original Miele fragrance flacons. The fragrance flacon must be stored in its packaging so please make sure you retain this. Make sure that you always keep the fragrance flacon, or the fluff filter with the flacon inserted in it, in a horizontal position when carrying it, and do not tip or place it down on any surface.
- Page 18 Miele tumble dryer and your Miele washing machine. If you order a plinth for this tumble dryer (available from Miele as an optional accessory), make sure it is the correct one. Miele cannot be held liable for damage caused by non-...
-
Page 19: Operating The Tumble Dryer
Operating the tumble dryer Control panel a language sensor e Optical interface For selecting the current user For service technicians. language in the display. f Programme selector After switching the appliance off and For selecting the drying programmes. back on, the supervisor language is The programme selector can be displayed again. -
Page 20: Symbols On The Control Panel
Operating the tumble dryer Symbols on the control panel Special programmes Express Normal Minimum iron Normal plus Normal Hand iron Woollens Timed drying programme Warm air Cottons Normal plus ... -
Page 21: Symbols In The Display
Operating the tumble dryer Symbols in the display Extras: Use the Extras sensor to add Extras to a drying programme. Low temperature: The Low temperature sensor allows you to reduce the mechanical stress placed on the items while drying. Anti-crease: The Anti-crease sensor allows you to reduce creasing if the ... -
Page 22: Sensors And Touch Display With Sensor Controls
Operating the tumble dryer Sensors and touch display with Main menu sensor controls Cottons The , , and Start/Stop sensors 1:43 Normal and the sensors in the display react to finger tip contact. Every touch of the sensors is confirmed by a keypad tone. You can switch this tone off (see “Supervisor level”). -
Page 23: Examples On How To Operate The Appliance
Operating the tumble dryer Examples on how to operate the appliance Normal Selection list Drying level Cottons The and arrows on the right of the display indicate that further options are available. After making your change, touch Setting numerical values čeština dansk ... -
Page 24: Using For The First Time
Some of the settings can only be configured during the initial commissioning process. After that, they must be changed by Miele Professional Service. These settings are also described in “Supervisor level”. -
Page 25: Reference To External Appliances
Using for the first time Reference to external Confirming the time query appliances A reference to external hardware appears. Should the clock display not be shown? With machine switched off, Touch the sensor. connect external Information hardware, then If you select , the system will skip switch on, or... -
Page 26: Selecting Programme Packages
Touch the sensor for the during the initial commissioning programmes. process. If you wish to change the The programmes are activated (framed) settings later, please contact Miele. or deactivated (no frame). Touch the sensor repeatedly until Confirm with the sensor. -
Page 27: Completing The Commissioning Process
Using for the first time The process for setting up a payment system is described in “Supervisor level - Payment system”. Duration Completing the commissioning process Touch the sensor at the top right The commissioning process is completed when a programme lasting until 0:20... -
Page 28: Notes On Correct Laundry Care
1. Notes on correct laundry care – Sew in or remove loosened Washing underwiring from bras. – Wash heavily soiled laundry thoroughly. Ensure that you use Care label symbols sufficient detergent and select a high temperature. If in doubt, wash the Drying items several times. -
Page 29: Loading The Tumble Dryer
2. Loading the tumble dryer Loading the laundry Socket for the fragrance flacon Textiles may be damaged. See the section “Fragrance flacon” for information on how to use fragrance Before loading the dryer, read “1. flacons. Notes on correct laundry care”. If you are not using a fragrance flacon: Push the tab down completely (see arrow) so that the socket is closed. -
Page 30: Selecting A Programme
3. Selecting a programme Selecting special programmes via the Switching on the tumble dryer programme selector position Press the button. The interior drum lighting will come on. The interior drum lighting will automatically go out after a few minutes and/or after the start of a programme to save energy. -
Page 31: Selecting Programme Settings
* The time frame for selecting the Different drying levels are available programme duration can be limited by depending on the programme. Miele Professional Service. – For standard programmes, you can – Timed drying warm air = 0:20-2:00... -
Page 32: Selecting Extras
4. Selecting programme settings Gentle tumble Selecting Extras Sensitive items are dried with less The drying programmes can be mechanical action (fewer drum supplemented with various Extras. rotations). Cottons Anti-crease 1:43 Normal After the programme has finished, the drum can be set to continue to rotate in ... -
Page 33: Selecting Delay Start
4. Selecting programme settings Selecting Delay start Delay start must be activated in the Supervisor level for it to be able to be Start at selected. In this case, one of these 3 symbols will also light up in the display: , , . -
Page 34: Starting A Programme
5. Starting a programme Payment system Programme duration/estimated time remaining Useful tip: If your machine is connected to a payment system, the The programme duration depends on amount of payment required will appear the quantity of laundry, the type of in the display. -
Page 35: End Of Programme - Unloading The Drum
6. End of programme - unloading the drum At the end of the programme Removing the laundry The laundry is cooled down shortly before the end of the programme. The laundry can then be removed. The programme has ended when only ... -
Page 36: Programme Chart
Programme chart All weights marked with * are based on the weight of dry laundry. Standard programmes Cottons Max. load 7 kg* Normal plus, Normal Items – Single and multi-layered cotton fabrics. – Towelling, bathrobes, T-shirts, underwear, jersey/terry bed linen, baby clothes. - Page 37 Programme chart Minimum iron Max. load 4 kg* Normal plus, Normal, Hand iron Items – Minimum iron items made of cotton, synthetic, or mixed fibre. – Workwear, overalls, pullovers, dresses, trousers, leggings and ta- ble linen. Woollens Max.
-
Page 38: Special Programmes
Programme chart Special programmes Towelling Max. load 7 kg* Items Large quantities of single-layered and multi-layered towelling items. These include towels, bath robes, face washers, terry bed linen. Notes This programme only dries to the Normal plus level. Shirts Max. - Page 39 Programme chart Silks Max. load 1 kg* Items Silk garments which are suitable for drying in a tumble dryer, e.g. blouses and shirts. Notes – Programme for reduced creasing. – Items are not dried completely. – Remove garments as soon as the programme has finished. Automatic plus Max.
- Page 40 Notes – This programme may only be used with the Miele tumble dryer basket (optional accessory). – The drum is not rotated in this programme.
-
Page 41: Programme Packages
Programme chart Programme packages You can select various programme packages. The programmes selected from the programme packages are displayed under Special programmes. Sport Sportswear Max. load 3 kg* Items Sportswear which is suitable for drying in a tumble dryer. Notes This programme only dries to the Normal level. - Page 42 Programme chart Home textiles Down bedding Max. load 2 kg* Items Bedding suitable for tumble drying (duvets or pillows filled with down or feathers). Notes This programme only dries to the Normal level. Notes Feathers are a natural product and may develop odours when exposed to heat.
- Page 43 Programme chart Hygiene In the hygiene programmes, items will be dried with a temperature that is constant over an extended period (longer temperature holding time). This temperature holding time kills off micro-organisms such as germs or dust mites and reduces allergens in the laundry. If a hygiene programme is cancelled early, micro-organisms will not be killed.
-
Page 44: Changing The Programme Sequence
Risk of burning when touching hot laundry in the drum. * Either during the commissioning You could burn yourself. process or subsequently by Miele Professional Service, a time period can Let the laundry cool down and be set during which a programme remove it carefully. -
Page 45: Fragrance Flacon
Fragrance flacon Inserting a fragrance flacon The fragrance flacon is inserted in the upper fluff filter. The socket is next to Fragrance flacons (optional the recessed grip. accessories) can be used to give your laundry a pleasant scent. To prevent the accumulation of fluff, the cover of the unused socket must ... - Page 46 Fragrance flacon Insert the fragrance flacon in the Turn the outer ring clockwise a opening as far as it will go. little. The fragrance flacon can slip out. Turn the outer ring so that markers and line up. Markers ...
-
Page 47: Opening The Fragrance Flacon
Fragrance flacon Opening the fragrance flacon Closing the fragrance flacon Before drying, you can select the After drying, the fragrance flacon should intensity of the fragrance. be closed to prevent the fragrance from escaping needlessly. Turn the outer ring clockwise: the ... -
Page 48: Removing/Replacing The Fragrance Flacon
– Always store in a cool, dry place fragrance flacon in its original away from direct sunlight. packaging. – When purchasing new fragrance Fragrance flacons are available to flacons, only remove the protective order from Miele or via the Miele seal just before use. online shop. -
Page 49: Cleaning And Care
Cleaning and care 1. When to clean the fluff filters Observing cleaning intervals The fluff filters are located in the drum This tumble dryer is equipped with a loading area. multi-stage filter system, which consists of fluff filters (1.) and a filter in the plinth (2.). -
Page 50: When To Clean The Filter In The Plinth
There is insufficient flow of air and heat exchange in the heat exchanger, as it is clogged. This requires a visit from Miele Professional Service. This can be avoided by following the advice in these operating instructions. -
Page 51: When To Clean The Grille On The Bottom Right/Heat Exchanger For Heat Dissipation
Cleaning and care 3. When to clean the grille on the Cleaning the filters bottom right/heat exchanger for heat This tumble dryer has 2 fluff filters in dissipation the drum loading area. The upper and Clean when Open bottom right grille, lower fluff filters trap fluff produced appears in clean the heat exchanger... -
Page 52: Cleaning The Fluff Filters And Air Flow Openings Thoroughly
Cleaning and care Cleaning the fluff filters and air flow openings thoroughly If the drying duration has become longer or the surface of the filters is visibly compacted with fluff, you should carry out the following cleaning procedure. Cleaning the fluff filters dry ... - Page 53 Cleaning and care Push the lower fluff filter in completely and lock it with the yellow dial. Use a vacuum cleaner with a long crevice nozzle attached to remove any visible fluff from the upper air flow openings. ...
-
Page 54: Cleaning The Filter In The Plinth
Cleaning and care Cleaning the filter in the plinth The fluff filter in the plinth collects finer fluff, hair and detergent residues that can penetrate the fluff filters. Removing the plinth filter Pull the filter out at an angle. ... -
Page 55: Cleaning The Plinth Filter With Water
There will Poor fit be an insufficient flow of air and heat exchange in the heat exchanger. This requires a visit from Miele Professional Service. Before and after cleaning, check the plinth filter in accordance with the description in “Replacing the plinth... - Page 56 Cleaning and care Deformations White residues or residues of other colours Deformations indicate that the filter has become blocked and worn by Residues arise from laundry fibres and continuous use. residues of detergent components Cracks, tears, indentations which can clog the filter. They can be found on the front and side edges of the filter.
-
Page 57: Cleaning The Filter Insert (In The Plinth)
Cleaning and care Removing the filter insert Cleaning the filter insert (in the plinth) If the filter insert is clogged up and soiled, it must be removed and cleaned The surface of the filter insert is visible under running water. after removing the fluff filter (in the plinth). -
Page 58: Checking The Cooling Fins On The Heat Exchanger
Cleaning and care Checking the cooling fins on the heat exchanger Danger of injury caused by touching the cooling fins. You could cut yourself. Do not touch the cooling fins. After removing the filter insert, you will see the cooling fins on the heat exchanger. -
Page 59: Refitting The Filter Insert In The Plinth
Cleaning and care Refitting the filter insert in the plinth Press the frame of the filter insert in at the position marked PUSH until it Use the handle on the right to slide clicks into position. the filter insert at an angle behind the edge. -
Page 60: Cleaning And Closing The Fluff Filter Flap
Cleaning and care Cleaning and closing the fluff filter flap Use the handle to slide the filter insert on the right side at an angle behind the edge. Use a damp cloth to remove any fluff. Make sure that you do not damage the rubber seal when doing this. -
Page 61: Cleaning The Bottom Right Grille/Heat Exchanger
Cleaning and care Removing the grille Cleaning the bottom right grille/heat exchanger The cooling fins of the heat exchanger behind the grille can become blocked with dust and dirt drawn in from the surrounding area. Open the fluff filter flap. Open the bottom right grille, e.g. -
Page 62: Cleaning The Cooling Fins
Cleaning and care Cleaning the cooling fins Refitting the grille Check whether the cooling fins are clogged. Danger of injury caused by touching the cooling fins. You could cut yourself. Do not touch the cooling fins. If there is visible soiling: ... -
Page 63: Cleaning The Dryer
Cleaning and care The drum and other stainless steel Cleaning the dryer parts can be cleaned with a suitable Disconnect the dryer from the stainless steel cleaner following the electricity supply. manufacturer's instructions. Damage due to the use of unsuitable care products. -
Page 64: Problem Solving Guide
With the help of the following guide, minor faults in the performance of the appliance, some of which may result from incorrect operation, can be remedied without contacting Miele. This will save you time and money because you won't need a service call. - Page 65 Problem solving guide Message Possible cause and remedy The tumble dryer is not working correctly or Clean out the economically. Possible causes could be clogging airways lights up caused by fluff or detergent residues. at the end of a ...
- Page 66 Touch the sensor. programme has If the programme terminates again with the same been cancelled. error message, then there is a fault. Contact Miele Customer Service. The laundry is unevenly distributed or has rolled up. Obstruction ...
-
Page 67: Unsatisfactory Drying Result
Problem solving guide Unsatisfactory drying result Problem Possible cause and remedy The laundry is not The load consisted of different types of fabric. sufficiently dry. Finish drying using the Timed drying warm air programme. Large items of laundry The laundry could not be untangled in the have rolled up, causing programme you selected. -
Page 68: The Drying Process Takes A Long Time
Problem solving guide The drying process takes a long time. Problem Possible cause and remedy The drying process The room in which the tumble dryer is located is too goes on too long or warm. even switches off*. Ventilate the room thoroughly. Detergent residues, hair and fine fluff can clog the filters. -
Page 69: General Problems With The Tumble Dryer
Problem solving guide General problems with the tumble dryer Problem Possible cause and remedy You can hear buzzing or This is not a fault. The compressor (heat pump) is humming operating operating. noises. These noises are normal and caused by the operation of the compressor. -
Page 70: Regenerating The Plinth Filter
Problem solving guide Regenerating the plinth filter You can regenerate one or more dirty plinth filters in the washing machine. In this way, a plinth filter can be used again for a reasonable period of time. Wash one or more plinth filters separately without garments. -
Page 71: Service
Optional accessories In the event of any faults which you Optional accessories for this tumble cannot remedy yourself, please contact dryer are available from Miele (see Miele. contact details at the back of these instructions). You can book a Miele customer service call-out online at www.miele.com/service. -
Page 72: Installation
*INSTALLATION* Installation Front view a Mains connection cable f Bottom right grille = air cooling opening b Control panel – Open only when a prompt appears c Door in the display d Fluff filter flap for the filter in the g Drain hose for condensed water plinth h Non-return valve, required... -
Page 73: Rear View
*INSTALLATION* Installation Rear view a Interface for communicating with d Module slot (for external external devices communication module) b Mains connection cable e Drain hose for condensed water c Protruding lid for holding the appliance during transport... -
Page 74: Installation Locations
All measurements in mm Side view 1191 1100 Washer-dryer stack min. 300 Steel plinth 1702 A stacking kit* is needed. This must be fitted by a Miele authorised service technician. Steel plinth* (open or closed bases) * optional Miele accessories... -
Page 75: Transporting The Dryer To Its Installation Site
*INSTALLATION* Installation Transporting the tumble dryer to its Transporting the dryer to its installation site installation site Danger of injury due to Risk of damage from incorrect unsecured lid. transport. The rear attachment of the lid may If the tumble dryer tips over, there is become brittle due to external a danger of injury to people and circumstances. -
Page 76: Installation
*INSTALLATION* Installation Installation Ensure that no lockable door, sliding door or a door hinged in the opposite direction is installed in the pivoting range of the dryer door. Downtime after installation Damage caused by switching the appliance on too soon. This can damage the heat pump. -
Page 77: Room Ventilation
Payment system The dryer can be fitted with a payment system (optional accessory). This must be connected and programmed by a Miele Professional Service technician. Coins/tokens must be removed from the coin box regularly. Otherwise, the payment system will become blocked. -
Page 78: Drain Hose For Condensed Water
*INSTALLATION* Installation Drain hose connection options Drain hose for condensed water Useful tip: Follow the warnings regarding leakage or backflow of water The condensed water is pumped away when selecting one of the following through the drain hose which is connection options. - Page 79 *INSTALLATION* Installation Fit the adapter 1 to the drain outlet Example: Connected directly to a laundry tub or trough drain outlet using the nut 2. If this nut has a spacer you should take the spacer out first. Attach the end of the hose 4 to the adapter 1.
-
Page 80: Electrical Connection
*INSTALLATION* Installation AS/NZS 3000). This connection must Electrical connection be carried out by a qualified and This description applies to tumble competent electrician. dryers both with and without a mains The plug connector or isolator switch plug. should be easily accessible at all times. The following applies to tumble dryers ... -
Page 81: Technical Data
Technical data Height 850 mm Width 596 mm Width (for appliances with a stainless 605 mm steel lid) Depth 777 mm Depth with door open 1191 mm Weight 72 kg Drum volume 130 l Load size 7 kg (weight of dry laundry) Hose length 1400 mm Length of connection cable 2000 mm Supply voltage See data plate on back of machine... -
Page 82: Supervisor Level
Enter code Carefully enter a new code. You will need to inform Miele if you have forgotten your new code. Miele Enter the individual numbers and will have to reset the code. confirm each selection with Make a note of your new code and store it in a safe place. -
Page 83: Language
Supervisor level Language Finish tone volume The display can be set to appear in The volume for the signal tone that one of several different languages. To sounds at the end of the programme select the language you want, go to can be changed. -
Page 84: Fault Alarm
Supervisor level Fault alarm Further cooling The acoustic signal that indicates a Before the end of the programme, the fault can be switched off. temperature of the dried laundry is monitored and the cooling phase at – Factory setting: On the end of the programme is extended if necessary. -
Page 85: Delay Start
Supervisor level Delay start Drying level Cottons The type of time input for the Delay Drying level Minimum iron start function can be changed or switched off. Drying level Automatic plus – Off You can alter the drying levels for the The Delay start function is not Cottons, Minimum iron, and Automatic available for selection. -
Page 86: Clean The Airways
Supervisor level Clean the airways Programme packages The tumble dryer's electronics The tumble dryer's additional scope of calculate the degree at which fluff or programmes can be configured. The detergent residue in the fluff filters and programmes are listed in the air ducts are impairing performance. -
Page 87: Peak Load Signal
The next settings are skipped and this system is connected to the tumble initial commissioning can be dryer via the Miele XCI Box. completed. – Factory setting: No function – Programme operation – Peak load with 230 V The machine is operated using a coin box. -
Page 88: Time / Impulse
Supervisor level Time / Impulse Payment system lock To be able to operate the tumble dryer To avoid tampering, a programme lock with conventional payment systems can be set up in programme where multiple coins can be inserted, operation. If the lock is applied, the you can adjust how much time is programme is interrupted and purchased each time a coin is... -
Page 89: Clear Paid Signal
Supervisor level Clear paid signal A time between 10 and 120 minutes can be set in 5-minute increments. The “Paid” signal in coin mode can be Factory setting: 120 minutes applied until the end of the programme or discarded after Duration Warm air 5 minutes if the programme has not been started. - Page 91 Miele Australia Pty. Ltd. ACN 005 635 398 ABN 96 005 635 398 Melbourne: 1 Gilbert Park Drive Knoxfield, VIC 3180 Telephone: 1300 731 411 service.prof@miele.com.au www.miele-professional.com.au sales@miele-professional.com.au Miele New Zealand Limited IRD 98 463 631 Level 2, 10 College Hill...
- Page 92 PDR 507 HP en-AU, NZ M.-Nr. 11 420 910 / 00...
Need help?
Do you have a question about the PDR 507 HP and is the answer not in the manual?
Questions and answers