Table of Contents

Related Manuals for Miele PDR 507 HP Marine


Summary of Contents for Miele PDR 507 HP Marine
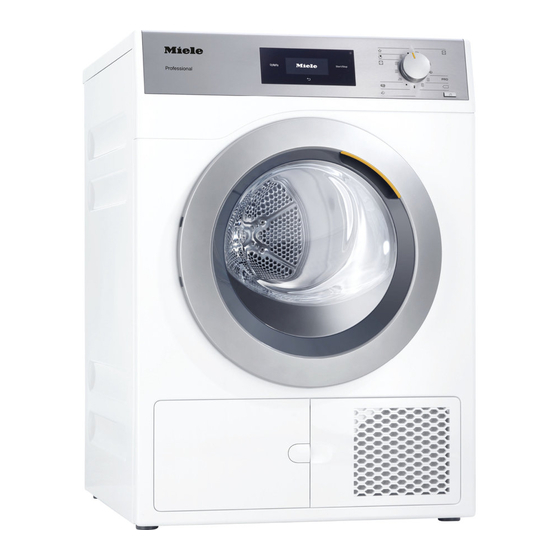
- Page 1 Operating and installation instructions Heat-pump dryer Always read the operating instructions before setting up, installing and commissioning the appliance. This prevents both personal injury and damage to the machine. en-GB M.-Nr. 11 321 900...
-
Page 2: Table Of Contents
Contents Caring for the environment ................. 6 Warning and Safety instructions ................. 7 Operating the tumble dryer ................ 18 Control panel ......................18 Symbols on the control panel ................19 Symbols on the display ..................20 Sensor controls and touch display with sensor controls ........21 Main menu...................... - Page 3 Contents Selecting extra options..................31 Gentle tumble ....................31 Anti-crease ....................... 31 Selecting delay start....................32 5. Starting the programme ................. 33 Starting the programme ..................33 6. End of programme – unloading the drum ............. 34 End of programme....................34 Unloading the drum....................
- Page 4 Contents Cleaning the filter insert (in the plinth) ..............56 Removing the filter insert ................. 56 Check the cooling fins on the heat exchanger ..........57 Refitting the filter insert (in the plinth)............... 58 Refitting the fluff filter in the plinth ................ 58 Cleaning and closing the fluff filter flap ..............
- Page 5 Contents Supervisor level .................... 82 Opening Supervisor level ..................82 Access via code ....................82 Change code ....................82 Opening the supervisor level................82 Exiting the supervisor level..................82 Language....................... 83 Brightness ......................83 Clock display......................83 Finish tone volume ....................83 Keypad tone volume .....................
-
Page 6: Caring For The Environment
/ recycling centre for electrical and electronic ap- pliances, or contact your dealer or Miele for advice. You are also respons- ible for deleting any personal data that may be stored on the appliance being disposed of. Please ensure that your old appliance poses no risk to children while being stored prior to disposal. -
Page 7: Warning And Safety Instructions
If using, do so at your own risk, and follow the in- structions provided on the packaging. Any other applications may be dangerous. Miele cannot be held liable for damage resulting from in- correct or improper use or operation. - Page 8 Extension leads are a fire hazard and do not guar- antee the required safety of the tumble dryer. If the electrical connection cable is faulty it must always be re- placed by a Miele authorised service technician to protect the user from danger.
- Page 9 It is essential that this standard safety re- quirement is met. If in any doubt, please have the on-site wiring sys- tem inspected by a qualified electrician. Miele cannot be held liable for the consequences of an inadequate earthing system (e.g. electric shock).
- Page 10 Warning and Safety instructions Faulty components must only be replaced by genuine Miele ori- ginal spare parts. The manufacturer can only guarantee the safety of the appliance when Miele replacement parts are used. To ensure the correct performance of the tumble dryer and to pre- vent the risk of faults and fire, it is important to carry out mainten- ance on a regular basis.
- Page 11 It is not suitable for room lighting. Replacement lamps may only be fitted by a Miele authorised person or by Miele Service. Information on the heat pump and refrigerant –...
- Page 12 Warning and Safety instructions – children climbing onto or into the dryer or hiding things in it. – pets or other small animals climbing into it. Do not use a pressure washer or hose to clean the tumble dryer. ...
- Page 13 Warning and Safety instructions To ensure problem-free operation: – After every cycle remove the fluff from the surfaces of the fluff fil- ters. – Clean the airways (fluff filters, plinth filter, bottom right grille) as soon as the prompt to do so appears in the display. ...
- Page 14 Warning and Safety instructions To prevent the risk of fire, the following textiles must not be dried in this tumble dryer: – items which have not been washed. – Items, such as workwear, which have not been thoroughly cleaned and which are still soiled with grease, oil or other depos- its (such as cosmetics, lotions etc).
- Page 15 (e.g. a timer or a peak-load switch-off device). The tumble dryer may only be operated with a peak-load device if this is connected to the tumble dryer via the Miele XCI box and the relevant settings have been configured on the tumble dryer.
- Page 16 Do not store containers of these agents near the tumble dryer. Using a fragrance flacon (optional accessory) Only ever use original Miele fragrance flacons. The fragrance flacon must be stored in its packaging so please make sure you retain this.
- Page 17 Only use genuine Miele original spare parts and accessories with this appliance. If spare parts or accessories from other manufactur- ers are used, this will invalidate the guarantee, and Miele cannot ac- cept liability. The tumble dryer can also be combined with a Miele washing ma- chine in a washer-dryer stack.
-
Page 18: Operating The Tumble Dryer
Operating the tumble dryer Control panel a Language sensor control e Optical interface For selecting the current user lan- This is used by the Service depart- guage on the display. ment as a transmission point. The operating language is displayed f Programme selector again after switching the appliance For selecting the drying programme. -
Page 19: Symbols On The Control Panel
Operating the tumble dryer Symbols on the control panel Special programmes Express Normal Minimum iron Normal plus Normal Hand iron Woollens Timed drying programme Warm air Cottons Normal plus ... -
Page 20: Symbols On The Display
Operating the tumble dryer Symbols on the display Extras: use the Extras sensor control to add extras to a drying pro- gramme. Low temperature: the Low temperature sensor control allows you to re- duce the mechanical stress placed on the items while drying. Anti-crease: the Anti-crease sensor control allows you to reduce creas- ... -
Page 21: Sensor Controls And Touch Display With Sensor Controls
Operating the tumble dryer Sensor controls and touch dis- Main menu play with sensor controls Cottons The , , and Start/Stop sensor 1:43 Normal controls and the sensor controls in the display react to finger tip contact. Every touch of a sensor control is confirmed with an audible tone. -
Page 22: Examples Of How To Operate The Appliance
Operating the tumble dryer Examples of how to operate the appliance Normal Selection list Drying level Cottons The and arrows on the right of the display indicate that choices are avail- able. After making your change, touch Setting numerical values čeština dansk ... -
Page 23: Initial Commissioning
Some of the settings can only be configured during the initial commissioning pro- cess. After that, they must be changed by Miele Service. These settings are also described under “Supervisor level”. -
Page 24: Reference To External Appliances
Initial commissioning Reference to external appli- Confirming the time request ances A reference to external hardware ap- pears. Should the clock display not be shown? With machine switched off Touch the sensor control. connect external Information hardware, then If you select , the system will skip switch on, or... -
Page 25: Selecting Programme Packages
The programmes are activated (framed) cess. If you wish to change the settings or deactivated (no frame). after the commissioning process, please contact Miele Service. Confirm with the sensor control. Touch the sensor control re- The display switches back to... -
Page 26: Completing The Commissioning Process
Initial commissioning Touch the sensor control for the set- ting you want. 0:10 Timed drying cool air The process for setting up a payment system is described under “Payment systems” in the chapter “Supervisor 0:10 level”. ... -
Page 27: Notes On Correct Laundry Care
1. Notes on correct laundry care – Sew in or remove underwiring from Washing bras. – Heavily soiled laundry must be washed particularly thoroughly. Use Understanding the care label sufficient detergent and select a high symbols temperature. If in doubt, wash the items several times. -
Page 28: Load The Tumble Dryer
2. Load the tumble dryer Loading the laundry Socket for the fragrance flacon Preventing textile damage. The “Fragrance flacon” chapter de- scribes how to use the fragrance Before loading, read chapter “1. flacon. Notes on correct laundry care.” If you are not using a fragrance flacon: push the tab down completely (see ar- row) so that the socket is closed. -
Page 29: Selecting A Programme
3. Selecting a programme Selecting special programmes via the Switch on the tumble dryer programme selector position Press the control. The drum lighting will come on. The drum lighting will automatically go out after a few minutes and/or after the start of a programme to save en- ergy. -
Page 30: Selecting Programme Settings
* The time frame for the selected pro- Different drying levels are available de- gramme duration can be limited by pending on the programme. Miele Service. – For standard programmes, you can – Timed drying warm air = 0:20-2:00... -
Page 31: Selecting Extra Options
4. Selecting programme settings Gentle tumble Selecting extra options Sensitive items are dried with less The drying programmes can be aug- mechanical movement (fewer drum ro- mented with various extra options. tations). Cottons Anti-crease 1:43 Normal After the programme has finished, the drum will continue to rotate in a certain ... -
Page 32: Selecting Delay Start
4. Selecting programme settings If the delay start time is set to Finish Selecting delay start Start at , the current times will be Delay start must be activated in the displayed. supervisor level to allow it to be selec- ... -
Page 33: Starting The Programme
5. Starting the programme Payment systems Programme duration/Estim- ated time remaining Tip: If your machine is connected to a payment system, the amount of pay- The programme duration depends on ment required will appear in the display. the quantity of laundry, the type of fab- ric and the residual moisture in the Once the programme has started, do laundry or also the water hardness. -
Page 34: End Of Programme - Unloading The Drum
6. End of programme – unloading the drum End of programme Unloading the drum The laundry will be cooled down shortly before the end of the programme. The laundry can now be unloaded. The programme has ended when only Finish is left on the display. -
Page 35: Programme Overview
Programme overview All weights marked with * are based on the weight of dry laundry. Standard programmes Cottons Max. load 7 kg* Normal plus, Normal Use for – Single and multi-layered cotton items. – Towelling, T-shirts, underwear, jersey bed linen, baby clothes. –... - Page 36 Programme overview Express Max. load 4 kg* Use for Hardy items for the Cottons programme with the Normal drying level. Note This programme is shorter compared to the Cottons programme. Minimum iron Max. load 4 kg* Normal plus, Normal, Hand iron Use for –...
-
Page 37: Special Programmes
Programme overview Special programmes Towelling Max. load 7 kg* Use for Large quantities of single-layered and multi-layered towelling items. These include, for example, towels, bath robes, face flannels, flannel bed linen. Note Items are dried to a Normal plus level only in this programme. Shirts Max. - Page 38 Programme overview Denim Max. load 3.5 kg* Normal, Hand iron plus Use for Denim garments, e.g. jeans, jackets, skirts, shirts. Silks Max. load 1 kg* Use for Silk garments which are suitable for tumble drying, e.g. blouses and shirts Note – Programme for reduced creasing. –...
- Page 39 Note – This programme may only be used with the Miele tumble dryer basket (optional accessory). – The drum is not rotated in this programme.
-
Page 40: Programme Packages
Programme overview Programme packages You can select various programmes packages. The programmes selected from the programme packages are displayed under Special programmes. Sport Sportswear Max. load 3 kg* Use for Sportswear that is suitable for drying in a tumble dryer. Note Items are dried to a Normal level only in this programme. - Page 41 Programme overview Home textiles Down bedding Max. load 2 kg* Use for Bedding suitable for tumble drying (duvets or pillows filled with down or feathers). Note Items are dried to a Normal level only in this programme. Feathers have a tendency of developing a strong odour when they are warm.
- Page 42 Programme overview Hygiene In the hygiene programmes, items will be dried with a temperature that is con- stant over an extended period (longer temperature holding time). This kills off micro-organisms such as germs or dust mites and reduces allergens in the laundry.
-
Page 43: Changing The Programme Sequence
Adding laundry how the tumble dryer was set up*). Open the door. * Either during the commissioning pro- cess or subsequently, a Miele service Risk of burns by touching hot technician can reset the payment sys- laundry in the drum. -
Page 44: Fragrance Flacon
Fragrance flacon Inserting a fragrance flacon The fragrance flacon is inserted in the upper fluff filter. The socket is next to Fragrance flacons (optional accessor- the recessed grip. ies) can be used to give your laundry a pleasant scent. If you are not using a fragrance flacon, the cover to the unused ... - Page 45 Fragrance flacon Insert the fragrance flacon as far it will Turn the outer ring clockwise a go into the socket. little. The fragrance flacon may slip out. Turn the outer ring in such a way that the markers and line up. The markers ...
-
Page 46: Opening The Fragrance Flacon
Fragrance flacon Opening the fragrance flacon Closing the fragrance flacon Before drying, you can select the in- After drying, the fragrance flacon should tensity of the fragrance. be closed to prevent the fragrance from escaping needlessly. Turn the outer ring clockwise: the fur- ... -
Page 47: Removing/Replacing The Fragrance Flacon
– Always store in a cool, dry place away from direct sunlight. Fragrance flacons are available to or- der from Miele or online. – When purchasing new fragrance flac- ons, only remove the protective seal just before use. -
Page 48: Cleaning And Care
Cleaning and care 1. When to clean the fluff filter Observe the cleaning intervals The fluff filters are located in the drum This tumble dryer is equipped with a loading area. multi-stage filter system, which con- sists of a fluff filter (1.) and a filter in the plinth (2.). -
Page 49: When To Clean The Filter In The Plinth
Cleaning and care 2. When to clean the filter in the Damage caused by insufficient plinth cleaning or by operation with a worn, The filter in the plinth is behind the fluff damaged filter in the plinth. filter flap on the bottom left. There is insufficient flow of air and heat in the heat exchanger due to clogging. -
Page 50: When To Clean The Grille In The Bottom Right/Heat Exchanger For Heat Dissipa- Tion
Cleaning and care 3. When to clean the grille in the bot- Cleaning the fluff filters tom right/heat exchanger for heat This tumble dryer has 2 fluff filters in dissipation the loading area. The upper and lower Clean when Open bottom right grille, fluff filters trap fluff produced during appears in the clean heat exchanger... -
Page 51: Cleaning The Fluff Filters And Air Flow Openings Thoroughly
Cleaning and care Cleaning the fluff filters and air flow openings thoroughly If the drying duration has become longer or the surface of the filters is visibly compacted with fluff, you should carry out the following cleaning procedure. Cleaning the fluff filters while dry ... - Page 52 Cleaning and care Use a vacuum cleaner with a long Push the lower fluff filter in com- crevice nozzle attached to remove pletely and lock it with the yellow dial. any visible fluff from the upper air flow openings. Cleaning the fluff filters with water ...
-
Page 53: Filter In The Plinth
Cleaning and care Filter in the plinth The fluff filter in the plinth collects finer fluff, hair and detergent residues that have got through the surfaces of the fluff filters. Removing the fluff filter Pull the fluff filter out at an angle. ... -
Page 54: Cleaning The Fluff Filter With Water
Cleaning and care Cleaning the fluff filter with water Replacing the plinth filter Clean the filter thoroughly under run- Filter wear caused by continuous ning water. tumble dryer use. Squeeze the filter very carefully sev- If the tumble dryer is in continuous eral times as you rinse it. - Page 55 Cleaning and care Deformation White residues or residues of other col- ours Deformations indicate that the filter has become blocked and worn by continu- Residues arise from laundry fibres and ous use. traces of detergent components which Cracks, tears, indentations can clog the filter.
-
Page 56: Cleaning The Filter Insert (In The Plinth)
Cleaning and care Removing the filter insert Cleaning the filter insert (in the plinth) If the filter insert is clogged up and soiled, it must be removed and cleaned The surface of the filter in the filter in- under running water. sert is visible after removing the fluff fil- ter in the plinth. -
Page 57: Check The Cooling Fins On The Heat Exchanger
Cleaning and care Check the cooling fins on the heat exchanger Danger of injury if you touch the cooling fins. You could cut yourself. Do not touch the cooling fins with your hands. After removing the filter insert, visually check the cooling fins on the heat ex- changer. -
Page 58: Refitting The Filter Insert (In The Plinth)
Cleaning and care Refitting the filter insert (in the plinth) Press the frame of the filter insert in at the positions marked PUSH until it Use the handle to slide the filter in- audibly engages. sert to the right at an angle behind the edge. -
Page 59: Cleaning And Closing The Fluff Filter Flap
Cleaning and care Cleaning and closing the fluff filter flap Use the handle to slide the fluff filter on the right at an angle behind the edge. Use a damp cloth to remove any fluff. Make sure that you do not damage the rubber seal when doing this. -
Page 60: Cleaning The Bottom Right Grille/Heat Exchanger
Cleaning and care Open the grille from left to right and Cleaning the bottom right pull it off at an angle to the front. grille/heat exchanger The heat exchanger's cooling fins be- hind the grille can become blocked with dust and dirt drawn in from the surrounding area. -
Page 61: Cleaning The Cooling Fins
Cleaning and care Cleaning the cooling fins Replacing the grille Check whether the cooling fins are clogged. Danger of injury caused by touching the cooling fins. You could cut yourself. Do not touch the cooling fins with your hands. If there is visible soiling: ... -
Page 62: Cleaning The Tumble Dryer
Cleaning and care The drum and other stainless steel Cleaning the tumble dryer parts can be cleaned with a suitable Disconnect the tumble dryer from the stainless steel cleaner. electrical supply. Damage caused by the use of unsuitable care products. Unsuitable care products could dam- age plastic surfaces and other parts. -
Page 63: Problem Solving Guide
Problem solving guide Many malfunctions and faults that can occur in daily operation can be easily remedied. Time and money will be saved because a service call will not be needed. The following guide may help you to find the reason for a malfunction or a fault, and to correct it. - Page 64 Problem solving guide Message Cause and remedy The tumble dryer is not working correctly or econom- Clean out airways ically. Possible causes could be clogging caused by lights up at the fluff or detergent residue. end of a pro- ...
- Page 65 Problem solving guide Message Cause and remedy You have attempted to dry only a few items of vary- Clean the fluff filter. ing size. A smaller item has been sucked into the Check the airways. loading area in the door and is clogging the holes in lights up after a the laundry deflector.
- Page 66 Touch the sensor control. programme has If the programme terminates again with the same er- been cancelled. ror message, then there is a fault. Contact Miele Ser- vice. The laundry is unevenly distributed or has rolled up. Obstruction detec- ...
-
Page 67: Unsatisfactory Drying Results
Problem solving guide Unsatisfactory drying results Problem Cause and remedy Large items of laundry The laundry could not be disentangled in the pro- have rolled up, causing gramme you selected. Smaller items have rolled up a problem. The indi- into one. vidual items of laundry ... -
Page 68: The Drying Cycle Duration Is Very Long
Problem solving guide The drying cycle duration is very long Problem Cause and remedy The drying process The room where the tumble dryer is located is too goes on too long or warm. even switches off*. Ventilate the room thoroughly. Detergent residues, hair and fine fluff can clog the fil- ters. -
Page 69: General Problems With The Tumble Dryer
Problem solving guide General problems with the tumble dryer Problem Cause and remedy There are humming The compressor is operating. noises. These noises are quite normal and do not indicate a fault. The drum lighting does The drum lighting switches off automatically when not come on. -
Page 70: Reactivating The Plinth Filter
Problem solving guide Reactivating the plinth filter You can reactivate one or more dirty plinth filters in the washing machine. You will then be able to use the plinth filter again for a reasonable period of time. Wash the plinth filter(s) separately, not with any laundry items. -
Page 71: Service
Optional accessories for this tumble cannot remedy yourself, please contact dryer are available from your Miele your Miele Dealer or Miele Service. Dealer or from the Miele Spare Parts Department. Contact information for Miele Service can be found at the end of this docu- ment. -
Page 72: Installation
*INSTALLATION* Installation Front view a Mains connection cable f Bottom right grille = Air cooling open- b Control panel – Open only when a prompt appears c Door in the display d Fluff filter flap for the filter in the g Drain hose for condensation plinth h Non-return valve, required... -
Page 73: Rear View
*INSTALLATION* Installation Rear view a Interface for communicating with ex- d Module slot (for external communica- ternal devices tion module) b Mains connection cable e Drain hose for condensation c Recesses under the protruding lid for transporting the appliance... -
Page 74: Locations
All measurements in mm Side view 1191 1100 Washer-dryer stack min. 300 Steel plinth 1702 A stacking kit* is needed. This must be fitted by a Miele authorised service technician. Steel plinth* (open or closed bases) * Miele accessory available to order... -
Page 75: Transporting The Tumble Dryer To Its Installation Site
*INSTALLATION* Installation Transporting the tumble dryer to its Transporting the tumble dryer installation site to its installation site Danger of injury due to unsecure Damage caused by incorrect lid. transportation of the tumble dryer. The fixings at the back of the lid If the tumble dryer tips over, there is could break as a result of external a danger of injury to people and... -
Page 76: Installation
*INSTALLATION* Installation Levelling the tumble dryer Installation Ensure that no closeable door, slid- ing door, or an oppositely hinged door is installed that would hinder the door of the tumble dryer being opened in any way. Installing the tumble dryer on boats On other types of floor structures (in cases where the tumble dryer is in- stalled on sea-going vessels, for ex-... -
Page 77: Room Ventilation
Payment systems This tumble dryer can be fitted with a payment system (optional Miele ac- cessory). In this case, a Miele Service technician must programme the relev- ant settings in the tumble dryer's elec- tronics and connect the payment sys- tem. -
Page 78: Hose For External Drainage Of Condensed Water
*INSTALLATION* Installation Drainage options Hose for external drainage of condensed water Tip: Follow the warnings regarding leak- ing or returning water if you select one The condensed water is pumped away of the following connection options. through the drain hose which is loc- –... - Page 79 *INSTALLATION* Installation Install adapter 1 to the sink drain out- Example: Connected directly to a sink drain outlet let using nut 2. The nut is usually fitted with a washer which must be removed. Attach the end of the hose 4 to ad- apter 1.
-
Page 80: Electrical Connection
*INSTALLATION* Installation The plug connector or isolator switch Electrical connection should be easily accessible at all times. This description applies to tumble dry- ers both with and without a mains Risk of electric shock from mains plug. voltage. If the tumble dryer is disconnected The following applies to tumble dryers from the mains, protective measures with a mains plug:... -
Page 81: Technical Data
Technical data Height 850 mm Width 596 mm Width (only for machines with a stain- 605 mm less steel lid) Depth 777 mm Depth with door open 1191 mm Weight 72 kg Drum volume 130 l Load size 7 kg (weight of dry laundry) Hose length 1400 mm Length of connection cable 2000 mm Supply voltage See data plate on back of machine... -
Page 82: Supervisor Level
from unauthorised access. Select the setting you want. Carefully enter a new code. Please inform Miele Service if you Exiting the supervisor level have forgotten your new code. Miele Touch the sensor control or Service will have to reset the code. -
Page 83: Language
Supervisor level Language Finish tone volume The display can be set to appear in The volume can be changed for the one of several different languages. To audible signal that sounds at the end select the language you want, go to of the programme. -
Page 84: Fault Alarm
Supervisor level Fault alarm Further cooling The audible signal that indicates an er- Before the end of the programme, the ror can be switched off. temperature of the dried laundry is monitored and the cooling phase at – Factory default: On the end of the programme is extended if necessary. -
Page 85: Delay Start
Supervisor level Delay start Drying level Cottons The type of time input for the delay Drying level Minimum iron start function can be changed or switched off. Drying level Automatic plus – Off You can alter the drying levels for the The delay start function is not avail- Cottons, Minimum iron and Automatic able for selection. -
Page 86: Clean The Airways
Supervisor level Clean the airways Programme packages The tumble dryer's electronics calcu- The tumble dryer's additional scope of late the degree at which fluff or deter- programmes can be configured. The gent residue in the fluff filters and air programmes are listed under “Pro- ducts are impairing performance. -
Page 87: Peak Load Signal
– No payment system ated with a peak-load system if this system is connected to the tumble The next settings are skipped and ini- dryer via the Miele XCI box. tial commissioning can be com- pleted. – Factory default: no function –... -
Page 88: Time / Impulse
Supervisor level Time / impulse The time for the lock can be adjusted to prevent laundry being added. To be able to operate the tumble dryer – Factory default: Off with conventional payment systems where multiple coins can be inserted, –... -
Page 89: Delete Paid Signal
Supervisor level Delete paid signal A time of between 10 and 120 minutes can be set in 5-minute increments. The “Paid” signal in coin box mode Factory default: 120 minutes can be applied until the end of the programme or discarded if the pro- Duration Warm air gramme is not started after 5 minutes. - Page 91 International Service Contacts America: +1 866 694 5849 Australia, Asia, Oceania: +61 3 9764 7880 Europe, Africa, Middle East: +49 5241 89 66 877 E-mail: service@miele-marine.com www.miele.com/marine-service Manufacturer: Miele & Cie. KG, Carl-Miele-Straße 29, 33332 Gütersloh, Germany...
- Page 92 PDR 507 HP Marine en-GB M.-Nr. 11 321 900 / 02...
Need help?
Do you have a question about the PDR 507 HP Marine and is the answer not in the manual?
Questions and answers