
Subscribe to Our Youtube Channel
Related Manuals for Numatic TRG 720/200T


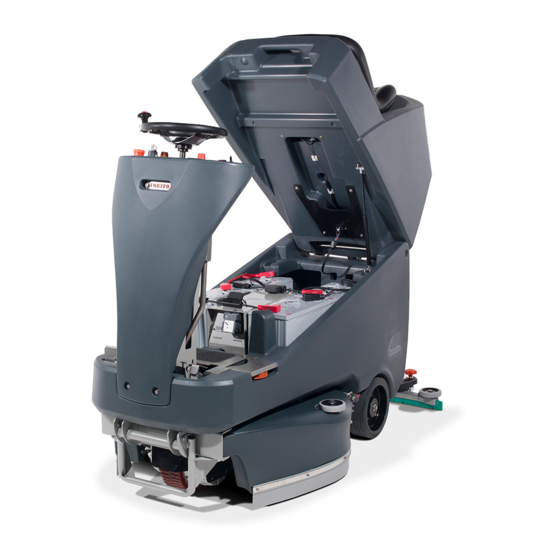
Summary of Contents for Numatic TRG 720/200T
- Page 1 TRG 720 / 200T TRG 720 / 300T R I D E - O N S C R U B B E R D RY E R Original Instructions TRG 720 200T / 300T Warning! Read instructions before using the machine www.numatic.co.uk...
-
Page 2: Table Of Contents
R I D E O N S C R U B B E R D RY E R TRG 720 200T / 300T Index Machine overview ........ Pages 2-3 PLEASE READ Control panel overview ........ Page 4 BEFORE COMMENCING Machine set-up guide ........ Page 5 OPERATION Hose U bend clip ........ -
Page 3: Machine Overview
Machine overview T (+ 44) 01460 68600... -
Page 4: Control Panel Overview
R I D E O N S C R U B B E R D RY E R TRG 720 / 200T / 300T Control panel overview... -
Page 5: Machine Set-Up Guide
Battery display panel illuminates to show power. the appliance is not in use. Less battery models - Numatic International Ltd recommends using MK Batteries for the TRG machines mentioned in this manual. For full battery specifications see page 24. NOTE: DO NOT DEPRESS ACCELERATOR PEDAL WHILE SOFTWARE INITIALISES. The machine will not operate in reverse with the floor tool lowered. -
Page 6: Hose U Bend Clip
Please ensure you do not over tighten the retaining knobs. Lower the floor tool. Slide floor tool onto bracket. Tighten retaining knobs to finger tight Raise the floor tool. and attach hose. NOTE: MACHINE WILL NOT REVERSE WITH FLOOR TOOL IN THE LOWERED POSITION. www.numatic.co.uk... -
Page 7: Fitting Side Pod Skirts
Machine set-up guide ALWAYS ENSURE THAT THE MACHINE IS SWITCHED OFF BEFORE MAKING ANY ADJUSTMENTS Fitting the side pod skirts To fit the side pod skirts, first remove the steel retaining strip already fitted to the pod (Fig.1). Align the steel retaining strip within the locating grooves of the rubber skirt and refit using existing screws (Fig.2). Periodically the side skirts should be examined and checked for wear and damage. -
Page 8: Raise / Lower Brush Deck
The water level in the clean water tank can be measured using the visible red float inside the clean water dump hose on the rear of the machine. Do not overfill the clean water tank. Fill level indicator ALWAYS ENSURE THAT THE MACHINE IS SWITCHED OFF BEFORE MAKING ANY ADJUSTMENTS. www.numatic.co.uk... -
Page 9: Adjusting The Seat
Machine set-up guide Adjusting the seat Sitting in the driving position, adjust the seat forwards or backwards as necessary by using the lever found on the left-hand side (see Fig 1, 2, 3). Note: The seat is fitted with a pressure sensor that disables the machine until an operator is seated. Setting the cleaning controls When in the area to be cleaned follow the instructions below to set up the machine ready for cleaning. -
Page 10: Waste Water Tank Full
Set desired traction speed as required, depending on floor type and level of soiling. Once the Max speed has been set using the control knob on the control panel, fine adjustments can be made using the variable control speed pedal located on the right side of the footplate. Slow Fast www.numatic.co.uk... -
Page 11: Machine In Use
Machine operation DO NOT OPERATE THE MACHINE ON INCLINES THAT EXCEED 11%. Machine in use To operate, select forward and depress the accelerator pedal. Vacuum pick-up and water flow will turn on if selected, and providing the brush and floor tool are in the lowered position, the machine will move forward. -
Page 12: Machine Cleaning
Sometimes the float vents get clogged and blocked, clean to ensure correct operation. Remove debris basket filter and rinse using clean water, and refit. Refit both of the vacuum hoses. IMPORTANT: IF THE DEBRIS BASKET IS ALLOWED TO BECOME CLOGGED, VACUUM PERFORMANCE CAN DETERIORATE. www.numatic.co.uk... -
Page 13: Fuses
Machine cleaning ALWAYS ENSURE THAT THE MACHINE IS SWITCHED OFF PRIOR TO ANY MAINTENANCE. The clean water pump filter is located to the rear of the battery compartment, and should be checked before each use. Lift the filter off of the cradle, unscrew the bottom and remove, taking care not to spill any liquid on to the batteries. Rinse using clean water and refit, refitting is reversal of removal. -
Page 14: Changing Floor Tool Blades
Replacement is a reversal of the removal process. Floor Tool Overview 1. Front blade (slotted) 2. Blade carrier 3. Rear blade 4. Floor tool main body 5. Retaining pins x 4 NOTE: THE BLADES ARE DESIGNED TO BE REVERSIBLE, THUS EXTENDING THEIR USEFUL WORKING LIFE. www.numatic.co.uk... -
Page 15: Free Wheel And Towing
Free wheel and towing ALWAYS ENSURE THAT THE MACHINE IS ON LEVEL GROUND BEFORE DISENGAGING BRAKE ARM. NEVER DISENGAGE THE BRAKE WHEN THE MACHINE IS ON A SLOPE / GRADIENT. NEVER TOW THE MACHINE WITH THE BRAKE ENGAGED AND POWER PLUG CONNECTED! REMOVE BATTERY FUSES The TRG 720 / 200T and TRG 720 / 300T is equipped with a Your start-up kit includes a brake drive disengage key free wheel function that will enable the operator to move / tow... -
Page 16: Machine Charging
Remove Isolator Plug (1) and connect your external charger (2). Refit Isolator Plug before operating the machine. NOTE: ONLY USE THE RECOMMENDED CHARGER AND LEADS. CONTACT NUMATIC INTERNATIONAL LTD FOR RECOMMENDED CHARGER AND LEADS. www.numatic.co.uk... -
Page 17: Battery Care
Battery care TO ENSURE YOUR MACHINE REMAINS AT ITS MAXIMUM EFFICIENCY AND PROLONG YOUR BATTERY LIFE, PLEASE FOLLOW THE SIMPLE STEPS BELOW: UNDER NORMAL DAILY USAGE: Re-charge the machine FULLY after each use regardless of machine operation time. Do not leave the machine in a discharged state. Periodically inspect the battery connections for tightness and corrosion. - Page 18 Contact service agent www.numatic.co.uk...
-
Page 19: Trouble Shooting
Handle safety fuse blown Replace fuse - (page 2 / 3 & 13) (or contact service engineer) Failure to rectify the problem or in the event of a breakdown contact your Numatic dealer or Numatic Technical helpline +44 (0)1460 269268... -
Page 20: Rating Label / Personal Protective Equipment / Recycling
Protection Wet Floor Sign Note: A risk assessment should be conducted to determine which PPE should be worn. Safety Critical Component: Charging Leads: H05VV-F x 1.0 mm x 3 Core Motor wheel & Brake: 904964 Battery Charger: (230V), (115V) www.numatic.co.uk... -
Page 21: Safety Precautions
Children should be supervised to ensure that they do not play with the appliance. If this product does not have a factory installed Numatic battery charger and batteries then it is the responsibility of the owner and user of the product to ensure that the charging system and battery combination are compatible, fit for purpose and safe to use. - Page 22 To remove the batteries:- Disconnect machine from the mains supply (if charging), raise waste water tank and ensure batteries are isolated by removing fuses. Disconnect hoses from separator and tanks, undo battery terminals and remove batteries. Only use genuine Numatic replacement batteries. Do not allow the batteries to become fully discharged, it may not be possible to recharge them.
-
Page 23: Recommended Spare Parts
Spare parts Part No. BRUSHES Part No. SIDE SKIRTS 903994 370MM NYLOSCRUB BRUSH 206947 SPLASH SKIRT Part No. HOSES 903449 370MM POLYSCRUB BRUSH 900524 360MM NULOC2 DRIVE BOARD 908990 DUMP HOSE 1100MM X Ø38MM (top tank) HOSE CLOSURE REPLACEMENT (35MM-38MM STRETCH Part No. -
Page 24: Battery Wiring
Battery Wiring Diagram 4 Battery Wiring Diagram 6 Battery Wiring Diagram For optimum performance Numatic International Ltd recommend the use of the following batteries in the Twintec machines. Numatic Machine Numatic Recommended Battery Number TRG 720 / 200T Less Battery MK Battery - 98A/h Stud Terminal Gel Type - Suppliers Ref: E31 SLD G ST... -
Page 25: Warranty
Warranty T (+ 44) 01460 68600... -
Page 26: Eu Declaration Document
EU Declaration of Conformity www.numatic.co.uk... - Page 27 Notes: T (+ 44) 01460 68600...
-
Page 28: Company Address
Tel: 0861 686 284 www.numatic.co.za Numatic International Schweiz AG. Sihlbruggstrasse 142, 6340 Baar. SCHWEIZ Tel: 0041 (0) 41 76 80 76 - 0 www.numatic.ch Numatic International ULDA. Rua da Boa Viagem, 177 4470 - 210 Moreira Maia PORTUGAL Tel: +351 220 047 700 www.numatic.pt This Product has been comprehensively inspected and checked during every stage of its manufacture.
Need help?
Do you have a question about the TRG 720/200T and is the answer not in the manual?
Questions and answers