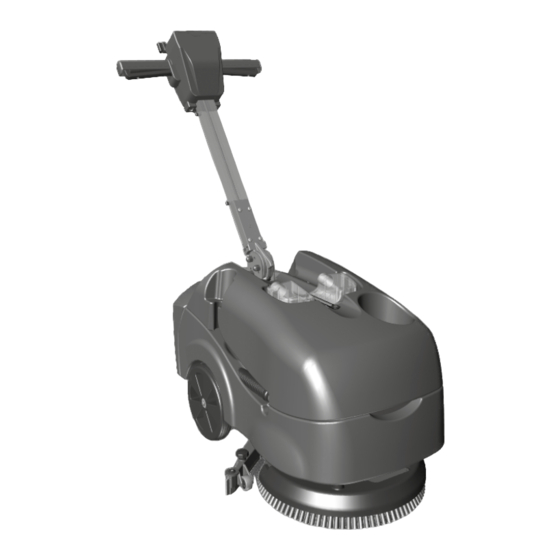
Summary of Contents for Numatic TTB1840NX
- Page 1 TTB 1840 36V S C R U B B E R D R Y E R Original Instructions Caution! Read instructions before using the machine numatic.com...
-
Page 2: Table Of Contents
Start Switch Recommended Spare Parts ......Page 15 Top tank (waste water) drainage hose Schematic Diagram ......... Page 15 Battery compartment EU Declaration Document ......Page 16 Battery Battery charger Warranty ......... Page 17 Company Address ......... Page 19 www.numatic.co.uk... -
Page 3: Machine Overview
Machine Overview T 01460 68600... -
Page 4: Control Panel Overview
Control Panel Overview Battery Charge Level Display Water Flow On / Off Button Water Flow Indicator In the event of a breakdown contact your Numatic dealer or the Vacuum Off/On Indicator Numatic Technical Vacuum Off/On Button help line +44 (0)1460 269268... -
Page 5: Quick Set Up Guide
Quick Set-up Guide PLEASE READ BEFORE COMMENCING ANY OPERATION. AFTER THE REMOVAL OF ALL THE PACKAGING, CAREFULLY OPEN AND CHECK THE CONTENTS. TTB 1840 36V CONTENTS ● Owner Manual ● Battery & Charger Manual ● Battery Charger & Lead ● Battery ● Scrub Brush ● Squeegee Assembly Using the handle position lever, (Fig.1) Move the handle into the upright position,... -
Page 6: Machine Set Up Guide
Secure to the carrier using the two knobs fitted to the floor-tool carrier (Fig.2) - (Fig.3). Do not over tighten the retaining knobs. Ensure inspection cap is in place on the fluid pipe. (Fig.4) - (Fig.5) For fitting the floor-tool blades (See Page 10). www.numatic.co.uk... -
Page 7: Filling The Clean Water Tank
Machine Set-up Guide Filling the Clean Water Tank The TTB 1840 is equipped with a large 18 litre clean-water tank allowing large areas to be cleaned in a single fill. Fill Indicator To fill the clean-water tank, remove the filler cap (Fig.1). Fill using a hose or a suitable container (Fig.2). Use the fill indicator (Fig.3). -
Page 8: Setting The Cleaning Controls
7) Brush overload 8) Control board failed Releasing the handle triggers will allow the machine to reset. IMPORTANT If the brush motor keeps overloading consider using a different type of brush. Heavy brush load decreases the available battery run time. www.numatic.co.uk... -
Page 9: Machine Operation
Machine Operation Raising/Lowering the Floor-tool To raise the floor-tool, ensure the floor-tool carrier is central to the machine. Lift the lever near the base of the handle and lock into position. WHEN HANDLING CHEMICALS Always ensure that chemical manufacturer’s safety guidelines are followed. Only use chemicals recommended for use in auto scrubber-dryers. -
Page 10: Regular Maintenance
Remove the filter and basket clipped into the separator and flush with clean water (5 & 6). Replace the filter by first fitting the rear of the filter first then clipping in the front to lock in place (5). www.numatic.co.uk... -
Page 11: Changing Floor-Tool Blades
Note: The blades are designed to be reversible, thus extending their useful working life. Refit the floor-tool using the two central knobs to the floor-tool. Floor-tool Overview 1. Retaining knobs x 4 2. Front blade (slotted) 3. Blade carrier 4. Rear blade 5. Floor-tool main body www.numatic.co.uk... -
Page 12: Lifting The Machine
Lifting the Machine Fold handle and lock in to position Lift Points Front Back Machine 2 Person Dry Weight 34 kg T 01460 68600... -
Page 13: Specifications
If cut out engages then the surface is to rough & an operating alternative machine may be required Failure to rectify the problem or in the event of a breakdown contact your Numatic dealer or Numatic Technical helpline +44 (0)1460 269268 www.numatic.co.uk... -
Page 14: About The Machine
NOTE: A risk assessment should be conducted to determine which PPE should be worn. In the event of a breakdown contact Safety Critical Component: your Numatic dealer or the Charging Leads: H05VV-F x 1.0 mm x 3 Core Numatic Technical... -
Page 15: Information For Scrubber Dryer
• Regularly examine the power cord for damage, such as cracking or ageing. If damage is found, replace the cord before further use. • Only replace the power cord with the correct Numatic approved replacement parts. • Ensure that the work area is clear of obstructions and / or people. -
Page 16: Twintec Maintenance
Daily Keep the machine clean. Ensure brushes/ pads/ squeegee/ filters are in good condition. Check for any worn or damaged parts and replace immediately. Drain and rinse dirty water tank after every use. Weekly – as daily and – Check brush or pad and skirt and rinse. Check floor-tool blades for wear and wipe clean. Clean separator assembly including filter and check condition of seal. -
Page 17: Eu Declaration Document
To claim warranty the following details must be supplied i. Serial number of the machine ii. Battery date code iii. Date purchased iv. Proof of Purchase v. Maintenance history and charging regime Failure to use the correct Numatic charger will void your warranty. Notes www.numatic.co.uk... -
Page 18: Warranty
Warranty T 01460 68600... - Page 19 www.numatic.co.uk...
-
Page 20: Company Address
Tel: 0861 686 284 www.numatic.co.za Numatic International Schweiz AG. Sihlbruggstrasse 3A, 6340 Baar. SCHWEIZ Tel: 0041 (0) 41 76 80 76 - 0 www.numatic.ch Numatic International ULDA. Rua da Boa Viagem, 177 4470.210 Maia. PORTUGAL Tel: +351 220 047 700 www.numatic.pt Numatic International SLU.


Need help?
Do you have a question about the TTB1840NX and is the answer not in the manual?
Questions and answers