Table of Contents
Advertisement
Quick Links
Advertisement
Table of Contents

Related Manuals for Fillauer Utah Arm U3


Summary of Contents for Fillauer Utah Arm U3
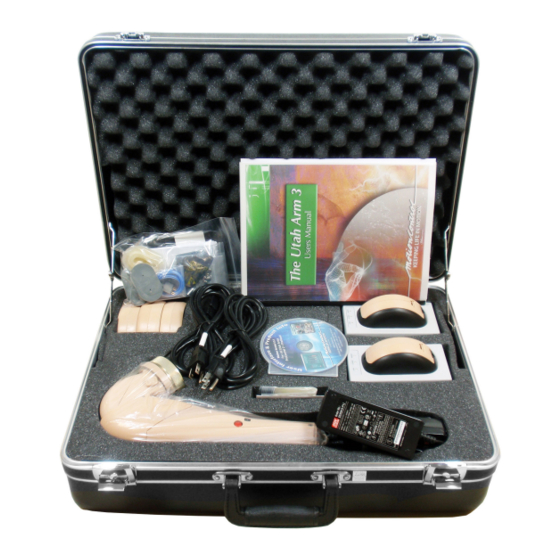
- Page 1 Utah Arm U3 and U3+ User Guide...
- Page 3 A supplemental battery can also be added for hands and terminal devices (TDs) with high current draw. This guide will provide an overview of the warnings, functions and limitations of the Utah Arm U3 and U3+. Please read this guide to familiarize yourself with the functions of your elbow. Your prosthetist has been specially trained by Motion Control for the fitting, function and operation of the Utah Arm.
-
Page 4: Table Of Contents
Components Figure 1 1. Harness with optional linear potentiometer 12. Forearm Screws (top and bottom), pg. 8 (provided by your prosthetist), pg. 6 13. On/Off Switch, pg. 9 2. Inner Socket (provided by your prosthetist), pg. 6 14. Forearm Gain (right side), pg. 9 3. - Page 5 Special Precautions Lithium-Ion (Li-Ion) Batteries Lithium-Ion Batteries must be installed as described in this manual and charged only using the chargers included with your prosthesis. Do not place any objects in or on the metal contacts of the battery. Failure to follow these instructions could result in malfunction, and damage your battery pack. Battery Chargers Use only the power supply provided with the battery charger.
-
Page 6: Figure 3
Special Precautions (Continued) Disassembly Do not disassemble any part of the elbow, battery, forearm or socket of the prosthesis. There are no user serviceable components in the system. Disassembly of any part of the prosthesis will void the warranty. Load Limit The elbow will support 22 kg (50 lbs) when the elbow is locked. -
Page 7: Lithium-Ion (Li-Ion) Battery (5 Included)
Lithium-Ion (Li-Ion) Batteries Lithium-Ion Batteries must be installed as described in this manual and charged only using the chargers included with your prosthesis. Do not place any objects in or on the metal contacts of the battery. Failure to follow these instructions could result in malfunction, and damage your battery pack. Battery Each battery pack (5 included with the U3 and U3+) provides all the energy to operate the elbow, terminal device and electric wrist rotator (if included). -
Page 8: Supplemental Battery Charging Port (Optional)
If the yellow “Fault” light remains illuminated Figure 4 after inserting a battery in the charger, there is a problem with the battery and/or the charger. Both should be returned to your prosthetist for evaluation. There are no user serviceable parts inside the battery or charger. -
Page 9: On/Off Switch
ON/OFF switch The ON/OFF switch is a slide switch located in the center of the forearm. As you are wearing the arm, pressing on the left side of the arm pushing the switch toward the right side turns the arm ON. Pushing in the opposite directions, turns the arm OFF (Figure 6). -
Page 10: Emg Electrodes/Preamps
Doffing your U3 or U3+ Before removing a U3 elbow, make sure the elbow is in the unlocked position, switch the elbow OFF, and remove the prosthesis. Before removing a U3+ elbow, you will find it more convenient to extend the elbow, enabling Silent Freeswing. - Page 11 The microprocessors in the Utah Arm allow use of several different control inputs and control schemes. These are programed through the User Interface. Your prosthetist has been trained to do this and will make those settings in your system. They will also instruct you how to operate the arm. Occupational therapy will provide training to ensure you are as functional as possible with your prosthesis.
- Page 12 Hand functions fine but Elbow will not function (or only flexes partially) Check elbow forearm gains to make sure they have not been moved. Neither the Elbow nor the Hand function (no whir or beeps from the system) Replace the battery with a fully-charged battery (as indicated by the green “Complete” light on the charger).
- Page 13 Limited Warranty Seller warrants to Buyer that the equipment delivered hereunder will be free from defects in materials and manufacturing workmanship, that it will be of the kind and quality described and that it will perform as specified in Seller’s written quotation. The limited warranties shall apply only to failures to meet said warranties that appear within the effective period of this Agreement.
- Page 14 Home Training Program for PNF Exercises Proprioceptive Neuromuscular Facilitation (PNF) is a strengthening exercise. We recommend this and/ or other exercises to be part of a conditioning program under the direction of a qualified Physical or Occupational Therapist. Also refer to Motion Control’s video course, “Training the Client with an Electric Arm Prosthesis”.
- Page 15 Step 5 Now practice the biceps pattern with your amputated arm and concentrate on not moving your shoulder. Start with your shoulder and arm relaxed at your side and your hand over the biceps muscle. Without moving the shoulder, contract the biceps while imagining the elbow bending and the palm turning up. Feel the contraction with your hand.
- Page 16 Motion Control, Inc. 115 N Wright Brothers Drive Salt Lake City, UT 84116 801.326.3434 Fax 801.978.0848 www.UtahArm.com © 2018 Motion Control, Inc. 1910025 Rev C 01-29-2018...
Need help?
Do you have a question about the Utah Arm U3 and is the answer not in the manual?
Questions and answers