
Related Manuals for Premier Mounts PDS-URPM


Summary of Contents for Premier Mounts PDS-URPM
- Page 1 PDS-URPM Installation Guide www.mounts.com | North America 800.368.9700 | International +1-714-632-7100 1321 S. State College Blvd., Fullerton, CA 92831 USA...
-
Page 2: Included Components
PDS-URPM Installation Guide Included Components: M2.5 x 10mm Screw M2.5 x 12mm Screw M3 x 16mm Screw M4 x 12mm Screw (Qty. 4) (Qty. 4) (Qty. 4) (Qty. 4) Upper Ceiling Adapter (Qty. 1) M5 x 12mm Screw M6 x 12mm Screw 1/4”-20 x 5/16”... - Page 3 PDS-URPM Installation Guide Determine if your projection image will project upwards or downwards to properly install the projector mount. Only attach to the projector manufacturer’s specified mounting points on the projector chassis with a minimum three mounting legs. Please follow all safety instructions specified by the projector manufacturer as well as the safety instructions outlined in this manual.
- Page 4 PDS-URPM Installation Guide Side-to-Side Center of Gravity Identify the projector’s approximate front-to-back center of gravity. Place your hands on each side of the projector and gently lift it an inch from the surface on which it is resting. Carefully adjust your grip on the projector until it seems balanced from front-to-back.
- Page 5 PDS-URPM Installation Guide Single Mount Point Installation If your projector has only one mounting point, a 1/4-20 x 5/16” screw must be used to attach the mount to the projector. Please refer to the following three steps: Determine where the mounting point is located.
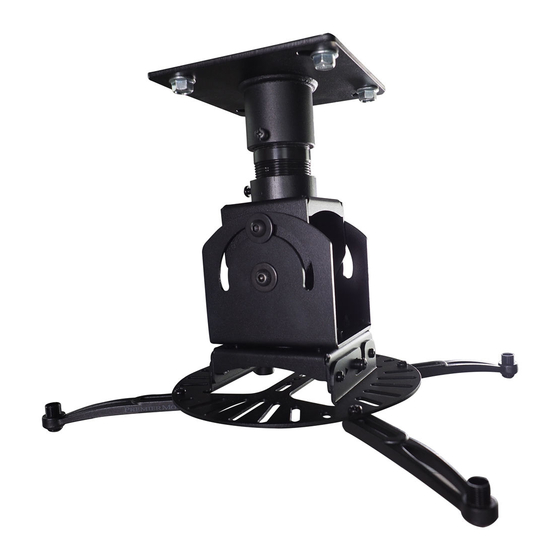
- Page 6 PDS-URPM Installation Guide Secure the universal leg assembly to the upper ceiling adapter using four (4) M6 x 12mm screws. Caution: The four (4) M6 x 12mm screws MUST be installed before adjusting or rotating the mount. You can adjust the angle of the projector by loosening the upper two (2) Button Head Screws using the supplied M5 Allen Key.
- Page 7 PDS-URPM Installation Guide If the projector does not maintain angle after tightening the two (2) M8 button head screws, replace the nylon washer with the supplied M8 External Tooth Washer. The nylon washer is located in between the ceiling adapter Caution: Arrow must be facing towards the floor when detaching the protector from the upper ceiling adapter.
- Page 8 Premier Mounts intends to make this manual accurate and complete. However, Premier Mounts makes no claim that the information contained herein covers all details, conditions or variations, nor does it provide for every possible contingency in connection with the installation or use of this product.
Need help?
Do you have a question about the PDS-URPM and is the answer not in the manual?
Questions and answers