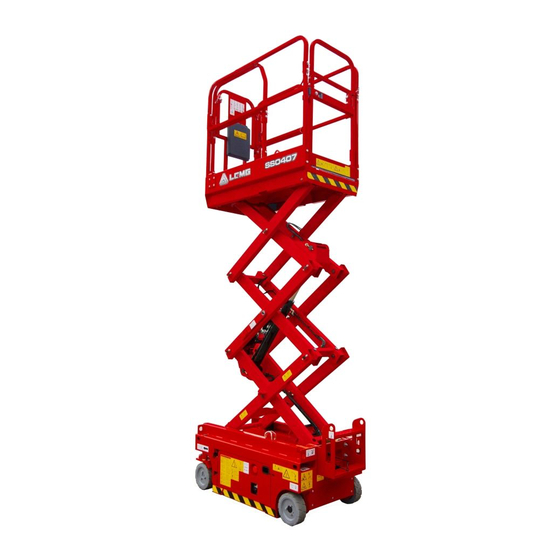
LGMG SS0407E User Manual
Hide thumbs
Also See for SS0407E:
- Operation manual (99 pages) ,
- Maintenance manual (48 pages) ,
- User manual (9 pages)

Related Manuals for LGMG SS0407E


Summary of Contents for LGMG SS0407E
- Page 1 LGMG Europe B.V. • Laanweg 16 • 3208 LC • Spijkenisse Rotterdam...
- Page 2 USER MANUAL SS0407E / SS0507E / SS0607E / AS0607 / AS0607W / AS0607WE / AS0607E / AS0608 / AS0608E / AS0808 / AS0808E / AS0812 / AS0812E / AS1012 / AS1012E / AS1212 / AS1212E / AS1413 Warning Operator and maintenance personnel must read and understand this manual for operation and maintenance.
-
Page 3: Table Of Contents
Chapter 9 Operating instructions Chapter 10 Transport and lifting instructions Chapter 11 Maintenance Chapter 12 Electrical diagram Chapter 13 Hydraulic diagram Notes USER MANUAL SS0407E / SS0507E / SS0607E / AS0607 / AS0607W / AS0607WE / AS0607E / AS0608 / AS0608E... -
Page 4: Foreword
Thank you for your understanding. If you have any doubts about the latest machine information and the manual, please contact us. This manual applies to the LGMG electric scissor lift. The user performs maintenance on the machine strictly according to the specified interval in the maintenance schedule. -
Page 5: Safety Precaution
NOTICE If not avoided, this may result in slight or moderate injury. This also applies to the situation that may result in damage to the machine or the life span being reduced, if the risk is not avoided. USER MANUAL SS0407E / SS0507E / SS0607E / AS0607 / AS0607W / AS0607WE / AS0607E / AS0608 / AS0608E... - Page 6 Chapter 1 - Safety Illustrations for rules and regulations As this machine is not permitted to drive on the road and the speed of movement is very low, corresponding national traffic laws are not necessary. The safety instructions in this manual must be followed. Danger Death or serious injury may be caused if the instructions and safety precautions in this manual are not followed.
- Page 7 2 Persons 1 person 320 Kg 113 Kg AS1212/AS1212E 2 Persons 320 Kg 113 Kg AS1413 2 Persons 200 Kg 113 Kg USER MANUAL SS0407E / SS0507E / SS0607E / AS0607 / AS0607W / AS0607WE / AS0607E / AS0608 / AS0608E...
- Page 8 Chapter 1 - Safety Safety of the workstation The platform can only be raised on a firm and level surface. Keep the lifting speed of the platform below 0.5 km/h. Do not use the tilt alarm as a level indicator. The tilt alarm of the chassis and the platform only gives an alarm when the machine is seriously tilted.
- Page 9 Check the workstation to avoid overhead obstructions or other potential risks. Pay attention to the risk of crushing when holding the protective rail of the platform. USER MANUAL SS0407E / SS0507E / SS0607E / AS0607 / AS0607W / AS0607WE / AS0607E / AS0608 / AS0608E...
- Page 10 Chapter 1 - Safety The user must follow the maintenance rules for the personal protection equipment prepared by the owner, the maintenance rules for the workstation and the laws added by the government. Pay attention and follow the movement arrow and the direction of rotation on the platform control and the platform label and nameplate.
- Page 11 Turn the ignition key to the “OFF” position and remove the key from the ignition to prevent unauthorised use. Place wheel blocks with a wedge shape. Charge the battery. USER MANUAL SS0407E / SS0507E / SS0607E / AS0607 / AS0607W / AS0607WE / AS0607E / AS0608 / AS0608E...
-
Page 12: Chapter 2 Legend
Chapter 2 - Legend No. . Part Left protective rail VeExtended platform Documents Bin Platform control Fall protection anchor point Right protective rail Pedal Door Main platform Yoke Lifting cylinder Safety support Cover part accessory Band Loader Exit protector AS0808 / AS0808E / AS0812 / AS0812E / AS1012 / AS1012E / AS1212 / AS1212E / AS1413 www.lgmgeurope.com... -
Page 13: Chapter 3 Label
Chapter 3 - Labels USER MANUAL SS0407E / SS0507E / SS0607E / AS0607 / AS0607W / AS0607WE / AS0607E / AS0608 / AS0608E... - Page 14 Chapter 3 - Labels 1. 2534000335 2. 2534000504 3. 2534000142 4. 2534000355 5. 2534000010 6. 2534000145 7. 2534000011 8. 2534000029 9. 2534000027 10. 2831990027 11. 2534000272 12. 2534000025 13. 2534000220 14. 2534000017 15. 2534000100 Code Product 2534000335 Company logo 2534000504 Product model 2534000142 Keep a safe distance from the machine...
- Page 15 Chapter 3 - Labels USER MANUAL SS0407E / SS0507E / SS0607E / AS0607 / AS0607W / AS0607WE / AS0607E / AS0608 / AS0608E...
- Page 16 Chapter 3 - Labels 1. 2534000229 2. 2534000033 3. 2534000119 4. 2534000008 5. 2534000539 6. 2534000102 7. 2534000146 8. 2534000144 9. 2534000334 10. 2534000143 11. 2534000009 12. 2534000016 13. 2534000139 14. 2534000018 15. 2534000236 16. 2534000101 17. 2534000015 18. 2534000535 19.
- Page 17 Forklift fork position 2534000015 Tilt danger sign 2534000535 Nominal working capacity t 2534000148 Manual Load 2534000147 Manual Load 2534000247 Electrocution Risk USER MANUAL SS0407E / SS0507E / SS0607E / AS0607 / AS0607W / AS0607WE / AS0607E / AS0608 / AS0608E...
-
Page 18: Chapter 4 Operation
Chapter 4 - Operation Basic operation The following items are discussed below: For platform control (PCU), see Fig. 2 and Fig. 3. For chassis operation (ECU), see fig. 4. Main power supply and safety The ignition key provides power to the machine, for which three operating modes are available. - Page 19 The travel speed is reduced if there is only one battery charger bar. The brake shall be applied in a non-moving mode. USER MANUAL SS0407E / SS0507E / SS0607E / AS0607 / AS0607W / AS0607WE / AS0607E / AS0608 / AS0608E...
- Page 20 Chapter 4 - Operation Raise or lower the Place the key switch in platform via the toggle Shutdown status the chassis position in switch on the chassis the boot state. panel. Place the key switch in the platform position. Select the move function, and then select the delay mode, if necessary.
- Page 21 Chapter 4 - Operation Platform control (PCU) and main control (ECU) LIFT KLAXTON LOW SPEED DRIVE DISPLAY Figure 2 - Platform control (PCU) USER MANUAL SS0407E / SS0507E / SS0607E / AS0607 / AS0607W / AS0607WE / AS0607E / AS0608 / AS0608E...
- Page 22 Chapter 4 - Operation LEFT TURN BACKWARD... FORWARD RIGHT TURN ON/OFF KEY EMERGENCY STOP SWITCH Figure 3 - Lever control button Figure 4 - Main control (ECU) AS0808 / AS0808E / AS0812 / AS0812E / AS1012 / AS1012E / AS1212 / AS1212E / AS1413 www.lgmgeurope.com...
- Page 23 Alarm when exceeding 99% load Alarm only Platform overload alarm Stop all actions Machine ramp error exceeding safety limit Stop lifting and moving USER MANUAL SS0407E / SS0507E / SS0607E / AS0607 / AS0607W / AS0607WE / AS0607E / AS0608 / AS0608E...
- Page 24 Chapter 4 - Operation Table: troubleshooting and guidance Description Display ECU may fail and replace the defective ECU. Check the communication line and other cable connection. If the malfunction is not resolved, replace PCU or ECU. Set the correct options for the machine. Check the wiring of the toggle switch or check whether the toggle switch is stuck.
- Page 25 Press the "driving" drive button and operate the lever as above. USER MANUAL SS0407E / SS0507E / SS0607E / AS0607 / AS0607W / AS0607WE / AS0607E / AS0608 / AS0608E...
- Page 26 Chapter 4 - Operation Display on PCU and ECU in normal operation The following contents are displayed on the PCU and ECU in normal operation. Table: PCU and ECU display Operating mode PCU display ECU display Startup and no displacement Battery status Move forward and backward Battery status...
- Page 27 If the equipment operation fails or breaks during normal operation, the personnel must be taken to a safe place and the equipment must be stabilised with a crane, fork-lift truck or other equipment. USER MANUAL SS0407E / SS0507E / SS0607E / AS0607 / AS0607W / AS0607WE / AS0607E / AS0608 / AS0608E...
- Page 28 Chapter 5 - Emergency operation Fixed top work panel If the work panel is jammed or obstructed by a high structure or equipment, stop operating the equipment from the workstation or ground control equipment and bring the operator and all personnel to a safe position. In this case, the work panel can be released with the help of necessary equipment and staff.
- Page 29 Platform overload component • Platform entrance door • Indicator light and alarm • Safety support • Extended platform • Arm scissors and fastener USER MANUAL SS0407E / SS0507E / SS0607E / AS0607 / AS0607W / AS0607WE / AS0607E / AS0608 / AS0608E...
- Page 30 Chapter 6 - Inspection before operation • Platform control lever • Brake release component • Exit protector Check the complete machine for: • weld connection or crack of the structural element • Corrosion or damage to machine • Keep all construction elements and other important parts complete, keep the corresponding fasteners and pins in the correct position and attach them.
- Page 31 Overhanging obstacle and high-voltage cable Dangerous location Surface support cannot support all machine loads Wind and Weather Non-authorised personnel Other possible unsafe conditions USER MANUAL SS0407E / SS0507E / SS0607E / AS0607 / AS0607W / AS0607WE / AS0607E / AS0608 / AS0608E...
-
Page 32: Chapter 8 Function Test
Chapter 8 - Function test Prohibited from operating unless The safety principles of the machine are understood and implemented. Dangerous conditions are avoided. The inspection before operation is always carried out. The function test is understood and followed up for the next step. The workstation has been checked. - Page 33 Result: the machine moves in the direction of the arrows on the control panel and stops. Notice: the brake must be able to stop the machine at any level. USER MANUAL SS0407E / SS0507E / SS0607E / AS0607 / AS0607W / AS0607WE / AS0607E / AS0608 / AS0608E...
- Page 34 Chapter 8 - Function test 8.13 Test of driving and braking function Press the lift/stop/lower switch and the indicator light will illuminate. Press the dead man switch on the lever to lift the platform until it reaches a height of about 2 m above the ground. Result: the exit protector is extended.
- Page 35 Place the red emergency stop buttons on the platform control and the ground control in the "ON" position. Keep the battery pack properly connected before the machine runs. Adjusting platform position USER MANUAL SS0407E / SS0507E / SS0607E / AS0607 / AS0607W / AS0607WE / AS0607E / AS0608 / AS0608E...
- Page 36 Chapter 9 - Operating instructions Press the lift function selection button. Press the dead man switch on the control lever. Move the lever according to the sign on the control panel. Turning Press the drive function select button. Press the dead man switch on the control lever. Turn the steering wheel via the toggle switch at the top of the steering lever.
- Page 37 Push the protective rail of the extended platform to bring it to the desired position. Notice: do not stand on the extended platform when the platform is extended. USER MANUAL SS0407E / SS0507E / SS0607E / AS0607 / AS0607W / AS0607WE / AS0607E / AS0608 / AS0608E...
-
Page 38: Transport And Lifting Instructions
Chapter 10 - Transport and lifting instructions 10.1 Compliance and follow-up If you lift the machine with a crane, make the correct assessment and draw up a plan for moving the machine. Only personnel qualified for above-ground lifting may load and unload the machine. The transport vehicle must be parked on a level surface. - Page 39 If the optional anti-breakage equipment is provided, the work panel and ground control box can be covered and locked to prevent access. USER MANUAL SS0407E / SS0507E / SS0607E / AS0607 / AS0607W / AS0607WE / AS0607E / AS0608 / AS0608E...
- Page 40 Chapter 11 - Maintenance 11.1 Compliance and follow-up The operator only performs the routine maintenance items specified in this manual. Regular maintenance and inspection must be carried out by a trained maintenance technician according to the manufacturer's requirements. Maintenance symbol legend The symbols in this manual are intended to indicate the corresponding meaning of the instruction.
- Page 41 The equipment must be repaired by the authorised mechanic according to the specification of the manufacturer and the requirements of this manual. USER MANUAL SS0407E / SS0507E / SS0607E / AS0607 / AS0607W / AS0607WE / AS0607E / AS0608 / AS0608E...
- Page 42 Chapter 11 - Maintenance Description Follow the operating manual of the device. The preparation for delivery consists of the operation check, item maintenance and functional test. Register the results in the table. Fill in each completed item according to the table in the operating manual. If the inspection result "N"...
- Page 43 D-1 Inspection for wear-resistant disc block of scissors D-2 Replacement of hydraulic oil filter core Checklist E (V) Completed (N) not completed (G) repaired E-1 Hydraulic Oil USER MANUAL SS0407E / SS0507E / SS0607E / AS0607 / AS0607W / AS0607WE / AS0607E / AS0608 / AS0608E...
- Page 44 Stop working with the machine before replacing the label. After use, return the manual to its original position. Reminder: Contact LGMG if necessary to replace manual or label. A-2Inspection for operation The inspection for operation is essential for the safe operation of the machine. The inspection for operation is made in the form of a visual inspection before operating the machine.
- Page 45 1,250 go to step 9. Charge the battery pack in a balanced way and leave it for at least 6 hours (preferably 24 hours). undisturbed. USER MANUAL SS0407E / SS0507E / SS0607E / AS0607 / AS0607W / AS0607WE / AS0607E / AS0608 / AS0608E...
- Page 46 Chapter 11 - Maintenance Open the battery cover, check the specific weight with a special gravity hydrometer and record the registra- tion. Check the ambient temperature and adjust the specific fluid gravity of each battery according to the instructions below: •...
- Page 47 As a safety function, in addition to the red emergency stop button on the platform, the selection and operation of the ground controls must be superior to those of the platform controls. USER MANUAL SS0407E / SS0507E / SS0607E / AS0607 / AS0607W / AS0607WE / AS0607E / AS0608 / AS0608E...
- Page 48 Chapter 11 - Maintenance • Turn the key switch to the ground controls and pull the red emergency stop buttons on the ground and platform operation controls. • Press the red emergency stop button on the ground control to the "OFF" position. Result: No action has been enabled by the machine.
- Page 49 Turn the key switch to the platform control and pull the red emergency stop buttons of the ground and platform operation controls. • Press the lift function selection button. • Press the on / off button. USER MANUAL SS0407E / SS0507E / SS0607E / AS0607 / AS0607W / AS0607WE / AS0607E / AS0608 / AS0608E...
- Page 50 Chapter 11 - Maintenance • Raise the platform to a height of about 2.3 m above the ground. • Press the drive function select button. • Select a point (such as the touchdown point on the wheel) of the machine as the visual inspection reference for the start and finish line.
- Page 51 Result: the diagnostics screen does not show code 18, the alarm goes off and the steering and driving functions are enabled. In this case, the limit switch must be replaced. USER MANUAL SS0407E / SS0507E / SS0607E / AS0607 / AS0607W / AS0607WE / AS0607E / AS0608 / AS0608E...
- Page 52 Chapter 11 - Maintenance Press the lift function select button to raise the platform by about 0.3 m. Result: the diagnostic screen displays code 18, the alarm goes off and the lift function is enabled. The machine operation is normal. Result: the diagnostic screen does not display code 18 and the alarm goes off.
- Page 53 After the klaxton sounds 5 times, this indicates that the calibration procedure has gone correctly. USER MANUAL SS0407E / SS0507E / SS0607E / AS0607 / AS0607W / AS0607WE / AS0607E / AS0608 / AS0608E...
- Page 54 Chapter 11 - Maintenance When the platform lowers and stops at the ground and the klaxton stops, this suggests that the calibration has been successfully completed. With charge: Load the platform: Place the counterweight (1.1 times the rated load) in the centre of the platform. Turn the ignition switch to Platform mode;...
- Page 55 Result: the measured value is greater than or equal to 24 mm. Perform step 2. Result: the measured value is less than 24 mm. Replace the wear-resistant sliding block. USER MANUAL SS0407E / SS0507E / SS0607E / AS0607 / AS0607W / AS0607WE / AS0607E / AS0608 / AS0608E...
- Page 56 Chapter 11 - Maintenance • Measure the distance from the outer section of the steel pipe on the side of the oil tank to the plane of the oil tank base panel. Result: the measured value is greater than or equal to 24 mm. Perform step 3. Result: if the measured value is less than 24 mm, replace the wear-resistant sliding block.
- Page 57 Operation without fuel can damage the hydraulic pump. Carefully pump the oil tank when filling the hydraulic system. Take precautions to protect the hydraulic pump against erosion. USER MANUAL SS0407E / SS0507E / SS0607E / AS0607 / AS0607W / AS0607WE / AS0607E / AS0608 / AS0608E...
-
Page 58: Electrical Diagram
Chapter 12 - Electrical diagram • AS series Hydraulic drive 4 2 5 3 1 AS0808 / AS0808E / AS0812 / AS0812E / AS1012 / AS1012E / AS1212 / AS1212E / AS1413 www.lgmgeurope.com... - Page 59 Chapter 12 - Electrical diagram • AS series Electric drive USER MANUAL SS0407E / SS0507E / SS0607E / AS0607 / AS0607W / AS0607WE / AS0607E / AS0608 / AS0608E...
- Page 60 Chapter 12 - Electrical diagram • SS series Electric drive AS0808 / AS0808E / AS0812 / AS0812E / AS1012 / AS1012E / AS1212 / AS1212E / AS1413 www.lgmgeurope.com...
-
Page 61: Hydraulic Diagram
1.1m steering cylinder control valve hole motor motor 0.25MPa filter insert working pump oil tank Operation Manual of Elevating Work Platform USER MANUAL SS0407E / SS0507E / SS0607E / AS0607 / AS0607W / AS0607WE / AS0607E / AS0608 / AS0608E... - Page 62 Chapter 13 - Hydraulic diagram AS0607W Hydraulic Schematic brake disk lifting cylinder control valve brake control valve pressure sensor hole 1.1m steering cylinder control valve hole motor motor filter insert working pump oil tank AS0608 hydraulic Schematic ifting cylinder control valve brake disk pressure sensor Φ1.4...
- Page 63 CE added pressure switch steering cylinder control valve Φ1.3 Φ1.3 21MPa motor Φ1.0 motor filter insert working pump oil tank USER MANUAL SS0407E / SS0507E / SS0607E / AS0607 / AS0607W / AS0607WE / AS0607E / AS0608 / AS0608E...
- Page 64 Chapter 13 - Hydraulic diagram Operation Manual of Elevating Work Platform AS0812 Hydraulic Schematic ifting cylinder control valve brake disk pressure sensor Φ1.4 brake control valve CE added pressure switch steering cylinder Φ1.3 Φ1.3 control valve motor Φ1.0 1.03MPa motor filter insert working pump oil tank...
- Page 65 CE added pressure switch control valve Φ1.3 Φ1.3 21MPa motor Φ1.0 motor Φ1.0 filter insert working pump oil tank USER MANUAL SS0407E / SS0507E / SS0607E / AS0607 / AS0607W / AS0607WE / AS0607E / AS0608 / AS0608E...
- Page 66 Chapter 13 - Hydraulic diagram Operation Manual of Elevating Work Platform AS0808 / AS0808E / AS0812 / AS0812E / AS1012 / AS1012E / AS1212 / AS1212E / AS1413 www.lgmgeurope.com...
- Page 67 Chapter 13 - Hydraulic diagram SS0407E Hydraulic schematic SS0507E Hydraulic schematic SS0607E Hydraulic schematic Operation Manual of Elevating Work Platform USER MANUAL SS0407E / SS0507E / SS0607E / AS0607 / AS0607W / AS0607WE / AS0607E / AS0608 / AS0608E...
- Page 68 Notes AS0808 / AS0808E / AS0812 / AS0812E / AS1012 / AS1012E / AS1212 / AS1212E / AS1413 www.lgmgeurope.com...
Need help?
Do you have a question about the SS0407E and is the answer not in the manual?
Questions and answers