Table of Contents
Advertisement
Quick Links
Installation Guide
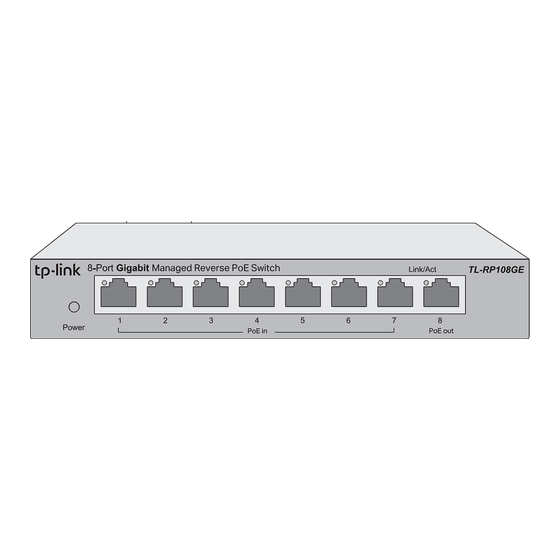
8-Port Gigabit Managed Reverse PoE Switch
Package Content: the Reverse PoE Switch, Installation Guide, DC Power Cable (0.3 m)
Connection
Power
Note:
1. DC out is a power output port,do not connect it to any power source.
2. Set the required voltage of the powered device before connection.
Configuration
The switch is plug and play. To configure the switch, you can use the Web-based
GUI or the configuration utility.
The utility is only supported on Windows now.
Using the Web-based GUI
1.
Find out the IP address of the switch.
By default, the switch receives an IP addess from a DHCP server (or a router
that functions as a DHCP server) in your network. You can find out this IP
address on the DHCP server.
If the switch cannot receive an IP address from a DHCP server, it uses the
static IP address of 192.168.0.1, with a subnet mask of 255.255.255.0.
2.
Configure IP address on your PC to make sure the switch and PC are in the
same subnet.
If the switch uses an IP address assigned by a DHCP server, set your PC to
obtain an IP address automatically from the DHCP server.
If the switch uses
192.168.0.1
address as
192.168.0.x
("x" ranges from 2 to 254), and subnet mask as
255.255.255.0.
3.
Launch a web browser on your PC, enter the IP address of the switch in the
address bar and press Enter. Log in with admin as both user name and
password.
Now you can configure the switch using the Web-based GUI. For further
information, refer to the
User
Guide.
Go to https://www.tp-link.com/support, search the model number of your switch,
and you can find this guide on the product
Note: If the switch gets a new IP address from the DHCP server, your connection to
the switch will be lost. Enter the new IP address in your browser to access the
switch again.
DC out
1
2
Data+Power In
PoE Injector
(24/48 VDC)
DC
PWR
LAN IN
Data
User
as the IP address, configure your PC's IP
Support
web page.
LED Explanation
Power
Link/Act
. . . . . .
Using the Configuration Utility
1. Go to https://www.tp-link.com/support and search the model number of your
switch. Download the
Support
web page on your PC.
2. Decompress the downloaded file, run the
installation wizard and follow the prompts to install
the
Easy Smart Configuration
3.
Double click the icon
utility Home page will display a list of TP-Link
switches on the local network.
4.
Click
to find out IP parameters of the switch.
If the switch uses an IP address assigned by a
DHCP server, set your PC to obtain an IP
address automatically from the DHCP server.
If the switch uses
192.168.0.1
configure your PC's IP address as
("x" ranges from 2 to 254), and subnet mask as
255.255.255.0.
5.
Double click the switch that you want to configure. Log in with admin as both
user name and password.
Now you can configure the switch using the configuration utility. For further
information, refer to the
Go to https://www.tp-link.com/support, search the model number of your switch,
and you can find this guide on the product
On:
Power on
Off:
Power off or abnormal power supply
Link/Act (Green)
On: Running at 10/100/1000 Mbps
Off: No device is linked to the
corresponding port
Flashing:Transmitting or receiving data
Data+Power Out
DC
PWR
LAN IN
User
Easy Smart Configuration Utility
Utility.
on the desktop, and the
as the IP address,
192.168.0.x
Easy Smart Configuration Utility User
Support
web page.
from the product
Guide.
Advertisement
Table of Contents

Related Manuals for TP-Link TL-RP108GE


Summary of Contents for TP-Link TL-RP108GE
- Page 1 The switch is plug and play. To configure the switch, you can use the Web-based GUI or the configuration utility. 1. Go to https://www.tp-link.com/support and search the model number of your The utility is only supported on Windows now. switch. Download the...
- Page 2 EU Declaration of Conformity Safety Information TP-Link hereby declares that the device is in compliance with the essential requirements and Keep the device away from water, fire, humidity or hot environments. other relevant provisions of directives 2014/30/EU, 2014/35/EU, 2009/125/EC, 2011/65/EU and Do not attempt to disassemble, repair, or modify the device.
Need help?
Do you have a question about the TL-RP108GE and is the answer not in the manual?
Questions and answers