Table of Contents
Advertisement
Advertisement
Table of Contents

Subscribe to Our Youtube Channel
Related Manuals for A&D EK-i Series


Summary of Contents for A&D EK-i Series
- Page 1 WM:PD4000465...
- Page 2 © 2002 A&D Company Ltd. All rights reserved. No part of this publication may be reproduced, transmitted, transcribed, or translated into any language in any form by any means without the written permission of A&D Company Ltd. The contents of this manual and the specifications of the instrument covered by this manual are subject to change for improvement without notice.
-
Page 3: Table Of Contents
CONTENTS 1. INTRODUCTION ..........................3 2. UNPACKING..........................3 3. PART NAMES AND FUNCTIONS.....................4 4. SETTING UP ..........................5 4-1. Setting up your balance ......................5 4-2. Power source..........................5 5. OPERATION ..........................6 5-1. Turn the power ON and OFF....................... 6 5-2. LCD backlight ..........................6 5-3. - Page 4 11-4. OP-12 Carrying case....................... 34 12. MAINTENANCE ........................34 12-1. Notes on maintenance......................34 12-2 Error codes ..........................35 13. SPECIFICATIONS........................36 13-1. EK-i series ..........................36 13-2. EW-i series ..........................37 13-3. Other weighing units ....................... 38 13-4. Dimensions ..........................39 GRAVITY ACCELERATION MAP....................39...
-
Page 5: Introduction
EK-i and EW-i series balances have the following features: q The EK-i series are high resolution type electronic balances having a resolution of 1/6,000 ~ 1/30,000. q The EW-i series are triple range balances and each range has a resolution of 1/3,000. -
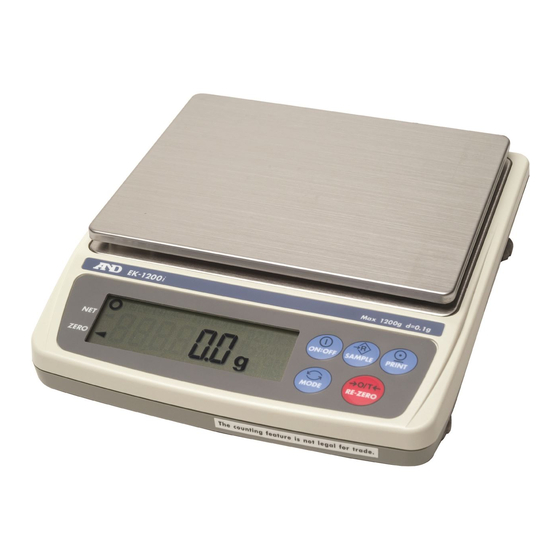
Page 6: Part Names And Functions
3. PART NAMES AND FUNCTIONS Outputs the weight value to Turns the power on or off. printer. Held down to enter the function Switches the weighing unit setting mode. (the weighing mode). Weighing mode (EW-i only): Changes the weighing range (when is selected). -
Page 7: Setting Up
4. SETTING UP 4-1. Setting up your balance 1. Place the weighing pan on the main unit as shown on the previous page. 2. Adjust the level of the balance using the leveling feet. Use the spirit level to confirm. The bubble should be in the center of the circle. -
Page 8: Operation
5. OPERATION 5-1. Turn the power ON and OFF 1. Press the ON/OFF key to turn the power ON. All of the symbols are displayed as shown above. (About units: Only the units available will be displayed.) The display turns off except for a weighing unit and the decimal point. The balance waits for the weighing data to become stable, and zero will be displayed with the ZERO mark (power-on zero). -
Page 9: Units
5-3. Units The most common unit of weight used around the world is the gram, but there is often a need to shift to alternative units specific to the country where the balance is used or to select modes such as counting or percent. The units and the order they appear in the display are as follows: Pound Ounce (avoir) -
Page 10: Selecting A Weighing Unit
5-4. Selecting a weighing unit Press the MODE key to select a unit. The following sections are a description of the Each pressing switches the three common units: g (gram mode), pcs (counting units available in the order described on the previous mode), and % (percent mode). -
Page 11: Weighing Range For The Ew-I Series
5-6. Weighing range for the EW-i series q The EW-i series have three weighing ranges, and the display shows which range the weight value belongs to with the mark R1, R2 or R3. q There is a function setting to select how the weighing range changes. q Select from automatic range ( ), manual range ( ) or fixed range (... -
Page 12: Counting Mode (Pcs)
5-7. Counting mode (pcs) Determines the number of objects in a sample. Calculates the reading, using the basic sample unit weight, and determines how many pieces are contained. Selecting the counting mode 1. Press the MODE key to select :pieces) Storing the sample unit 2. -
Page 13: Percent Mode (%)
9. The balance re-calculates the unit weight while the ACAI mark is blinking. Do not touch the balance or samples on the pan until the ACAI mark turns off. 10. Counting accuracy is improved when the ACAI mark turns off. Each time the above operation is performed, a more accurate unit weight will be obtained. -
Page 14: Comparator
6. COMPARATOR The results of the comparison are indicated by HI, OK or LO on the display. The comparison is as follows: LO < Lower limit value ≤ OK ≤ Upper limit value < HI Operating conditions (see the function setting “ ”): q No comparison (comparator function disabled). - Page 15 Entering the upper and lower limit values Cp Hi 6. With displayed, press the PRINT key. Cp Hi Enter the upper limit value using the following keys. SAMPLE key To select the digit blinking to change. RE-ZERO key To set the value of the digit 000000 selected.
-
Page 16: Calibration
7. CALIBRATION This function adjusts the balance for accurate weighing. Perform a calibration i n the following cases. q When the balance is first used. q When the balance has been moved. q When the ambient environment has changed. q For regular calibration. 7-1. -
Page 17: Gravity Acceleration Correction
5. At step 3, pressing the PRINT key weighs the zero- point value. Do not touch the pan during weighing. Weighing pan With nothing on the pan To store Cal 0 1000. 0 6. Place the calibration weight with the same value as displayed on the pan. -
Page 18: Functions
When the balance is first used or has been moved to a different place, it should be calibrated using a calibration weight. But if the calibration weight cannot be prepared, the gravity acceleration correction will compensate the balance. Change the gravity acceleration value of the balance to the value of the area where the balance will be used. -
Page 19: Key Operation
8-1. Key operation Cancels the operation and turns off the balance. Item key Selects a class and an item. In the weighing mode, press and hold the key to enter the function setting mode. Enter key Proceeds to the selected class. Stores the settings per class and goes to the next class. -
Page 20: Storing Weighing Units
1. Press and hold the SAMPLE key to display Press and hold f unc f unc 2. Press the PRINT key. The balance displays pof f 0 pof f 0 Each pressing 3. Press the RE-ZERO key to display pof f 1 switches the parameter pof f 1... -
Page 21: Function List
Select and store the weighing units as described below: Press and hold 1. Press and hold the SAMPLE key to display f unc f unc Press 2. Press the SAMPLE key several times to display several times Uni t Uni t 3. - Page 22 power off Auto power-off Auto power-off enabled Range change Manual range change r ng r ng setting for EW-i Range Automatic range change series Fixed to the lowest range Fixed to the middle range Fixed to the highest range Software filtering Fast / sensitive Cond Cond...
-
Page 23: Rs-232C Serial Interface
no additional samples ACAI function ACAI enabled required. d = the minimum Um i n Um i n display division Minimum unit 1/8 d weight total sample weight ≥5d The number of 10 pcs sm pl sm pl samples shown Sample number 25 pcs first when entered... -
Page 24: Interface Specifications
q The RS-232C interface has the following four modes. Stream mode Outputs data continuously. Key mode Outputs data by pressing the PRINT key. Auto-print mode Outputs data which meets the conditions of auto-print. Command mode Controls the balance using commands from a computer. q Set the parameters of the data format ( ) and data output mode bt pr... -
Page 25: Data Output Mode
q There are four types of headers: ST : Stable weighing data (including % data) QT : Stable counting data US : Unstable weighing data (including count and %) OL : Out of weighing range (Over) q The data is normally 9 digits including a decimal point and a sign. q There are 11 types of units: g : Weighing data “gram”... -
Page 26: Command Mode
Auto-print mode A Set the function “ ”. pr t 2 The balance transmits the weighing data when the display is stable (the stability mark is on) and the data is greater than +4d (of the lowest range for EW-i series). The next output can be obtained after the display returns below +4d. -
Page 27: Setting The Id Number
q The result of calibration (“Calibration report”) q The result of calibration test (“Calibration test report”) q The “Start block” and “End block” for GLP data 10-1. Setting the ID number Press and hold 1. Press and hold the SAMPLE key to display f unc f unc 2. - Page 28 Data format for “calibration test report” “Start block” and “End block”...
-
Page 29: Output Procedure For The "Calibration Report
Press and hold the CAL switch. Release the CAL switch Cal 0 Operation of Calibration (See “7.CALIBRATION”) 10-3. Output procedure gl p To output “Calibration report” calibration report The function setting: “ i nf o ” or “ i nf o ”... -
Page 30: Output Procedure For The "Calibration Test Report
displayed. The balance starts calibration. For details on calibration, see “7. CALIBRATION” appears when the calibration has been completed. is displayed and calibration report is gl p output. appears again. Remove the weight and press the MODE key to return to the weighing mode. - Page 31 1. Press and hold the calibration (CAL) switch. appears after . Release the switch when is displayed. CC 0 is displayed. 3. Press the SAMPLE key and change the weight 02000. 0 value using the following keys. SAMPLE key To select the digit blinking to change.
-
Page 32: Output Procedure For The "Start Block" And "End Block
appears. is displayed and calibration test report is gl p output. appears again. Remove the weight and press the MODE key to return to the weighing mode. 10-5. Output procedure for the “Start block” and “End block” The function setting: “ ”... -
Page 33: Options
PRINT key when is displayed. The st ar t balance outputs the Start block. 2. The balance can output the weighing data by pressing the PRINT key or selecting the auto- print mode. End block 3. Press and hold the PRINT key. Release the PRINT key when r ecend is displayed. -
Page 34: Comparator Relay Output And Buzzer
q OP-12 Carrying case 11-1. OP-04 Comparator relay output and buzzer Allows output of the HI, OK or LO signal results to an external device as a solid state relay output. It is possible to sound a buzzer according to the comparison result. See the function “... -
Page 35: Underhook Assembly
11-2. OP-07 Underhook assembly By attaching the underhook assembly to the bottom of the balance, large objects that are difficult to load on the weighing pan can be weighed in suspension, and the specific gravity of objects may be measured. q q OP-07 is available for use with the EK-6000i / 12Ki and EW-12Ki balances only. -
Page 36: Carrying Case
Charging the battery pack Connect the AC adapter to the balance and turn the power off, then charging starts. It will take approximately 15 hours to reach full charge. q q If “ ” is displayed when using the battery pack, immediately stop l b0 l b0 using it, and recharge the battery pack or use the AC adapter. -
Page 37: Error Codes
dampened with a mild detergent. 12-2. Error codes Overload error Warning to indicate that an object beyond the balance capacity has been placed on the pan. Remove the object from the pan. Range over notice This will be shown by the EW-i series when a weight beyond the range capacity is tared and removed from the pan. -
Page 38: Specifications
Press the MODE key to return to the weighing mode. If you cannot cancel an error or other errors occurred, request service from the store where you purchased the balance or from your local A&D dealer. 13. SPECIFICATIONS 13-1. EK-i series EK-120i EK-200i EK-300i EK-600i... -
Page 39: Ew-I Series
Min. unit weight *) 0.01 g 0.01 g 0.01 g 0.1 g Min. % display 0.1 % Min. 100 % weight 10 g Repeatability 0.01 g 0.01 g 0.01 g 0.1 g (Std. deviation) Linearity ±0.01 g ±0.01 g ±0.02 g ±0.1 g Sensitivity drift ±20 ppm / °C (10°C~30°C / 50°F~86°F) -
Page 40: Other Weighing Units
Repeatability 0.01g 0.02g 0.05g 0.1g 0.2g 0.5g (Std. deviation) ±0.01g ±0.02g ±0.05g ±0.1g ±0.2g ±0.5g ±1g ±2g ±5g Linearity Sensitivity drift ±20 ppm / °C (10°C~30°C / 50°F~86°F) Display 7 segment LCD display with backlight (Character height 16 mm) Display update 10 time per second Operating temp. -
Page 41: Dimensions
Min. display 0.005 0.01 0.02 0.05 Capacity 19.29 38.58 96.45 192.9 385.8 964.5 1929 3858 7715 Min. display 0.01 0.02 0.05 Capacity 463.0 926.0 2315 4630 9260 23150 ----- ----- ----- Min. display ----- ----- ----- Capacity 0.7935 1.587 3.968 7.935 15.87 39.68... - Page 42 Buenos Aires 9.797 m/s Ottawa 9.806 m/s Calcutta 9.788 m/s Paris 9.809 m/s Cape Town 9.796 m/s Rio de Janeiro 9.788 m/s Chicago 9.803 m/s Rome 9.803 m/s Copenhagen 9.815 m/s San Francisco 9.800 m/s Cyprus 9.797 m/s Singapore 9.781 m/s Djakarta 9.781 m/s Stockholm...
- Page 43 MEMO...
- Page 44 MEMO...
- Page 45 MEMO...
Need help?
Do you have a question about the EK-i Series and is the answer not in the manual?
Questions and answers
6 lines when turned on. Does not go to 0.0 until i press MODE. Cannot tare device display shows -37.6g.
If the A&D EK-i Series scale displays 6 lines and does not reset to 0.0 until the MODE button is pressed, and shows -37.6g when trying to tare, follow these steps:
1. Ensure that the weighing pan is empty.
2. Turn the power off and then turn it back on.
3. If the issue persists, check for any foreign objects or obstructions around the weighing pan and remove them.
4. If the problem continues, calibrate the balance to maintain accuracy.
5. If calibration does not resolve the issue, request service from the store where the balance was purchased or from a local A&D dealer.
If the error persists, professional service may be required.
This answer is automatically generated