
Related Manuals for A&D EJ-123


Summary of Contents for A&D EJ-123
- Page 1 -123/EJ-303 -123/EJ-303 EJ-1202/EJ-3002 EJ-1202/EJ-3002 EJ-54D2 EJ-54D2 Compact Precision Balance Compact Precision Balance 1WMPD4002746E...
- Page 2 This Manual and Marks All safety messages are identified by the following, “WARNING” or “CAUTION”, of ANSI Z535.4 (American National Standard Institute: Product Safety Signs and Labels). The meanings are as follows: A potentially hazardous situation, which if not avoided, could result WARNING in death or serious injury.
-
Page 3: Table Of Contents
4.1. Setting Up Your Balance ........................... 8 4.2. Power Source ..............................9 4.3. Breeze Break (For the EJ-123 / EJ-303) ....................... 11 4.4. Breeze Break (For the EJ-54D2) ........................12 5. OPERATION ......................... 14 5.1. Turn the Power ON and OFF ......................... 14 5.2. - Page 4 10.1. Setting the ID Number ..........................36 10.2. GLP Report ..............................37 11. MAINTENANCE ........................41 11.1. Notes on Maintenance ..........................41 11.2. Error Codes ..............................42 12. SPECIFICATIONS ........................ 44 12.1. Generals ..............................44 12.2. Other Weighing Units..........................46 12.3.
-
Page 5: Introduction
Gram mode Weighing capacity 22 g/Minimum display division 0.0002 g Weighing capacity 52 g/Minimum display division 0.001 g The EJ-123, EJ-303 and EJ-54D2 are equipped with a breeze break which is provided as standard for more accurate weighing. The EJ-54D2 is equipped with a carat pan for weighing jewelry which is provided as standard. -
Page 6: Unpacking
Main unit Main unit EJ-123 / EJ-303 EJ-1202 / EJ-3002 Weighing pan Weighing pan Protective film Wind shield cap (EJ-123 / EJ-303 only) Main unit EJ-54D2 Carat pan Weighing pan Pan support Instruction Manual AC adapter Please confirm that the AC adapter... -
Page 7: Part Names And Functions
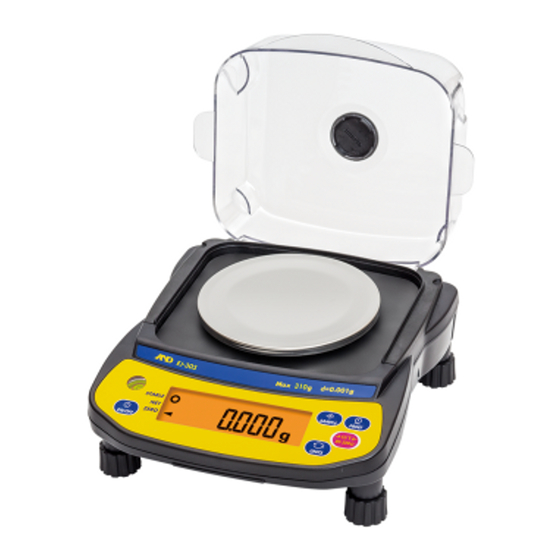
3. PART NAMES AND FUNCTIONS EJ-123 / EJ-303 / EJ-1202 / EJ-3002 Wind shield cap (Accessory) (EJ-123 / EJ-303 only) Breeze break (EJ-123 / EJ-303 only) Weighing pan (The shape of weighing pan of the EJ-1202 / EJ-3002 is square.) - Page 8 EJ-54D2 Breeze break Weighing pan Spirit level ON : OFF key Leveling foot Serial number SAMPLE key PRINT key Calibration switch cover (bottom) RE-ZERO key UNITS key EJ-02 / EJ-03 slot Battery cover Security slot (Use a security cable AC adapter jack commercially available.)
- Page 9 Total indicator Measurement in air for specific gravity M+ indicator Measurement in water ACAI indicator for specific gravity Battery indicator Density (Specific gravity) Hold indicator STABLE indicator STABLE Weighing units NET indicator ZERO ZERO indicator Turns the power ON or OFF. Switches the weighing units and modes.
-
Page 10: Setting Up
The bubble should be in the center of the circle. For the EJ-123, EJ-303, EJ-1202 and EJ-3002 balances, the two leveling feet on the front side have a two-tier structure. To adjust the height of the balance, turn the lower leveling feet. -
Page 11: Power Source
Balance location To measure correctly, to keep the balance in good condition, and to prevent hazards, observe the following: Do not install the balance in locations that are subject to excessive dust, breezes, vibration, large temperature fluctuations, condensation, or that may have magnetic fields. Install the balance on a solid surface and keep the balance level. - Page 12 Installing the Batteries 1. Turn the balance off and disconnect the AC adapter if used. 2. Slide the battery cover off. 3. Push the battery box up to unhook and pull it out. 4. Insert four new batteries (LR6 / R6P / AA) into the battery box, taking extreme care of the polarities.
-
Page 13: Breeze Break (For The Ej-123 / Ej-303)
4.3. Breeze Break (For the EJ-123 / EJ-303) The breeze break can prevent a measurement error due to a (disturbing) wind. The clear cover can be disconnected from the fixing frame easily when adding an excessive stress during operation. Assemble the breeze break with the following steps. -
Page 14: Breeze Break (For The Ej-54D2)
4.4. Breeze Break (For the EJ-54D2) The breeze break can prevent a measurement error due to a (disturbing) wind. Detaching the Breeze Break With the hooks located on the left and right sides of the balance held up, raise the breeze break. - Page 15 Attaching the Breeze Break 1. Align the breeze break with the balance. Place the breeze break so that the handle of the sliding door will face forward. 2. Engage the hooks to the guides on the balance to secure the breeze break. Confirm that the two hooks are securely engaged.
-
Page 16: Operation
5. OPERATION 5.1. Turn the Power ON and OFF 1. Press the ON:OFF key to turn the power ON. STABLE Weighing units ZERO All of the symbols are displayed as shown above. (About units: Only the available units will be displayed.) Only when operated using the batteries, the balance subsequently performs a countdown using the underscore on the display. -
Page 17: Units
The unit “lb” is not available for the EJ-123, EJ-303 and EJ-54D2 models. The unit “SG” is not available for the EJ-1202, EJ-3002 and EJ-54D2 models. -
Page 18: Selecting A Weighing Unit
5.4. Selecting a Weighing Unit Press the UNITS key to select a unit. Each pressing switches the units available in the order described The following sections are a description of on the previous page. the three common units: g (gram mode), pcs STABLE indicator (counting mode), and % (percent mode). -
Page 19: Weighing Range (Ej-54D2 Only)
5.6. Weighing Range (EJ-54D2 only) The EJ-54D2 has two weighing ranges available as follows: Range 1 (low range)…22 g×0.0002 g Range 2 (high range)…52 g×0.001 g Function settings available to select how the weighing range changes: automatic range (rng 1) or manual range (rng 0). Operation Function Description... -
Page 20: Counting Mode (Pcs)
5.8. Counting Mode (pcs) The balance weighs the sample pieces and calculates the unit weight. Using the sample unit weight, the balance counts the number of items in the sample. As for the minimum unit weight acceptable, refer to the item “Umin” of “8.5. Function List”. -
Page 21: Percent Mode (%)
10. Counting accuracy is improved when the ACAI indicator turns off. Each time the above operation is performed, a more accurate unit weight will be obtained. There is no definite upper limit of ACAI range for the number of samples exceeding 100. Try to add a similar number of samples as that displayed. -
Page 22: Accumulation Function
6. ACCUMULATION FUNCTION This function counts the number of times objects are weighed, calculates the total mass value and displays the number (accumulated count) and accumulated mass value. Preset the item “totl” of the function list to use the accumulation function. For the EJ-54D2, please note that the accumulation function is only available within the range of Range 1 (low range) when the weighing range is set to the manual range “rng 0”... -
Page 23: Selecting A Weighing Unit
6.2. Selecting a Weighing Unit 1. Press the UNITS key to select a unit to be used in the accumulation function. 0. 0 00 The unit cannot be changed after the ZERO accumulation data is stored. To change the unit, Unit reset the accumulation data and then press the UNITS key. -
Page 24: Calibration
7. CALIBRATION This function adjusts the balance for accurate weighing. Perform calibration in the following cases: When the balance is first used. When the balance has been moved. For regular calibration. Calibration (CAL) switch Calibration (CAL) switch cover 7.1. Calibration Using a Weight Prepare a calibration weight (sold separately) in advance. -
Page 25: Gravity Acceleration Correction
appears. Remove the weight from the pan. To store When the GLP output (function setting “info 1” or 100. 0 00 “info 2”) is selected, glp appears. The calibration report is output and end appears again. Then the balance turns off. 0end000 Note GLP output... -
Page 26: Functions
8. FUNCTIONS 8.1. Key Operation The ON:OFF key to cancel the operation and turn the balance off. Item key to select a class and an item. In the weighing mode, press and hold the key to enter the function setting mode. The enter key to proceed to the selected class, store the setting per class and go to the next class. -
Page 27: Setting Example
8.3. Setting Example To set auto power-off function to “Enabled”, and the ACAI function to “Disabled”. Press and hold 1. Press and hold the SAMPLE key to display func func 2. Press the PRINT key to display poff 0 . poff 0 3. -
Page 28: Storing Weighing Units
8.4. Storing Weighing Units It is possible to store the weighing units that will actually be used from the units available. For the units available, refer to “5.3. Units”. Select and store the weighing units as described below: Press and hold 1. -
Page 29: Function List
8.5. Function List Param- Class Item Description eter 0 Auto power-off disabled poff Automatically power OFF Auto power-off Auto power-off enabled Manual range Function to change the weighing range Weighing range 1 Automatic range (EJ-54D2 only) Fast / sensitive Cond ... - Page 30 Param- Class Item Description eter 0 Disabled d = readability (scale interval or “division”) Hold. Limit : ±10d Hold Hold: Holds stable weight values Hold. Limit : ±50d Display hold function except in the zero band. Hold. Limit : ±100d When the value changes more than Hold.
-
Page 31: Options
RS-232C serial interface can be installed at one time. 9.1. EJ-02 USB Interface The EJ-02 allows an EJ-123, EJ-303, EJ-1202, EJ-3002 or EJ-54D2 balance to be connected to a personal computer with the USB interface. The EJ-02 can transmit the weight value (numerical value only) unidirectionally to a personal computer via USB. -
Page 32: Rs-232C Serial Interface
9.2. EJ-03 RS-232C Serial Interface The EJ-03 allows an EJ-123, EJ-303, EJ-1202, EJ-3002 or EJ-54D2 balance to be connected to a printer or a personal computer using the RS-232C serial interface. The RS-232C serial interface has the following four modes: Stream mode Outputs data continuously. -
Page 33: Data Format
Pin Connections D-Sub 9-pin male connector N.C. Transmit data Receive data N.C. Signal ground Data set ready Request to send Clear to send N.C. Inside of the balance The interface is designated as DCE (Data Communication Equipment). 9.3. Data Format Header Data Unit... - Page 34 Example of output data: Weighing data “gram” S T , + 0 0 1 2 . 3 4 5 Counting data Q T , + 0 0 0 1 2 3 4 5 P C C Percentage data S T , + 0 0 0 1 2 . 3 4 Out of range “gram”...
-
Page 35: Density Determination Kit
Breeze break the balance can determine the density Weighing pan (specific gravity) of a sample. EJ-13 is for use with the EJ-123 / EJ-303. EJ-13 Installation Remove the weighing pan and the fixing frame. Install the beaker stand on the balance... - Page 36 Entering the density of a liquid (ldin = 0) SG indicator 1. Press the UNITS key to select SG . 2. Press and hold the UNITS key to display the liquid 0. 0 00 density input mode. The display will show the water temperature currently set (factory setting: 25 °C).
- Page 37 Example of Density Measurement Selecting the density measurement mode Measuring weight in air. 1. Press the UNITS key to select SG . SG indicator The weighing unit is “g”. The display shows that blinks and the 0. 0 00 balance is measuring the weight in air. When the display does not show zero, press the RE-ZERO key to set the display to zero.
-
Page 38: Id Number And Glp
10. ID NUMBER AND GLP The ID number is used to identify the balance when Good Laboratory Practice (GLP) is used. The ID number is stored in memory even if the power to the balance is turned OFF. The following GLP data is transmitted to a printer or a personal computer using the optional RS-232C serial interface. -
Page 39: Glp Report
Remove the weight. The balance turns off. The balance turns off. AD-8127/AD-8121B format “info 1” General format “info 2” Manufacturer ~~~~~~~~~~~ ___________A_&_D & <CRLF> Model MODEL_____EJ-123 MODEL~~~~~EJ-123<CRLF> Serial number S/N____Q12345678 S/N~~~~Q12345678<CRLF> ID number ID~~~~~~~~ABCDEF<CRLF> ID________ABCDEF DATE<CRLF> Date DATE__2013/11/14 <CRLF> Time TIME____02:53:21 TIME<CRLF>... - Page 40 Calibration Test Report The calibration test mode is used to compare a calibration test weight with the calibration test data weighed by the balance. This test does not perform calibration and this mode is available even after sealing the calibration (CAL) switch. Press and hold both keys.
- Page 41 AD-8127/AD-8121B format “info 1” General format “info 2” Manufacturer ~~~~~~~~~~~ ___________A_&_D & <CRLF> Model MODEL_____EJ-123 MODEL~~~~~EJ-123<CRLF> Serial number S/N____Q12345678 S/N~~~~Q12345678<CRLF> ID number ID~~~~~~~~ABCDEF<CRLF> ID________ABCDEF DATE<CRLF> Date DATE__2013/11/14 <CRLF> Time TIME____02:53:21 TIME<CRLF> Calibration test type CAL.TEST(EXT.) <CRLF> ACTUAL CAL.TEST(EXT.)<CRLF> Zero value ________0.000__g...
- Page 42 The balance returns to the weighing mode. AD-8127/AD-8121B format “info 1” General format “info 2” Title block Manufacturer ~~~~~~~~~~~ ___________A_&_D & <CRLF> Model MODEL_____EJ-123 MODEL~~~~~EJ-123<CRLF> Serial number S/N____Q12345678 S/N~~~~Q12345678<CRLF> ID number ID~~~~~~~~ABCDEF<CRLF> ID_______ABCDEF DATE<CRLF> Date DATE__2013/11/14 <CRLF> Start time START START<CRLF>...
-
Page 43: Maintenance
Pan support Pan support Hook Fixing frame Fixing frame Hook Leveling foot EJ-1202 / EJ-3002 EJ-123 / EJ-303 Breeze break Upper pan to weigh in air Sample weighing pan Pan stand Lower pan to weigh in water Weighing pan Beaker stand... -
Page 44: Error Codes
11.2. Error Codes Overload error Warning to indicate that an object beyond the balance eeeeee capacity has been placed on the pan. Remove the object from the pan. Range exceeding error Warning to indicate that the balance has detected an excessive upward force. - Page 45 Stability error Warning to indicate that the weight value is not stable and the error1 balance cannot display it. Prevent vibration and drafts. Press the UNITS key to return to the weighing mode. Internal errors (# is a number except 1.) The balance detects an error state in internal processing.
-
Page 46: Specifications
12. SPECIFICATIONS 12.1. Generals MODEL EJ-123 EJ-303 Weight capacity 120 g 310 g Readability 0.001 g 0.001 g Repeatability (Standard deviation) 0.003 g 0.003 g Linearity ±0.003 g ±0.003 g Sensitivity drift ±20 ppm / °C (10 °C to 30 °C / 50 °F to 86 °F) - Page 47 MODEL EJ-1202 EJ-3002 Weight capacity 1200 g 3100 g Readability 0.01 g 0.01 g Repeatability (Standard deviation) 0.03 g 0.03 g Linearity ±0.03 g ±0.03 g Sensitivity drift ±20 ppm / °C (10 °C to 30 °C / 50 °F to 86 °F) Number of samples 5, 10, 25, 50 or 100 pieces Max.
-
Page 48: Other Weighing Units
12.2. Other Weighing Units MODEL EJ-123 EJ-303 EJ-1202 EJ-3002 EJ-54D2 Capacity 4.23290 10.93495 42.3290 109.3495 0.77603 1.83425 Min. display 0.00005 0.00005 0.0005 0.0005 0.00001 0.00005 Capacity ----- ----- 2.64555 6.83435 ----- ----- Min. display ----- ----- 0.00005 0.00005 ----- ----- Capacity 3.85810... -
Page 49: Options
12.3. Options EJ-02 USB interface EJ-03 RS-232C serial interface EJ-13 Density determination kit for EJ-123 / EJ-303 12.4. Dimensions EJ-123 / EJ-303 110 ○ Min.126 EJ-1202 / EJ-3002 Min.82 Unit: mm... - Page 50 EJ-54D2 50 Min.114 Unit: mm...
- Page 51 108** (Opening) Unit: mm Inside size from the center of the weighing pan to the sliding door Size of the breeze break opening Size of the sliding door protruding from the rear of the balance when opened...
-
Page 52: Gravity Acceleration Map
13. GRAVITY ACCELERATION MAP Values of Gravity at Various Locations Amsterdam 9.813 m/s Manila 9.784 m/s Athens 9.807 m/s Melbourne 9.800 m/s Auckland NZ 9.799 m/s Mexico City 9.779 m/s Bangkok 9.783 m/s Milan 9.806 m/s Birmingham 9.813 m/s New York 9.802 m/s Brussels 9.811 m/s... - Page 53 World Map...
- Page 54 MEMO...
- Page 55 MEMO...
- Page 56 3-23-14 Higashi-Ikebukuro, Toshima-ku, Tokyo 170-0013, JAPAN Telephone: [81] (3) 5391-6132 Fax: [81] (3) 5391-1566 A&D ENGINEERING, INC. 1756 Automation Parkway, San Jose, California 95131, U.S.A. Telephone: [1] (408) 263-5333 Fax: [1] (408)263-0119 A&D INSTRUMENTS LIMITED Unit 24/26 Blacklands Way, Abingdon Business Park, Abingdon, Oxfordshire OX14 1DY United Kingdo Telephone: [44] (1235) 550420 Fax: [44] (1235) 550485 A&D AUSTRALASIA PTY LTD...
Need help?
Do you have a question about the EJ-123 and is the answer not in the manual?
Questions and answers