Advertisement
Quick Guide
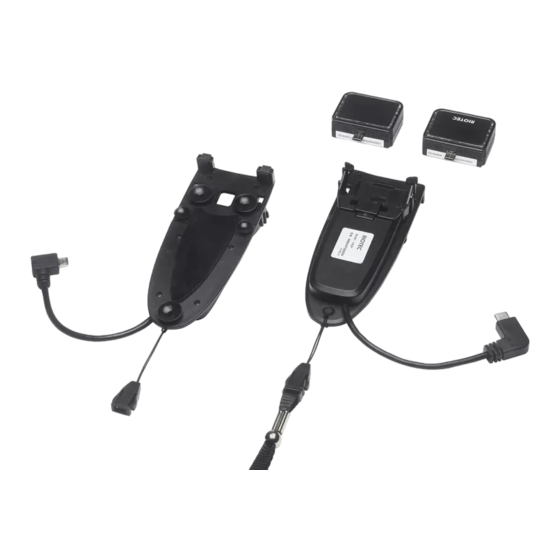
-DC9250KP (with Battery)
-DC9250KN (without Battery)
1
H92P/H92N
Suction Cup
PU Glue
(Can be used
repeatedly)
Micro USB
port (OTG)
Connect to micro USB port of OTG device
2
H92P/H92N
H92PH with
Li- Ion Battery/
H92NH without
Battery
Mini
scanner
3
O = Operation mode
LED Indicator
H92PH only
* Before you use scanner, please switch to "C" for battery
charge for 3~4 hours.
* Under "C mode", you can raise/lower soft-keyboard easily.
4
Micro USB
H92P Scan Holder is with Li-Ion battery inside. When in
charging, please use the original power adaptor of OTG
device (recommend). Through it, it charges both OTG
device and H92P internal battery at the same time. When in
Micro USB
low battery (Red LED flashing), please charge it
immediately.
LED Indicator Information
Green LED OFF
Green LED ON
Red LED Flashing
Attention: Under "Operation mode" please do not charging,
otherwise the OTG device's battery will be charging back to
H92P's battery.
C = Charge mode
LED Indicator
H92PH only
Full charged (Charge mode)
Charging (Charge mode)
Low battery (Operation mode)
1
5
Trigger Area
The touch sensor area is around the central area. (For both sides).
Please check the above drawing for your reference.
Installation
Before using scanner, please make sure that the OTG device is fully
charged.
1. Under USB HID interface
** When plugged into OTG device, it will be recognized and begin
to scan the barcode.
2.
Under USB Serial interface
** Please install PL-2303 driver into your OTG device first. PL-2303
driver can be downloaded from Google Play
** Connect scanner to your OTG device, then, you can know which
serial port scanner connects to.
** The data you scan will be sent to serial port and your APP can
get the data from serial port directly.
Advertisement
Table of Contents

Related Manuals for RIOTEC DC9250KP


Summary of Contents for RIOTEC DC9250KP
- Page 1 O = Operation mode C = Charge mode Quick Guide -DC9250KP (with Battery) -DC9250KN (without Battery) H92P/H92N Suction Cup PU Glue LED Indicator (Can be used H92PH only repeatedly) * Before you use scanner, please switch to "C" for battery ...
- Page 2 1D Symbologies – 1 Reset Configuration to Default : If you are unsure of the scanner configuration or have scanned the incorrect codes, please scan A1~A14 for USB HID or B1~B13 for RS232 / USB Serial. This will reset the scanner to its factory defaults. ...
- Page 3 This parameter specifies the delay between emulated keystrokes EAN 8 ENABLE DISABLE No Delay (0ms) (10ms) ENABLE DISABLE EAN 13 (50ms) Information in this document is subject to change without notice. For more information, please visit: www.riotec.com.tw R_190507_01 3 ...
Need help?
Do you have a question about the DC9250KP and is the answer not in the manual?
Questions and answers