GORMAN-RUPP PUMPS PA Series Installation, Operation And Maintenance Manual
Hide thumbs
Also See for PA Series:

Subscribe to Our Youtube Channel
Related Manuals for GORMAN-RUPP PUMPS PA Series


Summary of Contents for GORMAN-RUPP PUMPS PA Series
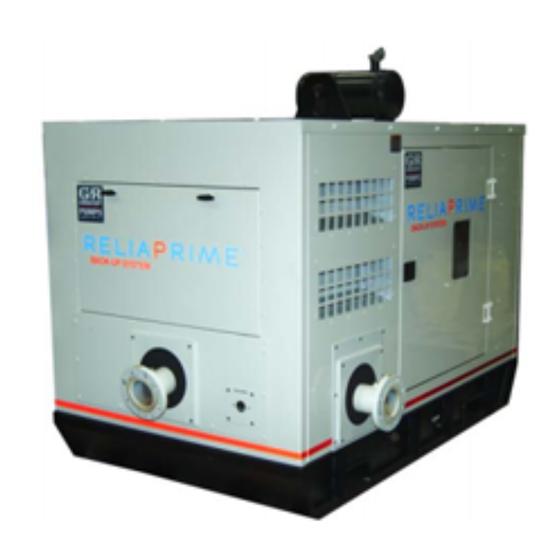
- Page 1 OM-07208-01 November 27, 2018 INSTALLATION, OPERATION, AND MAINTENANCE MANUAL WITH PARTS LIST PA SERIES PUMP MODEL PA4A60C-ZPP428-ESP GORMAN‐RUPP PUMPS www.grpumps.com 2018 Gorman‐Rupp Pumps Printed in U.S.A.
- Page 2 Register your new Gorman‐Rupp pump online at www.grpumps.com Valid serial number and e‐mail address required. RECORD YOUR PUMP MODEL AND SERIAL NUMBER Please record your pump model and serial number in the spaces provided below. Your Gorman‐Rupp distributor needs this information when you require parts or service. Pump Model: Serial Number:...
-
Page 3: Table Of Contents
TABLE OF CONTENTS INTRODUCTION ..........PAGE I - 1 SAFETY ‐... - Page 4 TABLE OF CONTENTS (continued) Horn Delay ............PAGE C - 4 ROUTINE OPERATION .
- Page 5 TABLE OF CONTENTS (continued) Discharge Check Valve Reassembly And Installation ..... . . PAGE E - 24 Priming Chamber Assembly And Installation .
-
Page 6: Introduction
PA SERIES OM-07208 INTRODUCTION Thank You for purchasing a Gorman‐Rupp pump. HAZARD AND INSTRUCTION Read this manual carefully to learn how to safely DEFINITIONS install and operate your pump. Failure to do so could result in personal injury or damage to the The following are used to alert maintenance per... -
Page 7: Safety - Section A
PA SERIES OM-07208 SAFETY ‐ SECTION A This information applies to Prime Aire Series pumps. Refer to the manual ac companying the engine or power source before attempting to begin oper This pump is equipped with an automat ation. ic starting system, and is subject to au... - Page 8 OM-07208 PA SERIES hose connections are tight, properly supported and secure before operation. Natural gas presents an extreme explo sion and fire hazard. Follow all safety precautions outlined by the National Fire Protection Association when de Do not operate the pump against a signing and installing the system.
-
Page 9: Installation - Section B
PA SERIES OM-07208 INSTALLATION - SECTION B Review all SAFETY information in Section A. specific application. Since the pressure supplied to the pump is critical to performance and safety, Since pump installations are seldom identical, this be sure to limit the incoming pressure to 50% of the... -
Page 10: Battery Specifications And Installation
OM-07208 PA SERIES ing, check for loose hardware at mating sur faces. c. Carefully read all tags, decals, and markings on the pump assembly, and perform all duties indicated. d. Check levels and lubricate as necessary. Re fer to LUBRICATION in the MAINTENANCE AND REPAIR section of this manual and per... -
Page 11: Positioning Pump
PA SERIES OM-07208 Clearance POSITIONING PUMP When positioning the pump, allow a minimum clearance of 18 inches (457,2 mm) in front of the Lifting enclosure suction cover to permit removal of the cover and easy access to the pump. NATURAL GAS FUEL... -
Page 12: Regulators (Natural Gas)
OM-07208 PA SERIES The amount of fuel which must be stored at the in Gorman‐Rupp has provided a secondary natural stallation will be determined by the length of time gas regulator. This regulator has a maximum inlet the engine must operate before refueling is neces... -
Page 13: Connecting Fuel Supply Line To The Unit
PA SERIES OM-07208 depending on code requirements. The secondary SUCTION AND DISCHARGE PIPING regulator supplied with the pumping unit has a range of 4 inches to 12 inches (102mm to 305mm) Pump performance is adversely effected by in of water column. -
Page 14: Suction Lines
OM-07208 PA SERIES Installation closer to the pump may result in erratic should be sealed with pipe dope to ensure an air readings. tight seal. Follow the sealant manufacturer's rec ommendations when selecting and applying the pipe dope. The pipe dope should be compatible SUCTION LINES with the liquid being pumped. -
Page 15: Submersible Transducer
PA SERIES OM-07208 Figure 2. Recommended Minimum Suction Line Submergence vs. Velocity SUBMERSIBLE TRANSDUCER above the point where it bends along the bot tom. See Figure 3 for a typical installation. This unit is equipped with an optional Electronic c. The wet well or sump must be vented to at... -
Page 16: Discharge Lines
OM-07208 PA SERIES SUCTION LINE DISCHARGE LINE SIGNAL CABLE (ATTACH TO SUCTION LINE) SUCTION SUBMERSIBLE STRAINER TRANSDUCER (DOWNSTREAM FROM SUCTION) FLOW Figure 3. Typical Submersible Transducer Installation DISCHARGE LINES friction losses. Never install a throttling valve in a suction line. -
Page 17: Operation - Section C
OM-07208 PA SERIES OPERATION - SECTION C OPERATION Review all SAFETY information in Section A. Make sure the pump is level. Lower jack Follow the instructions on all tags, labels and stands and chock the wheels, if so decals attached to the pump. -
Page 18: Optional Eps Control
OM-07208 PA SERIES S Three switches on front panel for all adjust Add liquid to the pump casing when: ments 1. The pump is being put into service for the S Battery level indicator on LCD screen to alert first time. -
Page 19: Eps Functions
OM-07208 PA SERIES upon connection of power as a lamp test feature. When the pressure decreases to a level equal However, no relay outputs are closed during test. to or less than the “A.of” setpoint, A output con tacts will open in approximately one second. -
Page 20: Eps Calibration
OM-07208 PA SERIES EPS Calibration Level Adjustment NOTE Level adjustment tells the unit when to turn the pump on and off. To set: Zero offset and span adjustments are only neces sary to calibrate a new unit, or when replacing the transducer. - Page 21 OM-07208 PA SERIES OPERATION IN EXTREME HEAT The safety shutdown system will automatically stop the unit if engine operating temperature ex A manual shut‐off valve should not be ceeds design limits. If engine over‐temperature installed in any bypass line. A manual shutdown occurs, allow the unit to cool before re...
- Page 22 OM-07208 PA SERIES Automatic Stopping In the automatic mode, the pump will stop when the liquid in the wet well or sump lowers and acti Allow an over‐heated pump to com vates the “Off” liquid level device(s). The pump will pletely cool before servicing.
- Page 23 OM-07208 PA SERIES Bearing Temperature Check conditions, change the filter more frequently. Irreg ular performance and loss of power usually indi Bearings normally run at higher than ambient tem cate a dirty fuel filter. peratures because of heat generated by friction.
- Page 24 PA SERIES OM-07208 TROUBLESHOOTING - SECTION D Review all SAFETY information in Section A. 5. Close the suction and discharge valves. 6. Vent the pump slowly and cau tiously. 7. Drain the pump. Before attempting to open or service the pump: 1.
- Page 25 OM-07208 PA SERIES TROUBLE POSSIBLE CAUSE PROBABLE REMEDY PUMP STOPS OR FAILS Impeller or other wearing parts Replace worn or damaged parts. TO DELIVER RATED worn or damaged. Check that impeller is properly cen tered and rotates freely. FLOW OR PRESSURE (cont.)
- Page 26 PA SERIES OM-07208 equipped) between regularly scheduled inspec PREVENTIVE MAINTENANCE tions can indicate problems that can be corrected Since pump applications are seldom identical, and before system damage or catastrophic failure oc pump wear is directly affected by such things as curs.
- Page 27 PA SERIES OM-07208 PUMP MAINTENANCE AND REPAIR ‐ SECTION E MAINTENANCE AND REPAIR OF THE WEARING PARTS OF THE PUMP WILL MAINTAIN PEAK OPERATING PERFORMANCE. STANDARD PERFORMANCE FOR PUMP MODEL PA4A60C-ZPP428-ESP Based on 70 F (21 C) clear water at sea level with Contact the Gorman‐Rupp Company to verify per...
- Page 28 OM-07208 PA SERIES ILLUSTRATION PARTS PAGE TO ENCLOSURE TO AIR FILTER ROUTE WIRES AND SECURE ECU MOUNTING Figure 1. Pump Model PA4A60C-ZPP428-ESP PAGE E - 2 MAINTENANCE & REPAIR...
- Page 29 PA SERIES OM-07208 PARTS LIST Pump Model PA4A60C-ZPP428-ESP (From S/N 1722839 Up) If your pump serial number is followed by an “N”, your pump is NOT a standard production model. Contact the Gorman‐Rupp Company to verify part numbers. ITEM PART NAME...
- Page 30 OM-07208 PA SERIES ILLUSTRATION TO PUMP DRAIN 81 82 SOLAR CHARGING KIT MOUNTING AND ROUTING FUEL LINE CONNECTION PLUGS INTO 21−PIN CONNECTOR TO DISCHARGE SPOOL PLUGS INTO 31−PIN CONNECTOR PLUGS INTO SQUARE−4 CONNECTOR TO SUCTION SPOOL RADIATOR Figure 2. Pump Model PA4A60C-ZPP428-ESP (cont'd) PAGE E - 4 MAINTENANCE &...
- Page 31 PA SERIES OM-07208 PARTS LIST Pump Model PA4A60C-ZPP428-ESP ITEM PART NAME PART ITEM PART NAME PART NUMBER NUMBER ZENITH ENGINE 29267-003 HOIST BAIL ASSY 44713-062 24150 BASE WELDMENT 41565-616 24150 HEX NUT W/FLANGE 21765-314 SUB BASE ASSY 41535-622 24150 HEX HEAD CAP SCREW...
- Page 32 OM-07208 PA SERIES ILLUSTRATION Figure 3. Pump End Assembly PAGE E - 6 MAINTENANCE & REPAIR...
- Page 33 PA SERIES OM-07208 PARTS LIST Pump End Assembly ITEM PART NAME PART ITEM PART NAME PART NUMBER NUMBER PUMP END ASSEMBLY 46133-694 CLAMP 27111-348 PRIMING CHAMBER KIT 48275-005 SPROCKET 24271-112 CONNECTOR S1598 BUSHING 24131-496 HOSE BARB FTG 26523-047 CHECK VALVE KIT 4"...
- Page 34 OM-07208 PA SERIES ILLUSTRATION Figure 4. Pump End Assembly PAGE E - 8 MAINTENANCE & REPAIR...
- Page 35 PA SERIES OM-07208 PARTS LIST Pump End Assembly ITEM PART PART NAME NUMBER PUMP CASING SEE NOTE BELOW HEX NUT D06 15991 LOCK WASHER J06 15991 SIGHT GAUGE S1471 PIPE PLUG P08 15079 PIPE PLUG P06 15079 WEAR PLATE ASSY...
- Page 36 OM-07208 PA SERIES ILLUSTRATION SEAL AREA DETAIL Î Î Î Î Î Ï Î Î Î Î Î Î Î Î Î Ï Ï Î Î Ç Ì Ì Ì Ï Ç Ì Î Ì Ì Ì Ì Ì Ì Ì...
- Page 37 PA SERIES OM-07208 PARTS LIST Repair Rotating Assembly ITEM PART PART NAME NUMBER IMPELLER 10528 11010 ADJ. SHIM SET 37J 17090 1.50 SEAL ASSY 46513-151 SEAL PLATE 38272-234 10010 GASKET 10959G 20000 OIL SEAL S1352 LOCK WASHER J08 15991 HEX HEAD CAP SCREW...
- Page 38 OM-07208 PA SERIES SECTION DRAWING Figure 6. Priming Chamber Kit ITEM PART PART NAME NUMBER PRIMING CHAMBER ASSY 46112-709 REDUCER PIPE BUSHING AP1608 15070 STREET ELBOW RS08 11999 BALL VALVE 26631-052 STUD C0809 15991 HEX NUT D08 15991 LOCK WASHER...
- Page 39 PA SERIES OM-07208 SECTION DRAWING Figure 7. Priming Chamber Assembly PARTS LIST ITEM PART PART NAME NUMBER PRIMING VALVE 26664-007 -ORIFICE BUTTON 26688-021 HEX HD CAPSCREW B0806 15991 LOCKWASHER J08 15991 PRIMING VALVE GASKET 38683-657 19060 PRIMING CHAMBER 38343-020 10000...
- Page 40 OM-07208 PA SERIES SECTION DRAWING Figure 8. Drive Assembly PARTS LIST ITEM PART PART NAME NUMBER COUPLING KIT 48112-005 -BUSHING 24131-496 -COUPLING ASSEMBLY 24391-105 LOCK WASHER 21171-536 SOCKET HEAD CAPSCREW BD0606-1/2 15991 SOCKET HEAD CAPSCREW 22644-220 HEX HD CAPSCREW B0605 15991...
- Page 41 OM-07208 PA SERIES PUMP AND SEAL DISASSEMBLY tenance procedures are used, and that any procedures not addressed in this AND REASSEMBLY manual are performed only after estab lishing that neither personal safety nor Review all SAFETY information in Section A.
- Page 42 OM-07208 PA SERIES Discharge Check Valve Removal and NOTE Disassembly When appropriate recycling facilities are available, the user should recycle components and fluids (Figure 3) when doing any routine maintenance / repairs and also at the end of the pump’s useful life. All other Remove the hardware (not shown) securing the components and fluids shall be disposed of ac...
- Page 43 OM-07208 PA SERIES To remove the coupling from the shaft, unscrew the impeller (1) and the pump casing (1, Figure 4) to two allen head setscrews from the bushing (2). prevent rotation. Screw one of the setscrews into the puller hole on Install the shaft key (23) in the shaft keyway.
- Page 44 OM-07208 PA SERIES 8) and separate the seal plate and gasket (5) from damaged when lifting. Suction and dis the bearing housing (9). Position the seal plate on a charge hoses and piping must be re flat surface with the impeller side down. Use a moved from the pump before lifting.
- Page 45 OM-07208 PA SERIES end. Dress small nicks and burrs with a fine file or be replaced any time the shaft and bear emery cloth. Replace the shaft if defective. ings are removed. Clean the bearing housing, shaft and all compo...
- Page 46 OM-07208 PA SERIES Install the mounting flange gasket (19) and secure the mounting flange to the bearing housing with the hardware (16 and 17). Be careful not to dam age the lip of the oil seal on the shaft keyway.
- Page 47 OM-07208 PA SERIES ly positioned on the shaft. The heads of the caps lubricant such as vegetable oil or glycerin, or a sili crews in the center of the coupling must be posi con‐based lubricant such as “WD40” or equivalent.
- Page 48 OM-07208 PA SERIES sleeve O‐ring and the external stationary seat O‐ Reusing an old seal could result in prema ring with a very small amount of light lubricating oil. ture failure. See Figure 11 for seal part identification. To ease installation of the seal, lubricate the shaft...
- Page 49 OM-07208 PA SERIES and screw the impeller onto the shaft until it is STATIONARY SEAT seated against the seal (see Figure 12). FULLY SEATED IN SEAL PLATE BORE O‐RING ENGAGED WITH SEAL PLATE BORE SHEAR RING (SHEARED) SHEAR RING Figure 13. Seal Fully Installed (UNSHEARED) Measure the impeller‐to‐seal plate clearance, and...
- Page 50 OM-07208 PA SERIES not try to force the impeller onto the shaft. lows will adhere to the sleeve during use, and attempting to separate them could damage the bellows. A clearance of .025 to .040 inch (0,64 to 1,02 mm) between the impeller and the seal plate is neces...
- Page 51 OM-07208 PA SERIES position the flapper in the valve body and check to Reconnect the suction piping to the hopper spool ensure free movement. and the air discharge tubing to the priming cham ber assembly. Install the valve cover O‐ring and secure the cover LUBRICATION to the body with the previously removed hardware.
- Page 52 For Warranty Information, Please Visit www.grpumps.com/warranty or call: U.S.: 419-755-1280 Canada: 519-631-2870 International: +1-419-755-1352 GORMAN‐RUPP PUMPS...
Need help?
Do you have a question about the PA Series and is the answer not in the manual?
Questions and answers