Advertisement
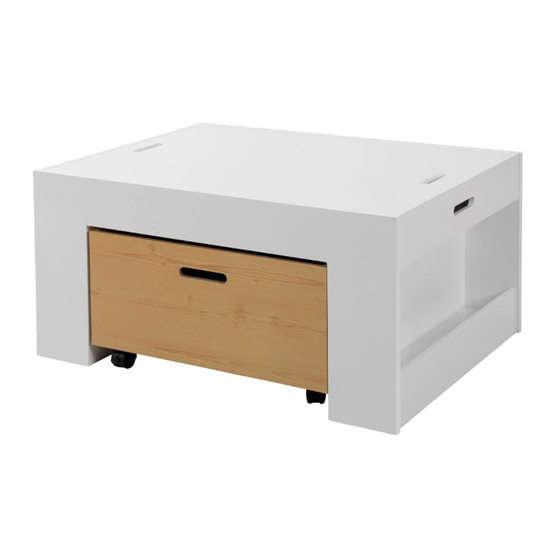
Activity Table
Thank you for your purchase.
Please follow the instructions below for correct assembly.
A
bolt
x52
D
screw
x16
Hardware Supplied
Phillips screwdriver required
For quicker assembly, we recommend the
use of a power drill on a low-speed setting.
*We recommend using a Flathead screwdriver to tighten all locking nuts 100% before first use.
Please clear any loose wood from the locking nut holes before inserting the nut to ensure it locks 100%.
mocka.co.nz | mocka.com.au | PO BOX 6171, Maroochydore BC, QLD, 4558
C
B
locking nut
dowel
x52
x48
E
wheels
x4
1
Advertisement
Table of Contents

Related Manuals for Mocka Activity Table


Summary of Contents for Mocka Activity Table
- Page 1 *We recommend using a Flathead screwdriver to tighten all locking nuts 100% before first use. Please clear any loose wood from the locking nut holes before inserting the nut to ensure it locks 100%. mocka.co.nz | mocka.com.au | PO BOX 6171, Maroochydore BC, QLD, 4558...
- Page 2 [1] and [3]. Slot together with the rest of panel [2] as shown. care not to overtighten bolts. Place locking 4x nuts (B) into holes in the panel and tighten with screwdriver. Repeat step. mocka.co.nz | mocka.com.au | PO BOX 6171, Maroochydore BC, QLD, 4558...
- Page 3 [6]. Slot together with the table panel [5] as shown. Place the panels as shown an tighten with screwdriver. locking 4x nuts (B) into holes in the panel [5] and tighten with screwdriver. mocka.co.nz | mocka.com.au | PO BOX 6171, Maroochydore BC, QLD, 4558...
- Page 4 (B) and tighten with a screwdriver. (C) into each of the panels [7]. Fit together with panel [8] as shown. Secure using 4x locking nuts (B) and fasten with a screwdriver. mocka.co.nz | mocka.com.au | PO BOX 6171, Maroochydore BC, QLD, 4558...
- Page 5 [9]. Slot both panels [9] down into holes in screws (D) with each wheel piece. Tighten all screws securely with a panels [7] and [8]. Secure using 12x locking nuts (B) and fasten with a screwdriver. screwdriver. mocka.co.nz | mocka.com.au | PO BOX 6171, Maroochydore BC, QLD, 4558...
- Page 6 Activity Table Assembly Instructions Drawer Slide the completed drawer under the activity table. Finally check all The drawer assembly is all done! Flip the drawer up onto its wheels as screws and locking nuts are securely fastened with a screwdriver shown, and follow on to final steps to complete assembly of the Activity before use.
- Page 7 Activity Table Assembly Instructions Place the lid [10] over the activity table when it’s not in use. You’re done, enjoy! mocka.co.nz | mocka.com.au | PO BOX 6171, Maroochydore BC, QLD, 4558...
Need help?
Do you have a question about the Activity Table and is the answer not in the manual?
Questions and answers