
Related Manuals for Kellfri 13-VM360E


Summary of Contents for Kellfri 13-VM360E
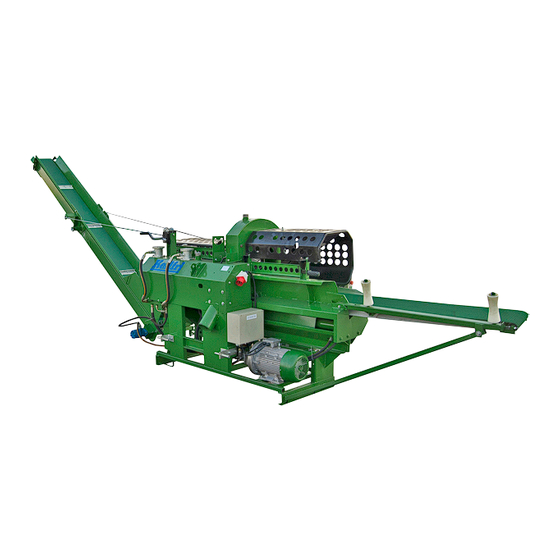
- Page 1 13-VM360E WOOD PROCESOR PLEASE READ ALL INSTRUCTIONS BEFORE USING THE PRODUCT!! TRANSLATED FROM THE ORIGINAL...
-
Page 2: Product Information
INTRODUCTION Thank you for choosing a product from Kellfri AB. By following the general safety information, instruction manual and common sense you will get many years of enjoyable use of the prod- uct. Kellfri’s tools and machines are aimed for farmers with high demands on functionality. -
Page 3: Safety Information
Your retailer The general safety instruction is also available from Kellfris website: www.kellfri.co.uk Do not use this equipment if you are feeling sick, tired or in influence of alcohol. Nor if you are under the influence of strong medications or drugs, suffering from strong depression or severe mental illness. - Page 4 PRODUKTSÄKERHETSINFORMATION • Read the manual carefully before using the machine. • The machine should only connect on 3-phase 400V grounded outlet. The outlet shall be installed by a qualified electrician. • For your own and others safety, make sure that circuit breaker is installed. •...
-
Page 5: Incase Of Emergencies
INCASE OF EMERGENCIES In case of an emergency please dial 112. Keep cell phone or emergency phone available specially when working alone. First aid kit and fire extinguishers must be kept easily accesable during all work, maintenance and service. PERSONAL PROTECTION Always wear suitable clothing and footwear. -
Page 6: Warning Signs And Labels
WARNING SIGNS AND LABELS Ensure that warning labels are always visible and clean. Clean the warning labels as required. Do not rinse using pressure washer directly on the warning labels. Any damage/ broken stickers should be replace. Order new stickers from your supplier. SYMBOL SPECIFICATION Read the instructions manual before using the machine. - Page 7 SAFETY MEASURES BEFORE OPERATING Read the safety information and instruction manual carefully. Be sure you understand the safety measures, instruction manual and warning labels. Use common sense when operating the machine and use appropriate personal protective equipment. Always check the performance and the machine combination that are used. It’s highly impor- tant these matches in a satisfactory manner.
-
Page 8: Operating The Machine
OPERATING THE MACHINE Only people who understand the safety information and instructions in this manual may op- erate the equipment. Be alert and careful when working with the machine and only use the tool or product in the manner described in this manual. When working with equipment that has moving parts, there is always the risk of injury. - Page 9 ALWAYS REMEMBER! • Work alone, concentrate and always use common sense. • Use working gloves, safety glasses and shoes with steel cap. • Do not wear loose or hanging clothing that can be drawn into the machine. • Always connect the hydraulic pressure hoses correctly. •...
- Page 10 PREPARE THE DISCHARGE CONVEYOR Crank the conveyor using the winch Lift the upper part of the conveyor and gently lay it down on the ground. When raising the car- rier to the full-length crank up to the desired height and angle. It is important that the angle of the conveyor belt is set so that the wood goes up and does not fall back into the machine.
- Page 11 After cranking the carrier lock the two sections with the lock on the underside of the conveyor. Preparing the support legs: Remove the pin that holds the support leg Lower the support leg. Attach the support leg in the tracks of the machine’s frame.
- Page 12 Setting Conveyor The selected bolts are tightened to ten- sion the belt. To adjust the tension of the conveyor belt tighten and/or re- lease bolts. If the belt tends to pull to the left, the left bolt should be tightened. REPLACING CHAINSAW/CHAINSAW BAR 1.
- Page 13 Chain oil Open the tap of the chain oil tank before starting. Turn off the tap when not in use to prevent chain oil leakage. Change the start time To change the start time (current limiter) turn the knob to the desired number of seconds.
- Page 14 Cutting the last piece: When cutting the last bit of the log, push the handle down to hold the log in place. Cut the log by pressing down the chainsaw carefully onto the log. Hydraulic filter Unscrew the cap of the oil filter con- tainer and remove the filter.
- Page 15 Firewood length is adjusted by mov- ing the measurement flag in the de- sired length. Adjust splitting length by loosening the bolts and move the plate forward or backward. Note! Don’t move the plate too far in or too far out, make sure it does not touch the ramming plate under the machine.
-
Page 16: Lubrication Chart
Replacement of blades: Pull the handle out of the machine while lifting up the knife. To put in another knife pull the handle and replace the knife in designated slot. LUBRICATION CHART Lubricate moving parts regularly. IMPORTANT! Avoid applying too much. Dirt gatheres easily in exposed grease that leads to increased wearing of the machine. -
Page 17: Transport And Storing
TRANSPORT AND STORING Make sure there are no people, children and foreign objects around the area before transport- ing the machine. Always take an extra caution during the transport. Ensure that the product is well secured and that transport brackets are mounted. Always place the load as low as pos- sible. -
Page 18: Troubleshooting
SERVICE INTERVAL ACTION Exchange after 10 h Oil Change Thereafter every 50 h • Use hydraulic oil ISO 32 or 46 or once a year • Draining the tank is done by removing the drain-plug under the tank. • Fill through the filler plug on top. Bolts and nuts Check regularly, preferably before each use Check and retighten all bolts and nuts... - Page 19 Chainsaw bar Turn the bar periodically to prevent wear. The bars edge should always be square. Check that the bar edge is not worn. Place a ruler on the chain outside a link. If there is a gap between them, the edge is normal. Otherwise, the bar edge is worn. A worn guide bar may need to be adjusted or replaced.
- Page 20 ART. NR DESCRIPTION R13-VM400.001 Chain VM400/VM360E 16” R13-VM400.002 chainsaw bar VM400/VM360E 16” R13-VM400.003 4 edges - splitting knife VM400/VM360E R13-VM400.004 6- edges splitting knife VM400/VM360E R13-VM400.014 Oil filter hydraulic oil R13-VM360E.001 Hydraulic pump (big) VM360 R13-VM360E.002 Hydraulic pump (small) VM360 R13-VM360E.003 Electric motor 7,5kW VM360 R13-VM360E.004...
- Page 21 ELECTRIC DIAGRAM VM360E SAFETY BREAKERS BIMETAL EMERGENCY STOP START TIDRELÄ...
- Page 23 Description Qnty Pump housing Connecting ring - pump bracket Jaw clutch Distance - clutch Gear Jaw clutch...
- Page 25 DESCRIPTION DESCRIPTION Bushing Ventilation plate Input Format Support roller Chainswa motor Sealing washer TREDO Infeed Roller Hydraulic coupling Ramming device - pressure plate Bracket for the chain Hydraulic valve - chainsaw Infeed conveyor belt Cover plate - Input Hydraulic cylinder Washer pressure plate Bolt...
- Page 27 Description Qnty Chainsaw bracket Spring Sågsvärd Chain Washer Spring washer Bolt M8X60 Cylinder 2-3 / 8 Hydraul coupling Chainsaw motor 306 Electric valve - pump G12 2-G1 / 2 " Hydraulic coupling Socket screws M8X50 Socket screws M8x30 Hose clamps - stainless Gasket Bolt M8x16...
-
Page 28: Warranty Terms And Conditions
Other equipment must meet the hardware requirements of the Directive. Tina Baudtler, VD 2015-08-28 Kellfri AB is constantly working on further developing their products and therefore reserves the right to modify, among other things the design and appearance without notice.
Need help?
Do you have a question about the 13-VM360E and is the answer not in the manual?
Questions and answers