Table of Contents
Advertisement
Quick Links
Advertisement
Table of Contents

Related Manuals for Bosch HCA628.2.U


Summary of Contents for Bosch HCA628.2.U
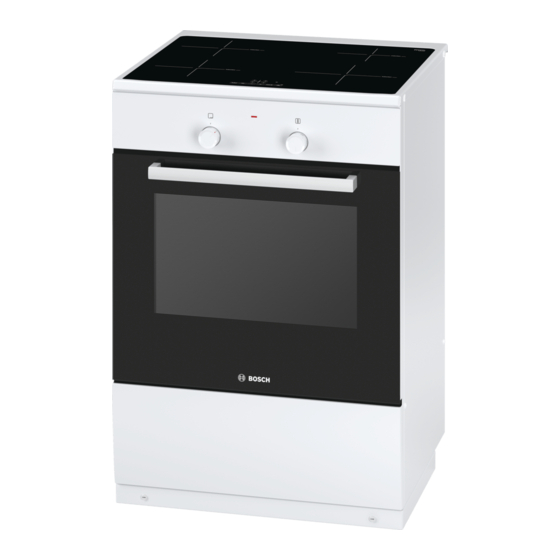
- Page 1 Free standing cooker HCA628.2.U [en] Instruction manual...
-
Page 3: Table Of Contents
Heating up the oven................ 12 Cleaning the accessories............... 12 Additional information on products, accessories, replacement Induction cooking ..............12 parts and services can be found at www.bosch-home.com and Advantages of induction cooking ..........12 in the online shop www.bosch-eshop.com Cookware ..................12 Programming the hob ..............13... -
Page 4: Important Safety Information
: Important safety information Read these instructions carefully. Only then Risk of fire! will you be able to operate your appliance Combustible items stored in the cooking ■ safely and correctly. Retain the instruction compartment may catch fire. Never store manual for future use or for subsequent combustible items in the cooking owners. - Page 5 Always allow the appliance to cool down. glass scraper, sharp or abrasive cleaning Keep children at a safe distance. aids or detergents. Accessories and ovenware become very When cooking in a bain marie, the hob Risk of serious burns! Risk of injury! ■...
-
Page 6: Causes Of Damage
mains or switch off the circuit breaker in circuit breaker in the fuse box. Contact the the fuse box. Contact the after-sales after-sales service. service. Cracks or fractures in the glass ceramic Risk of electric shock! ■ may cause electric shocks. Switch off the Causes of damage Overview The following table provides an overview of the most frequent... -
Page 7: Installation And Connection
Installation and connection For the installer Electrical connection The appliance must be connected to the mains by a licensed An all-pole isolating switch with a contact gap of at least ■ expert. The regulations of your electricity supplier must be 3 mm must be present in the installation circuit. -
Page 8: Door Lock
Door lock Removing the door lock If the door safety lock is no longer needed or if it is soiled: To prevent children reaching into the oven when it is hot, the oven door is equipped with a lock. It is located at the top of the Opening the oven door oven door. -
Page 9: Control Panel
The control panel Indicators Control panels Powerboost function › Main switch Residual heat • œ Select the hotplate Time program function ‹‹ Select settings Powerboost function boost Control panels Time program function Pressing a symbol activates its corresponding function. Childproof lock Note: Always keep the control surfaces dry. -
Page 10: The Cooking Compartment
The cooking compartment Temperature selector Use the temperature selector to set the temperature and the The oven light is located in the cooking compartment. A cooling grill setting. fan protects the oven from overheating. Oven light Positions Function During operation, the oven light in the cooking compartment is Zero position Oven not hot. -
Page 11: After-Sales Service Products
Optional accessories HEZ number Function Pizza tray HEZ317000 Particularly good for pizza, frozen meals and round tarts. You can use the pizza tray instead of the universal pan. Slide the tray in above the wire rack and proceed according to the instructions in the tables. -
Page 12: Before Using The Oven For The First Time
Before using the oven for the first time In this section, you can find out what you must do before using Keep the kitchen ventilated the whole time the oven is on. your oven to prepare food for the first time. First read the Use the function selector to set Top/bottom heating section on Safety information. -
Page 13: Programming The Hob
Programming the hob This section will show you how to program the hotplates. The Once detected, select the power level within the next table contains power levels and cooking times for several 20 seconds or the hotplate will switch off. dishes. -
Page 14: Cooking Guidelines Table
Cooking guidelines table Use power level 9 to begin cooking. When heating purées, creams and thick sauces, stir frequently. The table below contains some examples. Power level Melting Chocolate, chocolate coating 1-1. Butter, honey, gelatin Heating and keeping warm Stew (e.g., lentils) Milk** 1.-2. -
Page 15: Childproof Lock
Childproof lock The hob can be protected against being accidentally turned on, To deactivate: press the symbol for approximately to ensure that children do not switch on the hotplates. 4 seconds. The lock is now deactivated. Activating and deactivating the childproof Childproof lock lock With this function, the childproof lock automatically activates... -
Page 16: The Timer
The timer Press the + or - symbol. The basic setting appears. + symbol: 10 minutes. The timer can be set for periods of up to 99 minutes. It is - symbol: 5 minutes. independent of the other settings. This function does not automatically switch off a hotplate. -
Page 17: Accessing The Basic Settings
Indicator Function ™ˆ Power-Management function ‹ = Deactivated.* = 1,000 W. minimum power. ‚ .= 1,500 W. ‚ = 2,000 W. ƒ etc. . = maximum power of hob.** Š Š Hotplate time selection ™Š Unlimited: the last hotplate programmed remains selected.* ‹... -
Page 18: Setting The Oven
Setting the oven There are various ways in which you can set your oven. Here Set the temperature or grill setting using the temperature we will explain how you can select the desired type of heating selector. and temperature or grill setting. Note: We recommend preheating the oven before inserting the food in order to avoid condensation on the oven glass. - Page 19 Zone Cleaning agent Zone Cleaning agent Gas hob and pan Hot soapy water. Childproof lock* Hot soapy water: supports* Use very little water. Water must not be Clean with a dish cloth. (depending on allowed to enter the appliance through (depending on appliance model) If a childproof lock has been fitted to the...
-
Page 20: Detaching And Refitting The Rails
Installing the frames Zone Cleaning agent Insert the two hooks carefully into the upper holes. (Figure A- Accessories Hot soapy water: Soak and then clean with a dish cloth or a brush. Aluminium baking tray*: (depending on appliance model) Dry with a soft cloth. Do not clean in the dishwasher. -
Page 21: Detaching And Attaching The Oven Door
Detaching and attaching the oven door For cleaning purposes and to remove the door panels, you can detach the oven door. The oven door hinges each have a locking lever. When the locking levers are closed (figure A), the oven door is secured in place. -
Page 22: Fixing Malfunctions
Installation During installation, make sure that the lettering "top right" is upside down at the bottom left. Insert the panel at an angle towards the back (fig. A). Insert the top panel at an angle towards the back into the brackets. -
Page 23: Normal Noise While The Appliance Is Working
Normal noise while the appliance is working Replacing the bulb in the oven ceiling light If the bulb in the oven light fails, it must be replaced. Heat- Induction heating technology is based on the creation of resistant, 40 watt spare bulbs can be obtained from our after- electromagnetic fields that generate heat directly at the base of sales service or a specialist retailer. -
Page 24: After-Sales Service
After-sales service Our after-sales service is there for you if your appliance needs After-sales service to be repaired. We will always find the right solution in order to avoid unnecessary visits from a service technician. E number and FD number Please note that there will be a fee for a visit by a service technician in the event of a malfunction, even during the When calling us, please give the product number (E no.) and... -
Page 25: Tested For You In Our Cooking Studio
Tested for you in our cooking studio Cakes and pastries Here you will find a selection of dishes and the ideal settings for them. We will show you which type of heating and which temperature are best suited for your dish. You can find Baking tins information about suitable accessories and the height at which It is best to use dark-coloured metal baking tins. -
Page 26: Baking Tips
Small baked products Accessories Level Type of Temperature in Cooking time heating °C in minutes Biscuits Baking sheet 150-170 10-20 Viennese whirls (preheat) Baking sheet 140-150 30-40 Almond biscuits Baking sheet 110-130 30-40 Meringue Baking sheet 80-100 100-190 Choux pastry Baking sheet 200-220 30-40... -
Page 27: Meat, Poultry, Fish
Meat, poultry, fish Tips for grilling When grilling, preheat the oven for approx. 3 minutes, before Ovenware placing the food into the cooking compartment. You may use any heatresistant ovenware. The baking tray is Always grill with the oven door closed. also suitable for large roasts. -
Page 28: Tips For Roasting And Grilling
Meat Weight Accessories and Level Type of Temperature in Cooking time ovenware heating °C, grill setting in minutes Sausage Sausage Wire rack For duck or goose, pierce the skin on the underside of the Poultry wings. This allows the fat to run out. The weights indicated in the table refer to oven-ready poultry (without stuffing). -
Page 29: Bakes, Gratins, Toast With Toppings
Bakes, gratins, toast with toppings Always place the ovenware on the wire rack. How well cooked the bake is will depend on the size of the dish If you are grilling directly on the wire rack, you should also and the height of the bake. The figures in the table are only insert the baking tray at level 1. -
Page 30: Drying
Drying The baking tray is placed at level 4, the wire rack is placed at level 2. Use undamaged fruit and vegetables only and wash them Line the baking tray and the wire rack with greaseproof or thoroughly. parchment paper. Drain off any excess water from fruit and vegetables and dry Turn very juicy fruit or vegetables several times. -
Page 31: Acrylamide In Foodstuffs
Acrylamide in foodstuffs Acrylamide is mainly produced in grain and potato products toast, bread rolls, bread or fine baked goods (biscuits, prepared at high temperatures, such as potato crisps, chips, gingerbread, cookies). Tips for keeping acrylamide to a minimum when preparing food Keep cooking times to a minimum. - Page 32 Robert Bosch Hausgeräte GmbH Carl-Wery-Straße 34 81739 München Germany www.bosch-home.com *9001155488* 190298 9001155488...
Need help?
Do you have a question about the HCA628.2.U and is the answer not in the manual?
Questions and answers