Advertisement
Traverse Rod
Insure that the traverse rod is level and securely mounted to the wall.
The rod brackets should be screwed into the wall studs or the
appropriate type of fasteners should be used when anchoring the rod to
other types of wall construction. Motorized operation applies more
strain on the rod, brackets, and mounting fasteners than manual
cord-draw opertaion.
Cord
Only a No. 4 nylon cord with fiberglass core should be used. Check the
cord carefully and replace it if it is frayed or worn. Manually operate the
drapery to make sure that it draws smoothly and that the amount of
effort required is proportionate to the size of the drapery.
CENTER LINE.
36" MIN.
OPEN
SLOT
MOUNTING
SLOTS
FIG. 1
MOUNTING
PLATE
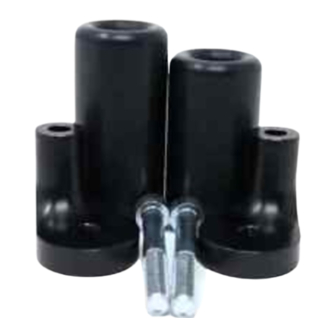
Insert the two machine screws into the holes at the top and bottom of the
drapery motor. See Fig. 2. Thread a retainer nut about two turns onto each
screw. Mount the motor onto the bracket by simultaneously inserting the
bottom retainer nut into the square hole on the front of the bracket and the
top retainer nut into the slot at the top of the bracket. Position the motor on
the bracket such that the top retainer nut is even with the top of the bracket.
See Fig. 3. Slightly tighten the two screws.
FIG. 4
DRAPERY MOTOR INSTALLATION
Model DR1000
Mounting Motor
For proper operation and maximum life of the cord and motor drive components, it is important that the
drapery motor be mounted as specified below:
A plumb line should be used to ensure that the center line of the bracket coincides with the center
distance between the cord outlets. See Figure 1. Ideally, the bracket should be concealed behind the
drapery and about 72 inches below the rod. Do not mount the bracket less than 36 inches below the rod.
Position the bracket at the correct location on the wall. Using a pencil, mark the location of the four round
mounting holes in the bracket. If the bracket will be mounted to drywall, drill a 1/8" diameter hole at each
of the four marks. Using a hammer or the butt of a screwdriver, gently tap the drywall anchors provided
into the wall. (Note: Do not pre-drill the wall where a mounting hole in the bracket is positioned over a
stud.) Using the screws provided, screw the bracket to the wall with the open slot at the top. See Fig. 1.
Remove the cover screw and cover from the front of the motor. Thread the cord loop through the drive
wheels being careful not to crisscross the cords. See Figure 4. Remove the slack in the cord by adjusting
length of cord at master carrier. Loosen the two motor mounting screws and lower the position of the
motor on the bracket to achieve a
life of the motor drive components.) Retighten screws until snug. Do not overtighten!
Load Setting
Set the load switch on front of motor according to the chart at left. (Note: Use of excessive power places
unnecessary stress on rod, brackets, and walls.) Replace the front cover and cover screw.
Suggested Settings
Rod Length
Light to Medium Fabric
0' - 8'
8' - 12'
12' - 16'
16' - 20'
Over 20'
COMPONENTS
MOUNTING
BRACKET
CAT. #6070002
RETAINERS
WALL
MOTOR
MOUNTING
FIG. 2
PLATE
slight
tension in the cord. (Note: Excessive cord tension can shorten the
Heavy Fabric
Light (L)
Light (L)
Light (L)
Light (L)
Medium (M)
Medium (M)
Medium (M)
Medium (M)
Heavy (H)
Heavy (H)
MOTOR WITH LOW VOLTAGE REMOTE INPUTS TO BE
USED WITH SOMFY 6300000 SERIES OF CONTROLS
COVER
COVER SCREW
WALL
MOUNTING
PLATE
FIG. 3
TOP OF
MOUNTING
PLATE
MOTOR
MOUNTING
PLATE
Advertisement
Table of Contents

Subscribe to Our Youtube Channel
Related Manuals for SOMFY DR1000


Summary of Contents for SOMFY DR1000
- Page 1 MOTOR WITH LOW VOLTAGE REMOTE INPUTS TO BE The rod brackets should be screwed into the wall studs or the USED WITH SOMFY 6300000 SERIES OF CONTROLS appropriate type of fasteners should be used when anchoring the rod to other types of wall construction. Motorized operation applies more...
- Page 2 Your drapery motor is designed for normal (intermittent) use only. Should the motor overheat as a result of excessive use, an internal thermal cut-off switch will be activated and shut off the motor for several minutes to prevent it from being damaged. Continually overheating the motor will shorten the life of the unit. Optional Accessories (Contact your Somfy dealer for availability): Part Number...
Need help?
Do you have a question about the DR1000 and is the answer not in the manual?
Questions and answers