Table of Contents
Advertisement
Quick Links
32"2 Door Stainless Steel
65000
33" Insert Grill Stainless Steel
65004
32" Bar Cart
65007
OUTDOOR KITCHEN Stainless Steel Sets
Warning: Excessive weight hazard!
Use two or more people to move, assemble or install cabinets and shelves to avoid back injury.
Do not leave children unattended near cabinets.
For assistance, call 1.877.306.8930; for UK 0800.031.4069; e-mail at info@newageproducts.com
32" SINK Stainless Steel
65001
45 Degree Stainless Steel Set
65005
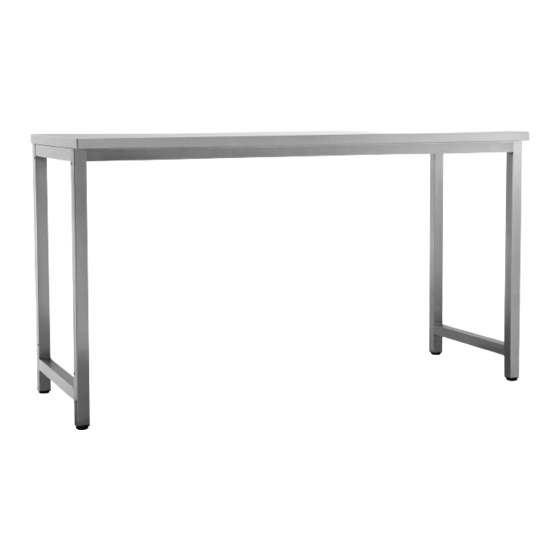
64" Prep Table
65008
32" 3 Drawer Stainless Steel
65002
90 Degree Shelf Stainless Steel
65006
32" Bar Stainless Steel
65003
65000-Series Cabinets
Advertisement
Table of Contents

Subscribe to Our Youtube Channel
Related Manuals for Newage 65000


Summary of Contents for Newage 65000
- Page 1 Warning: Excessive weight hazard! Use two or more people to move, assemble or install cabinets and shelves to avoid back injury. Do not leave children unattended near cabinets. For assistance, call 1.877.306.8930; for UK 0800.031.4069; e-mail at info@newageproducts.com 65000-Series Cabinets...
- Page 2 OUTDOOR KITCHEN 32”2 Door Cabinet SS Warning: Excessive weight hazard! Use two or more people to move, assemble or install cabinets and shelves to avoid back injury. Do not leave children unattended near cabinets. For assistance, call 1.877.306.8930; for UK 0800.031.4069; e-mail at info@newageproducts.com 65000-INSTL-01-Rev.01...
-
Page 3: Weight Capacity
Weight Worktops Capacity 32" Worktop. Fits over 1 Cabinet lbs. 56 " Worktop. Fits over 1 Cabinet & Fridge nook. lbs. 64" Worktop. Fits over 2 Cabinets lbs. 88" Worktop. Fits over 2 Cabinets lbs. & Fridge nook. 32" - 2 Door Cabinet 96"... -
Page 4: Parts Supplied
Unpacking • Begin by placing the package on a protected fl at surface. • Remove all cardboard, foam packaging material and clear plastic bags. • Dispose / recycle all packaging materials. • Verify all the contents in the box and gather the required tools. See “Parts” and “Tools Needed” in the list below. Parts Supplied 2 Door Cabinet... -
Page 5: Installing The Handles
Installing the Handles Align handle to holes on doors Parts Needed. or drawers. Handle Handle Bolt M4 x 30mm Screw in bolts. -
Page 6: Installing The Legs
Installing the Legs Open cabinet, remove any shelves Parts Needed. or loose items. 4 X Adjustable 16 X Hex Washer Feet Bolt Align leg with rivet nuts on crossbeam. Flip cabinet upside down, Tighten in Hex bolts . locate holes on crossbeam. Stand cabinet upright. - Page 7 Levelling the Legs Parts Needed. Use wrench to level cabinet and adjust height. Glide Wrench Rotate wrench to lower or raise corner of cabinet. Repeat step 1-3 for each corner. Level Cabinet.
- Page 8 Installing the Casters(optional) Open cabinet, remove any shelves Parts Needed. or loose items. 4 X Casters 16 X Hex Washer Bolt Align caster with holes on crossbeam. Flip cabinet upside down on protected Tighten in Hex bolts . surface and locate holes on crossbeam. Stand cabinet upright.
- Page 9 Fastening Cabinets(to each other) Remove plastic caps from cabinets. Parts Needed. 4 X Hex Nut(M5) 4 X Hex Bolt (M5 x 50mm”) Align bolts, tighten lightly. Level cabinets and tighten all bolts.
- Page 10 Mounting the Worktop Stand cabinet upright. Place worktop over cabinets. Insert the worktop bolt heads Push worktop in to lock. into the keyhole shape slots. Optional: Repeat steps 2-5 for mounting Tighten screws to secure cabi- nets. larger worktops.
- Page 11 Inserting Cabinet Shelves Open cabinet doors. Attach shelf clips to desired height. Begin with shelf being level. Insert and position above shelf clips. Install remaining shelves. Lower shelf down onto shelf clips.
-
Page 12: Adjusting The Door Hinges
To adjust the gap between the doors and frame, turn the screw (B) clockwise or counterclockwise. Thank you for purchasing a NewAge Product! Please give us a call or visit online if you have any questions. Call 1.877.306.8930; for UK 0800.031.4069; e-mail at info@newageproducts.com... - Page 13 Tip-over Hazard Only open one drawer at a time. If this Cabinet is installed on its own please fasten to a permanent structure. OUTDOOR KITCHEN 32"-3 Drawer Cabinet SS Warning: Excessive weight hazard! Use two or more people to move, assemble or install cabinets and shelves to avoid back injury. Do not leave children unattended near cabinets.
- Page 14 Weight Worktops Capacity lbs. 56” Worktop. Fits over 1 Cabinet & Fridge nook. lbs. 64” Worktop. Fits over 2 Cabinets lbs. 88” Worktop. Fits over 2 Cabinets lbs. & Fridge nook. 32” - 3 Drawer Cabinet 96” Worktop. Fits over 3 Cabinets Max 425 lbs.
- Page 15 Unpacking • Begin by placing the package on a protected fl at surface. • Remove all cardboard, foam packaging material and clear plastic bags. • Dispose / recycle all packaging materials. • Verify all the contents in the box and gather the required tools. See “Parts” and “Tools Needed” in the list below. 3 Drawer Parts Supplied Cabinet...
- Page 16 Installing the Drawers Removing Drawers. Right Side Left Side Slide Out Inserting Drawers. Slide In Align Rails...
- Page 17 Installing the Handles Align handle to holes on doors Parts Needed. or drawers. Handles Handle Bolts (M4 x 30mm) Screw in bolts.
- Page 18 Installing the Legs Remove Drawers, remove loose Parts Needed. items. 4 X Adjustable 16 X Hex Washer Legs Bolt Align foot with rivet nuts on crossbeam. Flip cabinet upside down, Tighten Hex bolts . locate holes on crossbeam. Stand cabinet upright. To level and Repeat steps 1-3 for each corner.
- Page 19 Levelling the Feet Parts Needed. Use wrench to level cabinet and adjust height. Wrench Rotate wrench to lower or raise corner of cabinet. Repeat step 1-3 for each corner. Level Cabinet.
- Page 20 Installing the Casters(optional) Open cabinet, remove drawers or Parts Needed. loose items. 4 X Casters 16 X Hex Washer Bolt Align foot with holes on crossbeam. Screw Flip cabinet upside down, in Hex bolts with washer and lock washer. locate holes on crossbeam. Stand cabinet upright.
- Page 21 Note: Fastening Cabinets All drawers must be removed prior to fastening cabinets together. Remove plastic caps from cabinets. Parts Needed. 4 X Hex Nut 4 X Hex Bolt (M5) (M5 x 50mm) Align bolts, tighten lightly. Level cabinets and tighten all bolts.
- Page 22 Mounting the Worktop Stand cabinet. Place worktop over cabinets. Insert the worktop bolt heads Push worktop in to lock. into the keyhole shape slots. Optional: Repeat steps 2-5 for mounting Tighten bolts to secure cabinets. larger worktops.
- Page 23 *Rear View Shown OUTDOOR KITCHEN 45˚ Cabinet SS Warning: Excessive weight hazard! Use two or more people to move, assemble or install cabinets and shelves to avoid back injury. Do not leave children unattended near cabinets. For assistance, call 1.877.306.8930; for UK 0800.031.4069; e-mail at info@newageproducts.com 65005-INSTL-01-Rev.01...
- Page 24 Weight Capacity lbs. lbs. lbs. lbs. 45˚ Cabinet Max 300 lbs.
- Page 25 Unpacking • Begin by placing the package on a protected fl at surface. • Remove all cardboard, foam packaging material and clear plastic bags. • Dispose / recycle all packaging materials. • Verify all the contents in the box and gather the required tools. See “Parts” and “Tools Needed” in the list below. Parts Supplied 45˚...
- Page 26 Installing the Handles Align handle to holes on doors Parts Needed. or drawers. Handle Handle Bolt M4 x 30mm Screw in bolts.
-
Page 27: Installing The Feet
Installing the Feet Flip cabinet upside down, Parts Needed. locate holes on crossbeam. 3 X Adjustable 16 x Hex Washer Feet Bolt Alignleg with holes on crossbeam. Fasten in Repeat step 2 for each leg. Hex bolts with washer and lock washer. Stand cabinet upright. - Page 28 Levelling the Legs Parts Needed. Use wrench to level cabinet and adjust height. 1 X Leg Wrench Rotate wrench to lower or raise corners of the cabinet. Repeat step 1-3 for each corner. Level Cabinet.
- Page 29 Fastening Cabinets Remove plastic caps from cabinet. Parts Needed. 4 X Hex Bolt 4 X Hex (1/4 x 2”) (1/4) Align bolts, tighten lightly. Level cabinets and tighten all bolts.
-
Page 30: Adjusting The Door Hinges
Adjusting The Door Hinges Using a Philips screwdriver, the doors can be adjusted: Left, right, forwards and backwards. To adjust the doors left or right, turn the screw (A) clockwise or counterclockwise. To adjust the gap between the doors and frame, turn the screw (B) clockwise or counterclockwise. - Page 31 OUTDOOR KITCHEN 64"Prep Table SS Warning: Excessive weight hazard! Use two or more people to move, assemble or install cabinets and shelves to avoid back injury. Do not leave children unattended near cabinets. For assistance, call 1.877.306.8930; for UK 0800.031.4069; e-mail at info@newageproducts.com 65008-INSTL-01-Rev.01...
- Page 32 Weight Capacity lbs. 64" - PREP TABLE Max 200 lbs.
- Page 33 Unpacking • Begin by placing the package on a protected fl at surface. • Remove all cardboard, foam packaging material and clear plastic bags. • Dispose / recycle all packaging materials. • Verify all the contents in the box and gather the required tools. See “Parts” and “Tools Needed” in the list below. Parts Supplied Prep Table...
- Page 34 Table Assembly Parts Needed. Insert Leg Frame into cross rails. Using M6 bolts to fasten the leg frame to cross rails. 8 x Hex Bolt (M6 x 13) 4 X Pan Head Bolts (M4 x 50mm) Use 4 x M4x 40mm Pan Head Bolts to assemble Worktop to Leg Frame Stand and level Table...
- Page 35 Table to Cabinet Ganging Parts Needed. 4 x Hex Bolt (M6x 30) Align inserts in Table Leg Frame with with 4 Holes in side of Cabinet. Fasten 4 x 4mm x 40 mm Hex Bolts as shown. Note: Table has rivet nuts in legs to thread into. Insert bolt from cabinet side.
- Page 36 Table to Table Ganging On a Flat Protected Surface fl ip over two Parts Needed. tables and align them right to left sides as shown. 4 x Ganging Brackets 4 X Pan Head Bolts (M4 x 13mm) Washers (M4) Using 4 Ganging Brackets and 2 x M4 Pan Head bolts per each bracket.
- Page 37 OUTDOOR KITCHEN 90˚ Corner Shelf SS Warning: Excessive weight hazard! Use two or more people to move, assemble or install shelves to avoid back injury. Do not leave children unattended near cabinets. For assistance, call 1.877.306.8930; for UK 0800.031.4069; e-mail at info@newageproducts.com 65006-INSTL-01-Rev.01...
- Page 38 Weight Capacity Granite Installation Rails included lbs. lbs. lbs. 90° Corner Shelf Max 200 lbs.
- Page 39 Unpacking • Begin by placing the package on a protected fl at surface. • Remove all cardboard, foam packaging material and clear plastic bags. • Dispose / recycle all packaging materials. • Verify all the contents in the box and gather the required tools. See “Parts” and “Tools Needed” in the list below. Parts Supplied Corner Shelf Height-Adjustable Aluminum Legs...
-
Page 40: Frame Assembly
Frame Assembly Parts Needed. Attach 2 legs to leg channel with 8 x M6 x25mm hex bolts. Pan Head Bolt (30 x 8/32 x 3/8”) Hex Washer Bolt (M6 x 25mm) Attach Top, Back Panel and Base with 4 x 8/32” x 3/8”pan head bolts. Attach 2 uprights to assembly using 4 x 8/32”... - Page 41 Frame Assembly for Granite Top Parts Needed. Undo Stainless Steel Top by removing 6 x Pan head 8/32” x 3/8” bolts Pan Head Screw (#6 x 5/8” Wood Screws) Attach 2 included Granite rails using Attach Granite corner top with 6 x 4 x 8/32”...
- Page 42 Levelling the Legs Parts Needed. Use wrench to level cabinet and adjust height. Foot Wrench Rotate wrench to lower or raise corner of cabinet. Repeat step 1-3 for each corner. Level Cabinet.
- Page 43 Fastening Cabinets Locate bolt slots on upright Parts Needed. supports. 4 X Hex Nut (M5) 4 X Hex Bolt (M5 x 50mm) 4 X Flat Washers (M5) *** Door removed for Align hole locations , put bolt and washer through ease of explaination *** holes tighten nut lightly.
- Page 44 OUTDOOR KITCHEN 32"Bar Cabinet SS Warning: Excessive weight hazard! Use two or more people to move, assemble or install cabinets and shelves to avoid back injury. Do not leave children unattended near cabinets. For assistance, call 1.877.306.8930; for UK 0800.031.4069; e-mail at info@newageproducts.com 65003-INSTL-01-Rev.01...
- Page 45 Weight Worktops Capacity 32" Worktop. Fits over 1 Cabinet lbs. 56 " Worktop. Fits over 1 Cabinet & Fridge nook. lbs. 64" Worktop. Fits over 2 Cabinets 88" Worktop. Fits over 2 Cabinets lbs. & Fridge nook. 32" - SS Bar Cabinet 96"...
- Page 46 Unpacking • Begin by placing the package on a protected fl at surface. • Remove all cardboard, foam packaging material and clear plastic bags. • Dispose / recycle all packaging materials. • Verify all the contents in the box and gather the required tools. See “Parts” and “Tools Needed” in the list below. Parts Supplied Bar Cabinet Height-Adjustable Aluminum Legs...
-
Page 47: Installing The Handles
Installing the Handles Align handle to holes on doors Parts Needed. or drawers. Handles Handle Bolts (M4 x 30mm) Tighten in bolts. - Page 48 Installing the Legs Open cabinet, remove any shelves Parts Needed. or loose items. 4 X Adjustable 4 X Adjustable Feet Feet Align foot with holes on crossbeam. Flip cabinet upside down. Tighten in Hex bolts . Locate holes on crossbeam. Stand cabinet upright.
- Page 49 Levelling the Legs Use wrench to level cabinet and adjust Parts Needed. height. 1 X Wrench Rotate wrench to lower or raise corner of cabinet. Repeat step 1-3 for each corner.
- Page 50 Installing the Casters(optional) Open cabinet, remove any shelves Parts Needed. or loose items. 4 X Casters 16 X Hex Washer Bolt Align foot with holes on crossbeam. Flip cabinet upside down, Tigh ten in Hex bolts. locate holes on crossbeam. Stand cabinet upright.
-
Page 51: Installing The Drawer
Installing the Drawer Inserting Drawer. Slide In Align Rails Removing Drawers. Right Side Left Side Slide Out... - Page 52 Note: Fastening Cabinets All drawers must be removed prior to fastening cabinets together. Remove plastic caps from cabinets. Parts Needed. 4 X Hex(M5) 4 X Hex Bolt (M5 x 50mm) Align bolts, tighten lightly. Level cabinets and tighten all bolts.
- Page 53 Mounting the Worktop Stand cabinet upright. Place worktop over cabinets. Insert the worktop bolt heads Push worktop in to lock. into the keyhole shape slots. Optional: Repeat steps 2-5 for mounting Tighten screws to secure top. larger worktops.
-
Page 54: Adjusting The Door Hinges
Adjusting the Door Hinges Using a Philips screwdriver, the doors can be adjusted: Left, right, forwards and backwards. To adjust the doors left or right, turn the screw (A) clockwise or counterclockwise. To adjust the gap between the doors and frame, turn the screw (B) clockwise or counterclockwise. - Page 55 Wine Rack, Ice Tray and Garbage Bin Installation Open Doors. Set rack clips in the Set rack on top of 4 clips at the same desired slot locations on the level height. Store beverage bottles. upright posts. Remove and install beverage chilling Slide beverage chilling tray into/out of tray with formed metal edge.
- Page 56 OUTDOOR KITCHEN 32" Bar Cart SS Warning: Excessive weight hazard! Use two or more people to move, assemble or install cabinets and shelves to avoid back injury. Do not leave children unattended near cabinets. For assistance, call 1.877.306.8930; for UK 0800.031.4069; e-mail at info@newageproducts.com 65007-INSTL-01-Rev.01...
- Page 57 Weight Capacity lbs. lbs. lbs. lbs. Bar Cart Max 230 lbs.
- Page 58 Unpacking • Begin by placing the package on a protected fl at surface. • Remove all cardboard, foam packaging material and clear plastic bags. • Dispose / recycle all packaging materials. • Verify all the contents in the box and gather the required tools. See “Parts” and “Tools Needed” in the list below. Parts Supplied Bar Cart Casters (2 with Brake for front, 2 without for back)
- Page 59 Installing the Handles Align handle to holes on doors Parts Needed. or drawers. Handle Bolt Handle (M5 x 30mm) Screw in bolts.
-
Page 60: Installing The Casters
Installing the Casters Flip cart upside down, Parts Needed. locate holes on corner brackets. 4 X Casters 16 X Hex Washer Bolt Align foot with holes on crossbeam. Screw Repeat step 2 for each corner. in Hex bolts with washer and lock washer. Stand cart upright. - Page 61 Installing the Drawers Inserting Drawers. Slide In Align Rails Removing Drawers. Right Side Left Side Slide Out...
- Page 62 Installing the Push Bar, Ice Tray, Liquor Rail Push handle should be attached Parts Needed. by two locations Ice Tray 2X Pan Push Bar Head 8mm Bolts Add Liquor Rail by aligning bolt heads Tighten 2 x 8mm x 60mm bolts. with keyhole slots in tray.
- Page 63 OUTDOOR KITCHEN 33"BBQ Cabinet SS Warning: Excessive weight hazard! Use two or more people to move, assemble or install cabinets and shelves to avoid back injury. Do not leave children unattended near cabinets. For assistance, call 1.877.306.8930; for UK 0800.031.4069; e-mail at info@newageproducts.com 65004-INSTL-01-Rev.01...
- Page 64 Weight Capacity lbs. lbs. lbs. 33” - BBQ SS Max 515 lbs.
- Page 65 Unpacking • Begin by placing the package on a protected fl at surface. • Remove all cardboard, foam packaging material and clear plastic bags. • Dispose / recycle all packaging materials. • Verify all the contents in the box and gather the required tools. See “Parts” and “Tools Needed” in the list below. Parts Supplied Cabinet Height-Adjustable Aluminum Legs...
- Page 66 Installing the Handles Align handle to holes on doors Parts Needed. or drawers. Handle Bolt Handle M4 x 30mm Screw in bolts.
- Page 67 Installing the Feet (Optional) Open cabinet, remove any loose items. Parts Needed. 4 X Adjustable 16 X Hex Bolt Feet Align foot with holes on crossbeam. Flip cabinet upside down, Tighten in Hex bolts. locate holes on crossbeam. Stand cabinet upright. To level and Repeat steps 2-3 for each corner.
- Page 68 Levelling the Legs Use wrench to level cabinet and adjust Parts Needed. height. 1 X Wrench Rotate wrench to lower or raise corner of cabinet. Repeat step 1-3 for each corner.
- Page 69 Installing the Casters ( Optional) Open cabinet, remove any shelves Parts Needed. or loose items. 4 X Casters 16 X Hex Washer Bolt Align caster with holes on crossbeam. Flip cabinet upside down on protected Tighten in Hex bolts . surface and locate holes on crossbeam.
- Page 70 Note: Fastening Cabinets All doors and drawers must be removed prior to fastening cabinets together. Remove plastic caps from cabinets. Parts Needed. 4 X Hex 4 X Hex Bolt (M5) (M5 x 50mm) Align bolts, tighten lightly. Level cabinets and tighten all bolts.
- Page 71 Installing the BBQ You may or may not need the adapter brackets depending Parts Needed. on the model BBQ you choose 2 X Adapter Brackets Once the BBQ is centered on the Cart Place BBQ so that the rails touch lift up edges of BBQ and Dab a little silicone the Brackets on the rails to hold it in place...
-
Page 72: Adjusting The Door Hinges
Adjusting The Door Hinges Using a Philips screwdriver, the doors can be adjusted: Left, right, forwards and backwards. To adjust the doors left or right, turn the screw (A) clockwise or counterclockwise. To adjust the gap between the doors and frame, turn the screw (B) clockwise or counterclockwise. - Page 73 OUTDOOR KITCHEN 32” Sink Base SS Warning: Excessive weight hazard! Use two or more people to move, assemble or install cabinets and shelves to avoid back injury. Do not leave children unattended near cabinets. For assistance, call 1.877.306.8930; for UK 0800.031.4069; e-mail at info@newageproducts.com 65001-INSTL-01-Rev.01...
-
Page 74: Tools Needed
UV stable. The 304 stainless steel material used in the construction of NewAge Outdoor Kitchen Cabinets is highly rust resistant, however, chlorine in the air from swimming pools or the salt from sea air may cause surface rust to appear and even create some pitting corrosion if left on the product. - Page 75 Weight Worktops Capacity 32" Worktop. Fits over 1 Cabinet lbs. 56 " Worktop. Fits over 1 Cabinet & Fridge nook. lbs. 64" Worktop. Fits over 2 Cabinets 88" Worktop. Fits over 2 Cabinets lbs. & Fridge nook. 32" - Sink Cabinet 96"...
- Page 76 Unpacking • Begin by placing the package on a protected fl at surface. • Remove all cardboard, foam packaging material and clear plastic bags. • Dispose / recycle all packaging materials. • Verify all the contents in the box and gather the required tools. See “Parts” and “Tools Needed” in the list below. Parts Supplied Sink Cabinet...
- Page 77 Installing the Handles Align handle to holes on doors Parts Needed. or drawers. Handle Handle Bolt M4 x 30mm Screw in bolts.
- Page 78 Installing the Feet Open cabinet, remove any shelves Parts Needed. or loose items. 4 X Adjustable 16 X Hex Feet Washer Bolt Align foot with holes on crossbeam. Screw Flip cabinet upside down, in Hex bolts with washer and lock washer. locate holes on crossbeam.
- Page 79 Levelling the Legs Parts Needed. Use wrench to level cabinet and adjust height. Foot Wrench Rotate wrench to lower or raise corner of cabinet. Repeat step 1-3 for each corner. Level Cabinet.
- Page 80 Inserting Cabinets Shelf Open cabinet doors. Attach shelf clips to desired height. Begin with shelf being level. Insert and position over clips. Lower shelf down onto shelf clips.
- Page 81 Fastening Cabinets Remove plastic caps from cabinets. Parts Needed. 4 X Hex (M5) 4 X Hex Bolt (M5 x 50mm”) Align bolts, tighten lightly. Level cabinets and tighten all bolts.
- Page 82 Adjusting The Door Hinges Using a Philips screwdriver, the doors can be adjusted: Left, right, forwards and backwards. To adjust the doors left or right, turn the screw (A) clockwise or counterclockwise. To adjust the gap between the doors and frame, turn the screw (B) clockwise or counterclockwise.
-
Page 83: Plumbing Installation
Plumbing Installation Locate the 3 pre slotted holes in the back of the cabinet. Using tin snips cut small webs to release the knockouts. Back View of Sink Cabinet. 1 2 3 Locate the 3 pre slotted holes in the bottom Bottom View of Sink Cabinet.
Need help?
Do you have a question about the 65000 and is the answer not in the manual?
Questions and answers