Advertisement
Quick Links
Advertisement

Subscribe to Our Youtube Channel
Related Manuals for Clearaudio Statement V2


Summary of Contents for Clearaudio Statement V2
- Page 1 Statement V2 User manual © clearaudio electronic GmbH, 2018/05 Made in Germany...
- Page 2 Statement V2 Please read this user manual carefully to ensure that your turntable is correctly installed ready to take you to a new dimension of music reproduction. We hope you will enjoy your new Clearaudio Statement V2 turntable. Clearaudio electronic GmbH...
-
Page 3: Table Of Contents
User manual Contents 1. Packaging overview ..........4 - 5 2. Construction overview ........6 3. Setup and operation ..........7 - 15 4. Motor adjustment ..........16 5. Special notes ............17 6. Technical data ............. 18 Warranty information ..........19 - 20 Made in Germany... -
Page 4: Packaging Overview
Attention / Warning: IMPORTANT! Before it is fully assembled there are strong magnetic fields around the main bearing, these could interfere with heart pacemakers and so the Statement V2 should not be Statement V2 setup by anyone with a pacemaker.The turntable is extremely heavy and should not be assembled by anyone with back problems. - Page 5 User manual Bearing oil Bubble level gauges Acrylic cleaner Not shown: Two wooden blocks Screwdriver Not shown: User manual Statement clamp Not shown: Warranty card, Clearaudio certificate card (QCQ) Made in Germany...
-
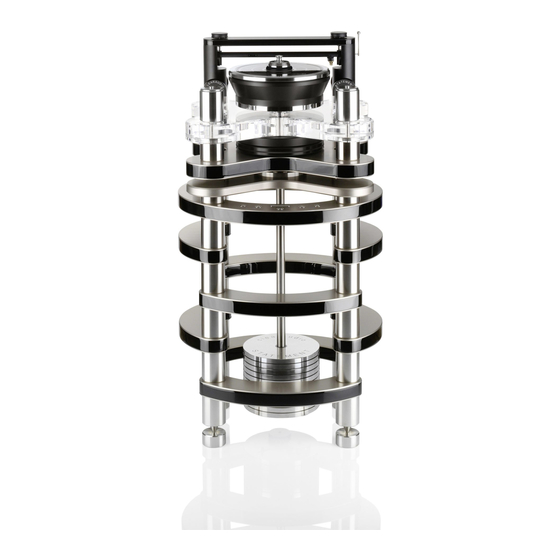
Page 6: Construction Overview
User manual 2. Construction overview Pic. 1: Construction overview © clearaudio electronic GmbH, 2018/05... -
Page 7: Setup And Operation
User manual 3. Set up and operation Statement V2 Select the position in which you will uste the Statement V2 turntable. Place the turntable base in this position on the four supplied feet. Statement Pic. 2: Placing the Statement V2 Place the two wooden blocks beneath the base as shown. - Page 8 Be sure to place a felt mat between each metal disc, building the pendulum with three solid discs at the bottom, then six half-cut-away discs, then two more solid discs, finally adding the solid disc engraved with the words Clearaudio Statement V2.
- Page 9 User manual Set the cross shaped massive metal part through the spindle onto the four cork. Pic. 6.1: Placing the metal part Pic. 6: Placing the metal part Tighten the bearing to the shaft by tightening the screws in the bearing collar (8x). Pic.
- Page 10 Pic. 8: Lifting the upper part Remove the wooden blocks from beneath the turntable and carefully lower the upper section back onto the four cork damping plates. Pic. 9: Removing the wood spacers © clearaudio electronic GmbH, 2018/05...
- Page 11 Pic. 10 : Removing the wood spacers Apply 3 to 4 drops of the Clearaudio Synthetic Bearing Oil (also available at www.analogshop.de Art.
- Page 12 Pic. 13: Placing the lower magnetic drive platter For the next step, please apply 3 to 4 drops of the Clearaudio Synthetic Bearing Oil also onto the main bearing spindle. Acrylic chassis Pic. 14: Oiling the main bearing spindle © clearaudio electronic GmbH, 2018/05...
- Page 13 User manual Making sure that the circular cut-outs in the corners of the acrylic chassis are on the underside. Carefully (!) insert the bearing spindle into the bearing sleeve in the acrylic chassis. IMPORTANT! Be careful not to allow the magnets to snatch the bearing as you insert it.
- Page 14 Pic. 17: To lower the acrylic chassis Firmly screw the four stainless steel arm bases through the acrylic chassis into the four pillars of the floating chassis. Pic. 18: Setting the arm bases © clearaudio electronic GmbH, 2018/05...
- Page 15 User manual Lower first the metal flywheel over the main bearing. In the next step lower the main platter on top of the metal flywheel, making sure that the dot on the top of the bearing and the platter are aligned. Pic.
-
Page 16: Motor Adjustment
To assembly the tonearm please refer to the instruction manual of the manufacturer. Statement V2 The setup of your turntable is now complete! Statement V2. Clearaudio wish you al lot of pleasure and musical enjoyment with your © clearaudio electronic GmbH, 2018/05... -
Page 17: Special Notes
Always take of the pulley off of the motor unit to prevent the motor shaft from any damage. To achieve the full Clearaudio warranty, you are required to fill out and return the corresponding part of the warranty registration certificate /card to Clearaudio within two weeks after purchase. -
Page 18: Technical Data
Manufacturers guarantee*: 10 years* * Provided that the warranty card is correctly completed and returned to Clearaudio within 14 days of purchase. Clearaudio electronic is not responsible for typographical errors in descriptions. Technical specifications subject to change or improvement without prior notice. -
Page 19: Warranty Information
The warranty time for the turntable is 10 years. To achieve the full Clearaudio warranty of 10 years, it is necessary that you fill out and send the corresponding part of the warranty registration certificate /card back to Clearaudio, within two weeks after purchase. - Page 20 ESPAÑOL GARANTIA Para obtener información acerca de la garantia póngase en contacto con su distribuidor Clearaudio. GUARDE SU RECIBO DE COMPRA Su recibo de compra es su prueba permanente de haber adquirido un aparato de valor, Este recibo deberá...
- Page 21 User manual Made in Germany...
- Page 22 User manual © clearaudio electronic GmbH, 2018/05...
- Page 23 User manual Made in Germany...
- Page 24 91054 Erlangen Germany Phone/Tel.: +49 9131 40300 100 Fax: +49 9131 40300 119 www.clearaudio.de www.analogshop.de info@clearaudio.de Handmade in Germany (Technische Änderungen vorbehalten - Technical specification are subject to change without prior notification) 2018 © clearaudio electronic GmbH, 2018/05 Made in Germany...
Need help?
Do you have a question about the Statement V2 and is the answer not in the manual?
Questions and answers