Advertisement
Quick Links
Advertisement

Subscribe to Our Youtube Channel
Related Manuals for Happybeds GRAYSON STORAGE BED 5'FT


Summary of Contents for Happybeds GRAYSON STORAGE BED 5'FT
- Page 1 GRAYSON STORAGE BED 5'FT ASSEMBLY INSTRUCTIONS Page 1 of 12...
- Page 2 Important informations Please take the time to carefully read through the whole of these instructions before you commence. Keep these instructions for future referance. Unpack, inspect and check aof all of the contents. Please dispose of all packing safely. Small components parts could choke a child if swallowed. We strongly recommend that you keep children well away from the work area.
-
Page 3: Part Description
Parts List Part Description Headboard Frame Left Wooden Post Right Wooden Post Footboard Frame Left Side Rail Right Side Rail Back Storage Panel Center Storage Panel Small Base Panel Large Base Panel Wooden Sprung Slats Left Hydraulic Base Support with Stopper Right Hydraulic Base Support Hydraulic Pump Back Bed Base... -
Page 4: Hardware List
Hardware List Part Description MINI FIX WOODEN DOWEL ML-CB (METAL CORNER SUPPORT) JCBC BOLT M8 x 35mm JCBC BOLT M8 x 25MM JCBC BOLT M8 x 15MM JCBC BOLT M8 x 20MM JCBC BOLT M8 x 75MM M8 FLAT WASHER BASE NUT BASE HANDLE JCBC BOLT... - Page 5 Step 1: Attach the back storage panel (7) to the left wooden post (2) and right wooden post (3). Secure the back storage panel with hardware parts A and B. DO NOT use any power tools as this may damage the frame and will invalidate any claim. Step 2: Attach the headboard frame (1) to the left wooden post (2) and right wooden post (3).
- Page 6 Step 4: Attach the headboard frame (1) and footboard (4) using hardware part E. DO NOT use any power tools as this may damage the frame and will invalidate any claim. Step 5: Attach hardware part C using hardware parts F. DO NOT use any power tools as this may damage the frame and will invalidate any claim.
- Page 7 Step 6: Attach the hydraulic pumps (14) to the left hydraulic base support (12) and right hydraulic base support (13) using hardware R. After that fix the base supports to the side rails using hardware part G as shown in Fig 6.2 – do not fully tighten yet.
- Page 8 Step 8: Insert the slats (11) to hardware parts N and O then press into the base making sure they are secure. DO NOT use any power tools as this may damage the frame and will invalidate any claim. Step 9: Insert the small base panel (9) and large base panels (10). DO NOT use any power tools as this may damage the frame and will invalidate any claim.
- Page 9 Step 11: Adjust the bed base making sure that the distance to the footboard is approximately 15 mm to above. Tighten all bolts and screws now. DO NOT use any power tools as this may damage the frame and will invalidate any claim. HEADBOARD 15mm to above FOOTBOARD...
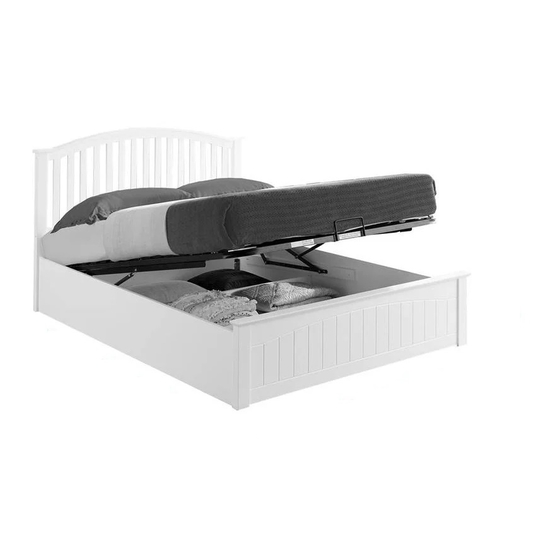
- Page 10 " IMPORTANT NOTE " WHEN THE BED IS BUILT AND THE MATTRESS FRAME IS AT 45 DEGREE ANGLE PLEASE PLACE THE MATTRESS ON THE BED. PLEASE NOTE THAT THE WEIGHT OF THE MATTRESS IS REQUIRED TO HELP CLOSE THE BED. TO LOWER THE SLEEPING PLATFORM STAND AT THE SIDE RAIL OF THE BED AND PUSH SHARPLY DOWNWARDS USING BOTH HANDS.
- Page 11 CAUTION : CAUTION : PLEASE USE HYDRAULIC PUMP STOPPER FOR SAFETY PURPOSE. PLEASE USE HYDRAULIC PUMP STOPPER FOR SAFETY PURPOSE. HYDRAULIC PUMP STOPPER (LOCK IN) (LOCK OUT) Page 11 of 12...
-
Page 12: General Care
General Care Wipe clean with a slightly damp soft cloth. Avoid the use of all household cleaners and abrasives. When moving your furniture, carefully lift into place. never drag or push the pieces across the floor as this will cause damage to the joints and could result in failure to the product that will invalidate the warranty.
Need help?
Do you have a question about the GRAYSON STORAGE BED 5'FT and is the answer not in the manual?
Questions and answers