Parker Sporlan S3C Installation And Operation Instructions Manual
Case control
Hide thumbs
Also See for Sporlan S3C:
- Manual (13 pages) ,
- Installation manual (2 pages) ,
- Startup manual (2 pages)

Subscribe to Our Youtube Channel
Related Manuals for Parker Sporlan S3C


Summary of Contents for Parker Sporlan S3C
- Page 1 March 2020 / Bulletin 100-50-9.1 Bulletin 100-50-9.1 – Page 1 S3C Case Control Installation and Operation Instructions S3C CASE CONTROL VALVE MODULE DISPLAY MODULE...
-
Page 2: Table Of Contents
OFFER OF SALE The items described in this document are hereby offered for sale by Parker Hannifin Corporation, its subsidiaries or its authorized distributors. This offer and its acceptance are governed by the provisions stated in the detailed “Offer of Sale” elsewhere in this document or available at www.parker.com. - Page 3 Bulletin 100-50-9.1 – Page 3 6 Applications ............24 6.16 Remote Multiple Evaporator with 2 EEVs and Case EEPR – Configuration P .... 69 Self-Contained Single Evaporator – Wiring Diagram – Configuration P ..... 71 Configuration A ......... 24 Wiring Diagram – Configuration A ..... 26 6.17 Remote Multiple Evaporator with 3 EEVs and Case EEPR –...
- Page 4 Page 4 – Bulletin 100-50-9.1 11.3 Case Level Configuration ......98 14 Dual Temperature Configuration ...... 113 Table 8 Case Configuration Menus ... 98 14.1 Changing Temperature Mode 11.4 Basic Operational Configuration ....98 Via The Display ........113 Table 9 Basic Configuration Menu ... 99 14.2 Configure the User Input ......
- Page 5 Bulletin 100-50-9.1 – Page 5 19.8 View EEPR Position ....... 126 19.21 Viewing Case Control Firmware Revision ......... 133 19.9 Adjust Superheat Setpoint ..... 126 19.22 Firmware Updates ......... 133 19.10 Adjust Discharge Air Setpoint ....126 20 Troubleshooting ..........134 19.11 Manually Position EEV ......
-
Page 6: Introduction
This manual contains information to aid in the installation Toll-Free: 888-920-6284 and operation of the Sporlan S3C Case Control system. To use this manual it is recommended to: Find your application in Section 6; review the set-up, piping and wiring diagrams. -
Page 7: System Components
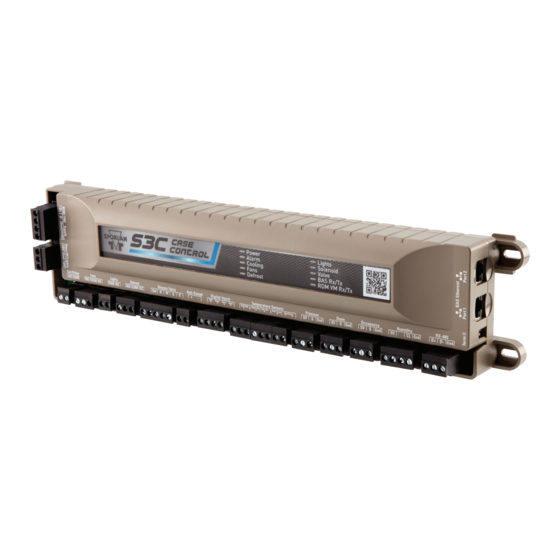
Bulletin 100-50-9.1 – Page 7 2. SYSTEM COMPONENTS S3C CASE CONTROL The S3C Case Control is equipped with the required One Form C relay output for control of defrost. (Heater inputs and outputs for advanced control of medium and Contactor, Drain Heater, Hot Gas Valve, etc.) low temperature refrigerated display cases in a variety of One 5V logic output for control of an external Solid State configurations. -
Page 8: S3C Display Module (Dm)
Page 8 – Bulletin 100-50-9.1 S3C DISPLAY MODULE (DM) Cooling Temperature Units Fans On Quick View Indicators Defrost Active Alarm(s) Active BAS Comm. Alarm Service Down/Decrement Defrost Up/Increment Escape Set/Enter The S3C Display Module (DM) is the local user interface for TABLE 2 - DISPLAY MODULE ICON DESCRIPTION the S3C Case Control system. -
Page 9: S3C Display Navigation
Bulletin 100-50-9.1 – Page 9 S3C DISPLAY NAVIGATION Defrost Pumpdown Active The ▲▼ buttons can be used to scroll up and down through menus. The SET button is similar to an “enter” button and can be used to enter a particular submenu or commit a selected parameter when it is changed. -
Page 10: System Specifications
Page 10 – Bulletin 100-50-9.1 3. SYSTEM SPECIFICATIONS Temperature Out of Range S3C CASE CONTROL Electrical Supply 22 to 26 VDC @ 0.5A minimum Notes: External DC Power Supply must be Class 2 and Class II rated. Maximum wire length between power supply and Case Control is 400 ft. -
Page 11: S3C Valve Module
Bulletin 100-50-9.1 – Page 11 Data Interface (3) Stepper Motor (2) RS-485 MODBUS, BACnet MSTP (Building Automation Unipolar/Bipolar 13.5VDC @ 400mA/Ø System) 200 pps/400 pps Software selectable Ethernet MODBUS, BACnet/IP (Case Control to Case Data Interface (1) Control or Building Automation System) RS-485 (Not Used) Notes: One Ethernet port can be used to connect case... -
Page 12: Control System Overview
Page 12 – Bulletin 100-50-9.1 4. CONTROL SYSTEM OVERVIEW may be used on the liquid line for each case or a single solenoid can be used for a line-up of cases; depending on TEMPERATURE CONTROL the application. The case controller will open and close the solenoid to maintain control temperature set point. -
Page 13: Anti-Sweat Heater Control
Bulletin 100-50-9.1 – Page 13 4.11 MULTIPLE VALVE CONTROL case controller supports a weekly schedule with one light on time and one light off time for each day of the week. The S3C Case Controller system is capable of controlling five electronic stepper valves;... -
Page 14: Diagnostics
Page 14 – Bulletin 100-50-9.1 4.16 DIAGNOSTICS Hardware inputs are physical sensors directly connected to the case controller. These sensors include temperature The S3C Case Control system employs sensors and diag- sensors and pressure transducers. Software inputs are pro- nostic algorithms to detect and aid in the diagnoses of fault vided via communications link to the BAS or from a peer conditions in the case and in some instances the refrigera- case controller. -
Page 15: S3C Display Module
Bulletin 100-50-9.1 – Page 15 S3C DISPLAY MODULE 5.2.1 MOUNTING Mount the Display Module in an indoor location on top of or near the refrigerated display case; outside of the conditioned space. After a location is determined, carefully cut out a 2.8” X 1.14” rectangle in the panel/bulkhead. The bulkhead thickness must be less than 0.31”... - Page 16 Page 16 – Bulletin 100-50-9.1 5.3.2 MOUNTING (DIN RAIL) Mount the controller in a rain-tight protected location. Fasten a 7” length of EN 50022 DIN 3 rail (35 mm height X 7.5 mm depth) to the surface where the controller will be mounted. Place the top of the controller down onto the top of the DIN Rail.
-
Page 17: Sensors
Bulletin 100-50-9.1 – Page 17 WARNING: Route and secure cables away from hot surfaces, high Pressure voltage lines and moving Discharge Air Sensor Transducer components. Coil Outlet Sensor Evaporator Defrost minimize Termination Sensor 1”- 2” 10”-14” ideal Return Air Sensor SENSORS 5.4.1.2 WIRING The S3C control system uses input from several sensors... - Page 18 Page 18 – Bulletin 100-50-9.1 5.4.2.1 WIRING With controller unpowered, carefully route the green Discharge Air sensor leads to the controller. Take caution to route the leads away from sharp edges, fans and defrost heaters. Ensure the terminal screws on the controller are backed all the way out.
- Page 19 Bulletin 100-50-9.1 – Page 19 5.4.5 SUCTION PRESSURE TRANSDUCER 5.4.5.1 MOUNTING The suction transducer is required when using an EEV and where superheat calculation is needed. It is also required when controlling an EEPR off of pressure. The sensor must be mounted on the suction line after the evaporator as shown below. The piping must be horizontal and free draining.
- Page 20 Page 20 – Bulletin 100-50-9.1 5.4.7 CASE SURFACE TEMPERATURE SENSOR 5.4.7.1 MOUNTING The case surface temperature sensor is required when using dew point control option for anti-sweat heaters. The sensor must be mounted on the door frame to detect surface temperatures.
-
Page 21: Dual Temperature Switch
Bulletin 100-50-9.1 – Page 21 on the controller. See the following figure. Note: Ensure that the wiring from the LED matches the output on the controller (ground to ground, etc). Tighten the terminal screws to 3-5 in.-lb. Carefully tug the leads to ensure they are secure. -
Page 22: Power Supply
Page 22 – Bulletin 100-50-9.1 5.7.2 WIRING 3mmt AL (0.118 in.t) Ensure high voltage supply is off. Permanently attach the L-Bracket high voltage wiring to the blue (AC Neutral) and brown Magnet (AC Line) leads of the power supply. Carefully route the low voltage red (24VDC +) and black (24VDC -) output wires from the power supply to the controller. -
Page 23: Valves
Bulletin 100-50-9.1 – Page 23 VALVES Case Control Valve Cable or Valve Module 5.9.1 ELECTRONIC EXPANSION VALVE (EEV) Black 5.9.1.1 MOUNTING White Green The EEV must be installed at the inlet to the evaporator using standard brazing practices. Refer to Sporlan’s valve installation instructions available at www.sporlan.com. -
Page 24: Applications
Page 24 – Bulletin 100-50-9.1 6. APPLICATIONS The S3C Case Control System offers numerous features to support a wide range of refrigerated display case configurations. This section includes references to piping diagrams, wiring diagrams for each application along with tables that show required controller hardware and proper electronic valve wiring locations on the controllers. - Page 25 Bulletin 100-50-9.1 – Page 25 15. Press the SET button when e d a. If is chosen, the display will show (Building (Discharge Air Automation System Protocol). Press the SET button Temperature Setpoint) is shown. Use the ▲▼ buttons to choose the setpoint in °F;...
-
Page 26: Wiring Diagram - Configuration A
Page 26 – Bulletin 100-50-9.1 WIRING DIAGRAM – CONFIGURATION A GREEN... -
Page 27: Self-Contained Single Evaporator With Eev - Configuration B
Bulletin 100-50-9.1 – Page 27 SELF-CONTAINED SINGLE EVAPORATOR WITH EEV – CONFIGURATION B The S3C case controller is capable of controlling and monitoring single temperature, single evaporator self-contained refrigerated fixtures. In this scenario, one S3C case is required. The S3C case controller will control all case functions as well as take all the desired sensor inputs and drive the EEV. - Page 28 Page 28 – Bulletin 100-50-9.1 Press the SET button when 15. Press the SET button when d (Building Automation (Discharge Air System Expected) is displayed. Use the ▲▼ buttons to Temperature Setpoint) is shown. Use the ▲▼ buttons to choose the setpoint in °F;...
-
Page 29: Wiring Diagram - Configuration B
Bulletin 100-50-9.1 – Page 29 WIRING DIAGRAM – CONFIGURATION B YELLOW... -
Page 30: Self-Contained Multiple Evaporator With 2 Eevs - Configuration C
Page 30 – Bulletin 100-50-9.1 SELF-CONTAINED MULTIPLE EVAPORATOR WITH 2 EEVS – CONFIGURATION C The S3C case controller is capable of controlling and monitoring single temperature, multiple evaporator self-contained refrigerated fixtures. In this scenario, one S3C case controller and one S3C valve module are required. The S3C case controller will control all case functions as well as take all the desired sensor inputs for one evaporator and drive EEV1. - Page 31 Bulletin 100-50-9.1 – Page 31 Press the SET button when 14. Press the SET button when e ef (Number of (Refrigerant Type) is Evaporators) is displayed. Use the ▲ button and scroll shown. Use the ▲▼ buttons to choose the Refrigerant Type;...
-
Page 32: Wiring Diagram - Configuration C
Page 32 – Bulletin 100-50-9.1 WIRING DIAGRAM – CONFIGURATION C YELLOW... -
Page 33: Self-Contained Multiple Evaporator With 3 Eevs - Configuration D
Bulletin 100-50-9.1 – Page 33 SELF-CONTAINED MULTIPLE EVAPORATOR WITH 3 EEVS – CONFIGURATION D The S3C case controller is capable of controlling and monitoring single temperature, multiple evaporator self-contained refrigerated fixtures. In this scenario, one S3C case controller and one S3C valve module are required. The S3C case controller will control all case functions as well as take all the desired sensor inputs for one evaporator and drive EEV1. - Page 34 Page 34 – Bulletin 100-50-9.1 10. Press the SET button when d (Day) is shown. Use the Configuration) is displayed. Use ▲ button to scroll to ▲ button to choose the current day; press SET. (Electronic Expansion Valve); press SET. This is the ...
-
Page 35: Wiring Diagram - Configuration D
Bulletin 100-50-9.1 – Page 35 WIRING DIAGRAM – CONFIGURATION D BLACK WHITE GREEN... -
Page 36: Remote Single Evaporator - Configuration E
Page 36 – Bulletin 100-50-9.1 REMOTE SINGLE EVAPORATOR – CONFIGURATION E The S3C case controller is capable of controlling and monitoring single temperature, single evaporator refrigerated fixtures installed as a line-up. The case shown in the diagram below is the lead case of the line-up. In this scenario, one S3C case controller is required. - Page 37 Bulletin 100-50-9.1 – Page 37 Press the SET button when 15. Press the SET button when (Expansion Valve (EPR Type) is shown. Type) is displayed. Press the SET button when display Use the ▲ button to choose oe (for no EPR);...
-
Page 38: Wiring Diagram - Configuration E
Page 38 – Bulletin 100-50-9.1 WIRING DIAGRAM – CONFIGURATION E GREEN... -
Page 39: Remote Single Evaporator With Eev - Configuration F
Bulletin 100-50-9.1 – Page 39 REMOTE SINGLE EVAPORATOR WITH EEV – CONFIGURATION F The S3C case controller is capable of controlling and monitoring single temperature, single evaporator refrigerated fixtures installed as a line-up. The case shown in the diagram below is the lead case of the line-up. In this scenario, one S3C case controller is required. - Page 40 Page 40 – Bulletin 100-50-9.1 Press the SET button when 15. Press the SET button when e (Number of (Number of Cases Evaporators) is displayed. Use the ▲ button and scroll to Expected in Line-up) is shown. Use the ▲▼ buttons to 1(1 Evaporator);...
-
Page 41: Wiring Diagram - Configuration F
Bulletin 100-50-9.1 – Page 41 WIRING DIAGRAM – CONFIGURATION F YELLOW... -
Page 42: Remote Single Evaporator With Circuit Eepr - Configuration G
Page 42 – Bulletin 100-50-9.1 REMOTE SINGLE EVAPORATOR WITH CIRCUIT EEPR – CONFIGURATION G The S3C case controller is capable of controlling and monitoring single temperature, single evaporator refrigerated fixtures installed as a line-up. The case shown in the diagram below is the lead case of the line-up. In this scenario, one S3C case controller is required. - Page 43 Bulletin 100-50-9.1 – Page 43 e 25 6386 a. If is chosen, the display will show (Building to choose from either depending on the Automation System Protocol). Press the SET button valve; press SET. Please consult the literature supplied then use ▲▼...
-
Page 44: Wiring Diagram - Configuration G
Page 44 – Bulletin 100-50-9.1 WIRING DIAGRAM – CONFIGURATION G... -
Page 45: Remote Single Evaporator With Case Eepr - Configuration H
Bulletin 100-50-9.1 – Page 45 REMOTE SINGLE EVAPORATOR WITH CASE EEPR – CONFIGURATION H The S3C case controller is capable of controlling and monitoring single temperature, single evaporator refrigerated fixtures installed as a line-up. The case shown in the diagram below is the lead case of the line-up. In this scenario, one S3C case controller is required. - Page 46 Page 46 – Bulletin 100-50-9.1 Press the SET button when 17. Press the SET button when o d (Month) is shown. Use (Discharge Air the ▲ button to choose the current month; press SET. Temperature Setpoint) is shown. Use the ▲▼ buttons to choose the setpoint in °F;...
-
Page 47: Wiring Diagram - Configuration H
Bulletin 100-50-9.1 – Page 47 WIRING DIAGRAM – CONFIGURATION H... -
Page 48: Remote Single Evaporator With Eev And Circuit Eepr - Configuration I
Page 48 – Bulletin 100-50-9.1 REMOTE SINGLE EVAPORATOR WITH EEV AND CIRCUIT EEPR – CONFIGURATION I The S3C case controller is capable of controlling and monitoring single temperature, single evaporator refrigerated fixtures installed as a line-up. The case shown in the diagram below is the lead case of the line-up. In this scenario, one S3C case controller and one S3C valve module are required. - Page 49 Bulletin 100-50-9.1 – Page 49 Press the SET button when 14. Press the SET button when ef (Expansion Valve (Refrigerant Type) is Type) is displayed. Use ▲▼ buttons to choose the shown. Use the ▲▼ buttons to choose the Refrigerant Type;...
-
Page 50: Wiring Diagram - Configuration I
Page 50 – Bulletin 100-50-9.1 WIRING DIAGRAM – CONFIGURATION I... -
Page 51: Remote Single Evaporator With Eev And Case Eepr - Configuration J
Bulletin 100-50-9.1 – Page 51 6.10 REMOTE SINGLE EVAPORATOR WITH EEV AND CASE EEPR – CONFIGURATION J The S3C case controller is capable of controlling and monitoring single temperature, single evaporator refrigerated fixtures installed as a line-up. The case shown in the diagram below is the lead case of the line-up. In this scenario, one S3C case controller and one S3C valve module are required. - Page 52 Page 52 – Bulletin 100-50-9.1 Press the SET button when 16. Press the SET button when e (Number of (Evaporator Pressure Evaporators) is displayed. Use the ▲ button and scroll Regulating Valve Type) is shown. Use the ▲▼ buttons (1 Evaporator);...
-
Page 53: Wiring Diagram - Configuration J
Bulletin 100-50-9.1 – Page 53 WIRING DIAGRAM – CONFIGURATION J... -
Page 54: Remote Multiple Evaporator With 2 Eevs - Configuration K
Page 54 – Bulletin 100-50-9.1 6.11 REMOTE MULTIPLE EVAPORATOR WITH 2 EEVS – CONFIGURATION K The S3C case controller is capable of controlling and monitoring single temperature, multiple evaporator refrigerated fixtures installed as a line-up. The case shown in the diagram below is the lead case of the line-up. In this scenario, one S3C case controller and one S3C valve module are required. - Page 55 Bulletin 100-50-9.1 – Page 55 Press the SET button when hour format; press SET. Note: Holding the ▲ or ▼ (Expansion Valve down while setting the time will accelerate the Type) is displayed. Use ▲▼ buttons to choose the scrolling.
-
Page 56: Wiring Diagram - Configuration K
Page 56 – Bulletin 100-50-9.1 WIRING DIAGRAM – CONFIGURATION K YELLOW... -
Page 57: Remote Multiple Evaporator With 3 Eevs - Configuration L
Bulletin 100-50-9.1 – Page 57 6.12 REMOTE MULTIPLE EVAPORATOR WITH 3 EEV – CONFIGURATION L The S3C case controller is capable of controlling and monitoring single temperature, multiple evaporator refrigerated fixtures installed as a line-up. The case shown in the diagram below is the lead case of the line-up. In this scenario, one S3C case controller and one S3C valve module are required. - Page 58 Page 58 – Bulletin 100-50-9.1 Press the SET button when 11. Press the SET button when d d (Case Identifier) (Day) is shown. Use the ▲ button to choose the current day; press SET. is displayed. Use the ▲▼ buttons to configure the 4 character Case Identifier.
-
Page 59: Wiring Diagram - Configuration L
Bulletin 100-50-9.1 – Page 59 WIRING DIAGRAM – CONFIGURATION L BLACK WHITE GREEN... -
Page 60: Remote Multiple Evaporator With Circuit Eepr - Configuration M
Page 60 – Bulletin 100-50-9.1 6.13 REMOTE MULTIPLE EVAPORATOR WITH CIRCUIT EEPR – CONFIGURATION M The S3C case controller is capable of controlling and monitoring single temperature, multiple evaporator refrigerated fixtures installed as a line-up. The case shown in the diagram below is the lead case of the line-up. In this scenario, one S3C case control- ler is required. - Page 61 Bulletin 100-50-9.1 – Page 61 Press the SET button when 15. Press the SET button when (Expansion Valve (Evaporator Pressure Regulating Valve Type) is shown. Use the ▲▼ buttons Type) is displayed. Use ▲ button and scroll to (Thermostatic Expansion Valve);...
-
Page 62: Wiring Diagram - Configuration M
Page 62 – Bulletin 100-50-9.1 WIRING DIAGRAM – CONFIGURATION M... -
Page 63: Remote Multiple Evaporator With 2 Eevs And Circuit Eepr - Configuration N
Bulletin 100-50-9.1 – Page 63 6.14 REMOTE MULTIPLE EVAPORATOR WITH 2 EEVS AND CIRCUIT EEPR – CONFIGURATION N The S3C case controller is capable of controlling and monitoring single temperature, multiple evaporator refrigerated fixtures installed as a line-up. The case shown in the diagram below is the lead case of the line-up. In this scenario, one S3C case controller and one S3C valve module are required. - Page 64 Page 64 – Bulletin 100-50-9.1 Press the SET button when (Local Stepper Valve Use the ▲ button to choose the current time in 24 hour format; press SET. Note: Holding the ▲ or ▼ Configuration) is displayed. Use the ▲ button to scroll down while setting the time will accelerate the (Electronic Expansion Valve);...
-
Page 65: Wiring Diagram - Configuration N
Bulletin 100-50-9.1 – Page 65 FIGURE 7 - WIRING DIAGRAM – CONFIGURATION N... -
Page 66: Remote Multiple Evaporator With 3 Eevs And Circuit Eepr - Configuration O
Page 66 – Bulletin 100-50-9.1 6.15 REMOTE MULTIPLE EVAPORATOR WITH 3 EEVS AND CIRCUIT EEPR – CONFIGURATION 0 The S3C case controller is capable of controlling and monitoring single temperature, multiple evaporator refrigerated fix- tures installed as a line-up. The case shown in the diagram below is the lead case of the line-up. In this scenario, one S3C case controller and two S3C valve modules are required. - Page 67 Bulletin 100-50-9.1 – Page 67 character Rack Identifier. Note: Push ▲ button for 10. Press the SET button when o (Month) is shown. Use numeric, ▼ for alpha characters. When satisfied the ▲ button to choose the current month; press SET. with each digit, press the SET button to go to the next 11.
-
Page 68: Wiring Diagram - Configuration O
Page 68 – Bulletin 100-50-9.1 FIGURE 9 - WIRING DIAGRAM – CONFIGURATION O... -
Page 69: Remote Multiple Evaporator With 2 Eevs And Case Eepr - Configuration P
Bulletin 100-50-9.1 – Page 69 6.16 REMOTE MULTIPLE EVAPORATOR WITH 2 EEVS AND CASE EEPR – CONFIGURATION P The S3C case controller is capable of controlling and monitoring single temperature, multiple evaporator refrigerated fixtures installed as a line-up. The case shown in the diagram below is the lead case of the line-up. In this scenario, one S3C case controller and one S3C valve module are required. - Page 70 Page 70 – Bulletin 100-50-9.1 Press the SET button when 15. Press the SET button when (Expansion Valve (Number of Cases Type) is displayed. Use ▲▼ buttons to choose the Expected in Line-up) is shown. Use the ▲▼ buttons to Expansion Valve Type based on the below chart;...
-
Page 71: Wiring Diagram - Configuration P
Bulletin 100-50-9.1 – Page 71 FIGURE 10 - WIRING DIAGRAM – CONFIGURATION P... -
Page 72: Remote Multiple Evaporator With 3 Eevs And Case Eepr - Configuration Q
Page 72 – Bulletin 100-50-9.1 6.17 REMOTE MULTIPLE EVAPORATOR WITH 3 EEVS AND CASE EEPR – CONFIGURATION Q The S3C case controller is capable of controlling and monitoring single temperature, multiple evaporator refrigerated fixtures installed as a line-up. The case shown in the diagram below is the lead case of the line-up. In this scenario, one S3C case controller and two S3C valve modules are required. - Page 73 Bulletin 100-50-9.1 – Page 73 Press the SET button when 12. Press the SET button when d e (Case Identifier) (Year) is shown. Use the ▲ button to choose the current day; press SET. is displayed. Use the ▲▼ buttons to configure the 4 character Case Identifier.
-
Page 74: Wiring Diagram - Configuration Q
Page 74 – Bulletin 100-50-9.1 FIGURE 12 - WIRING DIAGRAM – CONFIGURATION Q... -
Page 75: Remote Dual Temperature With Circuit Eepr - Configuration R
Bulletin 100-50-9.1 – Page 75 6.18 REMOTE DUAL TEMPERATURE WITH CIRCUIT EEPR – CONFIGURATION R The S3C case controller is capable of controlling and monitoring dual temperature, single evaporator refrigerated fixtures installed as a line-up. The case shown in the diagram below is the lead case of the line-up. In this scenario, one S3C case controller is required. - Page 76 Page 76 – Bulletin 100-50-9.1 e a. If is chosen, the display will show (Building with the valve to determine the correct step count. For Automation System Protocol). Press the SET button custom valve selection, see valve configuration menu in then use ▲▼...
-
Page 77: Wiring Diagram - Configuration R
Bulletin 100-50-9.1 – Page 77 FIGURE 13 - WIRING DIAGRAM – CONFIGURATION R... -
Page 78: Remote Dual Temperature With Eev And Circuit Eepr - Configuration S
Page 78 – Bulletin 100-50-9.1 6.19 REMOTE DUAL TEMPERATURE WITH EEV AND CIRCUIT EEPR – CONFIGURATION S The S3C case controller is capable of controlling and monitoring dual temperature, single evaporator refrigerated fixtures installed as a line-up. The case shown in the diagram below is the lead case of the line-up. In this scenario, one S3C case controller and one S3C valve module are required. - Page 79 Bulletin 100-50-9.1 – Page 79 Press the SET button when 15. Press the SET button when (Expansion Valve (Number of Cases Type) is displayed. Use ▲▼ buttons to choose the Expected in Line-up) is shown. Use the ▲▼ buttons to Expansion Valve Type based on the below chart;...
-
Page 80: Wiring Diagram - Configuration S
Page 80 – Bulletin 100-50-9.1 FIGURE 12 - WIRING DIAGRAM – CONFIGURATION S... -
Page 81: Remote Dual Temperature With Eev And Case Eepr - Configuration T
Bulletin 100-50-9.1 – Page 81 6.20 REMOTE DUAL TEMPERATURE WITH EEV AND CASE EEPR – CONFIGURATION T The S3C case controller is capable of controlling and monitoring dual temperature, single evaporator refrigerated fixtures installed as a line-up. The case shown in the diagram below is the lead case of the line-up. In this scenario, one S3C case controller and one S3C valve module per case are required. - Page 82 Page 82 – Bulletin 100-50-9.1 Press the SET button when e 25 6386 (Number of to choose from either depending on the valve; press SET. Please consult the literature supplied Evaporators) is displayed. Use the ▲ button and scroll to 1(1 Evaporator);...
-
Page 83: Wiring Diagram - Configuration T
Bulletin 100-50-9.1 – Page 83 WIRING DIAGRAM – CONFIGURATION T... -
Page 84: Walk-In Single Evaporator With Eev - Configuration U
Page 84 – Bulletin 100-50-9.1 6.21 WALK-IN SINGLE EVAPORATOR WITH EEV – CONFIGURATION U The S3C case controller is capable of controlling and monitoring walk-in coolers and freezers equipped with electric defrost. For a single coil walk-in with an EEV, one S3C case controller is required. In the scenario detailed above, the user has two choices of control method. - Page 85 Bulletin 100-50-9.1 – Page 85 Press the SET button when 15. Press the SET button when e (Number of (Number of Cases Evaporators) is displayed. Use the ▲ button and scroll Expected in Line-up) is shown. Use the ▲▼ buttons to (1 Evaporator);...
-
Page 86: Wiring Diagram - Configuration U
Page 86 – Bulletin 100-50-9.1 WIRING DIAGRAM – CONFIGURATION U... -
Page 87: Walk-In Single Evaporator With Eev And Eepr - Configuration V
Bulletin 100-50-9.1 – Page 87 6.22 WALK-IN SINGLE EVAPORATOR WITH EEV AND EEPR – CONFIGURATION V The S3C case controller is capable of controlling and monitoring walk-in coolers and freezers equipped with electric defrost. For a single coil walk-in with an EEV and EEPR, one S3C case controller and one S3C valve module are required. In the scenario detailed above, the typical control method involves controlling return air temperature (box temp) with the EEPR and controlling superheat with the EEV. - Page 88 Page 88 – Bulletin 100-50-9.1 e 25 6386 a. If is chosen, the display will show to choose from either depending on the valve; press SET. Please consult the literature supplied (Building Automation System Protocol). Press the SET button then use ▲▼ buttons to choose the with the valve to determine the correct step count.
-
Page 89: Wiring Diagram - Configuration V
Bulletin 100-50-9.1 – Page 89 WIRING DIAGRAM – CONFIGURATION V... -
Page 90: Controller Requirements Chart
Page 90 – Bulletin 100-50-9.1 6.22.1 DOOR SWITCH OPERATION A door switch may be used on low temperature walk-in freezer applications. When the door switch is active, the S3C case controller will shut off evaporator fans and will turn off refrigeration by closing the liquid line solenoid valve and EEV. Once activated, the system will remain off for 15 minutes. - Page 91 Bulletin 100-50-9.1 – Page 91 Configuration EEV2 EEV3 EEPR Not Used Not Used Not Used Not Used Case Controller Not Used Not Used Not Used “Stepper Valve” Case Controller Valve Module Not Used Not Used “Stepper Valve” “Stepper Valve 1” Case Controller Valve Module Valve Module...
-
Page 92: Passwords
Page 92 – Bulletin 100-50-9.1 7. PASSWORDS 9. Press the SET button to enter the new value. The display will revert to . S3C PASSWORDS 10. Press the ESC button 3 times to revert to the default display. Access to the S3C Case Control system configuration parameters and service functions are password protected. -
Page 93: Set-Up Menu
Bulletin 100-50-9.1 – Page 93 9. SET-UP MENU documentation for configuration via BACnet or MODBUS. Upon first power up of the S3C Case Control system the user Before beginning set-up of the S3C Control is presented with a Start Up menu through the Display Mod- System ensure all wiring is completed in ule where critical parameters are set to allow the system to accordance with the appropriate wiring dia-... -
Page 94: View Only Menus
Page 94 – Bulletin 100-50-9.1 Press the SET button to commit the selected parameter value to memory • The ESC button can be used to exit the value selection for the current parameter. A subsequent press of the ESC • button will move to the previous parameter. -
Page 95: Line-Up Menu
Bulletin 100-50-9.1 – Page 95 10.1 LINE-UP MENU Display Meaning d Aggregated Discharge Air Temperature across Line-up DEFAULT DISPLAY Aggregated Return Air Temperature across Line-up Suction Pressure (Aggregated suction pressure on u Line-up) EEPR Valve Position Display Meaning ▲▼... -
Page 96: Evaporator Menu
Page 96 – Bulletin 100-50-9.1 Display Meaning d1 d Defrost Temperature Coil Outlet Temperature Out of Service o1 U Evaporator Coil Outlet Temperature Refrigerant Dew Point Saturation Temperature (Based on aggregated suction pressure) eed EEV/SFV Duty Cycle EEV Left Valve Position ee1 ... -
Page 97: Configurable Menus
Bulletin 100-50-9.1 – Page 97 DEFAULT DISPLAY Display Meaning d Discharge Air Temperature Discharge Air Temperature Out of Service Superheat Suction Pressure (Local suction pressure OR U aggregated suction pressure on case) ▲▼ Suction Pressure Out of Service ... -
Page 98: Case Level Configuration
Page 98 – Bulletin 100-50-9.1 TABLE 6 - TOP LEVEL MENUS Display Meaning Description Hide Condition Case Configuration Allows configuration of case level parameters Line-up Configuration Allows viewing of line-up level process values e Evaporator 3 3 Allows configuration of evaporator level sensors offsets for evaporator 3 Configuration Evaporator 2 2... - Page 99 Bulletin 100-50-9.1 – Page 99 TABLE 9 - BASIC CONFIGURATION MENU Display Meaning Range Selection Hide Condition Walk-in Application Type Single Temperature Case g Dual Temperature Case (s) du e Case Type: Remote or Self Contained o u...
- Page 100 Page 100 – Bulletin 100-50-9.1 TABLE 9 - BASIC CONFIGURATION MENU Display Meaning Range Selection Hide Condition R-1366MZZ d2 Refrigerant Type ef R-513A 513 R-452A 452 R-449A 449 R-450A 45 R-448A 448 R-444B 444 R-434A 434 R-407F 47f R-508B 58 R-508A 58...
-
Page 101: Sensor Configuration
Bulletin 100-50-9.1 – Page 101 11.5 SENSOR CONFIGURATION Display Description The S3C supports Sporlan 10K thermistors and 0.5 to u Custom Transducer (see below for configuration) 4.5V ratiometric pressure transducers by default. There 652 psi are several additional options that are available in the controller. -
Page 102: Digital Input Configuration
Page 102 – Bulletin 100-50-9.1 11.8 DISPLAY CONFIGURATION Display Description Range The brightness of the side “Quick View” indicators on the Dry bulb temperature do -10°F to 10°F Display Module (DM) may be adjusted to suit individual calibration offset requirements. The indicators may also be turned off. Relative humidity o -10°F to 10%... -
Page 103: Network Configuration
Bulletin 100-50-9.1 – Page 103 Display Description Range Variable speed ( ) Fan control type Dual speed ( ) f Single speed ( ) U Fan fault current baseline .12 to 6A Fan fault detection enabled No or yes ... -
Page 104: Setting Time And Date
Page 104 – Bulletin 100-50-9.1 Display Description Range Selections o N Case Settings Synchronization o BAS Expected e o MODBUS over IP BACnet over IP BAS Communications Protocol BACnet over RS-485 485 MODBUS over RS-485 485 ... -
Page 105: Valve Configuration
Bulletin 100-50-9.1 – Page 105 11.13 VALVE CONFIGURATION To access Valve Configuration Menu: 12. From the default display, press the button. The This menu configures valve types attached to the S3C Case display will show . Control system. The Local Stepper Valve Type selection configures the functionality of the stepper valve connection 13. -
Page 106: Custom Valve Configuration
Page 106 – Bulletin 100-50-9.1 11.14 CUSTOM VALVE CONFIGURATION To set-up a Custom EEPR: The S3C offers a custom valve selection for the electronic 1. From the default display, press the button. The expansion valve and electronic evaporator pressure ... -
Page 107: Valve Module Configuration (For Eev And Eepr)
Bulletin 100-50-9.1 – Page 107 11.15 VALVE MODULE CONFIGURATION (FOR EEV AND EEPR) The S3C Valve Module may be configured to support two EEVs or one EEV and one EEPR. Additional Valve Modules may be added to support multiple coil cases. The DIP switch located on the side of the Valve Module must be configured based on the required valve support. -
Page 108: Minimum Saturation Pressure
Page 108 – Bulletin 100-50-9.1 11.16 MINIMUM SATURATION When display shows (Anti-Sweat Control Type); TEMPERATURE press SET. The S3C includes a minimum saturation temperature d Use the ▲▼ buttons, scroll to (Fixed Duty Cycle); setpoint, that can be used to limit the temperature in the press SET. -
Page 109: Configuration Menu Items
Bulletin 100-50-9.1 – Page 109 TABLE 13 - ANTI-SWEAT CONFIGURATION MENU ITEMS Display Meaning Range Selection Hide Condition d = fixed duty cycle Anti-sweat control type Set the type of control used for anti-sweat control control d = dew point control 1 to 120 ... -
Page 110: Defrost Configuration
Page 110 – Bulletin 100-50-9.1 12. DEFROST CONFIGURATION 12.1 DEFROST OPERATION 1. From the default display, press the button. The The Set-up menu ensures that the minimum required . display will show for safe and effective execution of case defrost is entered. Additional features and modification of the Defrost Cycle 2. -
Page 111: Defrost Schedule
Bulletin 100-50-9.1 – Page 111 12.2.2 CUSTOM DEFROST SCHEDULE Once the parameter is changed, press SET to commit the change. A custom schedule can only be configured through BAS Press the ESC button 3 times to revert to the default communications. -
Page 112: Lighting Configuration
Page 112 – Bulletin 100-50-9.1 13. LIGHTING CONFIGURATION Scroll to h(schedule type); press SET. Scroll to 1d; press SET. The S3C offers three case lighting options; Constant On, Simple One Day Schedule and a Full Custom 7 Day Press the ▲ button to scroll to the oe(on time); press Schedule. -
Page 113: Occupancy Sensor
Bulletin 100-50-9.1 – Page 113 14. DUAL TEMPERATURE 13.4 OCCUPANCY SENSOR CONFIGURATION The S3C supports the Sporlan OCC occupancy sensor. This sensor is mounted on the top of the case and senses 14.1 CHANGING TEMPERATURE MODE VIA when there is movement near the front of the case. This THE DISPLAY sensor is used in conjunction with an LED driver to dim or turn off the lights when there is no movement near the... -
Page 114: System Start Up
Page 114 – Bulletin 100-50-9.1 Hide Display Meaning Description Selection Condition Low temperature high alarm Sets the high temperature alarm when operating in low h °F -6 1 threshold temperature mode Low temperature low alarm Sets the low temperature alarm when operating in low ... -
Page 115: System Operation
Bulletin 100-50-9.1 – Page 115 16. SYSTEM OPERATION 17. OPERATING MODES 16.1 17.1 REFRIGERATION 17.1.1 DELAY ON START UP EEVs Maintain Control Temperature or Superheat dependent upon set points and refrigeration system conditions. In order For systems that use cut-in/cut-out case temperature for the EEV to switch from controlling superheat to control control, there will be a delay on start up prior to opening temperature, the superheat must be above the superheat... - Page 116 Page 116 – Bulletin 100-50-9.1 17.2.3 DRIP CYCLE 17.2.7 AIR DEFROST Upon defrost termination, the S3C will go into a drip cycle Air defrost is accomplished by stopping the flow of mode for applications that require the fans to be off during refrigerant to the evaporator while leaving the evaporator defrost.
- Page 117 Bulletin 100-50-9.1 – Page 117 is reached. The drain time delay allows water to drip off the coil and exit the case via the drain before resuming refrigeration. During this period, the EEV remains closed and the EEPR opens to the user selected EEPR Percent Open during drain parameter to bleed excess pressure to the suction header.
-
Page 118: Alarms
Page 118 – Bulletin 100-50-9.1 18. ALARMS 18.1 ALARM CONFIGURATION From the default display, press the button. The The S3C Case Control monitors control components and . display will show system conditions and performance and detects conditions that result in alarm notification to the user and appropri- Use the ▲▼... -
Page 119: Control Alarms
Bulletin 100-50-9.1 – Page 119 The set-up is simplified by presenting the user with only the parameter selections required based on previous parameter value selections. Parameters that can be hidden can be seen in the table below. TABLE 18 - HIDE CONDITIONS FOR ALARM CONFIGURATION MENU ITEMS Number Hide Condition Skipped if application type is not walk-in... - Page 120 Page 120 – Bulletin 100-50-9.1 denotes required control configuration to enable alarm and/or control response. Self Alarm Description Cause Control Response Clearing Superheat Control selected. EEV closes to prevent possible flood back. EEPR Pressure control selected. Superheat or Pressure Control Single case in line-up: EEPR moves No Suction Pressure Transducer...
-
Page 121: Sensor Alarms
Bulletin 100-50-9.1 – Page 121 denotes required control configuration to enable alarm and/or control response. Self Alarm Description Cause Control Response Clearing EEV/SFV configured for 1 evaporator. EEV Open Load/SFV Open Load EEV not connected, miswired or open winding/connection. - Page 122 Page 122 – Bulletin 100-50-9.1 denotes required control configuration to enable alarm and/or control response. Self Alarm Description Cause Control Response Clearing Superheat Control selected. No Suction Pressure Transducer Superheat Control using EEV 1. EEV closes to prevent possible flood detected on Center Evaporator (S3C selected.
- Page 123 Bulletin 100-50-9.1 – Page 123 denotes required control configuration to enable alarm and/or control response. Self Alarm Description Cause Control Response Clearing EEPR Temperature control selected. Single case in line-up. One DA sensor connected to S3C Valve No Discharge Air Temperature sensor Sensor must be detected on initial Module: EEPR moves to calculated...
-
Page 124: User Alarms
Page 124 – Bulletin 100-50-9.1 18.4 USER ALARMS denotes required control configuration to enable alarm and/or control response. Self Alarm Description Cause Control Response Clearing Measured suction pressure is below user selected low limit for a period Suction pressure low greater than selected low alarm time delay. -
Page 125: View Superheat
Bulletin 100-50-9.1 – Page 125 Press ESC button three times to return to default For Coil 1: From the default display, press the ▲ button to display (discharge air). then press SET. 19.5 VIEW SUCTION PRESSURE Press the ▲ button and scroll to d1. 1. -
Page 126: View Eepr Position
Page 126 – Bulletin 100-50-9.1 Press SET button to show EEV position. is displayed; press SET. Press the ▼ button until Press ESC button three times to return to default Use the ▲▼ buttons and scroll to e; press SET. display. -
Page 127: Manually Position Eepr
Bulletin 100-50-9.1 – Page 127 12. Press the SET button to move the valve to the desired From the default display, press and hold the and ▼ position. The display will revert to . buttons for 3 seconds. The display will show ... - Page 128 Page 128 – Bulletin 100-50-9.1 Press SET to enter the Service sub-menu. The display WARNING: Controller functionality will halt while in will show (Clean Mode). test mode. All components, such as valves, fans and lights, will remain in the last position/state when test mode e...
-
Page 129: Led Service Indicators
Bulletin 100-50-9.1 – Page 129 To Exit Test Mode: Use the ▼ button and scroll to e; press SET. Use the ▼ button and scroll to off; press SET. The system will resume operation. Press the ESC button 2 times to revert to the default display. 19.15 LED SERVICE INDICATORS The S3C case control and Valve Module have integrated visible LED indicators on the top surface of the enclosures. -
Page 130: Sensor Scan
Page 130 – Bulletin 100-50-9.1 19.16 SENSOR SCAN Press SET to enter the Service sub-menu. The display will show (Clean Mode). The S3C Case Control system uses multiple sensors for Use the ▲ button and scroll to d (Fan Fault monitoring and control. - Page 131 Bulletin 100-50-9.1 – Page 131 19.19.2 CHANGING A FUSE ON THE VALVE Locate fuses as shown below. Replace as necessary. MODULE WARNING: Use caution when working around high voltage components. Ensure power is removed from all inputs prior to handling the controller. For replacement use the following fuse specification or Defrost equivalent:...
-
Page 132: Controller Replacement
Page 132 – Bulletin 100-50-9.1 Locate fuse as shown below. Replace as necessary. Remove controller either by pressing down and releasing the DIN rail latch or removing the four Solenoid/Pulse Valve mounting screws. Install new controller by snapping on to DIN rail or using mounting screws. -
Page 133: Viewing Case Control Firmware Revision
Slip out display from the panel/bulkhead. 19.22 FIRMWARE UPDATES To update firmware, contact Sporlan Technical Support. Slide new display into bulkhead. E-mail: svdtechsupport@parker.com Install slide locks onto the display and compress against Phone: 636-392-3906 bulkhead to ensure proper sealing. Connect power and communications terminal plug. -
Page 134: Troubleshooting
Page 134 – Bulletin 100-50-9.1 20. TROUBLESHOOTING saturated suction temperature (as defined by the suction pressure) should be maintained at 10˚F below the speci- As with any refrigeration component troubleshooting, fied case temperature. In all instances, consult the refriger- actual system conditions should be verified with a gauge ated display case OEM specification sheet for sub-cooling, set and calibrated temperature sensor (i.e. -
Page 135: Case Controller
Bulletin 100-50-9.1 – Page 135 21.2 CASE CONTROLLER The Case Controller communicates to the DM and Valve Module via a dedicated private network. This network is not configurable through software and is not available for third party components. This network can support one Case Controller, One Display and up to two valve modules for multi-coil cases. - Page 136 Page 136 – Bulletin 100-50-9.1 Line-up synchronization allows cases within a line-up to Press the ▼ button until (Network Configuration) e is showing, then press SET. share key parameters. In many instances, this simplifies set- up and allows for sensor redundancy to maximize case up (Case Sync);...
- Page 137 Bulletin 100-50-9.1 – Page 137 Parameter Description Display Used to determine cut-in/ cut-out temperatures for Control Temperature Differential Allowed distance from set point ON/OFF control. (Self-Contained and Walk-In only) Determines temperature input used for control and Control Temperature Input Selection Selects input for temperature control ...
- Page 138 Page 138 – Bulletin 100-50-9.1 Parameter Description Display LT Control Temperature Low Alarm Low alarm threshold for Low Temperature Threshold operation (Dual Temp) LT Control Temperature High Alarm High alarm delay time for Low Temperature d Delay operation (Dual Temp) LT Control Temperature Low Alarm Low alarm delay time for Low Temperature d...
- Page 139 Bulletin 100-50-9.1 – Page 139 Parameter Description Display Shares Occupancy Sensor input state between controllers in a line-up. 1. Required if each controller not equipped with a local Occupancy Enable/Disable sharing of Occupancy Detector Line-up Occupancy Sensor Sharing Sensor. h input state with peer controllers.
-
Page 140: Building Automation System
Page 140 – Bulletin 100-50-9.1 21.4 BUILDING AUTOMATION SYSTEM The S3C Case controller can be integrated into the BAS network using CAT5 Ethernet or RS-485 Serial line. If CAT5 is used, the cable must be connected to either port 1 or port 2 on the case controller;... - Page 141 Bulletin 100-50-9.1 – Page 141 Scroll and select 485(Modbus over RS-485); press SET. (BACnet over RS-485); press SET. 485 Scroll and select 10. Use the ▲ button and scroll to (building 10. Use the ▲ button and scroll to (building automation time-out);...
- Page 142 Page 142 – Bulletin 100-50-9.1 BACNET NETWORK CONFIGURATION USING RS-485 TO BAS Address = 0 Address = 2 Address = 0 Address = 2 Maximum Master = 2 Maximum Master = 2 Maximum Master = 2 Maximum Master = 2 Baud Rate = 9600 Baud Rate = 9600 Baud Rate = 9600...
- Page 143 Bulletin 100-50-9.1 – Page 143 21.4.4 CONFIGURING THE SOFTWARE TO factory setting. If the address needs to be changed, see below for specific procedure. SUPPORT BACNET OVER ETHERNET TO Note: The BAS controller must not have the same THE BAS IP address as any of the S3C Controls.
-
Page 144: Viewing Controller Ip Address
10.64.x.x. The factory IP range of the Sporlan S3C Case Control is 10.0.0.1 thru 10.63.255.255 14. Press the ▲ button repeatedly until 1 is displayed. -
Page 145: Terms Of Sale With Warranty Limitations
OFFER OF SALE The goods, services or work (referred to as the “Products”) offered by Parker-Hannifin Corporation, its subsidiaries, groups, divisions, and authorized distributors (“Seller”) are offered for sale at prices indicated in the offer, or as may be established by Seller. The offer to sell the Products and acceptance of Seller’s offer by any customer (“Buyer”) is contingent upon, and will be governed by all of the terms and conditions contained in this Offer of Sale. - Page 146 © 2020 Parker Hannifin Corporation. Bulletin 100-50-9.1 / 32020 Parker Hannifin Corporation Sporlan Division 206 Lange Drive • Washington, MO 63090 USA phone 636 239 1111 636 239 9130 www.sporlan.com...
Need help?
Do you have a question about the Sporlan S3C and is the answer not in the manual?
Questions and answers