Table of Contents

Related Manuals for McQuay Remington PTAC Series


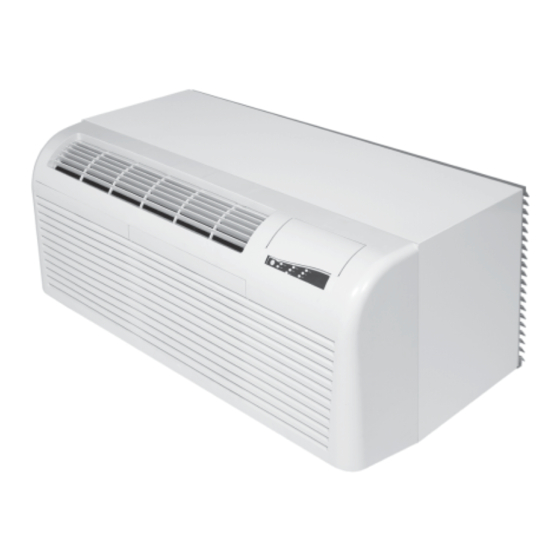
Summary of Contents for McQuay Remington PTAC Series
- Page 1 Installation & Maintenance Data IM 812 Group: PTAC/PTHP Part Number: TBD Date: July 2004 McQuay/Remington Packaged Terminal Air Conditioners and Heat Pumps – B+ Model ® ©2004 McQuay/Remington Air Conditioning For Parts & Support Call 800-411-7822...
-
Page 2: Table Of Contents
Thin Wall Construction ..........9 Trouble Shooting ............21-23 Medium Thick Wall Construction ....... 10 General Description ® ® McQuay /Remington Packaged Terminal Air Conditioners and NOTICE Heat Pumps are designed and built for through-the-wall installation in either new or existing buildings. The self-con- This product was carefully packed and thoroughly tained refrigerant system delivers cooling to the desired space. -
Page 3: Nomenclature
® equipment, its care and operation should be a high priority. For training information on all McQuay HVAC products, please visit us at www.mcquay.com and click on Training or phone 540-248-0711 and ask for the Training Department. IM 812 / Page 3 of 24... -
Page 4: Control Features
Control Features Standard Control Control Pad – Can remain unit-mounted as shipped, or can – Room Freeze Protection When dip switch #4 of 4, located be remote wall mounted. Remote mounting requires an on front of the control box, is “OFF”, a unit mount sensor will accessory 20´, 35´... - Page 5 Dip SWI #1–#8 While room is occupied, the motion sensor keeps the control #1–#4 = Temperature Limiting – see chart, page 4. “normal” so the occupant has full control of the unit. Fifteen #5–#6 = Outdoor coil temperature when unit will change from minutes after the occupant leaves the room, the unit goes into reverse cycle heating to electric.
-
Page 6: Wall Opening Requirements And Unit Dimensions
Unit Installation – General Wall Opening Requirements Before installing the unit, check the wall opening to be sure opening can start right at the finished floor level (208/230V the wall sleeve will slide into the opening unobstructed. For only). Leave enough space for carpeting, etc. masonry walls, a lintel must be used to provide support over each opening. -
Page 7: Installation Of Optional Condensate Drain Kit
Installation of Optional Condensate Drain Kit Assembly of the outdoor drain kit should be completed after Figure 3 illustrates the installation of the indoor drain kit. The the wall sleeve has been installed. indoor drain kit must be installed before placing the wall sleeve into the opening. -
Page 8: Subbase Installation
Subbase Installation Installation WARNING 1. If the minimum depth subbase is required (4 ⁄ ˝), discard the side extension pieces. The subbase mounts flush with All electrical work must be done by trained, experienced the front of the wall sleeve. electricians in accordance with applicable codes and stan- 2. -
Page 9: Wall Sleeve Installation Thin Wall Construction
Wall Sleeve Installation – Thin Wall Construction For panel wall and thin wall construction, a louver frame should be used. Refer to page 11 for installation of louver frame before continuing. Panel wall and thin wall construction varies only slightly from Recess the wall sleeve so that the louver is flush with the frame and brick construction. -
Page 10: Medium Thick Wall Construction
Wall Sleeve Installation – Medium Thick Wall Construction A heavy-gauge, corrosion-resistant wall sleeve is provided for each unit. The wall sleeve is either shipped in a separate carton or shipped in a multi-pack of 15 on a skid. The standard wall sleeve is designed to be easily installed in a If the optional drain kit is to be employed (heat pumps only), refer to page 7 before proceeding. -
Page 11: Thick Wall Construction
Wall Sleeve Installation – Thick Wall Construction Use Table 1 to determine the maximum wall thickness allowed Level wall sleeve left to right, pitch it 1/4" bubble to the for the standard wall sleeve. For thicker walls, wall-sleeve ex- outdoors and secure in wall with fasteners (as shown in tensions are available from your sales representative. -
Page 12: Wall Sleeve Extension And Louver Frame
Wall Sleeve Extension and Louver Frame The standard wall sleeve will accommodate the maximum wall Figure A. Wall Sleeve Extension thickness described in Table 1, page 11. For thicker walls, wall sleeve extensions are available from your local distribu- tor. Air splitters will be included in the wall sleeve extension as Room shown in Figure A. -
Page 13: Outdoor Louvers
McQuay/Remington representative for factory evaluation. A louver design that restricts the passage of condenser air or causes condenser air to be recirculated will dramatically alter the performance of the unit. -
Page 14: Installation Of Louvers And Chassis
Remove the two screws attaching the front panel to the 12. When installing the chassis in older McQuay wall sleeves, chassis and unlatch the front panel from the chassis by bend both 1˝... -
Page 15: Equipment Start-Up
Equipment Start-up 5. If the control pad is being remote mounted, unsnap the Initial start-up of the unit by trained, experienced personnel, is control from its mounting bracket on the unit, unplug it usually the responsibility of the installing contractor. This start- and mount it on the wall. - Page 16 14. TEMPERATURE LIMITING – If the owner wants the con- 18. WIRELESS REMOTE CONTROLLER – If this optional ac- trol temperature range to be less than as ships (60 cessory will be used, check it out at this time. It will only it can be reduced using dip switches #1 - #4 of 8 on front work with the control pad (either unit or wall mounted).
-
Page 17: Remote Mounted Thermostat
Installing Remote Mounted Thermostat Units that are using remote mounted thermostats should be 2. If a subbase is used under the unit wall sleeve, a small field wired as shown in Figure 16. The Remote Wall Thermo- hole may be drilled and grommeted in the subbase front to stat internal wiring shown is typical for manual changeover. -
Page 18: Wiring Diagrams
Wiring Diagrams – PTAC/HP - 07B/09B/12B Figure 17. Universal Heater with Field Installed Power Cord Motion Sensor Door Sensor Remote ON/OFF Dry Contacts Wireless Remote Remote CN7 CN4 CN3 Control Thermostat CN10 CN11 Control NEUTRAL 2 HIGH FAN Room LOW FAN Room ID Coil NEUTRAL 3... -
Page 19: Scheduled Maintenance
Scheduled Maintenance such as kinks, cuts, abrasions and signs of malfunc- This unit is built to last. With proper care, the unit can provide uninterrupted service for many years. Scheduled maintenance tion, such as melting, pitting, discoloration or miss- of this equipment as described below, is the key to the ing wires. -
Page 20: Shipping Weights
Approximate Shipping Weights Subbase Heating/Cooling Chassis and Front Panel 3" (76mm) High Electrical ........... 10 Ibs. Size 007 ..............140 Ibs. 4" (102mm) High Electrical ......... 10 Ibs. Size 009 ..............140 Ibs. Size 012 ..............145 Ibs. Electrical Receptacle ............ 1 Ib. Size 015 .............. -
Page 21: Trouble Shooting
Troubleshooting Chart WARNING Troubleshooting can present hazards of electricity, rotating parts, sharp edges and weight. Troubleshooting must be done by trained, experienced technicians only. Improper troubleshooting can result in equipment damage, severe personal injury or death. Trouble Possible Causes Treatment Indoor and outdoor fans will not operate in cool No power to unit. - Page 22 Troubleshooting Chart WARNING Troubleshooting can present hazards of electricity, rotating parts, sharp edges and weight. Troubleshooting must be done by trained, experienced technicians only. Improper troubleshooting can result in equipment damage, severe personal injury or death. Trouble Possible Causes Treatment Insufficient cooling capacity.
- Page 23 Troubleshooting Chart (Continued) WARNING Troubleshooting can present hazards of electricity, rotating parts, sharp edges and weight. Troubleshooting must be done by trained, experienced technicians only. Improper troubleshooting can result in equipment damage, severe personal injury or death. Trouble Possible Causes Treatment 14.
- Page 24 The information in this bulletin supersedes and replaces previous bulletins with regards to McQuay/Remington Applied Terminal Air Conditioning products. Illustrations cover the general appearance of McQuay/Remington products at the time of publication and the manufacturer reserves the right to make changes in design and construction at anytime without notice.
Need help?
Do you have a question about the Remington PTAC Series and is the answer not in the manual?
Questions and answers