
Related Manuals for Chattanooga Triton 4749


Summary of Contents for Chattanooga Triton 4749
- Page 1 Moving Rehabilitation Forward™ User Manual Model 4749 - Triton® Traction Unit Model 4798 - Triton® DTS Traction Unit Electromagnetic Compatibility (EMC) Tables ISO 13485 Certified...
-
Page 2: Table Of Contents
tAble oF contents Triton® Traction Foreword . . . . . . . . . . . . . . . . . . . . . . . . . . . . . . . . . . . . . . . . . 1 Operating Controls - Home Screen . -
Page 3: Foreword
Foreword Triton® Traction This manual has been written for the operators of the Triton traction unit. It contains general instructions for operation, precautionary instructions, and maintenance recommendations. In order to obtain maximum life and efficiency from your Triton traction unit, and to assist in the proper operation of the unit, read and understand this manual thoroughly. -
Page 4: About Traction Therapy
About trAction therApy Triton® Traction precAutionAry instructions NOTE : The precautionary instructions found in this section and throughout this Throughout this manual “NOTE” may be found. These Notes are helpful manual are indicated by specific symbols. Understand these symbols information to aid in the particular area or function being described. and their definitions before operating this equipment. - Page 5 Do not operate the unit when connected to any unit other than Read, understand, and practice the precautionary and operating Chattanooga devices. Do not use devices manufactured by other instructions. Know the limitations and hazards associated with using companies on Chattanooga equipment. DJO, LLC is not responsible sEMG, DTS Pull Patterns and the Triton traction unit.
- Page 6 About trAction therApy Triton® Traction • This device should only be used under the continued supervision of a • Do not use the Clevis as a handle to pick up or carry the unit. licensed practitioner. • Do not permit any foreign materials or liquids to enter the unit. Take •...
- Page 7 About trAction therApy Triton® Traction • Use only tables, stands, power cords and accessories that are specially • Handle, clean, and dispose of components and accessories that have designed for the Triton traction unit. Do not use accessories manufactured come in contact with bodily fluids according to National, Local and by other companies on the Triton traction unit.
-
Page 8: Overview Of Traction Therapy
About trAction therApy Triton® Traction oVerView oF trAction therApy Effects of Traction Therapy Static Traction Therapy The Triton traction device provides a treatment in static, intermittent, This term denotes that a steady amount of traction is applied for periods and cyclic distraction forces to relieve pressures on structures that may from a few minutes up to 99 minutes. -
Page 9: Indications
About trAction therApy Triton® Traction indicAtions contrAindicAtions The Triton traction device provides traction and mobilization of skeletal Traction is contraindicated for the following: structures and skeletal muscles. • Structural disease secondary to tumor or infection The Triton traction device may be used to relieve peripheral radiation/ • Patients with vascular compromise sciatica and pain associated with: • Any condition for which movement is contraindicated • Protruding discs... -
Page 10: Nomenclature
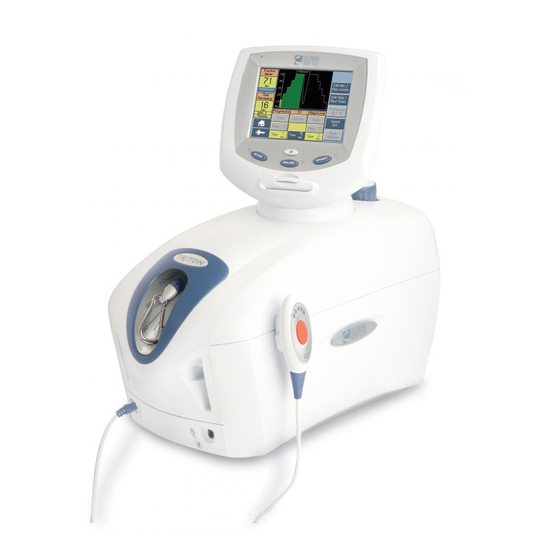
nomenclAture Triton® Traction bAse unit- Front View The Base Unit serves to house the mechanical and electrical components Touch Screen that provide the actual traction tension for the Triton traction unit under User Interface the electronic control and supervision of the Controller. Traction Cord To prevent wear and fraying, the unit should be mounted facing toward... - Page 11 nomenclAture Triton® Traction bAse unit- Front View (continued) Accessory Clip Patient Interrupt Switch The Accessory Clip allows you to Receptacle attach the desired accessory (i.e., The Patient Interrupt Switch Spreader Bar or traction harnesses) to Receptacle is located on the front of the unit.
-
Page 12: Base Unit- Rear View
nomenclAture Triton® Traction bAse unit- reAr View The rear view of the base unit is the site of electric current control and Screen Contrast surge protection, and serves as a connection point for both the traction Control controls and safety features of the Triton traction unit. Power On/Off Switch The Power On/Off Switch is a toggle Lock... - Page 13 nomenclAture Triton® Traction bAse unit- reAr View (continued) Lock Knob The Lock Knob is used to clamp the Triton traction unit to the base (i.e. pedestal, traction stand).
-
Page 14: Lcd Base
nomenclAture Triton® Traction lcd bAse (1) LED Indicator (Power On/Off) The LCD Base serves as a programming terminal during the selection This indicator will illuminate when the unit is powered on. of the traction parameters, as well as a display showing all the factors NOTE: The LED indicator will blink when the unit goes in screen saver affecting the traction during therapy. -
Page 15: Symbol Definitions
nomenclAture Triton® Traction symbol deFinitions Below are the definitions for all of the Symbols used on the Triton traction unit hardware and software. Study and learn these symbols before any operation of the unit. System Hardware Symbols System Software Symbols Patient Card/ Multi-Media Contrast Stop... -
Page 16: Specifications
speciFicAtions Triton® Traction trAction unit dimensions And speciFicAtions Meets Directive 93 /42 /EEC IEC/UL/EN: 60601-1 60601-1-2 Width ...........24 cm (9.5 in) Depth . -
Page 17: Semg Module Dimensions And Specifications
speciFicAtions Triton® Traction semg module dimensions And speciFicAtions Width ..........16.83 cm (6.63 in) Depth . -
Page 18: Description Of Device Markings
speciFicAtions Triton® Traction description oF deVice mArkings The markings on the Triton traction unit are your assurance of its conformity to the highest applicable standards of medical equipment safety and electromagnetic compatibility. One or more of the following markings may appear on the device: This product complies with WEEE Directive 2002/96/EG Meets Directive 93 /42 /EEC IEC/UL/EN 60601-1, 60601-1-2... -
Page 19: Setup
setup Triton® Traction contents oF cArton Remove the Triton traction unit and all accessories from the shipping NOTE: When shipping the unit back to the dealer or factory, make cartons. Visually inspect for damage. certain the original packaging is used. If the original packaging is not available, contact DJO, LLC to obtain the following Report any damage to the carrier immediately. -
Page 20: Mounting Unit On Table
Triton® Traction mounting unit on tAble The Triton traction unit was designed to be utilized with Chattanooga 1. To secure the traction unit to the traction tables: mounting surface, first loosen the Clamp Knob by turning to the left. -
Page 21: Attaching The Patient Switch Hook
Hook Cover to cover the hook screw right side of the unit to hook the Patient Interrupt Switch. hole. A screw hole cap with the Chattanooga logo is located on both sides of the traction unit. Using a screwdriver, pop the screw hole cap off. -
Page 22: Installing The Semg Module
setup Triton® Traction instAlling the semg module Patient NOTE: Model 4749 can be upgraded to become a traction unit with FRONT VIEW sEMG Interrupt Switch Lead Wire sEMG by attaching a sEMG Module (P/N 4766) to the unit. Receptacle Receptacle BACK VIEW Connector • Disconnect the traction unit from the power source before attempting... -
Page 23: Removing The Semg Module
setup Triton® Traction remoVing oF the semg module Gently push the front panel back into the front of the traction unit. Once the plastic of the unit and the front panel are aligned, the connector • Disconnect the traction unit from the power source before attempting should be inserted properly, with the any maintenance, installation, removal, or replacement procedures to tabs locked in place. -
Page 24: Initial Unit Setup
To save the Clinic Name as entered, press the Return Arrow button. To discard the Clinic Name, press the Cancel (X) button. Press the Clinical Resources button. NOTE: The default of the Clinic Name is set as Chattanooga. Volume Press the Volume button until the desired unit volume is achieved. - Page 25 setup Triton® Traction initiAl unit setup (continued) Language Reset Unit Settings To change the language displayed on the unit, press the Language Press the Reset Unit Settings button to restore the unit defaults (Clinic button until the desired language is displayed and the setting will Name, Volume, Unit of Measure, and Language).
-
Page 26: Operation
operAtion Triton® Traction pAtient prepArAtion NOTE: The Patient Interrupt Switch must be plugged in for the unit to Traction therapy may be given by or on order of a qualified licensed operate. If the Patient Interrupt Switch is not inserted into the practitioner. - Page 27 operAtion Triton® Traction pAtient prepArAtion (continued) 5. Position the patient on the appropriate type of table in accordance with the instructions supplied with the table. • In the event of a loss of power to the unit or when quick release is needed, traction tension should only be released by having the patient move towards the traction head to release the tension on •...
-
Page 28: Operating Controls - Home Screen
operAtion Triton® Traction operAting controls - home screen Cervical Traction The Cervical Traction button will go straight to the Cervical Traction menu. The Cervical Traction menu offers the following options: Traction Rationale - Button provides a description of the traction being used as well as definitions of terms used in areas of the Treatment Screen. - Page 29 operAtion Triton® Traction operAting controls - home screen (continued) Edit - Button provides access to the Treatment Screen to set up Edit - Button provides access to the Treatment Screen to set up parameters for treatment. parameters for treatment and to the sEMG Graph to set up the Back and Home - Buttons go back to the Home Screen.
- Page 30 operAtion Triton® Traction operAting controls - home screen (continued) Traction Technique - Button provides visual steps as to how to set up a patient for traction treatment of the desired body area. NOTE: After viewing the steps for set up, the Forward Arrow button will automatically go to the Treatment Screen.
-
Page 31: Operating Controls - Treatment Screen
operAtion Triton® Traction operAting controls - treAtment screen The Touch Screen User Interface allows the operator to access and set up for therapy in the following areas of the Treatment Screen: NOTE: Should you make a mistake while entering data, you may correct by re-pressing the appropriate key and re-entering the data. - Page 32 operAtion Triton® Traction operAting controls - treAtment screen (continued) (5) Home (9) Regressive The Home button will return to the Home Screen of the unit. There are two buttons to use under the Regressive section. The first button allows you to choose from Static or Intermittent Traction Mode to use during the Regressive phase of the traction therapy session.
- Page 33 operAtion Triton® Traction operAting controls - treAtment screen (continued) Edit Hold/Rest Times button, (11) Speed The percentage of speed of when press the appropriate button, the Traction Cord is being pulled or and use the Up or Down Arrow released. There are three speed options buttons any changes.
- Page 34 operAtion Triton® Traction operAting controls - treAtment screen (continued) FOR LUMBAR TRACTION ONLY: (15) Clinical Resources The Minimum and Maximum Traction This button offers the following features of the traction unit: (See Tension levels can be entered in two Patient Data Card and User Protocols in the Operation Section for different ways: Force Levels in Weight more information) or Percentage of Body Weight.
-
Page 35: Semg Traction Treatment
operAtion Triton® Traction semg trAction treAtment NOTE: sEMG is only used as a trigger to begin traction therapy. Preparing for sEMG Traction Therapy Plug the sEMG lead wire into the front • Handle, clean, and dispose of components and accessories that of the unit. - Page 36 operAtion Triton® Traction semg trAction treAtment (continued) Press the sEMG Traction button from Target button - This toggle button the Home Screen. allows the clinician to select the target either manually or take the NOTE: Once the sEMG Traction average of muscle activity achieved button is pressed, a over a 15 second period.
- Page 37 operAtion Triton® Traction semg trAction treAtment (continued) Press the Start button on the front of the unit to begin treatment. To Capture the Average Target - Press the Target button until Average NOTE: Once the Start button is pressed, the continuous audible tone is selected.
-
Page 38: Starting, Pausing And Stopping Treatment
operAtion Triton® Traction stArting, pAusing And stopping treAtment Traction therapy can be stopped at any time by pressing the Stop button or by pressing the red button of the Patient Interrupt Switch. NOTE: Read and follow steps of the Patient Preparation section on When the Stop button is pressed: Pages 24 - 25 , the Operating Controls of the Home and... - Page 39 operAtion Triton® Traction stArting, pAusing And stopping treAtment (continued) When the traction therapy is finished, the audible tone sounds, the traction tension will decrease gradually, the Traction Cord will release, and a message will display saying, "Treatment has been completed. Do you want to save data to Patient Card?"...
-
Page 40: Saving Treatment To A Patient Data Card
operAtion Triton® Traction sAVing treAtment to A pAtient dAtA cArd Pain Scale - There are eleven pain scale The Triton traction unit incorporates a Patient Data Card interface that settings to choose from a numeric scale allows transfer of patient therapy data from the unit to the Patient Data of 0 to 10. - Page 41 operAtion Triton® Traction sAVing treAtment to A new pAtient dAtA cArd (continued) Pain Map - Press the Edit Pain Map Once a therapy session has been button. Press the area of the body to completed, press the Clinical Resources highlight where the patient describes button.
- Page 42 operAtion Triton® Traction sAVing treAtment to A new pAtient dAtA cArd (continued) Approximately ten treatments can be saved on a Patient Data Card. Use After the Save to Patient Card button is one card per patient. pressed, a keyboard will be displayed to enter the patient's name, if the card is blank.
-
Page 43: Retrieving Data From Existing Patient Data Card
operAtion Triton® Traction retrieVing dAtA From existing pAtient dAtA cArd The treatment list is located on the Existing Patient Data Card Use right side. Press the Up or Down Arrow Insert the Patient Data Card (with the button to select the desired treatment. gold chip facing up) into Patient Data Press the Return Arrow to accept. -
Page 44: Erasing Patient Data Card
operAtion Triton® Traction erAsing pAtient dAtA cArd Insert the Patient Data Card (with the When the Patient Data Card is erased, gold chip facing up), to be erased, into a message will be displayed saying, the Patient Data Card port located on "Patient Card has been erased". -
Page 45: User Protocols
operAtion Triton® Traction user protocols After the Return Arrow is pressed, a This library is a series of protocols created by the user and stored in the keyboard will be displayed to enter the unit memory. The following information gives general instructions as to name of the User Protocol. - Page 46 operAtion Triton® Traction user protocols (continued) Accessing User Protocols Press the Clinical Resources button on The list of the User Protocols is located the front of the traction unit. on the right side and the body part buttons are located on the left side Press the Retrieve Protocol button to toggle between body part User located in the Protocols section of the...
-
Page 47: Clinical Protocols
operAtion Triton® Traction clinicAl protocols™ The Clinical Protocols™ section is a series of traction protocol presets Select the desired body area for a where the body area is selected by the user and the Clinical Protocols™ Clinical Protocol. algorithm will select the parameter settings. These Clinical Protocols™ are to be used only as guidelines. Each patient should be individually assessed by a licensed practitioner to determine the appropriateness of the protocol parameters prior to use. All Clinical Protocols™ can be edited to suit appropriate patient treatment prescription and patient comfort. - Page 48 operAtion Triton® Traction clinicAl protocols™ (continued) Press the Traction Rationale button to view the text explaining the rationale for the type of traction associated with the Clinical Protocol selected as well as a definition of terms associated to the Treatment Screen. Press the Traction Technique button to view patient preparation instructions.
-
Page 49: Multimedia Card (Mmc) Graphics Library
operAtion Triton® Traction multimediA cArd (mmc) grAphics librAry Once the body area is selected, a list of related items to the body The Multimedia Card (MMC) Graphics Library offers an anatomical library that is designed to aid the operator in visually identifying and recognizing area will be displayed. -
Page 50: Dts Pull Patterns (If Applicable)
operAtion Triton® Traction dts pull pAtterns (iF ApplicAble) The DTS Pull Patterns, only available with P/N 2842 Triton DTS Card, offer a Selecting a DTS Pull Pattern selection of various intermittent traction programs. It is up to the clinician From the Home Screen, press the DTS to determine the applicability and appropriate parameters of the presets Pull Pattern button. -
Page 51: Accessories
The following provides the users of the Triton traction unit the necessary information to order the replacement accessories most commonly used with the system. This list of replacement accessories are designed for use with Chattanooga traction devices. When ordering, provide the respective part number, description and quantity desired. - Page 52 Accessories Triton® Traction ref . description 21284 Euro Mains Power Cord 78121 US Equivalent Mains Power Cord 20971 Australian Mains Power Cord 20972 Swiss Mains Power Cord 20973 UK Mains Power Cord 20974 Danish Mains Power Cord 20975 Japanese Mains Power Cord 20976 Indian Mains Power Cord 20977...
-
Page 53: Troubleshooting
troubleshooting Triton® Traction The Triton traction unit is designed with patient safety in mind. An error can be caused by both external and internal disturbances. Errors can be caused by disruptions in the power supply (such as a voltage break), and excess or inadequate voltage. Errors may also be caused by patient movement during the traction therapy. - Page 54 troubleshooting Triton® Traction problem possible remedy Unable to properly read Patient Data Card. • Properly insert a Patient Data Card. • Use a known good Patient Data Card. • If problem persists, contact dealer or DJO, LLC for service. • Properly insert a Patient Data Card. Attempted to use an Invalid Patient Data Card. • Use a known good Patient Data Card. • If problem persists, contact dealer or DJO, LLC for service. No Session Data is available on the inserted Patient • Save session data to Patient Data Card. Data Card. • Use a known good Patient Data Card. • If problem persists, contact dealer or DJO, LLC for service.
-
Page 55: Error Messages
troubleshooting Triton® Traction error messAges ERROR ERROR DEFINITION PROBABLE CAUSES POSSIBLE REMEDY CODE TYPE WARNING Treatment has been running for 8 seconds, but no tension is Too much slack in Traction Cord. Remove Traction Cord slack. detected on the rope. WARNING Patient pressed Patient Interrupt Switch. - Page 56 troubleshooting Triton® Traction error messAges (continued) • In the event that an Error message or Warning appears beginning with a 2 or 3, immediately stop all use of the system and contact the dealer or DJO, LLC for service. Errors and Warnings in these categories indicate an internal problem with the unit that must be tested by DJO, LLC or a Field Service Technician certified by DJO, LLC before any further operation or use of the unit.
-
Page 57: Maintenance
mAintenAnce Triton® Traction cleAning cAlibrAtion requirements NOTE: Before cleaning, disconnect the unit from the power source. Annual factory calibration is required for Triton traction units. The unit Periodically, clean the system with a clean, lint free cloth moistened with should be sent to the factory or a Field Service Technician certified by water and mild antibacterial soap. -
Page 58: Service
3. Ship unit to Factory in the original container with all accessories and information as required in item one (1) above to: DJO, LLC Chattanooga Repair Center 47492 SD Hwy 22 PO Box 709 Clear Lake, SD 57226 USA... -
Page 59: Warranty
wArrAnty Triton® Traction DJO, LLC (“Company”) warrants that the Triton Traction Unit (“Product”) is free of defects in material and workmanship. This warranty shall remain in effect for two years (24 months) from the date of original consumer purchase. If this Product fails to function during the two year warranty period due to a defect in material or workmanship, at the Company's option, the Company or the selling dealer will repair or replace this Product without charge within a period of thirty (30) days from the date on which the Product is returned to the Company or the dealer. - Page 60 Moving Rehabilitation Forward™ ISO 13485 Certified DJO, LLC 1430 Decision St Vista, CA 92081 USA T: 1-800-592-7329 USA T: 1-317-406-2209 F: 1-317-406-2014 chattgroup.com © 2011 DJO, LLC 48144_F...
Need help?
Do you have a question about the Triton 4749 and is the answer not in the manual?
Questions and answers