Table of Contents
Advertisement
Available languages
Available languages
INSTRUCTION MANUAL
Keep this manual in a safe place for future reference
FREE FLOAT TYPE STEAM TRAPS
SJFX SERIES
EINBAU- UND BETRIEBSANLEITUNG
Gebrauchsanleitung leicht zugänglich aufbewahren
FREISCHWIMMER-KONDENSATABLEITER
SJFX SERIE
MANUEL D UTILISATION
Conserver ce manuel dans un endroit facile d'accès
PURGEURS DE VAPEUR À FLOTTEUR FERMÉ LIBRE
GAMME SJFX
Copyright (C) 2016 by TLV CO., LTD. All rights reserved.
Advertisement
Table of Contents

Related Manuals for TLV SJFX Series


Summary of Contents for TLV SJFX Series
- Page 1 EINBAU- UND BETRIEBSANLEITUNG Gebrauchsanleitung leicht zugänglich aufbewahren FREISCHWIMMER-KONDENSATABLEITER SJFX SERIE MANUEL D UTILISATION Conserver ce manuel dans un endroit facile d'accès PURGEURS DE VAPEUR À FLOTTEUR FERMÉ LIBRE GAMME SJFX Copyright (C) 2016 by TLV CO., LTD. All rights reserved.
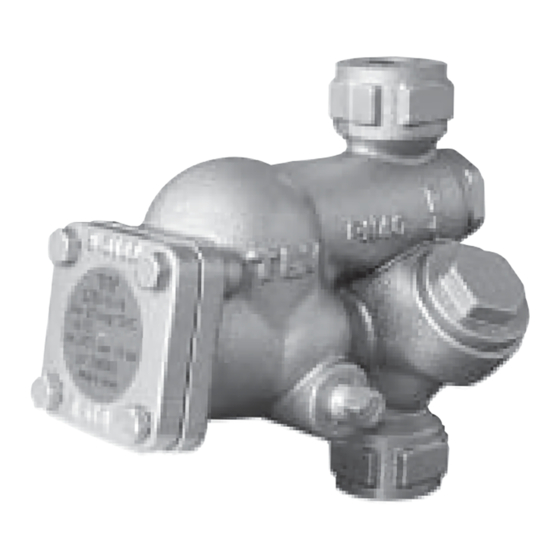
- Page 2 Keep the manual in a safe place for future reference. The inline repairable SJFX Series steam traps with thermostatic air vent (X-element) are suitable for a wide range of applications with small-to-large capacities and pressures up to 22 barg, such as heat exchangers, tank heaters, dryers and process equipment.
-
Page 3: Safety Considerations
• The three types of cautionary items above are very important for safety; be sure to observe all of them, as they relate to installation, use, maintenance, and repair. Furthermore, TLV accepts no responsibility for any accidents or damage occurring as a result of failure to observe these precautions. - Page 4 • Diese drei Warnzeichen sind wichtig für Ihre Sicherheit. Sie müssen unbedingt beachtet werden, um den sicheren Gebrauch des Produktes zu gewährleisten und Einbau, Wartung und Reparatur ohne Unfälle oder Schäden durchführen zu können. TLV haftet nicht für Unfälle oder Schäden, die durch Nichtbeachtung dieser Sicherheitshinweise entstehen.
-
Page 5: Règles De Sécurité
• Ces 3 indicateurs sont importants pour votre sécurité; observez les précautions de sécurité énumérées dans ce manuel pour l'installation, l'utilisation, l'entretien et la réparation du produit. TLV n'accepte aucune responsabilité en cas d'accident ou de dommage survenant à la suite d'un non-respect de ces précautions. - Page 6 20** Orifice Plug Drain Plug 21** Orifice Plug Gasket Nameplate * M : Maintenance Kit; R : Repair Kit ** SJFNX only Float Replacement Replacement floats are available for all SJFX series models. Bauteil Bauteil Gehäuse Haltestopfendichtung Gehäusedeckel Entlüfter-Schmutzsieb Schwimmerkugel Kapselgehäusedichtung...
- Page 7 SJ _ FNX Flanged, for horizontal installation Flansch, für waagerechten Einbau À brides, pour installation horizontale 1 12 7 6 14 19 18 17 16 SJ _ FVX Flanged, for vertical installation Flansch, für senkrechten Einbau À brides, pour installation verticale SJ3V-X Screwed, for vertical installation Apart from the piping connection, configuration...
- Page 8 3. Specifications Technische Daten Données techniques Refer to the product nameplate for detailed specifications. Die technischen Daten stehen auf dem Typenschild. Les données techniques sont inscrites sur la plaquette nominative. A Model Modèle B Nominal Diameter Größe/DN Dimension/DN C Maximum Allowable Pressure* Maximal zulässiger Druck* Pression maximale admissible* D Maximum Allowable Temperature* TMA...
-
Page 9: Proper Installation
4. Proper Installation • Installation, inspection, maintenance, repairs, disassembly, adjustment CAUTION and valve opening/closing should be carried out only by trained maintenance personnel. • Take measures to prevent people from coming into direct contact with product outlets. • Install for use under conditions in which no freeze-up will occur. •... -
Page 10: Inspection And Maintenance
Check to make sure that the pipes connected to the trap have been installed properly. 1. Is the pipe diameter suitable? 2. Has the trap been installed within the allowable inclination and with the arrow on the body pointing in the direction of flow? 3. - Page 11 Disassembly / Reassembly (to reassemble, follow procedures in reverse) Part & No. During Disassembly During Reassembly Drain Plug 10 Use a wrench to remove Wrap threads with 3 - 3.5 turns of sealing tape, tighten to the proper torque Cover Bolt 9 Use a wrench to remove Coat threads with anti-seize, tighten to proper torque...
-
Page 12: Operational Check
Leakage: (When conducting a visual inspection, flash steam is sometimes mistaken for steam leakage. For this reason, the use of a steam trap diagnostic instrument such as TLV TrapMan is highly recommended.) Flash Steam... -
Page 13: Troubleshooting
8. Troubleshooting If the expected performance is unachievable after installation of the steam trap, read chapters 4 and 5 again and check the following points to take appropriate corrective measures. Problem Cause Remedy Replace the float Float is damaged or filled with condensate No condensate Orifice, screen or piping is clogged with rust or Clean... - Page 14 Instructions for Plug / Holder Disassembly and Reassembly The seal on the threaded plugs/holders found on TLV products is formed by a flat metal gasket. There are various installation orientations for the gaskets, such as horizontal, diagonal and downward, and the gasket may be pinched in the thread recesses during assembly.
- Page 15 4. Einbauhinweise • Einbau und Ausbau, Inspektion, Wartungs- und Reparaturarbeiten, VORSICHT Öffnen/Schließen von Armaturen, Einstellung von Komponenten dürfen nur von geschultem Wartungspersonal vorgenommen werden. • In sicherer Enfernung von Auslassöffnungen aufhalten und andere Personen warnen, sich fern zu halten. • Kondensatableiter in frostsicherer Umgebung einbauen. •...
-
Page 16: Inspektion Und Wartung
Stellen Sie sicher, dass die Rohrleitungsarbeiten richtig ausgeführt wurden und dass der KA wie beschrieben eingebaut wurde: 1. Ist die Nennweite groß genug? 2. Wurde der Kondensatableiter horizontal, bzw. innerhalb der Schräglagentoleranz und mit dem Pfeil in Durchflussrichtung eingebaut? 3. Ist genügend Platz für Wartungsarbeiten vorhanden? 4. - Page 17 Ausbau und Einbau der Teile (Einbau erfolgt in umgekehrter Reihenfolge) Bauteil & Nr. Ausbau Einbau Mit Rohrzange abschrauben Entwässerungs- Gewinde 3 bis 3,5 mal mit Dichtungsstreifen stopfen 10 umwickeln und Anzugsmoment beachten Gehäuse- Gabel- oder Ringschlüssel Mit Schmiermittel bestreichen und schraube 9 verwenden Anzugsmoment beachten...
- Page 18 Falls der Kondensatableiter das Kondensat ins Freie abführt, können visuelle Inspektionen einen Hinweis geben, ob sofortige Wartung oder Reparatur notwendig ist. An Kondensatrückführ- leitungen angeschlossene KA können mit geeigneten Messgeräten, z. B. TLV TrapMan oder TLV Pocket TrapMan (innerhalb ihrer Druck- und Temperaturmessbereiche) geprüft werden.
-
Page 19: Fehlersuche
8. Fehlersuche Falls der Kondensatableiter nicht zufriedenstellend arbeitet, lesen Sie nochmals Kapitel 4 und 5. Gehen Sie dann die nachfolgende Fehlerliste durch, um den Fehler zu orten und zu korrigieren. Symptom Ursachen Gegenmaßnahmen Schwimmerkugel ist beschädigt, oder voll Wasser Schwimmerkugel ersetzen Kondensat läuft nicht ab, oder Ventilsitz, Schmutzsieb oder Rohrleitungen sind... - Page 20 Aus- und Einbau-Anleitung für Entwässerungsstopfen Die Gewindedichtung der Entwässerungsstopfen an TLV-Kondensatableitern besteht aus einem flachen Metallring. Stopfen und Dichtung können in verschiedenen Lagen eingebaut werden - horizontal, diagonal oder nach unten zeigend. Wird der Metallring dabei im Gewinde gequetscht, verliert er seine Funktionstüchtigkeit.
- Page 21 4. Installation correcte • Tout installation, inspection, entretien, réparation, démontage, ajustement ATTENTION et ouverture/fermeture de vanne doit être fait uniquement par une personne formée à l’entretien. • Eviter que des personnes n’entrent en contact direct avec les ouvertures du produit. •...
- Page 22 Vérifier que les conduites raccordées au purgeur ont été installées correctement. 1. Est-ce que le diamètre de la conduite est approprié? 2. Est-ce que le purgeur a été installé en respectant les limites d’inclinaison, et avec la flèche sur le corps pointant dans la direction du flux? 3.
- Page 23 Retrait et remplacement des pièces (suivre l'ordre inverse pour le rassemblage) Pendant le démontage Pendant le rassemblage Pièce & No. Bouchon de Utiliser des tenailles à tuyaux Enrouler du ruban de scellement 3 à 3,5 fois vidange 10 autour du pas de vis et reserrer avec le moment de torsion approprié...
- Page 24 à l'atmosphère. Utiliser du matériel de diagnostique, comme un TLV TrapMan ou un TLV Pocket TrapMan (en respectant les limites de pression et de température indiquées pour la mesure) si le condensât n'est pas évacué dans l'atmosphère.
- Page 25 8. Détection des problèmes Si la performance escomptée n'est pas atteinte après l'installation, relire les parties 4 et 5, et vérifier les points suivants de façon à prendre les mesures appropriées. Problème Cause Remèdes Le flotteur est endommagé ou rempli Remplacer le flotteur Pas de décharge de condensât...
- Page 26 Instructions pour le démontage/rassemblage du bouchon/support Le dispositif d’étanchéité des bouchons/supports filetés compris dans les produits TLV est constitué d’un joint en métal plat. Les joints peuvent être orientés différemment (horizontalement, diagonalement, vers le bas), et ils peuvent se bloquer dans la saignée du filet au cours de l’assemblage.
-
Page 27: Product Warranty
. Product Warranty 1) Warranty Period: one year after product delivery. 2) TLV CO., LTD. warrants this product to the original purchaser to be free from defective materials and workmanship. Under this warranty, the product will be repaired or replaced at our option, without charge for parts or labor. - Page 28 For Service or Technical Assistance: Contact your representative or your regional office. Für Reparatur und Wartung: Wenden Sie sich bitte an Ihre Vertretung oder an eine der Niederlassungen. Pour tout service ou assistance technique: Contactez votre agent ou votre bureau régional USA and Canada: T e l: [1]-704-597-9070 USA und Kanada:...
Need help?
Do you have a question about the SJFX Series and is the answer not in the manual?
Questions and answers