Advertisement
Table of Contents
- 1 Table of Contents
- 2 Register Your Laser Cinema
- 3 Important Safety Information
- 4 Packaged Contents
- 5 Laser Cinema Diagram
- 6 STEP 1 Mount the Screen
- 7 STEP 2 Set up the Laser Cinema
- 8 STEP 3 Adjust the Display Image and the Screen
- 9 STEP 4 Use Your Remote
- 10 STEP 5 Proceed through the Screen Setup Menu
- 11 Begin to Enjoy Your Cinema
- 12 Maintenance & Quick Problem-Solving Tips
- 13 Product Specifications
- 14 Certification and Compliance
- Download this manual
Model 100L5F
Quick Start Guide
Before using the Laser Cinema, please read this guide carefully and keep it for future reference.
Disclaimer: This Quick Start Guide is intended as a general guideline to help you set up your Laser Cinema. Images throughout this document are for illustrative purposes only
and may differ from the actual product.
Advertisement
Table of Contents

Subscribe to Our Youtube Channel
Related Manuals for Hisense 100L5F


Summary of Contents for Hisense 100L5F
- Page 1 Model 100L5F Quick Start Guide Before using the Laser Cinema, please read this guide carefully and keep it for future reference. Disclaimer: This Quick Start Guide is intended as a general guideline to help you set up your Laser Cinema. Images throughout this document are for illustrative purposes only...
- Page 2 CANADA, MEXICO and International copyright and/or other intellectual property laws. Reproduction or transmission of the materials, in whole or in part, in any manner, electronic, print, or otherwise, without the prior written consent of Hisense Company Ltd. is a violation of Hisense Company Ltd. rights under the aforementioned laws.
-
Page 3: Table Of Contents
Congratulations on the purchase of your new Laser Cinema! This Quick Start Guide will walk you through a few easy steps to set up your Laser Cinema. Table of Contents Register Your Laser Cinema! Important Safety Information Packaged Contents Laser Cinema Diagram STEP 1. -
Page 4: Register Your Laser Cinema
Register Your Laser Cinema! Because we value your business, we want to keep you in the know of 'all things Hisense'. Using your mobile phone, scan the Registration page QR code to register your Laser Cinema. Depending on the make and model of your phone, you may need to download a QR code scanning app. -
Page 5: Important Safety Information
• Do not place any water-containing vessel on this device, such as cosmetics or liquid medicine. • If any object or water enters this device, please unplug this device and contact the service staff of Hisense. • Do not place any exposed fire source (e.g. burning candle) on this device. Keep away from high temperature and heat. - Page 6 • Do not expose the battery to direct sunlight or candle light. • Keep air vents on both sides clear from any objects to prevent the device from overheating inside. • To avoid a short circuit, product damage or electric shock, do not use any sharp object or metal to touch the ports or other openings on the Laser Cinema.
-
Page 7: Packaged Contents
• Laser Cinema • 1 USB extension cable • 1 Remote control • Hisense 4K Laser Cinema Quick Start Guide • 2 AAA batteries • Hisense 4K Laser Cinema User Manual • 2 pairs of gloves for handling the Laser Cinema • Important Safety Information &... -
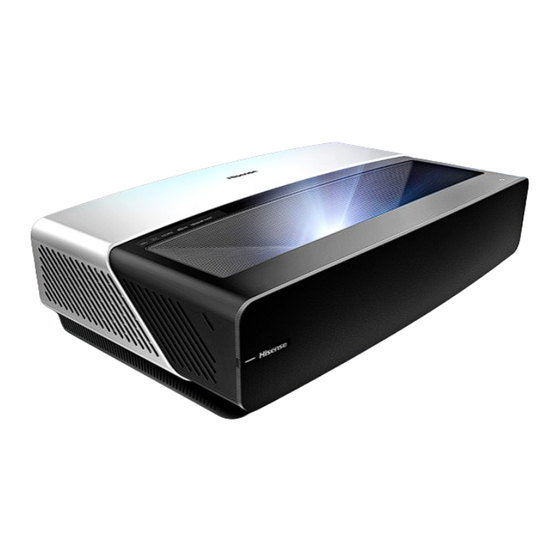
Page 8: Laser Cinema Diagram
Laser Cinema Diagram Power Indicator Air vents Remote control receiver protection sensor Lens with laser Power button We strongly recommend that two people handle this device when moving it from one place to another. Be sure to protect the lens when you handle this device. -
Page 9: Step 1 Mount The Screen
STEP 1 Mount the Screen If you purchased a screen from Hisense to include with your Laser Cinema, then refer to the Screen Installation Guide that’s included in the package. STEP 2 Set up the Laser Cinema To begin setting up the Laser Cinema, we strongly recommend that TWO people move it from one place to another because of the weight. - Page 10 NOTE: Ports to connect certain cables to Use the USB extension cable (included) for easier connection and disconnection. When connecting a hard disk or a USB hub, always connect the mains adapter of the connected device to the power supply. Exceeding a total current consumption may result in damage.
- Page 11 External AV devices HDMI DVD Player USB devices for browsing photos, music and Set-top Box movies. This unit only recognizes USB Memory Sticks. Video Camera Satellite Receiver External audio devices Left-right audio adapter White Speakers Digital audio adapter Audio Amplifier...
-
Page 12: Step 3 Adjust The Display Image And The Screen
STEP 3 Adjust the Display Image and the Screen Follow the steps in the order shown below, only if they apply to your situation. Note: Before adjusting, fold the wall-mount bracket wands so that screen is vertically level. PARALLEL THE BOTTOM OF THE IMAGE WITH THE SCREEN FIT THE BOTTOM OF THE IMAGE TO THE SCREEN If the bottom of the image is lower on the left and higher on the • If the image shifts to the left side, then move the Laser... - Page 13 • If the bottom of the image is wider than the screen, then ADJUST THE UPPER-RIGHT CORNER OF THE IMAGE move the Laser Cinema closer to the screen. 1. If the top of the image is lower on the left and higher on the right, then use the wrench to rotate the back-right foot clockwise so that the bottom of the image is also higher on the right.
- Page 14 3. Repeat the steps above until the top of the image is parallel 2. Now, rotate the Laser Cinema clockwise so that the bottom of with the screen. the image is parallel with the screen. 4. Rotate the back-left foot to the same height as the right one and make sure the Laser Cinema sits stably.
- Page 15 clockwise. If the top of the image is narrower than the screen, then use the wrench to rotate the left- and right-back feet of the Laser Cinema clockwise, until the left and right borders of the image are parallel with the screen borders. Next, move the projector further from the screen to fill the image to screen width.
-
Page 16: Step 4 Use Your Remote
STEP 4 Use Your Remote BUTTON DESCRIPTION BUTTON DESCRIPTION Power on / off Return to the previous place in the menu or app INPUT Change Laser Cinema input source Number Enter Channels / input numbers Display the Home screen Dash button / Select a digital sub- APPS All Apps channel... - Page 17 1. Press and slide the back cover to open the battery • It can work at a 30 degree horizontal or 15 degree vertical compartment of the remote control. angle.( This angle is used by infrared means in an unpaired 2.
-
Page 18: Step 5 Proceed Through The Screen Setup Menu
STEP 5 Proceed through the Screen GEOMETRIC CORRECTION Setup Menu 1. Select a point for adjustment using the UP/DOWN/LEFT/ RIGHT buttons. Adjust eight main points at the corners and midpoints first, then adjust the six smaller points on the top PROJECTION MODE border. -
Page 19: Begin To Enjoy Your Cinema
Disclaimer: Subscriptions or other payments may be required to access content through some applications. Some or all of the included or downloaded application services in this Hisense device may not function depending on the Internet connection, local limitations of included applications or other reasons outside of Hisense’s control. HISENSE... - Page 20 Maintenance • Do not touch this device when it is running or just turned off because it may be hot. • Do not wipe this device with oil because it may deteriorate the exterior or damage the paint. Contact with rubber or ethylene products for a long time may cause stains on this device.
- Page 21 3. Check to see if the LED light is on or not. If it is, then the Laser Cinema is receiving power. I have connected an external source to my Laser Cinema and I get no picture and/or sound. 1. Check for the correct output connection on the external source and for the correct input connection on the Laser Cinema. 2.
- Page 22 3. Check if the batteries are correctly installed. Saturday - Sunday 9 AM to 6 PM EST NEED MORE HELP? support/ Email: Service@hisense-usa.com Additional help is available online at Phone: 1-855-344-7367 support links. You will find answers Monday - Friday 8 AM to 8 PM EST...
-
Page 23: Product Specifications
Product Specifications MODEL NAME 100L5F DIMENSION (W × H × D) 21.5 × 6.2 × 13.6 inches (547 × 158 × 346 mm) WEIGHT 24.3 lbs (11 kg) ACTIVE SCREEN SIZE (DIAGONAL) 100 inches SCREEN RESOLUTION 3840 × 2160 AUDIO POWER 2 ×... - Page 24 RECEIVING CHANNELS VHF: 2 - 13, UHF: 14 - 69, CATV: 1 - 125 Digital Terrestrial Broadcast (8VSB): 2 - 69 Digital cable (64/256 QAM): 1 - 135 TUNER TYPE Frequency synthesized RECEIVING SYSTEM Analog: NTSC Digital: ATSC/QAM Disclaimer: All products, product specifications, and data are subject to change without notice to improve reliability, function, design or otherwise.
-
Page 25: Certification And Compliance
Total Technology is a trademark of THAT Corporation. NOTE: THE MANUFACTURER IS NOT RESPONSIBLE FOR ANY RADIO ©2019. All rights reserved. Hisense and the Hisense logo are registered trademarks of Hisense. Other brand OR LASER CINEMA INTERFERENCE CAUSED BY UNAUTHORIZED and product names are registered trademarks of their MODIFICATIONS TO THIS EQUIPMENT. - Page 26 ES--1...
Need help?
Do you have a question about the 100L5F and is the answer not in the manual?
Questions and answers